
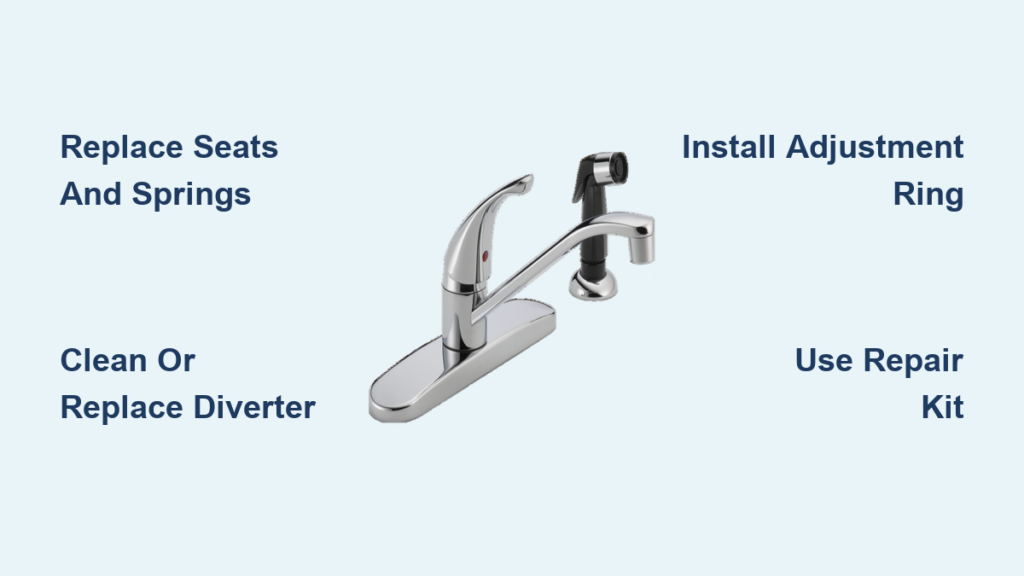
If your Peerless faucet is dripping, leaking, or not shutting off properly, you are not alone. These common issues stem from worn internal parts like valve seats, springs, O-rings, or cartridges. The good news? Most problems can be fixed in under an hour with basic tools and a repair kit. This guide walks you through diagnosing and fixing every major Peerless faucet issue, from kitchen models to tub/shower setups, using step-by-step instructions and pro tips.
Fix Dripping Spout on Two-Handle Faucet
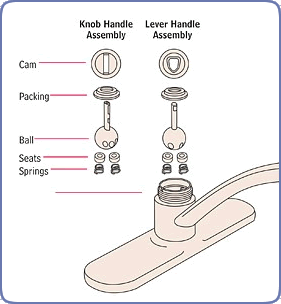
A steady drip from the spout after turning off the faucet usually means worn valve seats and springs inside the valve body.
Replace Worn Seats and Springs
- Shut off water supply under the sink.
- Remove the handle by prying off the red (hot) or blue (cold) cap with a flat-head screwdriver, then unscrewing the Phillips screw beneath.
- Unscrew the bonnet nut with an adjustable wrench.
- Pull out the stem assembly straight without twisting.
- Remove old seats and springs using a pencil or needle-nose pliers.
- Clean seat pockets with a soft cloth.
- Install new parts by inserting the spring (wide end first) into the faucet body, then placing the rubber seat over the narrow end.
- Reinstall the stem with the “stop” on the stem facing toward the spout for knobs, or right for lever handles.
- Reassemble by hand-tightening the bonnet nut, replacing the handle and screw, then snapping the cap back on.
- Turn water on slowly and test for leaks.
Pro Tip: Always replace both hot and cold side seats and springs, even if only one side drips. This prevents future leaks and balances wear between the two sides.
Stop Handle Leak on Single-Handle Faucet
Water seeping around the base of the handle points to a loose or worn cam, packing, or adjusting ring.
Repair Cam and Packing Assembly
- Shut off water supply and cover the drain with a towel.
- Remove the handle by prying off the red/blue button and loosening the Allen set screw.
- Unscrew the cap counterclockwise using a crescent wrench with cloth for protection.
- Lift out the ball, cam, and packing via the ball stem.
- Inspect the ball for scratches or pitting. Soak in vinegar for 30 to 60 minutes if needed.
- Replace seats and springs if damaged, inserting the spring wide-end first.
- Install new packing and cam, aligning the cam tab with the body slot.
- Partially unscrew the adjusting ring, place the cap over the stem, and hand-tighten.
- Tighten the adjusting ring until no leak occurs when the handle is fully on.
- Test operation and avoid over-tightening, which causes early failure.
Note: If the cam and packing is a self-adjusting single unit, remove the adjusting ring completely before reassembly.
Fix Pull-Out Spray Drip
Dripping after using the pull-out spray is normal for up to one minute due to water draining from the hose and aerator.
When Drip Lasts Too Long
If dripping continues beyond 60 seconds:
- Remove the aerator from the spray head.
- Turn the faucet on briefly to flush debris.
- Clean the aerator under running water.
- Reinstall the aerator.
- If dripping persists, follow the single-handle spout repair steps and replace seats, springs, or cartridge.
Pro Tip: Hose contraction after use squeezes out residual water, which is not a leak but normal behavior.
Repair Tub/Shower Drip
Water dripping from the tub spout when the shower is on typically indicates worn seats or stems.
Replace Seats and Stems
- Shut off hot water or main supply.
- Remove the handle using a Phillips or Allen wrench.
- Unscrew the bonnet nut with an adjustable wrench.
- Remove the stem extender screw and pull out the stem assembly.
- Remove old seats and springs from the valve body.
- Clean seat pockets thoroughly.
- Install new seats and springs.
- Reassemble and test.
- Repeat on the cold side if needed.
- If the leak persists, replace both stem assemblies.
- For valves over 25 years old, consider replacing the entire valve body due to internal corrosion.
Safety Note: Tub/shower repairs can lead to scalding or flooding. If you are unsure, call a licensed plumber.
Fix Leaking Tub Spout During Shower
A pencil-thin stream from the tub spout during shower use is normal. Excessive flow means the diverter has failed.
Replace Faulty Diverter
- Turn off water supply.
- Unscrew the tub spout from the copper or steel pipe.
- Install a new Genuine Peerless tub spout.
- Hand-tighten, then snug with a wrench without over-tightening.
Where to Buy: Call 1-800-438-6673 or visit peerless.com for replacement parts.
Fix Kitchen Spout Leak During Spray Use
When using the vegetable spray, water leaking from the main spout points to a blocked or damaged diverter.
Clean or Replace Diverter
For Single-Handle Faucets:
- Shut off water and remove handle, cap, cam, packing, and ball.
- Lift off the spout and pop the diverter out of the body cavity.
- Soak in 50/50 vinegar-water for 2 hours.
- Reinstall if undamaged, otherwise replace.
For Two-Handle Faucets:
- Shut off water and unscrew the spout nut.
- Unscrew the diverter from the top using a coin or flat-head screwdriver.
- Soak in vinegar solution and flush the cavity.
- Replace the diverter and spout nut, removing the old diverter seal first.
Note: New plastic diverters work fine in place of old metal ones.
Fix Pressure Balance Valve

No hot water, sudden temperature shifts, or weak flow indicate a clogged Monitor cartridge.
Clean Monitor Cartridge
- Shut off water and remove the handle.
- Pull off the sleeve by twisting and pulling.
- Remove the cartridge after unscrewing the brass bonnet nut.
- Soak in 50/50 vinegar-water for 24 hours.
- Reinstall the cartridge with the stop on the cap facing left.
- Turn on water with cold flowing first for safety.
Test Cartridge Function
Shake the cartridge in the full-mix position. If it rattles, it is working. If silent, replace it.
Maintenance Tip: In hard water areas, inspect the cartridge annually.
Fix Pop-Up Sink Stopper That Will Not Seal
The stopper not holding water is usually caused by misalignment or a poor flange seal.
Adjust and Reseal Pop-Up
- Check the linkage under the sink to ensure the pivot rod is tight and the strap is not bent.
- Adjust the stopper height by rotating slightly to avoid hitting the cabinet.
- Test the seal by removing the horizontal rod, plugging the drain, and filling the sink.
- If leaking, remove the flange, apply plumber’s putty or silicone, and reinstall without rotating after tightening.
Caution: Some putty brands stain marble. Check the label before use.
Use Aftermarket Repair Kits
You do not need original Peerless parts. Danco Pro Pack and similar kits work perfectly with Peerless faucets.
Install Danco Cartridge
- Shut off water and remove the handle and retaining nut.
- Extract the old cartridge, noting that the half-round key faces the spout.
- Prepare the new cartridge by lubricating O-rings with silicone-based grease.
- Insert the cartridge by aligning the key with the body and pushing fully in.
- Reinstall the retaining nut snugly, then attach the handle.
- Test by running water without the aerator first to flush debris.
Result: Most users report complete leak elimination after using aftermarket kits.
Identify Your Peerless Model
Getting the right parts requires knowing your model number.
- Find the model number on packaging, the manual, or the base of the faucet.
- Visit peerless.com and enter the model number.
- Download the Installation and Maintenance Guide.
- View the parts diagram to identify correct seats, springs, and cartridges.
Need Help: Call 1-800-438-6673 with your model number and photos.
Fix Persistent Drip After Repair
Some faucets only shut off in a “magic spot” even after replacing parts. This is common in Peerless and Delta hybrids.
Diagnose the Cause
Common causes include a missing adjustment ring, inconsistent seal quality from replacement parts, micro-imperfections in the ball or chamber, and weak spring tension.
Solve It
- Replace seats and springs again using different ones from the same kit.
- Swap parts between identical faucets to isolate the issue.
- Install an adjustment ring if the bonnet has threads for it.
- Replace the ball if it is scratched or dented.
“Neither faucet has the adjusting ring. I think that is why the ball does not seat properly.” — Verified User, 2022
Essential Replacement Parts

| Part | Purpose | Tip |
|---|---|---|
| Valve Seats | Seal water inlet | Replace with springs |
| Conical Springs | Apply pressure to seat | Never reuse old springs |
| O-Rings | Prevent spout and handle leaks | Lubricate with silicone grease |
| Cartridge | Control flow and temperature | Replace if leaking internally |
| Adjustment Ring | Fine-tune ball pressure | Retrofit if missing |
| Diverter | Switch spray and spout flow | Replace if clogged |
| Tub Spout | Contains shower diverter | Replace if leaking during shower |
Where to Buy: Home Depot, Lowe’s, or plumbing suppliers. Bring old parts to match.
Maintenance Best Practices
Keep your Peerless faucet leak-free with these habits:
- Soak the cartridge in vinegar every 6 to 12 months in hard water areas.
- Lubricate O-rings during every repair.
- Flush supply lines annually.
- Clean the aerator monthly.
- Replace seats and springs every 3 to 5 years.
- Use genuine or compatible parts for best results.
Pro Tip: Take photos during disassembly to help with reassembly.
When to Call a Plumber
Peerless recommends professional help if water leaks behind the wall, the tub/shower valve fails internally, the stem drops into the wall, the pressure balance valve fails repeatedly, or you lack plumbing experience.
Safety First: Always shut off the main water supply before any major repair.
Final Reassembly and Testing
- Reinstall the cartridge, ball, or stem with correct alignment.
- Tighten the bonnet, retaining nut, or spout nut snugly without over-tightening.
- Replace the handle and secure the set screw.
- Snap the decorative cap back on.
- Turn water on slowly and test through the full range of motion.
- Check for drips after shut-off and verify the handle stops water at the standard position.
Success: Water stops cleanly with no leaks and smooth operation throughout.
Frequently Asked Questions About Fixing Peerless Faucets
How do I stop a dripping Peerless faucet?
The most common cause is worn valve seats and springs. Turn off the water supply, remove the handle and stem, replace both hot and cold seats and springs, and reassemble. This fix works for most two-handle kitchen and bathroom faucets.
Can I use a Danco repair kit on my Peerless faucet?
Yes. Danco Pro Packs and similar aftermarket kits are compatible with Peerless, Delta, and Delex faucets. These kits include cartridges, springs, O-rings, and grommets that restore full functionality at a fraction of the cost of new faucets.
Why does my Peerless faucet only shut off in one position?
This usually indicates a missing adjustment ring or inconsistent seal quality from replacement parts. Try installing an adjustment ring if your bonnet has threads, or swap in parts from a different batch to achieve a better seal.
How often should I replace Peerless faucet internals?
Replace seats and springs every 3 to 5 years as preventive maintenance. In hard water areas, soak the cartridge in vinegar annually to prevent mineral buildup that causes low flow and temperature fluctuations.
What tools do I need to fix a Peerless faucet?
You will need a Phillips screwdriver, flat-head screwdriver, Allen wrench (typically 1/8 inch), adjustable wrench, needle-nose pliers, and silicone-based plumber’s grease. A flashlight and 50/50 vinegar-water solution are also helpful for cleaning mineral deposits.
When should I call a plumber for my Peerless faucet?
Call a licensed plumber if water is leaking behind the wall, the tub/shower valve is failing internally, you cannot stop the leak after replacing parts, or you lack experience with plumbing repairs. Professional help prevents water damage and scalding risks.
Key Takeaways for Fixing Your Peerless Faucet
Most Peerless faucet problems stem from worn internal components like valve seats, springs, cartridges, and O-rings. With basic tools and a repair kit, you can fix dripping spouts, handle leaks, and diverter issues in under an hour without professional help. Always shut off the water supply before starting, replace both hot and cold sides on two-handle faucets, and use silicone-based grease on all seals. If dripping persists after replacing seats and springs, check for a missing adjustment ring or try different parts from the same kit. For tub/shower repairs or internal valve issues, call a licensed plumber to avoid water damage or scalding. Visit peerless.com or call 1-800-438-6673 for genuine replacement parts and model-specific support.







