You turn on the tap and get a weak, sputtering stream instead of strong water flow. Or maybe the water sprays in odd directions or you notice cloudy droplets. These are telltale signs that mineral buildup, debris, or grime has accumulated inside your faucet. If you have been wondering how to clean inside faucet components, especially the aerator and internal passages, you are not alone. Over time, hard water deposits, sediment, and corrosion can clog the tiny openings, reducing water pressure and even affecting water quality.
The good news? Cleaning the inside of your faucet is a simple, low-cost DIY task that takes under 30 minutes and requires only basic household tools. In this guide, you will learn step-by-step methods to disassemble, deep clean, and reassemble your faucet to restore full water flow and prevent future buildup.
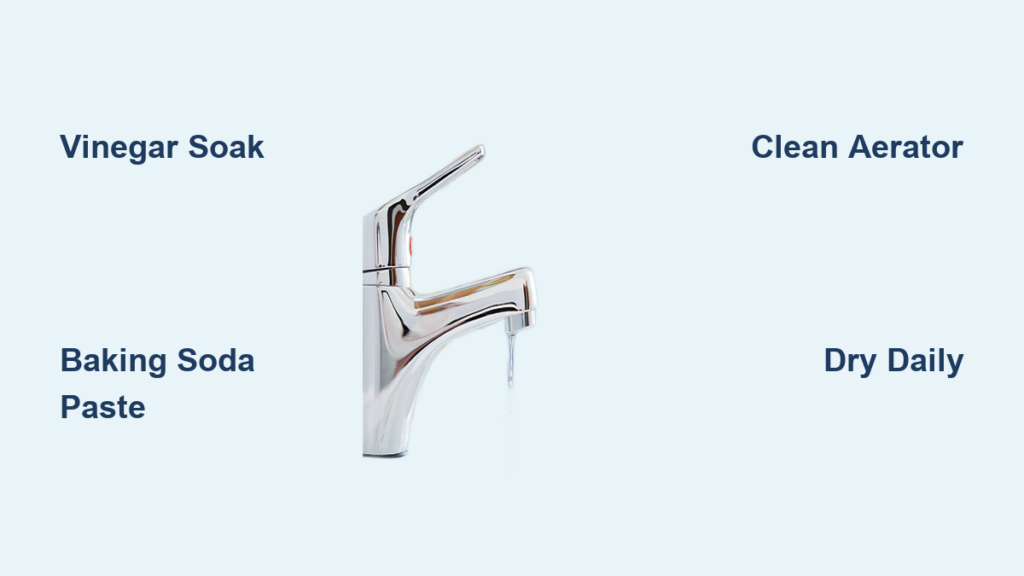
Remove the Faucet Aerator

The aerator, located at the tip of most faucets, mixes air with water to reduce splashing and improve flow. It is also the most common spot for clogs.
Unscrew the Aerator by Hand
Start by checking if the aerator can be removed with your fingers. Wet your hands to improve grip and twist it counterclockwise. If it is too tight, proceed to using tools, but gently.
Use Pliers with a Cloth Barrier
If hand removal fails, wrap the aerator with a rubber band or microfiber cloth to protect the finish. Then use adjustable pliers to loosen it. Turn counterclockwise and remove carefully to avoid scratching the finish.
Identify Aerator Components
Once removed, place the aerator on a clean towel and disassemble its parts. You will find an outer casing, mesh screens, a rubber washer, and possibly a flow restrictor. Note the order of these components for easy reassembly later.
Soak Parts in Vinegar Solution

White vinegar is a natural descaler that dissolves lime, calcium, and mineral deposits without harsh chemicals. This makes it perfect for cleaning faucet internals safely.
Prepare a Vinegar Bath
Fill a small bowl or cup with white vinegar. You need enough to fully submerge the aerator parts. For heavy buildup, mix vinegar with equal parts water to prevent over-acidification of softer components.
Soak for 30 Minutes to Overnight
Let the parts soak for at least 30 minutes. For severe scaling, leave them overnight. Check periodically. The fizzing you see is the vinegar reacting with mineral deposits, which means the cleaning is working.
Scrub with a Soft Brush
After soaking, use an old toothbrush or soft-bristled brush to gently scrub each piece. Focus on mesh screens and crevices where debris hides. Rinse thoroughly with clean water afterward to remove all residue.
Clean the Faucet Spout Interior
With the aerator removed, the inside of the faucet spout is now accessible. It may also harbor buildup that affects your water flow.
Flush the Spout with Water
Turn on the faucet briefly to flush out loose debris. Use both hot and cold settings to clear any sediment lodged in the valve lines. This quick step removes particles that simple soaking cannot reach.
Wipe the Interior with a Vinegar-Soaked Cloth
Wrap a cloth or paper towel around a narrow tool like a screwdriver or chopstick. Soak it in vinegar and gently swab the inside of the spout. Rotate the cloth to cover all surfaces and reach around curves.
Use a Flexible Brush for Deep Cleaning
For faucets with long or curved spouts, use a bottle brush or pipe cleaner dipped in vinegar. Move it back and forth to dislodge deposits in areas your cloth cannot reach. This ensures thorough cleaning of hidden passages.
Reassemble the Aerator Correctly
Improper reassembly can lead to leaks or reduced performance. Taking time to put everything back together properly saves you from problems later.
Arrange Parts in Proper Order
Refer to your earlier layout or take a photo before disassembly. Typically, the order is washer, mesh screen, flow restrictor, second screen, then outer casing. Reassemble on a flat surface to keep parts organized.
Hand-Tighten Only
Screw the aerator back onto the faucet by hand. Over-tightening with tools can damage the threads or cause leaks. Stop when it feels snug and secure. You should still be able to turn it with moderate finger pressure.
Test Water Flow and Check for Leaks
Turn on the faucet and observe the stream. It should be smooth and even. If water leaks around the base of the aerator, tighten slightly, but no more than a quarter turn with pliers if necessary.
Prevent Future Buildup
Regular maintenance keeps your faucet flowing cleanly and extends its lifespan. A little prevention goes a long way toward avoiding future clogs.
Clean Aerator Every 3 to 6 Months
Set a reminder to remove and clean the aerator routinely. This is especially important if you have hard water. Monthly inspection can catch issues early before they become serious problems.
Install a Water Softener or Filter
If mineral buildup returns quickly, consider a whole-house water softener or under-sink filter. These systems reduce hardness and sediment in your water supply, cutting down on future cleaning needs.
Flush Faucets After Plumbing Work
After any plumbing repairs or pipe replacements, open all faucets and let them run for several minutes. This clears out debris that may have entered the lines during the work.
Handle Different Faucet Types
Not all faucets are the same. Some require special care during cleaning to avoid damage to unique components.
Pull-Down and Sprayer Faucets
These often have internal hoses and valves. Remove the spray head by unscrewing the connecting nut. Then soak its filter and nozzle separately. Check for kinks or clogs in the hose while you have it apart.
Touchless or Sensor Faucets
Avoid submerging electronic parts in vinegar. Instead, wipe the aerator area with a vinegar-dampened cloth. Use compressed air to clear debris from sensor zones without risking water damage to electronics.
Wall-Mounted or Vintage Faucets
Older models may have fragile finishes or non-standard threading. Use hand tools only and avoid vinegar if the metal is corroded or unknown in composition. Test a small area first if you must use any cleaning solution.
Troubleshoot Common Post-Cleaning Issues

Even after cleaning, problems can persist. Knowing how to fix them fast saves you frustration and additional repair costs.
Low Water Pressure Returns Quickly
If pressure drops again within days, the issue may be in the supply lines or cartridge. Shut off water, disassemble the faucet handle, and inspect the cartridge for scale. You may need to replace the cartridge if buildup is internal.
Aerator Will Not Screw Back On
Check for cross-threading. Start threading slowly by hand. If resistance occurs, remove and realign the threads. Damaged threads may require a replacement aerator rather than forcing the old one into place.
Cloudy or Discolored Water
After cleaning, run the faucet for a full minute to flush out loosened particles. If discoloration continues, flush the entire plumbing system or consult a plumber to rule out larger supply issues.
Frequently Asked Questions About Cleaning Inside Faucet
How often should I clean the inside of my faucet?
You should clean the aerator and faucet interior every 3 to 6 months. Homes with hard water may benefit from monthly cleaning to prevent heavy mineral deposits from forming.
Can I use bleach instead of vinegar to clean my faucet?
Bleach is too harsh for most faucet internals and can damage rubber seals and finish. White vinegar is the safer choice. It dissolves minerals effectively without causing corrosion or leaving harmful residues.
What if my aerator is stuck and will not budge?
Soak the aerator in vinegar for several hours to loosen the mineral deposits. If it still will not move, use a wrench with a cloth barrier to protect the finish, but work slowly to avoid cracking the metal.
Do I need to clean my faucet if my water pressure seems fine?
Yes. Even with good pressure, bacteria and biofilm can accumulate inside faucet lines. Regular cleaning improves hygiene and prevents future flow problems from developing unnoticed.
Can I clean a touchless faucet the same way as a regular faucet?
You should avoid submerging the electronic base. Focus cleaning on the aerator and external surfaces. Use a vinegar-dampened cloth around the sensor area and compressed air to clear internal passages.
Why does my water still look cloudy after cleaning the aerator?
Cloudy water after cleaning usually means loosened particles are still traveling through the lines. Run the faucet for one to two minutes to flush the system completely.
Key Takeaways for Cleaning Your Faucet Internals
Knowing how to clean inside faucet systems empowers you to maintain optimal water flow and hygiene in your kitchen or bathroom. By removing and soaking the aerator, scrubbing internal surfaces, and reassembling correctly, you restore performance with minimal effort. Regular cleaning every few months prevents clogs, reduces wear on faucet components, and improves overall water quality.
For homes with hard water, pairing routine maintenance with a filtration system delivers long-term results. Remember to hand-tighten all reassembled parts and test for leaks before considering the job complete. Keep this guide handy for your next faucet refresh, and enjoy a stronger, cleaner stream every time you turn the tap.