
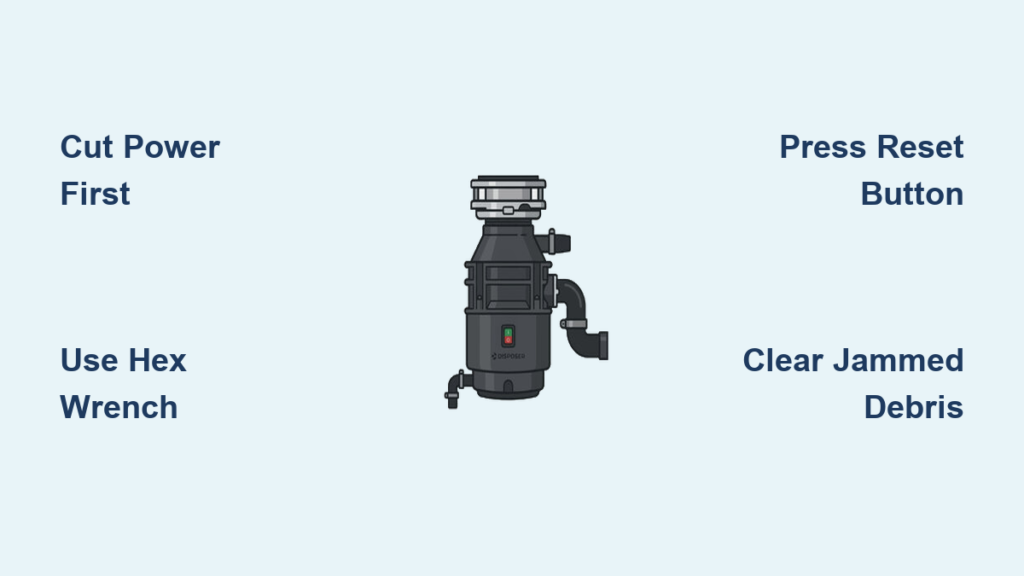
A garbage disposal that hums, clicks, or refuses to turn on can stop your kitchen routine in its tracks. The frustrating part is that most people assume a broken sink disposal means an expensive plumber visit or a full replacement. In reality, 90% of disposal breakdowns come down to a jam, a tripped safety switch, or a simple power issue that you can resolve yourself in under 30 minutes.
This guide gives you a complete roadmap for diagnosing and repairing your garbage disposal safely. You will learn how to clear stubborn jams, reset the thermal protector, test for electrical faults, and recognize when replacement is truly the only option. Let’s get that disposal grinding again.
Cut the Power: Safety Steps Before Touching the Disposal
Before any repair begins, you must eliminate the risk of electric shock. Even with the wall switch flipped off, the unit can remain live, so verify power is disconnected at the source.
Start by heading to your electrical panel and switching off the circuit breaker dedicated to the disposal. If your unit plugs into an outlet under the sink, simply unplug it. Also check whether the outlet is a GFCI type that may have tripped on its own.
Once power is cut, gather your safety gear:
- A flashlight (your phone’s flashlight app works fine)
- Long needle-nose pliers or tongs for debris removal
- Never your hands, even when the unit is off, because the grinding components are sharp
Press the Red Reset Button
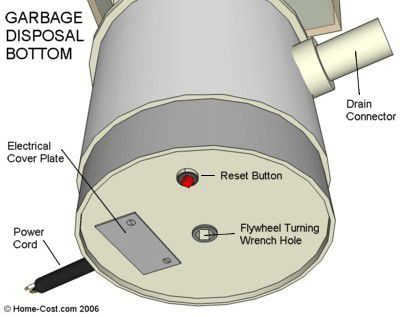
Look on the bottom or side of the disposal for a small red button. This is the thermal overload reset switch. If the button has popped outward, press it firmly back in. Wait 10–15 minutes before testing again so the motor can fully cool. Pressing it too soon risks a re-trip.
Confirm the Unit Is Receiving Power
Test the disposal’s outlet with another small appliance to confirm electricity flows. Also inspect the plug and cord for visible damage. If the outlet works but the disposal remains dead, you are likely facing an internal failure such as motor burnout, corroded connections, or damaged wiring.
Diagnose the Symptom: What Your Disposal Is Telling You
The symptom you observe points directly to the cause. Read each scenario carefully and match it to your situation.
No Sound and No Power
If flipping the switch does nothing at all, the problem is electrical. Check the circuit breaker, the GFCI outlet, and confirm the unit is plugged in. Press the reset button. If all of these check out and the unit still does not respond, the motor has likely failed and replacement is the realistic path forward.
Humming Without Grinding
A clear hum means electricity reaches the motor but the blades cannot move. A jam is locking the grind plate. Stop the unit right away. Running it while jammed causes the motor to overheat and burn out.
Runs Briefly Then Shuts Off
This pattern signals the thermal overload protection has triggered. The motor overheated from resistance and shut itself down to prevent damage. Let the unit cool for 15–20 minutes, then clear the jam and reset.
Unjam the Disposal: Four Reliable Methods
Mechanical jams cause the majority of disposal failures. Try these methods in order, starting with the safest and simplest.
Use the Hex Wrench from the Bottom
Every disposal has a center access hole on the bottom that accepts a 1/4 inch or 6mm hex wrench. This tool often came with your unit or is sold at any hardware store.
Insert the wrench and rock it back and forth 10–15 times in both directions. This manually rotates the motor shaft and breaks free whatever is stuck.
Pro Tip: Pour a small amount of vegetable oil down the drain while turning the wrench. The oil lubricates compacted food and helps it slide free.
Try a Wooden Dowel from Above
If the hex wrench is missing, grab a sturdy wooden dowel or broom handle. Press it gently against the grinding plate through the drain and twist. Avoid metal screwdrivers or sticks from above because they can damage the impellers or fly out dangerously.
Pull Out Visible Debris
With the power confirmed off, shine your flashlight down the drain and push open the rubber baffle flaps. Use long tongs or needle-nose pliers to fish out bones, fruit pits, silverware, or other obstructions. This alone solves many jams.
Disconnect the Unit for Deep Clogs
If you suspect a lodged object you cannot reach:
- Squeeze the spring clamp on the dishwasher drain line and disconnect it
- Loosen the tubular connector on the waste pipe
- Rotate the mounting lock ring counterclockwise using the three-prong cleat system
- Lift the disposal out and turn it upside down over a bucket
- Retrieve the object and reinstall by reversing the steps
Reset and Test the Disposal
Once the jam appears cleared, press the reset button firmly. Wait 10–15 seconds, then run cold water and flip the switch. Listen for smooth grinding without humming or clicking.
If the unit hums again, the jam is not fully cleared and you should repeat the wrench method. If the reset button pops out immediately, resistance remains somewhere in the system. Do not keep pressing it, because that damages the motor. Recheck for hidden debris.
Use an Impact Driver as a Last Resort
For severely seized disposals, a cordless impact driver with a 1/4 inch bit can free the jam. Attach the bit to the center hole and apply short bursts of power. An angle adapter helps in tight spaces.
Warning: This method risks damaging gears and the motor housing. Use it only when every other method has failed, and never apply continuous force.
Prevent Future Breakdowns with Simple Habits

Most disposal problems are avoidable with consistent habits and a quick monthly cleaning routine.
Keep These Items Out of the Disposal
Your disposal is built for soft, wet food scraps only. The following items cause the majority of jams and clogs:
- Grease, oil, and fat that solidify in pipes
- Fibrous foods like celery, corn husks, and onion skins
- Starchy scraps including pasta, rice, and potato peels
- Hard items such as bones, fruit pits, and seafood shells
- Anything larger than a dime, including silverware that slips in by accident
Monthly Cleaning with Ice and Soap
This quick routine sharpens the grind plate and washes away residue:
- Drop in a handful of ice cubes
- Add a few drops of liquid dish soap
- Run the disposal with cold water for 30 seconds
- Finish by flushing with hot water to clear the drain line
Always Run Cold Water
Run cold water whenever the disposal operates and continue for 10–15 seconds after you turn it off. Cold water solidifies grease so the blades can chop it into small pieces that flush cleanly. Hot water melts grease and lets it re-solidify inside your pipes.
Know When Replacement Is the Right Answer

Some failures cannot be repaired. Watch for these clear signs that your disposal has reached the end of its life:
- No power after verifying the breaker, plug, and reset button
- Burning smell or visible smoke during operation
- Water leaking from the bottom of the unit, indicating seal failure
- Persistent grinding or metallic noises after clearing jams, pointing to bearing failure
- Age over 10–15 years, when internal wear is advanced
Modern disposals are quieter, more efficient, and easier to install than older models. A DIY swap typically takes one to two hours with basic plumbing tools.
Skip the Chemical Drain Cleaners
Never pour Drano or similar chemical cleaners into a disposal. They corrode internal metal components and leave hazardous residue for anyone who services the unit later. Stick to mechanical cleaning methods and natural deodorizers like baking soda and vinegar.
Quick Troubleshooting Reference
| Symptom | Likely Cause | Fix |
|---|---|---|
| No power at all | Tripped breaker, GFCI, or dead motor | Reset breaker, plug, and reset button |
| Humming but not grinding | Jammed blades | Use hex wrench and clear debris |
| Runs briefly then stops | Overheating or jam | Cool 15 minutes, clear jam, reset |
| Water leaking underneath | Failed seal or loose connection | Tighten fittings or replace unit |
| Bad odor from the drain | Food buildup inside chamber | Clean with ice, soap, and water |
Frequently Asked Questions About Fixing a Broken Sink Disposal
Why does my disposal hum but not spin?
A hum means electricity reaches the motor but the blades cannot rotate. Something is jamming the grinding mechanism, usually a bone, pit, silverware, or compacted food. Shut the unit off immediately to prevent motor overheating, then use a 1/4 inch hex wrench in the bottom access hole to manually free the blades.
How long should I wait after pressing the reset button?
After pressing the reset button, wait 10–15 minutes before running the disposal again. This gives the motor time to cool down after triggering the thermal overload protection. If the button pops out again right away, the jam is not fully cleared.
Can I use Drano in a garbage disposal?
No. Chemical drain cleaners like Drano corrode the metal components inside the disposal and can leave hazardous residue for future repairs. Use mechanical methods such as a hex wrench, tongs, and the ice-and-soap cleaning routine instead.
What size hex wrench do I need for a disposal?
Most garbage disposals use a 1/4 inch or 6mm hex wrench. This tool fits the center access hole on the bottom of the unit and lets you manually turn the motor shaft to break free jams. Many disposals ship with this wrench included.
How long does a garbage disposal typically last?
With proper care and regular cleaning, a garbage disposal lasts 10–15 years. Avoiding hard objects, fibrous foods, and grease dramatically extends its lifespan.
When should I replace my disposal instead of repairing it?
Replace the unit when you notice no power after all troubleshooting, a burning smell, leaking from the bottom, persistent mechanical noise after clearing jams, or when the unit is older than 10–15 years. These signs indicate motor failure, seal damage, or worn bearings that repairs cannot fix.
Final Thoughts on Repairing Your Sink Disposal
A broken sink disposal feels like a major problem, but the fix is usually simple. Start by cutting power completely, then diagnose based on the symptom. Use the hex wrench method to clear jams, press the reset button after the motor cools, and run cold water during testing. Most issues resolve in minutes once you identify the root cause.
Keep a 1/4 inch hex wrench under the sink, run cold water with every use, and perform the ice-and-soap cleaning routine monthly. These small habits prevent nearly all common breakdowns and help your disposal reach its full 10–15 year lifespan. If you have worked through every troubleshooting step and the unit still will not run, replacement is a straightforward DIY project that restores your kitchen’s full functionality.







