
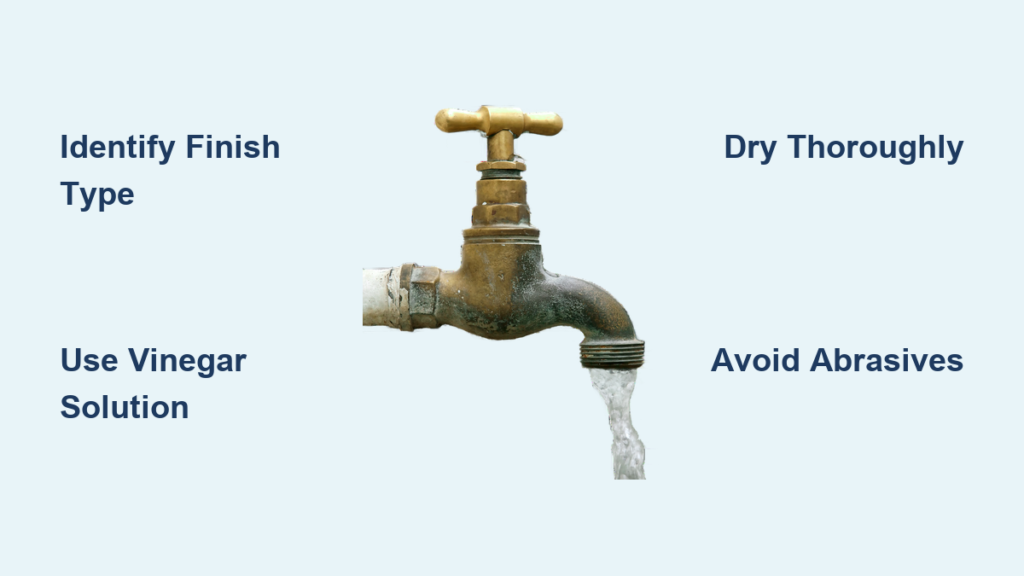
Brass faucets bring timeless elegance to any kitchen or bathroom, but they require specific care to stay beautiful. Using the wrong cleaning method can permanently damage the finish, leaving you with a dull, patchy fixture instead of the warm, golden glow you expected. The key lies in identifying whether your faucet has a lacquered coating or an unlacquered raw brass finish, as each requires completely different approaches. This guide provides step-by-step techniques for both types, helping you clean gently, restore shine safely, and protect your investment for decades.
Identify Your Brass Finish Type Before Cleaning
Before applying any cleaner, you must determine whether your faucet is lacquered or unlacquered. This single step prevents the most common cleaning mistakes that permanently ruin brass finishes.
How to Recognize Lacquered Brass
Lacquered brass features a clear protective sealant that keeps the surface bright and mirror-like. Look for these telltale signs. The surface reflects light sharply without any visible oxidation or darkening. There is no gradual color change around handles or high-touch areas. The finish feels smooth and slightly plastic-like under your fingertips. If you cannot confirm the finish type, treat the faucet as lacquered and use only mild cleaning methods.
Signs of Unlacquered Raw Brass
Unlacquered brass lacks any protective coating and naturally reacts with air and moisture. Watch for these indicators. The surface gradually changes color from gold to amber to deep brown over time. You notice uneven darkening based on where hands touch the fixture most. The faucet develops a warmer, antique appearance that varies throughout the surface. This patina is actually protective, forming a stable layer that slows further corrosion.
Safe Daily Cleaning Methods for All Brass Types
These universal practices work for both lacquered and unlacquered brass without risking damage to the finish.
Weekly Cleaning with Mild Dish Soap
Mild dish soap removes everyday grime safely for all brass types. You will need mild dish soap like Dawn, warm water, a soft microfiber cloth, and a dry lint-free towel. Dampen your cloth with warm soapy water and wipe the entire faucet, focusing on handles and the spout base where oils accumulate. Rinse thoroughly using a clean wet cloth to remove all soap residue. Dry completely with a soft towel to prevent water spots from forming. Gentle surfactants lift oils and soap scum without stripping protective coatings or accelerating tarnishing.
The Critical Drying Step
Leaving moisture on brass promotes tarnish and mineral deposits. Use a soft, absorbent microfiber towel and pay special attention to crevices where water pools. In hard water areas, drying after each use reduces limescale buildup by up to eighty percent. This simple habit extends time between deep cleanings significantly.
Deep Clean Unlacquered Brass Without Damage
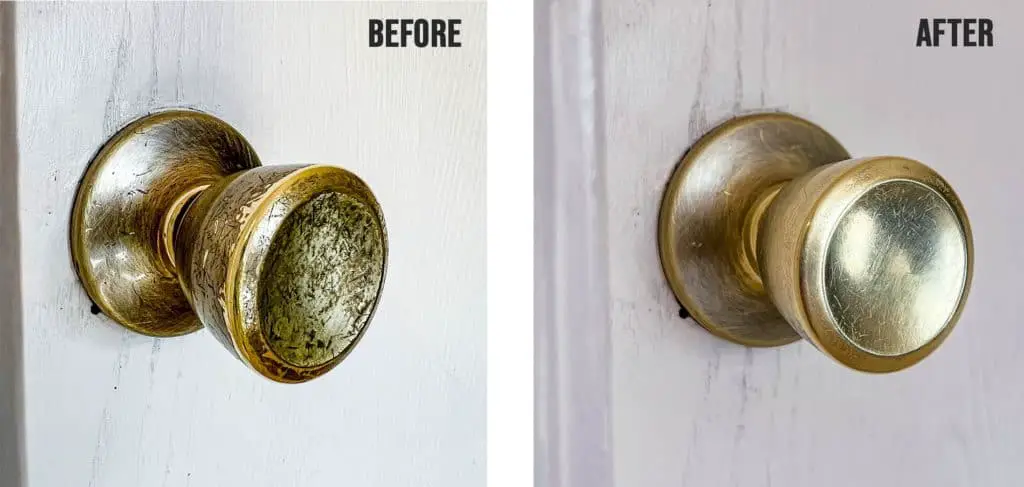
Raw brass needs slightly stronger care to manage oxidation while preserving the protective patina.
Vinegar-Water Solution for Light Tarnish
A vinegar solution works well for weekly maintenance and light tarnish removal. Mix equal parts white vinegar and water in a spray bottle. Spray the solution onto your cloth, never directly on the faucet. Wipe gently in circular motions, then rinse with clean water and dry thoroughly. This method temporarily brightens the surface, and the natural patina resumes afterward. Never soak unlacquered brass, as vinegar can seep into joints and cause internal corrosion.
Baking Soda Paste for Stubborn Stains
For limescale or tarnish that resists vinegar, use a baking soda paste. Combine three parts baking soda with one part water to form a thick paste. Wet the faucet lightly, then apply the paste to a damp cloth, never directly. Rub gently for ten to fifteen seconds per area, then rinse immediately and dry completely. Baking soda is mildly abrasive, so overuse causes fine scratches that become visible over time. Never use this method on lacquered brass, as even slight abrasion compromises the coating.
Restore Shine with Proper Polishing Techniques
Polishing brings back the original luster of oxidized unlacquered brass, but use this technique sparingly to preserve the protective patina.
Choosing the Right Brass Polish
Select products specifically labeled for unlacquered brass. Recommended options include Brasso, Wright’s Brass Cream, Weiman Brass Polish, and Mother’s Polish for Brass. Always verify the product is safe for raw brass before purchasing. User feedback indicates Brasso works incredibly well if you do not overdo it, but over-polishing removes too much patina and creates a patchy appearance.
Step-by-Step Polishing Process
Gather brass polish, rubber gloves, lint-free cloths, an old toothbrush, and a dry microfiber towel. Protect your countertops and grout by covering them before starting, as brass polishes can stain marble, granite, and wood. Apply polish to a cloth and spread over tarnished areas, working into crevices with the toothbrush. Wipe off residue thoroughly, then buff vigorously for maximum shine. The more you buff, the higher the shine. Expect to restore an as-good-as-new appearance, but understand that over-polishing makes brass more prone to future tarnish.
Remove Tough Limescale and Green Corrosion

Hard water deposits and verdigris require targeted treatment to avoid damaging the metal.
Vinegar Soak for Limescale Removal
Chalky white or light green limescale responds well to acetic acid. Soak a cloth in undiluted white vinegar and wrap it around affected areas for fifteen to thirty minutes. Wipe gently with a soft sponge, then rinse and dry completely. For clogged aerators, unscrew the part and soak it in vinegar for thirty minutes or longer. Rinse under running water before reinstalling. Do not let limescale build up, as it becomes much harder to remove over time.
Handling Green Corrosion Carefully
Verdigris appears as a green film indicating copper carbonate formation from moisture exposure. For light verdigris, use a vinegar-soaked cloth as described above. For deep corrosion, consult a professional rather than scrubbing aggressively, as this damages the metal. Never use bleach, as it reacts with copper and causes pitting and permanent green staining.
Chemicals and Tools That Destroy Brass Finishes
Many common household items permanently harm brass and should always be avoided.
Avoid These Damaging Chemicals
Never use ammonia, which causes discoloration and accelerates oxidation. Avoid bleach entirely, as it reacts with copper and leads to pitting and green stains. Steer clear of acidic toilet bowl cleaners, which corrode both brass and surrounding materials. Do not use lemon juice, ketchup, or vinegar-baking soda mixes, as these natural acids speed up tarnishing. Never apply DIY acidic pastes to lacquered brass, as they strip the protective coating instantly.
Skip All Abrasive Tools
Brass is a soft alloy easily scratched by rough materials. Never use steel wool, wire brushes, scouring pads, or rough sponges. Even non-scratch pads may contain invisible abrasive particles that mar the surface. Use only soft cloths and lint-free towels for all cleaning and drying.
Protect Brass Faucets with Long-Term Care
Extend time between cleanings and slow unwanted tarnishing with protective measures.
Apply Carnauba Wax Sealant
After polishing, apply a thin coat of automotive-grade carnauba wax. Clean and dry the faucet completely, then apply wax with a soft cloth. Let it dry to a haze, then buff lightly. Reapply every three to six months or when water no longer beads on the surface. This creates a sacrificial barrier against air, moisture, and minerals. WatermarkFixtures, a manufacturer, specifically recommends carnauba wax to seal brass surfaces and reapplication as it wears off.
Consider Water Softening Solutions
In hard water areas, mineral content speeds up limescale formation dramatically. Installing a water softener reduces spotting and buildup while extending time between deep cleanings. Alternatively, use distilled water for final rinsing during cleaning to prevent mineral deposits.
Maintenance Schedule for Lasting Beauty
Consistency prevents stubborn buildup and preserves both appearance and function.
Follow This Cleaning Routine
Wipe the faucet after each use daily. Perform mild soap cleaning weekly. Deep clean monthly or whenever buildup appears. Polish only one to twice per year for unlacquered brass. Check the aerator every three months for clogs. Reapply wax every three to six months. One homeowner reports cleaning weekly with vinegar and water, which takes only five minutes and keeps the faucet looking great.
Troubleshoot Common Brass Faucet Problems
Address issues quickly before they worsen.
Solutions for Frequent Issues
Dull, uneven darkening results from mixed grime and patina. Clean with vinegar solution and allow even re-patination through consistent wiping. Sticky handles come from soap scum building up in joints. Use a toothbrush with vinegar solution, rinse well, and dry thoroughly. Water spots form from hard water evaporation. Wipe after each use and dry thoroughly after cleaning. Cloudy film indicates residue from improper rinsing. Re-clean with plain water and try filtered water for the final rinse. Minor scratches blend into patina over time, while deep scratches may need professional refinishing.
Key Takeaways for Cleaning Brass Faucets

Brass faucets can last generations with proper care. Always identify your finish type first, as lacquered and unlacquered brass require completely different approaches. Clean gently using soft cloths and mild solutions like dish soap or diluted vinegar. Dry thoroughly after every cleaning to prevent spots and mineral buildup. Polish unlacquered brass sparingly to preserve the protective patina. Avoid all abrasives and harsh chemicals that damage both finish and function. Embrace natural aging, as patina adds character and protection. Act fast on limescale before it hardens. Seal with wax after polishing to extend shine and reduce maintenance. Inspect monthly to catch issues early.
Frequently Asked Questions About Cleaning Brass Faucets
Can I use vinegar to clean lacquered brass faucets?
Vinegar can degrade lacquer coatings over time with prolonged exposure. If your faucet is lacquered, stick to mild dish soap and warm water. Test any vinegar solution on an inconspicuous area first, and avoid leaving it on the surface for extended periods.
How often should I polish my unlacquered brass faucet?
Polish unlacquered brass only one to twice per year. Over-polishing removes the protective patina layer, making the metal more vulnerable to future tarnishing. If you prefer the shiny look, occasional polishing is fine, but allow the patina to regenerate between sessions.
What removes green corrosion from brass?
Light green verdigris responds to a vinegar-soaked cloth wrapped around the affected area for fifteen to thirty minutes. For deep corrosion, consult a professional rather than scrubbing aggressively. Never use bleach, as it reacts with copper and causes permanent pitting and staining.
Why does my brass faucet turn brown?
Brown discoloration on unlacquered brass is natural patina developing. This oxidation creates a protective layer that slows further corrosion. On lacquered brass, brown spots indicate the coating has failed and the underlying brass is exposing to air. If this happens, professional refinishing may be needed.
Can I use lemon juice to clean brass?
Avoid lemon juice entirely. Like other citrus acids, it accelerates tarnishing and can damage both lacquered and unlacquered finishes. If acid contacts your faucet accidentally, wipe it off immediately with a damp cloth and dry thoroughly.
What is the best way to prevent water spots on brass?
Wipe the faucet dry after every use, especially in hard water areas. During cleaning, rinse with clean water and dry immediately. For final rinsing, consider using distilled water to eliminate mineral content that causes spotting. Applying carnauba wax also helps repel water and reduce spot formation.







