
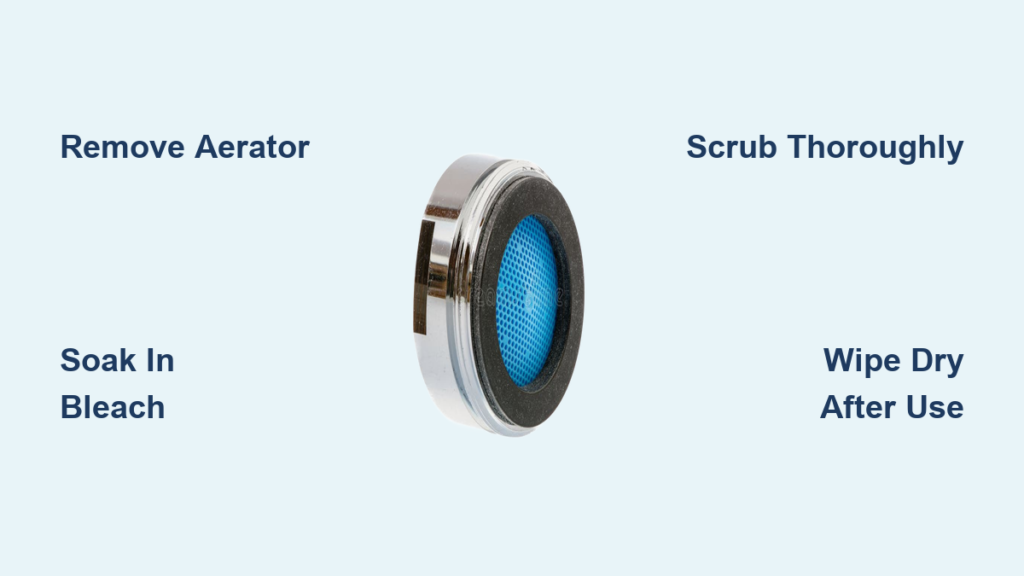
You turn on the tap and notice dark, slimy buildup around the aerator or base of your faucet. It is not just dirt. It is mold, mildew, or bacterial growth that can look unsightly and irritate sensitive individuals. The good news? You do not need to replace your faucet. With the right method, you can clean a moldy faucet in under 30 minutes using common household supplies.
This guide shows you exactly how to remove mold, mildew, and pink slime from faucets step by step. You will learn the best cleaning agents, how to disassemble and soak parts safely, and what mistakes to avoid. Plus, we will cover prevention strategies so your faucet stays clean longer.
Remove and Disassemble Aerator

The faucet aerator is the number one spot for microbial buildup. This small screen traps waterborne particles but also holds moisture, creating a breeding ground for mold, mildew, and pink slime.
Unscrew Aerator Safely
Turn off the water supply if needed, though it is not always required. Grip the aerator by hand and unscrew it counterclockwise. If it is stuck, wrap pliers in a microfiber cloth or use an aerator wrench to prevent scratching chrome or brass finishes. Place all small parts, including screen, washer, flow restrictor, and housing, into a labeled container to avoid loss.
Take a photo before disassembly to remember the correct reassembly order.
Soak in Disinfectant Solution
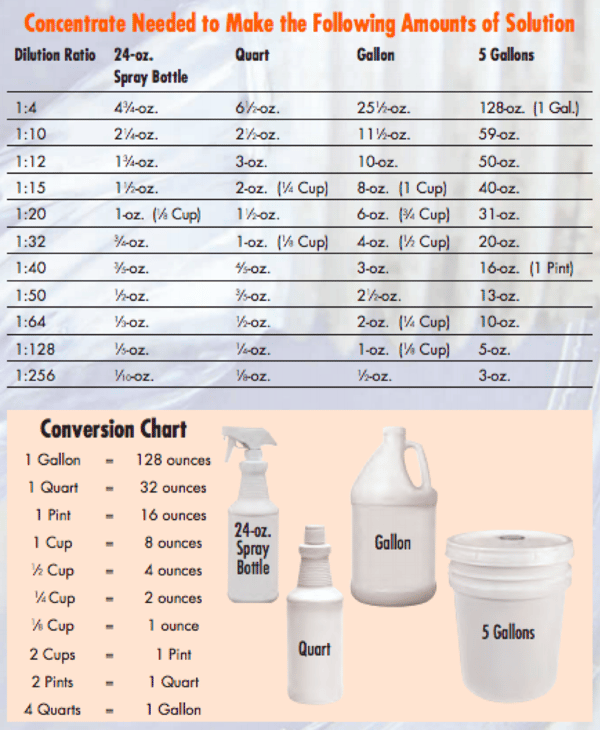
Soaking breaks down biofilm and kills microbes. Two primary solutions work best: bleach for fast disinfection and vinegar for eco-friendly cleaning and limescale removal.
Use Bleach for Maximum Kill
Mix one part household bleach with nine parts water in a one to ten ratio. Soak aerator parts for 20 to 30 minutes. Bleach destroys mold, mildew, and bacteria, including stubborn pink slime.
Never mix bleach with vinegar or ammonia, as this creates toxic chlorine gas.
Try Vinegar for Natural Cleaning
Use undiluted white vinegar, which contains five percent acetic acid. Soak for 30 to 60 minutes. Vinegar dissolves mineral deposits and disrupts microbial cells but is less potent than bleach.
Vinegar works best for routine maintenance, well water users, or septic-safe cleaning.
Scrub All Components Thoroughly
Soaking alone will not remove all biofilm. You need mechanical action to get into crevices and scrub away buildup.
Clean with Soft-Bristled Brush
Use an old toothbrush or small cleaning brush. Scrub both sides of the mesh screen, threads and internal grooves, and rubber washers and gaskets. Focus on crevices where slime accumulates.
Avoid steel wool or abrasive pads, as they scratch surfaces and encourage future buildup.
Rinse and Reverse-Flush Faucet
Residual cleaner can damage fixtures or affect water taste, so thorough rinsing is essential.
Rinse Each Part
Hold all components under clean running water. Ensure no bleach or vinegar remains, especially on rubber seals.
Flush Internal Faucet Lines
With the aerator still off, turn on the faucet. Let water run for 15 to 30 seconds to flush out loosened debris and disinfect internal passages.
Water should run clear with no odor.
Reassemble and Test
Proper reassembly prevents leaks and cross-threading, ensuring your faucet works properly after cleaning.
Reinstall in Correct Order
Reassemble parts as they came out, referring to your photo if needed. Screw the aerator back on by hand first. Tighten gently with pliers if necessary, but do not over-tighten.
Run Final Flush
Turn on the faucet for 30 seconds. Check for smooth water flow, no leaks, and no lingering chemical smell.
Clean Other Fixtures Together
Mold and bacteria rarely stay isolated to one faucet. Treat related fixtures to prevent rapid recontamination.
Soak Showerhead
Remove and soak in fifty-fifty bleach and water solution for 20 minutes. Or use the bag method: fill a plastic bag with solution, secure over showerhead with a rubber band, and let sit. Rinse thoroughly and reinstall. Replace if corroded or leaking.
Disinfect Toilet Tank
Add one-quarter cup of bleach, let sit 15 to 20 minutes, then flush two to three times. Do not exceed 20 minutes, as bleach damages rubber seals. Avoid automatic tank tablets, as they degrade internal components over time.
Wipe Sink and Tub Surfaces
Spray with bleach solution or hydrogen peroxide. Scrub pink slime with a brush, rinse well, and dry with a microfiber towel.
Prevent Mold with Daily Habits
Cleaning is only half the battle. Prevent regrowth with smart habits that address the moisture that fuels mold.
Wipe Faucet Dry After Use
Use a dry towel or squeegee on faucet handles and base after each use. This removes standing moisture, which is critical for stopping biofilm formation.
Run Bathroom Fan After Showers
Operate exhaust fan during and for 20 to 30 minutes after showering. This reduces humidity and condensation. No fan? Open the door and window to improve airflow.
Flush Unused Taps Weekly
Turn on guest bathroom or utility sink faucets for 30 seconds weekly. This maintains chlorine residual in stagnant lines and prevents microbial colonization.
Choose the Right Cleaner for Your Needs
Not all cleaning agents work the same. Pick based on your goal and fixture type.
Bleach at a one to ten ratio works fastest for killing mold and mildew. White vinegar removes limescale naturally. Baking soda paste provides gentle scrubbing. Hydrogen peroxide at three percent is septic-safe. Commercial lime removers handle heavy mineral buildup.
Combine vinegar and baking soda for a foaming deep clean, but never mix with bleach.
Avoid Common Cleaning Mistakes
Even small errors can damage fixtures or reduce effectiveness. Learn what to avoid before you start.
Do not mix bleach and vinegar, as this creates toxic chlorine gas dangerous to lungs. Use one or the other, never together. Do not soak rubber too long, as bleach degrades rubber washers and O-rings over time. Rinse promptly after disinfecting. Do not skip the aerator, as most mold hides inside rather than on visible surfaces. Cleaning only the outside leads to fast regrowth.
Know When to Call a Pro
Most faucet mold is harmless and fixable at home. But some signs mean deeper trouble.
Call a Plumber If
Mold returns within days of cleaning. Multiple fixtures are affected, even rarely used ones. Water smells musty or looks cloudy. This could indicate internal pipe contamination or stagnant plumbing zones.
Call a Mold Specialist If
You see fuzzy black mold on walls, grout, or behind tiles. Family members have unexplained allergies or respiratory issues. Musty odor persists despite cleaning. This may be toxic mold requiring professional remediation.
Maintain a Mold-Free Faucet Long-Term
Prevention beats repeated cleaning. Follow this simple routine to keep your faucet clean between deep cleanings.
Monthly Maintenance
Remove and soak aerator in vinegar for 60 minutes or bleach for 20 minutes. Scrub and reassemble.
Weekly Actions
Wipe faucet dry after use. Run infrequently used taps for 30 seconds. Clean showerhead and sink surfaces.
Environmental Controls
Keep humidity below 60 percent. Use exhaust fans or dehumidifiers in bathrooms. Replace old aerators every one to two years if heavily scaled.
Frequently Asked Questions About Cleaning Moldy Faucets
Why does my faucet aerator keep getting moldy?
The aerator traps moisture and organic particles, creating an ideal environment for mold, mildew, and pink slime bacteria. Regular cleaning and drying prevent regrowth.
Is the pink slime in my faucet dangerous?
Pink slime, caused by Serratia marcescens bacteria, is generally not toxic but can irritate sensitive individuals. It is a hygiene issue rather than a health hazard.
Can I use bleach on all faucet materials?
Bleach is safe for chrome, stainless steel, and plastic. Avoid prolonged contact with rubber gaskets, as bleach degrades them over time. Test on a small area first for specialty finishes.
How often should I clean my faucet aerator?
Clean the aerator every one to three months. Increase frequency in humid bathrooms or if you notice recurring mold.
What is the fastest way to clean a moldy faucet?
Remove the aerator, soak in one part bleach to nine parts water for 20 to 30 minutes, scrub with a toothbrush, rinse thoroughly, and reinstall. This whole process takes under 30 minutes.
Why does mold come back immediately after cleaning?
Mold returns when moisture remains or when the aerator interior is not cleaned thoroughly. Dry the faucet after each use and ensure complete disassembly during cleaning.
Key Takeaways for Cleaning Your Moldy Faucet
The primary cleaning target is the aerator, which is the hidden hotspot where most mold and bacteria grow. Bleach offers the most killing power for fast disinfection, while vinegar provides a safer alternative for routine maintenance and scale removal. Drying is the critical step. Moisture is the enemy, and wiping your faucet dry after each use prevents biofilm formation. Take a systemic approach by cleaning all bathroom fixtures together, as mold spreads easily between fixtures.
By following these steps, you will keep your faucets clean, functional, and free of unsightly buildup without costly replacements. Regular maintenance takes less than 10 minutes a month. A clean faucet is not just about looks. It is about keeping your water safe and your home healthy.







