

A foul odor drifting up from your bathroom sink drain is never a good sign. Slow drainage or a small puddle forming under the cabinet often points to a failing P-trap. This curved pipe holds a small amount of water to block sewer gases from entering your home. Over time, it can crack, corrode, or leak. The good news is that replacing a P-trap under a bathroom sink is a simple DIY project that most homeowners can finish in about 15 minutes. No plumber needed.
With basic tools and careful steps, you can stop leaks, clear odors, and restore proper drainage. This guide covers everything from preparing your workspace to testing the new installation, so you get it right the first time.
Prepare Your Work Area and Tools
Gather Essential Supplies
Before you start, collect all your materials in one place:
– Bucket or bowl to catch residual water
– Rag for drips and cleanup
– Channel locks for stuck connections
– Flathead screwdriver for scraping old putty
– Replacement P-trap matching your pipe size (1.25″ or 1.5″)
– Teflon tape for threaded joints
– Plumber’s putty if replacing the drain flange
Having everything ready prevents mid-project interruptions.
Set Up the Cabinet Space
Clear everything stored under the sink. Lay a rag on the cabinet floor to protect the finish and absorb spills. Position a bucket directly beneath the P-trap to catch the small amount of water trapped inside. This simple setup keeps the job clean and stress-free.
Remove the Old P-Trap
Loosen the Slip Nuts by Hand
Start by letting any standing water drain from the sink. Then unscrew the slip nuts connecting the P-trap to the tailpiece and wall pipe. Most nuts turn easily by hand. If one sticks, use channel locks gently to avoid cracking the plastic.
Detach the J-Bend
Once the nuts are loose, carefully remove the J-bend (the curved section). Hold it over the bucket since water and debris will spill out. This is also a great moment to check for lost items like rings or earrings. Gently tip the trap to see if anything falls out.
Decide Whether to Reuse or Replace
Metal P-traps in good condition can sometimes be reused. However, plastic traps often degrade over time. Inspect for cracks, warping, cloudy material, or misalignment. If anything looks off, replace it. New P-traps cost under $10 and offer a reliable seal.
Check Pipe Sizes and Alignment

Confirm the Correct Size
Most bathroom sinks use 1.25-inch pipes, though some use 1.5-inch. Check the old trap or packaging for the size label. Using the wrong size leads to leaks and poor drainage. Bring the old trap to the hardware store if you’re unsure.
Align the Wall Pipe with the Tailpiece
The wall pipe (drain arm) is usually slightly adjustable. Slide it forward or back to align with the sink’s tailpiece. A properly aligned trap prevents sagging and long-term leaks.
Install the New P-Trap
Assemble the Trap in Place
Slide the slip nut and washer onto the tailpiece first so you don’t forget this step. Then connect the top of the J-bend to the tailpiece and the bottom to the wall pipe. Hand-tighten both slip nuts.
Tighten Carefully Without Overdoing It
This step is critical: do not overtighten. Snug is enough. Over-tightening can crack plastic or crush washers, causing leaks. Use channel locks only for a final quarter-turn snug fit. If a nut spins without tightening, the washer may be misaligned. Disassemble and reseat it.
Replace the Drain Assembly (If Needed)

Remove the Old Drain Components
If you’re replacing the entire drain, start from the top:
1. Pull out the stopper and remove the adjuster rod
2. Unscrew the mounting bracket under the sink
3. Loosen the large locknut securing the drain body
4. Remove the entire assembly
Use channel locks if the nut is stuck due to old putty or corrosion.
Clean the Sink Opening Thoroughly
Scrape away old plumber’s putty and debris from the sink flange area. Use a flathead screwdriver carefully to avoid scratching the sink. A clean, smooth surface ensures the new gasket seals properly.
Install the New Drain with Plumber’s Putty
- Roll a thin rope of plumber’s putty and press it around the underside of the new flange
- Insert the flange into the sink opening
- From below, screw on the locknut and gasket
- Hand-tighten, then snug with channel locks
- Reconnect the adjuster rod and bracket, ensuring smooth stopper movement
Pro Tip: Some drain kits include a thin rubber gasket. Remove it. It can compress unevenly and cause leaks when used with putty.
Seal Threaded Connections with Teflon Tape
Apply Tape to Key Joints
Even with slip nuts, some connections are threaded and need extra sealing. Wrap Teflon tape clockwise in 2 to 3 layers on:
– Adjuster rod threads
– Drain body threads
– Adapter fittings
This creates a watertight seal and prevents future drips.
Pay Attention to the Throat Connection
The drain body to tailpiece joint is a common leak point. Apply Teflon tape even if the connection seems sealed. Some kits include dual-piece fittings that leak without tape.
Build a Custom P-Trap with ABS Pipe (Optional)
Measure and Cut the Pipe
If your setup doesn’t fit a standard P-trap, build one from 1.5-inch ABS pipe:
1. Dry-fit the pieces under the sink
2. Mark the cut line with a Sharpie
3. Cut with a handsaw
4. File any burrs for smooth flow
Join the Pieces with ABS Cement
- Apply ABS cement to both pipe end and fitting
- Join and twist a quarter-turn
- Hold for 30 seconds to prevent separation
- Repeat for other joints
Wait at least 2 hours before testing. Rushing causes leaks.
Run Leak Tests
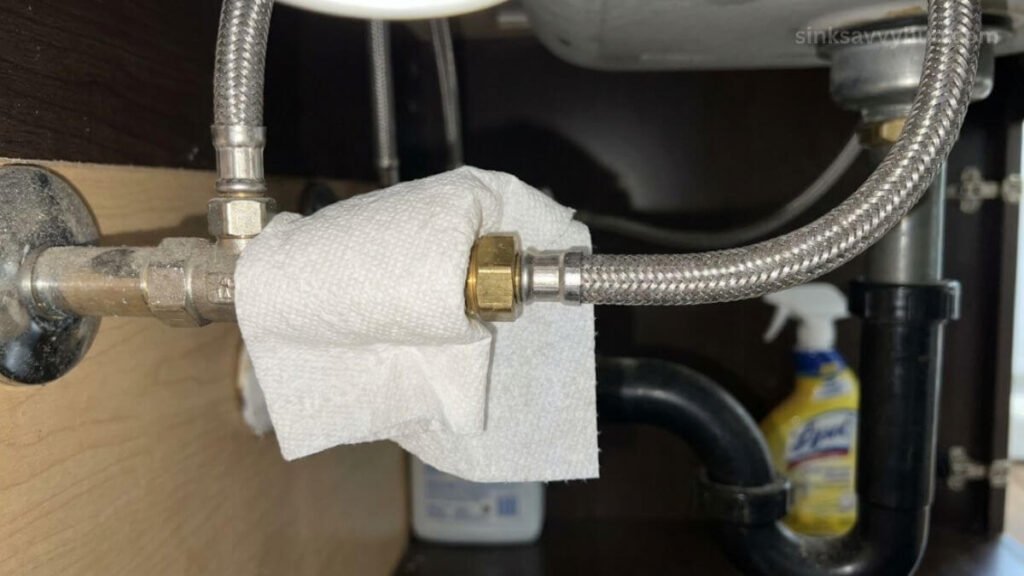
Test with Running Water
Turn on the faucet and let water run for 30 seconds. Watch all connections carefully:
– Top and bottom of the P-trap
– Tailpiece joint
– Wall pipe connection
– Drain body
Look for any drips or moisture.
Simulate Heavy Drainage
Fill the sink with 2 to 3 inches of water, then pull the stopper. The sudden rush reveals hidden leaks. If you see dripping, tighten slightly or reapply Teflon tape.
Verify with the Toilet Paper Test
For peace of mind, wrap toilet paper around each joint and leave it for 2 to 3 days. If it stays dry, your seal is solid. This method catches slow seepage missed during initial testing.
Troubleshoot Common Issues
Stop Leaks at the Throat
If water drips where the trap meets the tailpiece, disassemble and check the washer. Ensure it sits flat, then reapply Teflon tape on the threaded tailpiece.
Loosen Stuck Slip Nuts
Old connections can seize from mineral buildup. Use channel locks with a rag-wrapped jaw to prevent damage. Apply steady pressure without jerking. If it won’t budge, replace the entire fitting.
Prevent Over-Tightening Damage
Snug does not mean tight. If you see cracks in plastic or squished washers, you’ve gone too far. Replace the damaged part and reassemble with hand-tightening only.
Maintain Your P-Trap Long-Term
Inspect Every Six Months
During routine cabinet cleaning, check for moisture around joints. Early detection prevents mold and rot. Look for damp insulation, musty smells, or pipe discoloration.
Avoid Harsh Drain Chemicals
Drain cleaners can degrade plastic traps over time. Use boiling water or a drain snake for clogs instead.
Keep the Area Accessible
Don’t store heavy items under the sink that block access. You should be able to inspect and remove the P-trap easily in an emergency.
Frequently Asked Questions About Replacing a P-Trap
How long does it take to replace a P-trap?
A standard P-trap replacement takes about 15 minutes. If you’re also replacing the drain assembly or building a custom ABS system, allow at least 2 hours of curing time before testing.
What size P-trap do I need?
Most bathroom sinks use 1.25-inch pipes, though some use 1.5-inch. Check your old trap or packaging for the size label. Bring the old trap to the hardware store if you’re unsure.
Can I reuse my old P-trap?
Metal P-traps in good condition can be reused if they show no cracks or corrosion. Plastic traps should generally be replaced, since they degrade over time. New P-traps are inexpensive and provide a more reliable seal.
Why does my P-trap keep leaking after tightening?
Over-tightening is the most common cause. It can crack plastic fittings or crush washers. Disassemble the joint, inspect the washer, reapply Teflon tape, and reassemble with hand-tightening only.
Do I need to turn off the water to replace a P-trap?
Turning off the water isn’t always necessary for P-trap work, but it’s a safe habit. Make sure the sink is drained before you begin.
What if I drop something valuable down the drain?
Check the removed J-bend immediately. Lost rings, earrings, and small items often settle in the trap. Gently tip the curved section over a bucket to recover anything inside.
Key Takeaways for a Successful P-Trap Replacement
Replacing a P-trap under a bathroom sink is a quick, affordable fix that prevents odors, leaks, and water damage. The three most important points to remember: hand-tighten all connections to avoid cracking plastic, apply Teflon tape to every threaded joint for a reliable seal, and test thoroughly with both running water and the toilet paper method. With the right approach, your new P-trap will serve silently and reliably for years, keeping your bathroom fresh and dry.
Next step: Gather your tools, clear the cabinet, and start the job today. Most homeowners finish the entire replacement in under half an hour.







