A broken garbage disposal or a kitchen remodel often leaves homeowners staring under the sink, wondering where to start. You might worry about water leaks, electrical hazards, or damaging the sink itself. Learning how to remove garbage disposal from sink without calling a plumber saves money and gives you full control over the repair timeline.
This guide breaks down the entire removal process into clear, manageable steps. With basic tools, about an hour of work, and careful attention to safety, you can detach your old unit and prepare the sink for a new disposal or a standard drain.
Shut Off Water and Power Before Anything Else
Safety always comes first when working with plumbing and electrical connections under your sink.
Cut the Water Supply
Find the shut-off valve under the sink, typically along the cold water line. Rotate the valve clockwise until it stops completely. This prevents flooding if any fitting loosens during the job. Even a small drip can create a slippery workspace or damage the cabinet floor.
Kill the Electrical Power
If your disposal plugs into an outlet, the fix is simple: unplug it. Many units are hardwired directly into your home’s electrical system. In that case, head to the circuit breaker panel and flip the breaker labeled for the disposal or kitchen.
Always confirm the power is off using a non-contact voltage tester near the disposal’s wiring. If the tester shows no voltage, you are safe to continue.
⚠️ Critical Safety Tip: Never assume the breaker is labeled correctly. Mislabeled circuits are common. A quick voltage check takes seconds and prevents serious shock.
Disconnect the Drain Hose
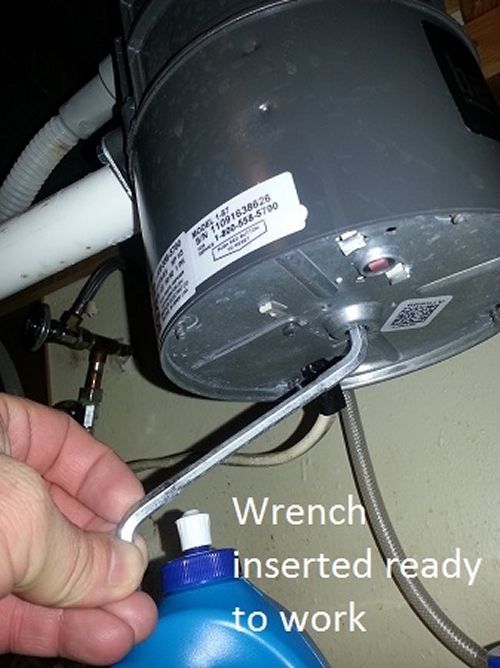
With utilities off, focus on the plumbing that connects the disposal to your home’s drain system.
Prepare for Residual Water
Place a bucket or folded towel directly beneath the drain hose connection. Several ounces of liquid will spill out the moment you loosen the slip nut. A bucket handles larger amounts, while a towel catches steady drips.
Loosen the Slip Nut
Use a 3/8-inch wrench or an adjustable wrench to turn the slip nut counterclockwise. Once loose enough, slide it back and pull the drain hose away from the disposal’s side outlet. If the hose feels stiff, twist it gently while pulling to free it.
💡 Pro Tip: A flexible blue plastic wrench grips slip nuts without cracking or scarring plastic fittings.
Inspect the hose once it is off. Look for cracks, brittleness, or buildup. Clean it thoroughly if you plan to reuse it with a new disposal.
Remove the Sink Flange and Mounting Ring
The disposal attaches to the sink through a mounting assembly that includes the flange and a metal ring underneath.
Lift Out the Sink Flange
From above the sink, locate the sink flange, which is the visible metal rim around the drain opening. It is held in place by three small mounting screws. Use a flathead screwdriver to remove these screws, then lift the flange straight up.
Old plumber’s putty or a rubber gasket may have created a strong seal. Twist the flange gently or pry around the edges with a screwdriver to break the seal. Take care not to scratch a stainless steel or porcelain sink.
🔍 Troubleshooting: If the flange refuses to budge, tap the screwdriver lightly around the rim to break the seal. Avoid metal tools that can gouge the sink surface.
Detach the Mounting Ring
Slide under the sink and locate the mounting ring attached to the underside of the drain opening. This metal ring locks the disposal in place with small tabs. Rotate it slightly counterclockwise to release the lock, then pull it free.
Corrosion can freeze the ring in place. A flathead screwdriver and gentle prying will usually free it. Save both the rubber gasket and the mounting ring if they look reusable. Many new disposals accept the same parts.
Detach the Garbage Disposal Unit

Now that the mounting hardware is out of the way, the disposal itself is ready to come down.
Remove the Mounting Bolts
Flip the disposal upside down on a stable surface or hold it carefully in one hand. Locate the three mounting bolts spaced evenly around the mounting bracket. Use a Phillips head screwdriver to remove each bolt completely.
Lower the Disposal
Grip the disposal firmly and pull it straight down. It may resist at first due to a tight seal or old putty. Wiggle the unit gently side to side in a slow circular motion to break the seal without forcing it. Once free, lower the unit carefully. Most disposals weigh between 10 and 15 pounds.
💡 Pro Tip: The old rubber gasket and putty usually come off with the disposal. If it is intact and flexible, clean it and set it aside for reinstallation.
Set the unit on a towel or inside a cardboard box to catch any leftover debris or moisture.
Clean and Inspect the Sink Opening
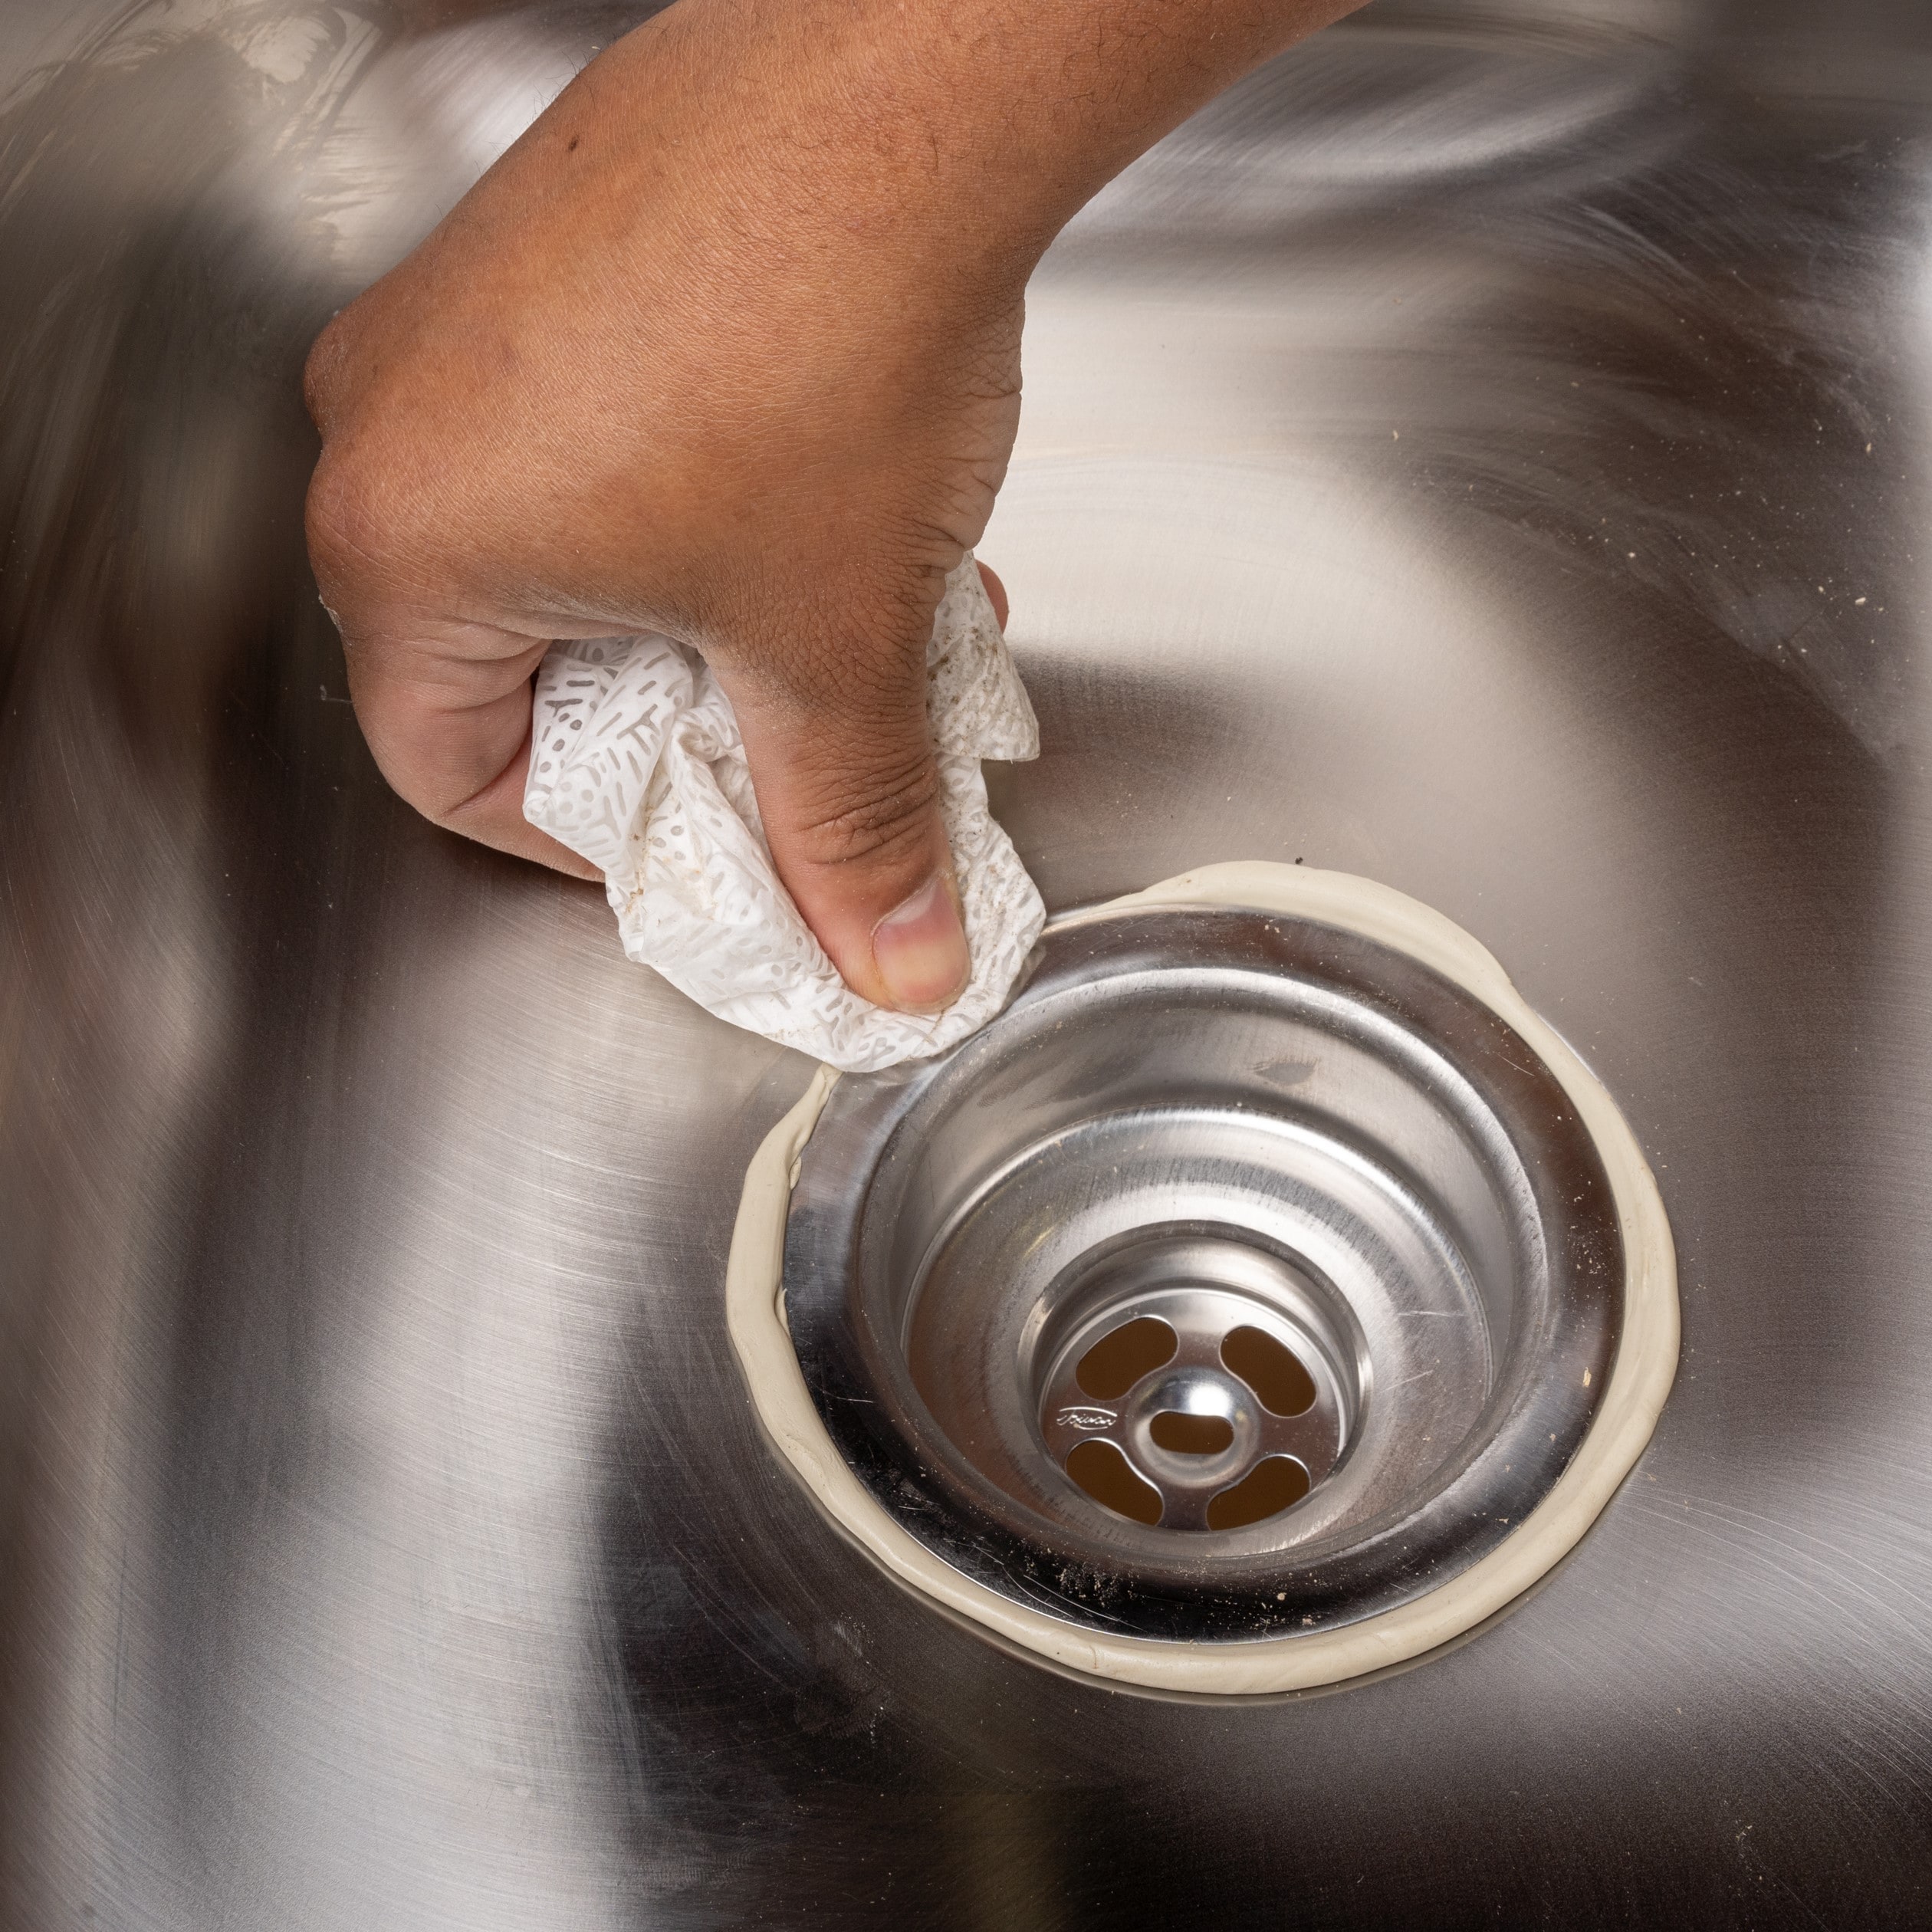
A clean sink flange area is essential whether you plan to install a new disposal or revert to a standard drain.
Scrape Away Old Sealant
Use a flathead screwdriver or a putty knife to remove every trace of old plumber’s putty, rubber fragments, and gasket material from the drain opening. Work slowly to protect the sink’s finish.
Wipe the area with a damp cloth, then dry it with a separate dry cloth. Moisture or debris left behind will prevent a watertight seal on the next installation.
Check for Damage
Look closely at the sink opening for rust, cracks, or warping. Light surface corrosion wipes away with vinegar and a soft scrub pad. If the metal feels thin, pitted, or cracked, pause and consult a plumber. Continued use could lead to leaks under the sink.
✅ Final Check: The opening must be smooth, dry, and completely clear before moving forward.
Prepare for a New Disposal or Standard Drain
With the sink clean, decide on your next move.
Install a New Garbage Disposal
Most new disposals reuse the same mounting system. Reuse the old mounting ring and gasket if they are in good condition. Roll a fresh rope of plumber’s putty under the new flange, press it into the sink opening, and tighten the hardware from below. Reconnect the drain hose, restore power at the breaker, and run water to check for leaks.
⚠️ Warning: Never reuse old plumber’s putty. It hardens over time and loses its sealing ability. Always apply fresh putty for a reliable seal.
Revert to a Standard Sink Drain
If you are removing the disposal permanently, install a standard pop-up or strainer drain. Apply plumber’s putty around the new flange, insert it into the sink opening, and tighten the lock nut from below. Reconnect the P-trap and run water to confirm a tight, leak-free connection.
Troubleshoot Stuck or Stubborn Parts
Older disposals often have corroded hardware that refuses to cooperate.
When the Mounting Ring Will Not Turn
Spray a small amount of penetrating oil, such as WD-40, around the edge of the ring. Wait 10 to 15 minutes for the oil to work into the threads. Tap the ring gently counterclockwise with a flathead screwdriver and hammer to break it loose. Rotate it just enough to release the locking tabs.
Avoid heavy force. Bending the sink flange can create permanent leaks.
When the Disposal Will Not Drop
Double-check that every mounting bolt is fully removed. Wiggle the unit again in slow circles. A few light taps with a rubber mallet around the mounting collar can loosen a stubborn seal. Never use a metal hammer or pry bar on the disposal, since both can crack the sink or destroy the mounting assembly.
Essential Tools and Helpful Extras
The right tools save time and prevent damage.
Must-Have Tools
- Adjustable wrench or 3/8-inch wrench
- Phillips head screwdriver
- Flathead screwdriver
- Bucket or large towel
- Non-contact voltage tester
- Putty knife
Optional but Useful
- Flexible blue plastic wrench for slip nuts
- Flashlight for under-sink visibility
- Work gloves to protect against sharp metal edges
💡 Time-Saving Tip: Lay out every tool before crawling under the sink. The workspace is tight, and frequent trips out waste valuable minutes.
Safety Habits That Prevent Costly Mistakes
A few habits separate a smooth removal from a trip to the emergency room.
Verify Power Every Time
Even if the breaker is off, nearby wires can remain live. Always test with a voltage tester before touching any electrical component.
Support the Disposal During Removal
One hand should cradle the unit while the other removes bolts. A 15-pound disposal that drops suddenly can crack the sink, damage the cabinet, or land on your foot.
Keep the Workspace Dry
Wipe up any water before starting. A dry floor reduces slip risks and lowers the chance of electrical shock.
Frequently Asked Questions About Removing a Garbage Disposal
Do I need a plumber to remove a garbage disposal?
No. Most homeowners can complete the job with basic tools and an hour of free time. The process involves simple mechanical steps, but you must verify the power is off before touching any wires.
How do I know if my disposal is plugged in or hardwired?
Look under the sink. A plugged-in disposal has a cord running to a wall outlet. A hardwired unit has a conduit or wire nuts connecting directly to your home’s wiring. Hardwired units require you to shut off the breaker.
What if the mounting ring is corroded and will not turn?
Apply penetrating oil and wait 10 to 15 minutes. Then tap the ring counterclockwise with a screwdriver and hammer to break the corrosion loose. Work slowly to avoid bending the flange.
Can I reuse the old plumber’s putty?
No. Old putty dries out and loses its sealing ability. Always apply a fresh rope of plumber’s putty when reinstalling a flange or standard drain.
What should I do with the old disposal?
Many local recycling centers accept metal appliances. Some areas offer bulk pickup services. You can also check with the retailer where you purchase a replacement unit, since many will haul away the old disposal for free.
Final Thoughts on Removing Your Garbage Disposal
Removing a garbage disposal is one of the most approachable plumbing tasks a homeowner can tackle. The job comes down to three essentials: shut off utilities, work methodically, and keep the sink opening clean for whatever comes next.
Quick recap of the key steps:
– Turn off the water supply and verify the power is disconnected with a voltage tester
– Disconnect the drain hose and prepare for residual water
– Remove the sink flange, mounting ring, and disposal bolts in order
– Clean the sink opening thoroughly before reinstalling anything
Your next step is simple: gather your tools, clear out the cabinet under the sink, and follow the sequence above. With patience and attention to safety, you will have that old disposal out in under an hour.