
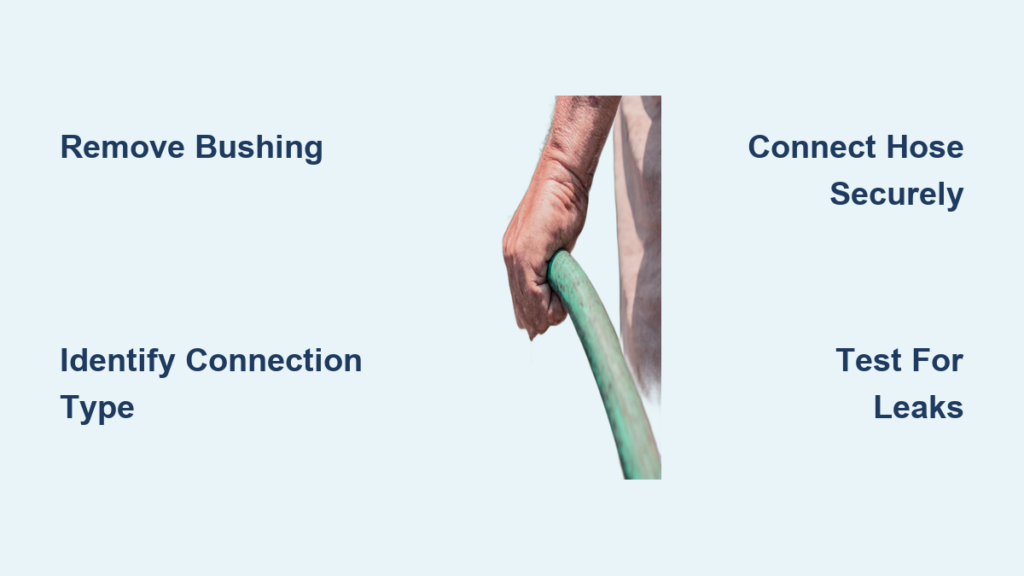
If your kitchen sink sprayer isn’t working or you’re upgrading your faucet, connecting the sprayer hose properly is essential for leak-free performance. A faulty connection can lead to water damage, low pressure, or mold growth under the sink. Whether you’re replacing an old sprayer or installing a new faucet with a side spray, this guide walks you through every step using proven installation procedures. You’ll learn how to mount the sprayer, connect the hose correctly, avoid common mistakes, and test for leaks like a professional.
This article covers everything from shutting off water supply to testing your completed installation. You’ll discover which tools you need, how to identify different connection types, and exactly what to do for each. By the end, you’ll have a fully functional sprayer that delivers strong, consistent spray without any leaks.
Gather Tools and Prepare Your Workspace
Before starting any plumbing work, gathering the right tools prevents multiple trips to the hardware store and ensures smooth progress. Having everything within reach means you won’t have to stop mid-installation to search for a missing item.
Essential Tools for This Project
You will need an adjustable wrench or crescent wrench for securing nuts and connections in tight spaces. A basin wrench proves invaluable for reaching mounting nuts under the sink where regular wrenches won’t fit. Keep a Phillips screwdriver handy for securing mounting screws on the faucet body. Teflon tape wraps around threaded connections to create watertight seals. A clean rag wipes excess plumber’s putty and dries connections during testing. Have a bucket or bowl ready to catch water remaining in the lines after you shut off the supply.
Most sprayer kits include the hose, mounting nut, friction washer, and gasket, but check your package before starting. Optional items include plumber’s putty for sealing non-gasketed sprayer bases and a drill with a 1¼-inch hole saw if you need to drill a new mounting hole for the sprayer.
Shut Off Water Supply and Relieve Pressure

Turning off the water supply is the most critical first step. Failing to do this results in a flooded cabinet and a much bigger mess to clean up. Even if you’re only replacing the sprayer and not the entire faucet, shutting off water prevents unexpected sprays and water everywhere.
Locate both the hot and cold shut-off valves under the sink. Turn them clockwise until they stop completely. If your system lacks individual shut-off valves, you must turn off the main water supply for the entire house. Once the valves are closed, open the faucet handle fully to release any remaining pressure in the lines. Let the water drain out completely.
Place a bucket or large bowl beneath the connections under your sink. Even after draining, some water remains in the supply lines and can drip out when you disconnect things. This simple preparation prevents water damage to cabinet contents and makes cleanup much easier.
Remove Old Sprayer If Replacing
Skipping this section applies only if you’re installing a sprayer on a brand-new faucet that doesn’t have one. For sprayer replacements, you must carefully remove the existing unit before installing the new one.
Disconnect the Hose from Faucet
Find the connector nipple at the bottom of the faucet body where the sprayer hose attaches. Grip the sprayer hose firmly and pull it straight off the nipple. On threaded models, you may need to unscrew a retaining nut before the hose will come free. If the connection feels stuck, twist gently while pulling to avoid damaging the faucet finish.
Never force a stuck connection. Forcing it damages the connector and may require replacing the entire faucet. If resistance is strong, spray some penetrating oil around the connection and wait five minutes before trying again.
Remove the Sprayer Base
Use an adjustable wrench or basin wrench to loosen the mounting nut securing the sprayer base to the sink deck. Turn the nut counterclockwise until you can remove it by hand. Pull out the friction washer, then lift the sprayer assembly out from above the sink.
Feed the old hose up through the hole and set the entire assembly aside for disposal. Clean the sink deck hole with a rag to remove old plumber’s putty, debris, or mineral buildup. A clean surface ensures a proper seal with your new sprayer.
Install New Faucet If Needed
This section applies only when installing an entirely new faucet with a side sprayer. Skip ahead if you’re only replacing the sprayer on an existing faucet.
Feed Lines Through Sink Holes
Standard four-hole sinks accommodate the faucet body, handles, and sprayer. The typical configuration places the faucet in the center hole, handles in the two outer holes, and the sprayer in the fourth hole. Feed the water supply lines and sprayer hose through their respective holes. Make sure any logo or branding on the faucet faces forward for correct alignment.
If your sink lacks a fourth hole for the sprayer, you must drill one. Use a 1¼-inch hole saw for the sprayer base. Drilling into stone, granite, or solid surface countertops often requires professional assistance due to the risk of cracking the material.
Secure the Faucet Base
From underneath the sink, slide the rubber washer followed by the metal washer over the faucet tailpiece. Thread on the locking nut and hand-tighten it as far as possible. Use a Phillips screwdriver to tighten the mounting screws, but avoid over-tightening which can crack the faucet body or strip the threads.
The faucet should sit flush and centered on the sink deck. Check alignment from above before fully tightening. A crooked faucet base causes sprayer interference and makes the sprayer difficult to use.
Mount the Sprayer Base Properly
Getting a proper seal at the sprayer base prevents water from leaking onto your countertop. The method depends on whether your sprayer has a pre-installed gasket or requires plumber’s putty.
Apply Plumber’s Putty for Non-Gasketed Models
If your sprayer lacks a pre-installed rubber gasket, roll a quarter-inch bead of plumber’s putty around the underside lip of the sprayer base. Some models include a gasket with a built-in reservoir designed to hold the putty in place. Fill this reservoir with putty before insertion.
Insert the sprayer tailpiece into the sink hole from above. From underneath, place the friction washer over the tailpiece, then thread on the mounting nut. Tighten with a wrench until snug. Wipe away excess putty that squeezes out around the base with a clean rag.
Use Pre-Installed Gasket for Modern Models
Many newer sprayers come with factory-installed rubber gaskets or O-rings that eliminate the need for plumber’s putty. Simply insert the base into the sink hole and secure with the friction washer and mounting nut. Tighten just enough to hold the sprayer firmly in place.
Over-tightening is the most common mistake here. Excessive force deforms the gasket and actually causes leaks rather than preventing them. Snug is sufficient.
Connect Sprayer Hose to Faucet
This step determines whether your sprayer works properly or leaks constantly. Connection types vary significantly, so identifying your type first saves frustration.
Identify Your Connection Type
Three main connection types exist. Push-in quick-connect systems feature a smooth nipple with no visible threads and require no tools. Threaded nut connections have exposed threads on the connector and require a wrench for tightening. Quick-connect hybrid nuts combine threading with a snap-fit mechanism.
Check under your faucet to determine which type you have before proceeding. Using the wrong technique damages the connection.
Fix Push-In Quick-Connect Hose
Push-in connections dominate modern faucet designs like Krauss models. Locate the connector nipple beneath the faucet body. Pull off the protective bushing covering the O-rings at the hose end. This small plastic piece protects the O-rings during shipping but blocks the connection if left on. This step gets forgotten more than any other and causes the majority of push-in connection failures.
Push the hose firmly into the nipple until you hear or feel a distinct click. The click indicates the internal locking ring has engaged. Gently tug on the hose to confirm it’s locked in place. If it pulls out, the bushing may still be attached or the connection wasn’t fully seated.
Attach Threaded Sprayer Hose
Older and commercial-grade faucets use threaded connections. Align the sprayer hose with the barb or nipple on the faucet. Slide the retaining nut over the hose end and thread it onto the connection point by hand. Finish tightening with an adjustable wrench or basin wrench until snug.
Apply Teflon tape to the threads if they aren’t pre-sealed. Wrap clockwise, which is the same direction you thread the connection. Three to five wraps provide an adequate seal without interfering with the fit.
Install Hybrid Quick-Connect Nut
Some systems combine threading and snapping. Thread the quick-connect nut onto the faucet outlet by hand first. Finish tightening with a wrench until snug, then press the sprayer hose into the fitting until it clicks.
If you’re not using a sprayer at all, insert the manufacturer-supplied plug into the open port and tighten securely with a wrench to prevent leaks.
Reconnect Water Supply Lines
With the sprayer connected, you now restore water flow to the faucet. Proper reconnection ensures correct hot and cold operation.
Match Hot and Cold Lines Correctly
Wrap Teflon tape clockwise around the threads of both shut-off valves. Three to five wraps create a proper seal. Connect the blue-coded line to the cold water valve on the right side. Connect the red-coded line to the hot water valve on the left side. Mixing these up means your faucet controls work backwards.
Hand-tighten each connection first, then use a wrench to snug them final. Never over-tighten, which damages the valve seats and causes leaks. Most modern braided nylon supply lines include pre-installed dome washers that filter debris and maintain consistent flow.
Test for Leaks and Performance

Testing catches problems before they cause water damage. Taking time now saves headaches later.
Flush the System
Slowly turn on both shut-off valves. Open the main faucet and let water run for 30 to 60 seconds. This flushes air pockets and any debris from installation out of the lines. Expect some sputtering initially as air works through the system. The water should run clear after a minute.
Check All Connections
Activate the sprayer trigger to verify water flow. Inspect every connection underneath the sink with a dry rag. Check around the sprayer mounting nut, at the hose-to-faucet joint, and on the supply line fittings. Wiping connections dry first makes it easier to spot leaks. Look for drips, seepage, or even fine misting.
Fix Common Leak Issues
A drip at the sprayer base usually means a loose mounting nut or damaged gasket. Tighten slightly or replace the gasket. A leak at the connector indicates an improperly seated push-in hose or missing Teflon tape on threaded connections. Re-seat the hose or reapply tape. Low pressure often results from air in the line or a clogged sprayer nozzle. Flush longer or clean the sprayer head with vinegar.
Best Practices for Lasting Results
Following proven techniques ensures your installation lasts years without problems. These tips come from professional installers and manufacturer guidelines.
Avoid Over-Tightening Everything
Snug is secure. Over-tightening cracks fittings, warps gaskets, and strips threads. A good rule is hand-tight plus a quarter turn with a wrench. This provides enough compression for a seal without causing damage.
Always Remove the Protective Bushing
This small plastic piece protects O-rings during shipping but prevents connection if left on. Always pull off the protective bushing on push-in hoses before installing. This single step prevents more installation failures than any other.
Center Faucet Before Final Tightening
A crooked base causes sprayer interference and makes the sprayer difficult to operate. Check alignment from above before fully tightening mounting hardware. Make adjustments while you can still move the faucet.
Flush After Installation
Metal shavings and debris from installation can clog the sprayer valve. Flushing the system clears these particles and ensures proper operation. Skipping this step risks reduced spray pressure or complete blockage.
Maintenance Tips for Long Life
Regular care extends your sprayer’s lifespan and maintains performance. Simple maintenance takes minutes but prevents major problems.
Clean the Nozzle Monthly
Mineral buildup from hard water reduces spray pressure over time. Soak the sprayer head in white vinegar for 30 minutes monthly. Rinse thoroughly before reattaching. This dissolves scale and keeps spray patterns strong.
Inspect the Hose Annually
Check for cracks, swelling, or kinks in the sprayer hose. Damage restricts flow and can lead to bursts. Replace the hose if you find any deterioration. Most hoses last five to seven years under normal use.
Replace O-Rings Every Few Years
Even without visible leaks, O-rings degrade over time from water exposure and mineral buildup. Replacing them every two to three years during routine maintenance prevents sudden leaks. Keep replacement O-rings on hand for quick repairs.
When to Call a Professional
Most installations are DIY-friendly, but certain situations require professional help. Don’t risk damaging expensive countertops or plumbing.
Call a pro if you need to drill into granite, quartz, or stone countertops. These materials crack easily without proper tools and technique. Also seek help if no accessible shut-off valves exist or if connections keep leaking despite following all steps correctly. A plumber has specialty tools for safe, clean work.
Final Thoughts on Connecting Sprayer Hose to Faucet
Connecting a sprayer hose to a faucet is straightforward when you follow the proper steps. The key is identifying your connection type and using the correct technique. Push-in systems dominate modern faucets and make installation fast, but only if you remember to remove the protective bushing first. Taking time to properly prepare, test, and maintain your sprayer ensures leak-free performance for years.
Whether you’re upgrading during a kitchen remodel or replacing a worn sprayer, this guide gives you everything needed to succeed on the first try. The investment of an hour or less pays off in reliable daily use.
Frequently Asked Questions About Connecting Sprayer Hose to Faucet
Why does my sprayer have no water pressure after installation?
Low pressure usually stems from air remaining in the line or a clogged nozzle. Run the main faucet for 60 seconds to flush air from the system. If pressure remains low, remove the sprayer head and soak it in vinegar to dissolve mineral deposits.
Can I connect any sprayer hose to any faucet?
Not always. Faucets require a dedicated sprayer port or T-connector under the main spout. Check your faucet’s specifications to confirm sprayer compatibility before purchasing. Some faucets are designed for side sprayers only and don’t accept standard sprayer attachments.
What happens if I forget to remove the protective bushing?
The sprayer won’t work. The bushing blocks the connection between the hose and faucet nipple. Water either won’t flow at all or will leak around the connection. Simply remove the bushing and reconnect to fix this.
How do I know if my connection is properly sealed?
Run water and check all connections with a dry rag. Drips, seepage, or misting indicate problems. A properly sealed connection shows no moisture. Tighten or reseat as needed until no leaks appear.
Do I need plumber’s putty for every sprayer installation?
No. Modern sprayers often have pre-installed rubber gaskets that don’t require putty. Using putty on gasketed models can cause bulges and leaks. Check your model’s instructions to determine the correct sealing method.
How long does it take to connect a sprayer hose to a faucet?
Sprayer-only replacement takes approximately 30 minutes. A full faucet and sprayer installation takes 45 to 90 minutes depending on experience and whether drilling is needed.







