
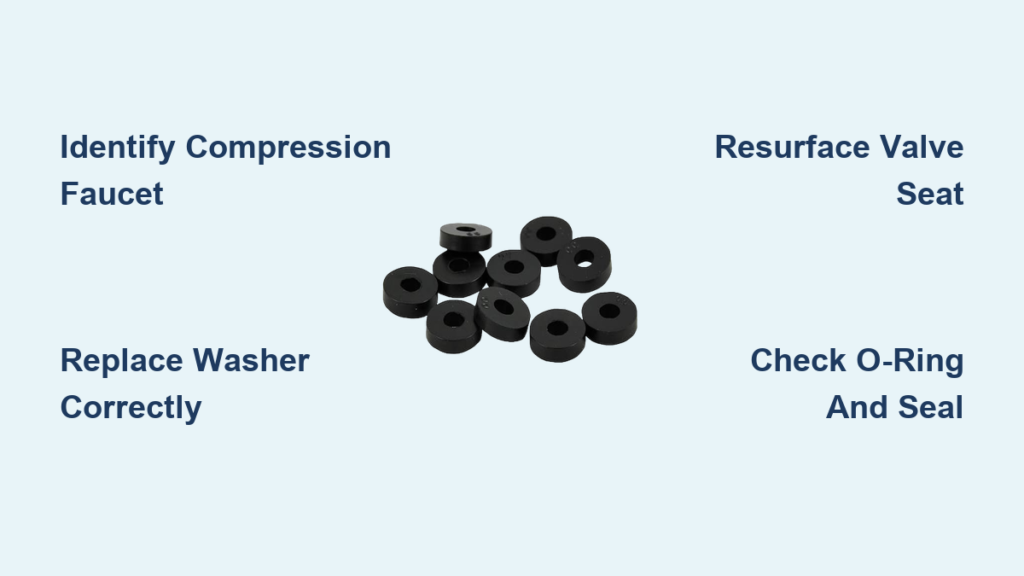
A dripping faucet can waste thousands of gallons of water a year and drive up your water bill, yet the fix is often as simple as replacing a 50-cent rubber washer. This common problem occurs in compression-style faucets, where a worn washer at the base of the valve stem fails to seal against the valve seat. Over time, heat, mineral buildup, and constant use degrade the washer, causing that annoying drip-drip sound even after you’ve turned the faucet off completely.
This guide walks you through every step to stop the drip for good. You’ll learn how to identify a compression faucet, gather the right tools, replace the washer, and test your work. The entire repair takes under an hour and costs less than $5 in parts, making it one of the most cost-effective DIY plumbing fixes you can do.
Identify Your Faucet Type Before Starting
Compression faucets are the only type that uses replaceable rubber washers, so confirming your faucet style saves time and frustration.
Check for Two-Handle Design
Look at your faucet. If you have separate hot and cold handles that each turn half to a full rotation to open or close, you likely have a compression faucet. Single-handle models or faucets that shut off with less than a quarter-turn use cartridges, ball valves, or ceramic disks instead. These require different repair methods entirely.
Inspect the Internal Mechanism
Remove the decorative cap on top of the handle. If you find a screw underneath securing the handle to a threaded stem, you’re working with a compression faucet. The internal mechanism includes a brass stem, packing nut, and rubber washer pressed down to seal water flow. A plastic cartridge inside means this washer replacement method won’t fix your leak.
Pro tip: If water still drips after tightening the handle firmly, the washer is failing and needs replacement.
Turn Off Water Supply and Prepare Your Workspace
Skipping this step risks flooding your cabinet. Always start here before disassembling anything.
Close Shutoff Valves Properly
Locate the hot and cold shutoff valves under the sink. Turn them clockwise until tight. If they leak or won’t close, shut off the main water supply to the entire house. This prevents water from spraying when you disconnect the stem.
Relieve Remaining Pressure
Open the faucet handles to release remaining water and air. This prevents splashing when you disassemble the stem. Plug the sink drain with a rag to catch any dropped screws or small parts that might roll away.
Warning: Never skip turning off the water. Even a small leak under pressure can soak your cabinet in minutes.
Remove the Faucet Handle
With the water off, you can safely access the internal components by removing the handle.
Lift Off the Decorative Cap
Use a flat-head screwdriver to gently lift the cap on top of the handle. It may be marked with “H” or “C” or colored red and blue. Insert the screwdriver at the seam and pry upward slowly to avoid scratching chrome finishes.
Extract the Handle Screw
Once the cap is off, you’ll see a set screw. It may be slotted, Phillips, or hex (Allen). Remove it with the correct screwdriver and keep it safe. If the screw is stuck, spray penetrating oil like WD-40 and wait 10-15 minutes before trying again. For stubborn handles, a faucet handle puller applies even pressure without damaging the finish.
Extract the Valve Stem
The valve stem holds the washer and sits inside the faucet body. Removing it gives you access to the worn part.
Loosen the Packing Nut
Use an adjustable wrench or pipe wrench to turn the packing nut counter-clockwise. Pipe wrenches grip better on round or corroded nuts. Avoid excessive force, as overtightening can crack the faucet body.
Pull Out the Stem Carefully
Once the nut is off, pull the stem straight out. If it’s stuck, reattach the handle temporarily and turn counter-clockwise to break the seal. Some vintage faucets like Old Chicago models have reverse threads, meaning you turn clockwise to remove them.
Caution: Stems in older faucets may be brittle. Use minimal force to avoid breakage.
Replace the Worn Rubber Washer

This is the core repair step. The washer sits at the base of the stem and creates the seal against the valve seat.
Remove the Old Washer Assembly
Turn the stem upside down. Use a screwdriver to remove the brass retaining screw holding the washer. If the screw slot is corroded, clean it with a utility knife or small file. Then pry out the old rubber washer.
Inspect for Wear Patterns
Check the old washer for visible signs of failure. Flattening, cracking, black residue (heat damage, common on the hot side), mineral buildup, or warping all indicate it’s time for a new one. Any of these mean the washer can no longer create a proper seal.
Install the Correct Replacement Washer
Choose the right washer for your faucet. Flat washers work with flat valve seats, while cone-shaped or beveled washers fit angled seats. Use red rubber for the hot water side because it resists heat degradation, and use neoprene (black) for cold water. Slide the new washer onto the stem, align the hole, and secure it with the retaining screw. Tighten firmly but don’t strip the threads.
Pro tip: Bring the old washer, screw, and stem to the hardware store for exact matching. Hardware employees can help you find the correct size and shape.
Check and Resurface the Valve Seat
A damaged valve seat will destroy your new washer quickly. This step is critical for a lasting fix.
Test the Seat Surface
With the stem removed, insert a fingernail into the valve seat inside the faucet body. Run it across the surface. If you feel grooves, pits, or scratches, the seat is damaged and won’t seal properly even with a new washer.
Resurface or Replace the Seat
Use a valve seat resurfacing tool (available at hardware stores) to grind away imperfections. Insert it and twist clockwise to smooth the surface. For deep cracks or severe pitting, consider replacing the seat or the entire faucet. Skipping this step means your new washer will fail within weeks.
Replace O-Ring and Shoulder Washer If Needed
Leaks around the handle base often stem from worn O-rings or shoulder washers, not the main washer.
Inspect the O-Ring Condition
The O-ring sits around the stem and prevents leaks at the handle base. If it’s cracked, dry, or compressed, replace it. Apply silicone spray lubricant to the new O-ring before reassembly to keep it flexible.
Check the Shoulder Washer
This flat washer sits near the stem collar. Replace it if cracked or compressed, as it prevents water from seeping into the faucet body. Apply waterproof grease to all moving parts including stem threads, O-rings, and shoulder washers during reassembly.
Warning: Avoid oil-based lubricants, as they degrade rubber and can contaminate your water supply.
Reassemble the Faucet
Now rebuild everything in reverse order, taking care not to overtighten any components.
Reinsert the Valve Stem
Slide the stem back into the faucet body. Make sure it aligns straight, as misalignment causes leaks and handle stiffness. The stem should fit snugly without forcing.
Hand-Tighten Then Wrench
Screw the packing nut on by hand first. Then use a wrench for a quarter to half-turn more. Do not over-tighten, as this can crack the faucet body or compress seals too much, causing new problems.
Reinstall the Handle and Cap
Slide the handle back onto the stem, insert the set screw, and tighten until snug with no wobble. Press the decorative cap back into place. The handle should point forward when off and turn smoothly through its full range.
Restore Water and Test for Leaks
Bring the water back and verify your repair worked correctly.
Open Shutoff Valves Gradually
Open both hot and cold valves slowly to avoid water hammer. Let air escape from the spout by opening the faucet fully.
Run Water and Check All Areas
Run water for 15-30 seconds to flush any debris. Then turn the faucet off and check for drips from the spout. Inspect around the handle base for leaks and check under the sink for seepage at connections. Leave water running for 1-2 minutes to ensure no slow leaks appear.
Test tip: Even a small drip under the handle means the O-ring or shoulder washer needs attention.
Fix Common Post-Repair Problems
Sometimes issues persist after reassembly. Here’s how to address them.
Faucet Still Drips
Wrong washer shape or size, a damaged valve seat, or a misaligned stem typically cause continued dripping. Recheck that your washer matches the seat type, resurface the seat if needed, or remove and reinsert the stem ensuring straight alignment.
Leaking Around Handle Base
A worn O-ring or shoulder washer usually causes this. Disassemble and replace both parts, then lubricate during reassembly.
Handle Turns Hard
Over-tightened packing nut or dry threads create stiff handle operation. Loosen the packing nut slightly and apply waterproof grease to the stem threads.
No Water Flow
Check that shutoff valves are fully open. Debris may be blocking the valve, or the stem might be installed incorrectly. Flush the line and recheck alignment.
Select the Right Washer Type
Using the correct washer ensures a watertight seal that lasts for years.
Match Shape to Valve Seat
Bring the old washer to the store for comparison. Flat washers fit flat valve seats, while cone-shaped washers work with angled seats. Some specialty models use dome or cross-shaped washers.
Choose Material Based on Water Temperature
Red rubber washers resist heat and work best on hot water sides. Neoprene (black) washers handle cold water effectively. Using the wrong type leads to premature failure, especially on the hot side where heat accelerates degradation.
Maintain Your Faucet Long-Term
Prevent future leaks with regular upkeep and timely replacements.
Set a Replacement Schedule
Replace washers every 2-5 years, especially in homes with hard water or high usage. Annual inspection catches issues early before they cause drips.
Keep Spare Parts on Hand
Store assorted rubber washers (flat and cone-shaped), brass retaining screws in various sizes, O-rings, and shoulder washers. Having parts ready means you can fix drips immediately instead of making an emergency hardware store run.
Lubricate Annually
Apply silicone spray or waterproof grease to stem threads and O-rings each year. This keeps everything moving smoothly and extends the life of rubber components.
Water savings: Fixing one drip saves over 3,000 gallons annually. A single drip per second wastes more than 10,000 gallons a year.
Know When to Call a Professional
Most washer replacements succeed, but some situations need expert help.
Seek Professional Help If
The valve seat is cracked or too damaged to resurface. The faucet body itself is leaking, indicating structural failure. Shutoff valves won’t close or are severely corroded. Multiple repairs fail despite correct washer installation. You’re working on a rare or antique faucet with fragile parts where professional restoration might preserve the fixture’s value.
Plumber’s insight: “I’ve seen people replace entire faucets when all they needed was a washer. This is the simplest, most effective fix in plumbing.”
Handle Special Situations Carefully
Unique circumstances require extra care during the repair process.
For Users with Visual Impairments
Use tactile inspection to identify parts, alignment, and wear. Apps like BeMyEyes or AIRA provide real-time visual assistance. Use distinct textures to differentiate washer types, and work in a quiet environment to hear water flow and detect leaks.
For Vintage and Antique Faucets
Handle vintage faucets with extreme care since parts may be brittle. Use padded wrenches to avoid marring finishes. Apply minimal force to avoid bending stems or breaking caps. Some antique models like Old Chicago faucets from the 1920s-1930s use specialized parts that may require professional sourcing.
Key Takeaways for Replacing Your Faucet Washer
Replacing a rubber washer in a compression faucet is one of the most satisfying DIY plumbing repairs you can tackle. The fix costs less than $5 in parts, takes 20-45 minutes, and resolves over 85% of faucet drips. Success depends on correctly identifying your faucet type, using the right washer shape and material, inspecting the valve seat for damage, and reassembling without overtightening.
This repair pays for itself in under a month through lower water bills while conserving thousands of gallons annually. With the right tools, correct parts, and this guide, you’ll stop the drip and keep your faucet running smoothly for years to come.
Frequently Asked Questions About Replacing Faucet Washers
How do I know if my faucet needs a washer replacement?
If your faucet drips persistently even after turning the handle firmly off, the washer is likely worn. Other signs include handle stiffness requiring excessive force, a vibrating “chatter” during water flow, or visible damage when you inspect the washer directly.
Can I replace the washer on any type of faucet?
No. This repair only works on compression-style faucets, which have two separate handles and turn multiple times to shut off. Cartridge, ball-type, and ceramic disk faucets require different repair methods.
What happens if I skip resurfacing the valve seat?
Your new washer will fail quickly. A pitted or scratched valve seat prevents the washer from creating a proper seal, so the drip returns within days or weeks despite installing a fresh washer.
How much does this repair cost?
The washer itself costs 50 cents to $2. Total parts (washer, O-ring, shoulder washer if needed) typically run under $5. Compare this to $150-300 for professional repair or full faucet replacement.
How often should I replace faucet washers?
Inspect washers annually and replace them every 2-5 years, depending on water hardness and usage. Homes with hard water may need more frequent replacements.







