
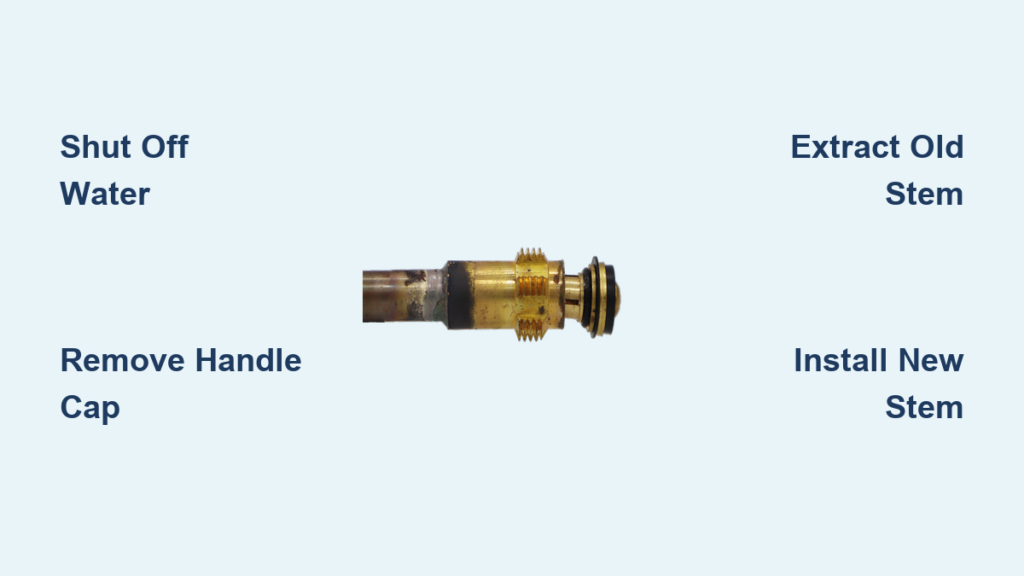
A constantly dripping faucet wastes water and drives up your utility bills. The culprit is usually a worn faucet stem, the internal component that controls water flow. Replacing a faucet stem is a cost-effective DIY fix that can stop leaks, restore smooth operation, and extend your fixture’s life without replacing the entire faucet. This guide walks you through every step, from diagnosing which side is leaking to testing your repair.
You will learn how to identify the faulty stem, remove stuck parts safely, source the correct replacement components, and reassemble everything correctly. With basic tools and an hour of your time, you can save between $150 and $300 compared to hiring a plumber.
Gather the Right Tools and Parts for Faucet Stem Replacement
Before starting any repair, collect everything you need to avoid mid-project trips to the hardware store.
Essential Tools
You will need several specific tools to handle different faucet components. Adjustable channel-lock pliers grip chrome nuts and stubborn fittings. A 5/8-inch socket wrench removes and installs standard faucet stems. A small flat-head screwdriver pries off caps, clears clogs, and extracts internal parts. A Phillips screwdriver removes handle screws, while a hex key handles set-screw handles. Keep vice grips or a crescent wrench nearby for extra torque on seized parts.
Replacement Parts
The exact parts depend on your faucet type, but you will typically need a new faucet stem or cartridge that matches your original. Rubber gaskets in red or orange colors should be replaced even if they appear intact. You also need a cone-shaped spring and a dished-bottom cup, which are key internal wear components. For outdoor spigots, top and bottom seals are critical. Pick up penetrating oil like WD-40 to loosen corroded joints and CLR or vinegar to dissolve mineral buildup in valve bodies.
Pro Tip: Use a wood block between your hammer and screwdriver when tapping parts loose. This prevents damage to delicate components.
Identify Which Stem Is Leaking
Do not guess which side needs repair. Test to know exactly which stem is causing the problem.
Diagnostic Test Procedure
Start by shutting off the cold-water supply valve under the sink. Turn on the faucet. If dripping continues, the hot-side stem is faulty. Then shut off the hot-water valve. If dripping stops, the hot stem was the source. Reverse this process to check for a cold-side leak.
Note: In homes with tankless water heaters, hot lines stay cold until activated. Use pressure isolation rather than temperature to diagnose the problem.
Remove Handle Caps and Disassemble the Faucet

Expose the internal mechanism without damaging the finish.
Safely Pry Off Handle Caps
Handle caps cover “H” for hot and “C” for cold indicators. Use your fingernail, a butter knife, or a razor blade to work them off gently. Avoid scratching the chrome finish.
Unscrew and Remove Handles
Use a Phillips screwdriver to remove hidden screws beneath the caps. For set-screw models, use a hex key instead. Lift handles straight up and place them behind the faucet to prevent breakage.
Keep parts separate: Hot and cold stems may differ slightly, so label each side as you remove components.
Extract the Old Stem and Cartridge
Access the cartridge or stem assembly by removing the retaining nut.
Loosen the Chrome Retaining Nut
Each stem is held by a chrome nut with an inward-facing shoulder. Use channel-lock pliers on the shoulder to turn counterclockwise. The shoulder must face inward toward the faucet center when you reinstall it.
Pull Out the Cartridge
If the cartridge sticks, grip the stem with pliers and pull straight up. To remove internal parts, insert a small flat-head screwdriver into the center hole. Tilt and pull out the dished-bottom cup, then remove the cone-shaped spring beneath it. Inspect both for cracks, flattening, or wear.
Mineral deposits? Spray CLR into the valve orifice and let it sit for 5 to 10 minutes before cleaning.
Clean the Valve Body and Orifice
A clogged seat causes leaks even with a new stem installed.
Clear the Tiny Orifice
Below the spring lies a small opening prone to sediment buildup. Insert the same screwdriver and wiggle it back and forth to remove all debris. Optionally flush with water or spray CLR, then rinse thoroughly.
Inspect the Seat
Look for pitting or erosion in the metal seat. If damaged, use a faucet seat wrench to replace it. Light buildup cleans off with a wire brush or emery cloth.
Never reuse old gaskets or springs: They degrade over time and will cause leaks to return quickly.
Find the Correct Replacement Stem
Accuracy here prevents repeat disassembly and wasted money.
Match Components at the Store
Place your old cup, spring, cartridge, and gasket in a bag. Visit Ace Hardware, Westlake, Home Depot, or a plumbing supply shop. Staff can match groove count, spring shape, gasket size, and stem length and diameter.
For branded faucets like Grohe: Look for markings like “GROHE A 98 01 R 90” on the valve body. Many have non-removable stems, requiring you to replace the entire cartridge.
Install the New Stem and Internal Components
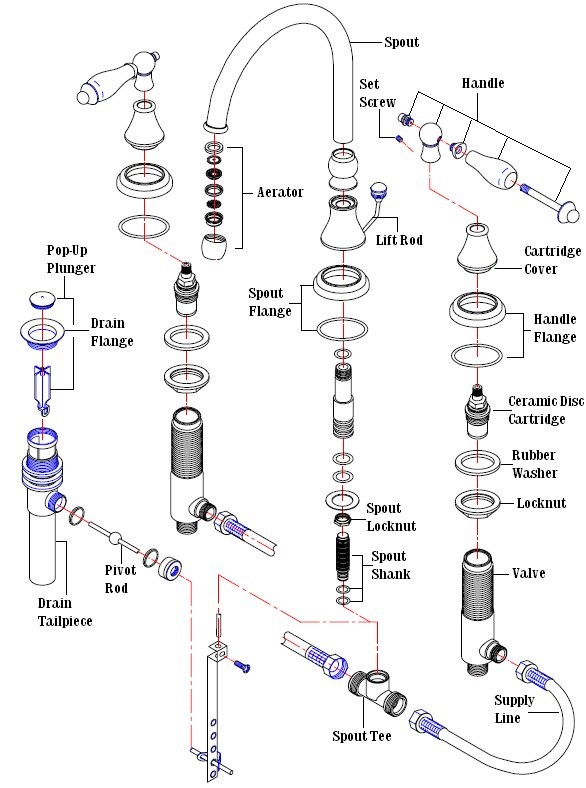
Rebuild the cartridge before reinstalling it into the faucet.
Assemble the Spring and Cup
Slide the cone-shaped spring onto the stem with the larger base facing down. Place the dished-bottom cup on top of the spring. Insert the screwdriver through the center hole and push the assembly into the housing using your fingers. Ensure it seats fully with no gaps or tilting.
Double-check orientation: The spring should be wide at the base, and the cup concave side should face down.
Reassemble and Secure the Cartridge
Lock the new stem in place by reinstalling the retaining nut.
Align and Insert the Cartridge
Match the two bottom grooves on the cartridge to the ridges in the faucet body. Push down firmly until fully seated. Confirm the inward-facing shoulder points toward the center of the faucet.
Tighten the Retaining Nut
Slide the chrome nut over the stem. Use channel-lock pliers to tighten a quarter-turn past hand-tight. For final snugness, gently swing the spout aside to relieve tension, then tighten the last nut securely. Repeat on the other side.
Do not overtighten: This can crack porcelain or strip threads.
Reattach Handles and Test for Leaks
The final assembly brings everything back together.
Reinstall Handles Correctly
The handle has a three-quarters-round interior with one flat side. Align the flat with the stem’s flat surface. Lower straight down until seated. Reinsert the Phillips screw and tighten gently without stripping the threads.
Press Caps Back In
Align “H” forward on the left handle and “C” forward on the right. Press firmly until flush.
Restore Water and Check for Leaks
Open shut-off valves gradually. Watch for leaks at the base of handles, stem nuts, and supply line connections. Open the faucet briefly to flush debris, then shut off and wait 30 to 45 seconds. Check for post-shutdown drips.
If water still leaks, recheck cartridge alignment and confirm the shoulder faces inward. Ensure the spring and cup are fully seated, then tighten the nut slightly, no more than a quarter-turn.
Still leaking? The valve seat may be damaged. Consider full faucet replacement.
Replace a Bathtub Cartridge (Special Steps)
Bathtub faucets use a different setup requiring special handling.
Steps for Tub Faucets
Shut off the main water supply. Remove the plastic handle by prying or unscrewing. Take off the chrome sleeve. Remove the copper retaining clip holding the cartridge. Use a core puller tool to extract the cartridge. Spray CLR into the valve and wait 5 to 10 minutes. Insert the new cartridge with correct orientation. Reinstall the new clip, sleeve, and handle.
Core pullers prevent damage: Rent or buy one at hardware stores if you do not own one.
Fix an Outdoor Spigot Stem Leak
Outdoor spigots have a simpler design but common failure points.
Repair Steps
Shut off the indoor supply valve. Remove the handle by unscrewing the set-screw or pulling it off. Unscrew the plastic or metal nut. Pull out the stem assembly. Replace both top and bottom seals. Reinsert the stem and use a new nut. Reattach the handle. Turn water on and test for leaks.
If the stem is corroded: Replace the entire stem rather than just the seals.
Troubleshoot Stuck or Seized Stems
When parts will not budge, try these proven fixes.
Apply Penetrating Oil
Spray WD-40 or PB Blaster at the joint. Let it soak for 15 to 30 minutes. Tap lightly with a hammer on a wood block. Try unscrewing again.
Remove Entire Valve Assembly
Disconnect braided supply lines. Use vice grips on the non-threaded valve body. Apply a crescent wrench to the packing nut to free the stem.
Use Heat Carefully
Apply a propane torch to the outer nut only. Heat expands metal and breaks the corrosion bond. Avoid nearby plastic or wood components.
Never force it: If the stem will not release, replace the entire faucet.
Follow Best Practices for Long-Lasting Results
Avoid common mistakes that lead to early failure.
Do This
Hand-tighten first, then use tools. Clean the orifice before installing the new stem. Bring old parts for accurate matching. Use OEM-equivalent parts. Test slowly after reassembly.
Avoid This
Do not overtighten nuts or screws. Do not force stuck parts without oil or heat. Do not mix hot and cold components. Do not reuse old gaskets or springs.
Maintain Your Faucet to Prevent Future Leaks
A little care extends the life of your repair.
Annual Maintenance Tips
Clean orifices with vinegar or CLR in hard water areas every year. Inspect for stiffness or drips every 3 to 5 years. Replace stems preemptively if handles feel gritty. Keep a repair kit with spare seals, springs, and clips.
Expected Lifespan
Indoor stems last 5 to 10 years with maintenance. Outdoor spigots last 3 to 5 years due to weather exposure.
DIY saves $150 to $300 per repair versus calling a plumber.
Frequently Asked Questions About Replacing a Faucet Stem
How do I know if my faucet stem needs replacing?
If your faucet drips constantly even when the handle is in the off position, the stem is likely worn. Other signs include stiffness when turning the handle, water leaking around the base, or reduced water flow from one side.
Can I replace just the stem, or do I need a whole new faucet?
In most cases, you can replace just the stem or cartridge. However, some brands like Grohe use non-removable stems that require replacing the entire cartridge. Bring your old part to the hardware store for accurate matching.
What tools do I need to replace a faucet stem?
You need a 5/8-inch socket wrench, adjustable channel-lock pliers, flat-head screwdriver, Phillips screwdriver, and hex key. Penetrating oil and CLR help with stuck parts and mineral buildup.
How long does it take to replace a faucet stem?
Most faucet stem replacements take about one hour for a double-handle faucet. Simpler outdoor spigot repairs may take 30 minutes. Bathtub cartridges can take longer due to additional components.
Why does my faucet still leak after replacing the stem?
Common causes include misaligned cartridge grooves, incorrect shoulder orientation, unseated springs or cups, or a damaged valve seat. Recheck your assembly and ensure everything is fully seated before tightening.
How often should faucet stems be replaced?
With proper maintenance, faucet stems typically last 5 to 10 years. Outdoor spigots may need replacement every 3 to 5 years due to freeze-thaw cycles and weather exposure.
Key Takeaways for Successfully Replacing Your Faucet Stem
Replacing a faucet stem is one of the most cost-effective plumbing repairs you can tackle yourself. The process involves diagnosing which side is leaking, removing the handle and retaining nut, extracting the old cartridge, cleaning the valve seat, installing the new stem with proper orientation, and testing for leaks.
Always bring your old parts to the hardware store for accurate matching. Use penetrating oil before forcing stuck components, and never overtighten nuts or screws. Regular maintenance including annual orifice cleaning can extend your repair for years.
When in doubt, take photos of markings and bring the old part to the store. Physical matching beats model number lookup every time, especially for older or imported faucets. With the right tools and careful attention to detail, you can stop that drip and restore your faucet to full functionality in under an hour.







