
A broken faucet handle is more than an annoyance. It can waste thousands of gallons of water annually and drive up your utility bills. The good news? Most handle issues can be fixed in under 30 minutes with basic tools and the right approach. Whether your handle is loose, cracked, stuck, or has completely broken off, this guide walks you through diagnosing the problem, choosing the right repair method, and restoring full function to your faucet.
Identify Your Faucet Type Before Starting Repair

Before you disassemble anything, you need to understand your faucet’s internal mechanism. The repair method depends entirely on the design.
Compression Faucets
These two-handle faucets have separate hot and cold controls. Turning the handle compresses a rubber washer against a valve seat to stop water flow. Common issues include leaks when off, stiff turning, and loose handles. Repair focus is on replacing washers, lubricating stems, and tightening packing nuts.
Ball-Type Faucets
Found in many single-lever Delta models, these use a rotating ball cam under the handle to control water flow and temperature. Failure signs include a wobbly handle, leaks at the base, and difficulty adjusting temperature. The fix involves replacing O-rings, springs, or the entire ball assembly.
Cartridge Faucets
Common in Moen and Kohler models, these use a plastic or brass cartridge that moves up and down to regulate water. Symptoms include handle wobble, leaks at the base, and stiff operation. The solution is replacing the cartridge or O-rings, but you need an exact model match.
Ceramic Disc Faucets
High-end faucets use two ceramic discs that slide to control flow. They are extremely durable but sensitive to debris. Problems include incomplete shutoff, grinding noise, and base leaks. The repair is replacing the disc cartridge.
Quick Tip: Most modern single-handle faucets use cartridge or disc systems with a set screw hidden under a decorative cap.
Diagnose Why Your Faucet Handle Is Broken
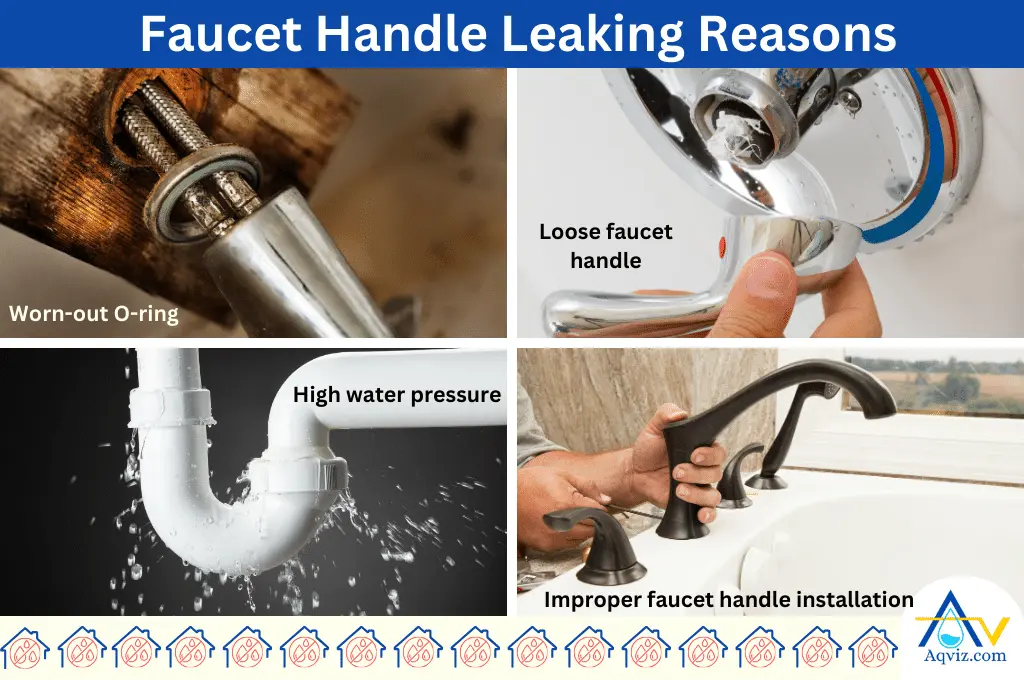
Pinpointing the exact issue prevents unnecessary disassembly and part replacement.
Check for Handle Wobble
Gently wiggle the handle side to side. If it feels loose, the problem is likely a loose or stripped set screw. If it feels tight but is hard to turn, you are dealing with internal corrosion or mineral buildup.
Test Rotation and Leaks
Turn the handle through its full range. Stiffness could indicate lack of lubrication or limescale buildup. Leaking at the base or spout points to worn O-rings, washers, or a faulty cartridge.
Inspect for Physical Damage
Look for cracks in plastic handles, detached chrome sleeves, rusty or frozen set screws, and stripped screw heads that won’t tighten.
User Insight: If you tighten the screw but it loosens again within weeks, this suggests stripped threads. Apply thread-locking compound or replace the handle.
Gather Essential Tools for Faucet Handle Repair
Having the right tools on hand makes the repair much smoother.
Essential Repair Tools
• Allen wrench (hex key) in 1/8″, 5/64″, or 1.5–3 mm sizes for set screws
• Flathead and Phillips screwdrivers for prying off caps
• Adjustable wrench for removing retaining nuts
• Rubber mallet for gently tapping stuck parts loose
• Penetrating oil (WD-40 or PB Blaster) for frozen screws
• Hair dryer to apply heat for easier metal removal
Replacement Parts You May Need
• O-rings (replace if dry, cracked, or stretched)
• Washers (for compression faucets)
• Cartridge or valve stem
• Set screw (if stripped or missing)
• Entire handle or insert
Lubricants and Adhesives
• Plumber’s grease for lubricating O-rings and moving parts
• Teflon tape for sealing threaded connections (2–3 wraps clockwise)
• Two-part epoxy (like J-B Weld) for reattaching detached metal inserts
• Isopropyl alcohol for cleaning surfaces before bonding
Safety First: Always turn off the water supply under the sink before starting any repair.
Remove the Faucet Handle Step by Step
Locate and Remove the Set Screw
Find the decorative cap on top or side of the handle. Use a flathead screwdriver to gently pry it off. Underneath, look for a hex or Phillips set screw. Insert the correct Allen wrench and turn counterclockwise to loosen.
If the screw is stuck, spray penetrating oil and wait 10–30 minutes. Tap lightly with a hammer and punch. For stripped screws, use a left-hand drill bit or easy-out tool.
Warning: Older Pfister models may have welded handles that require full faucet replacement.
Pull Off the Handle
Pull straight upward with steady pressure. If stuck, tap the base with a rubber mallet or wiggle gently. Never use metal pliers, as they risk cracking plastic.
Caution: Avoid prying, which can permanently damage chrome or plastic finishes.
Replace Worn Internal Parts to Stop Leaks
Fix Leaks with New Washers
Compression faucets have washers at the base of the stem. Replace them if flattened, cracked, or eroded. Secure with the original retention screw and apply plumber’s grease to prevent sticking.
Replace O-Rings to Stop Base Leaks
O-rings are located on stems, cartridges, and spindles. They are a common failure point in ball and cartridge faucets. Always apply plumber’s grease before installing new O-rings.
Install a New Cartridge or Valve Stem
Match the model exactly by taking the old one to the store. Brands like Moen, Delta, and Kohler use proprietary designs. Soak in vinegar first if removing mineral buildup.
Expert Advice: Get a complete Delta rebuild kit. These include all seals, springs, and O-rings in one package.
Reassemble and Test Your Faucet
Reinstall Internal Components
Insert the new cartridge or stem fully. Apply plumber’s grease to all O-rings. Wrap Teflon tape around threaded connections (2–3 turns, clockwise).
Reattach the Handle
Slide the handle back onto the stem. Align it in the off position (usually vertical). Insert the set screw and tighten securely, but do not overtighten.
Fix for Loose Handles: Apply a drop of thread-locking compound (Loctite) to the screw threads to prevent future loosening.
Restore Water and Check for Leaks
Turn shut-off valves slowly counterclockwise. Open the faucet to purge air. Inspect for leaks at the base and spout. Operate the handle through its full range.
Repair vs Replace: When to Get a New Faucet
Not every faucet is worth repairing. Replace if the internal valve body is corroded, no replacement parts are available, the handle is broken off at the stem, or the faucet is outdated and leaking from the base.
| Factor | Repair | Replace |
|---|---|---|
| Handle cracked? | Only if insert detached | If handle broken off |
| Internal parts damaged? | Replace O-rings or cartridge | If valve body corroded |
| Parts available? | Yes | No or discontinued |
| Cost | $5–$25 | $39+ |
| Skill level | Beginner | Intermediate |
| Expected lifespan | 1–5+ years | 10–15+ years |
Bottom Line: Repair if possible. Replace only when parts are unavailable or internal damage is severe.
Prevent Future Faucet Handle Problems
Maintenance Tips for Longevity
• Check set screw tightness every 6 months
• Lubricate O-rings annually with plumber’s grease
• Clean the aerator monthly with vinegar to prevent buildup
• Replace washers every 3–5 years
• Install a water softener if you have hard water
Pro Tip: Use Teflon tape on all threaded connections during reassembly. This prevents leaks and seizing.
Key Takeaways for Repairing Your Faucet Handle
A broken faucet handle does not require a costly plumber visit or full replacement. With basic tools and this guide, most repairs take less than 20 minutes and cost under $25. Start by identifying your faucet type, then diagnose the specific problem (loose screw, cracked handle, worn internal parts). Gather the necessary tools, shut off the water, and follow the step-by-step removal and reassembly process. Replace washers and O-rings to stop leaks, apply plumber’s grease for smooth operation, and use thread-locking compound if handles keep loosening. For detached metal inserts, high-strength epoxy can provide a durable fix lasting over 5 years. When parts are unavailable or damage is severe, replacing the entire faucet (typically $39–$200) provides a modern, water-efficient solution that will last 10–15+ years.
Frequently Asked Questions About Fixing Broken Faucet Handles
Why does my faucet handle keep coming loose?
The set screw is likely stripped or the threads are worn. Apply thread-locking compound to the screw threads, or replace the handle if the threads are damaged.
Can I replace just the handle on my faucet?
Yes. Take the old handle to a hardware store for an exact match, or search online using the brand and model number. Most single-lever handles cost $8–$25.
How do I fix a cracked plastic faucet handle?
Replace the handle mechanically for the most durable solution. If only the metal insert is detached, you can bond it with high-strength epoxy, but this is less reliable.
What if the set screw is frozen and won’t budge?
Spray penetrating oil (PB Blaster works best), wait 10–30 minutes, and tap lightly with a hammer. If it still won’t move, use a left-hand drill bit or easy-out tool to reverse it out.
How long does an epoxy repair on a faucet handle last?
When done correctly with high-strength epoxy and proper surface preparation, an epoxy repair can last 5+ years. However, mechanical replacement is more reliable long-term.
Should I repair or replace a faucet that’s over 10 years old?
Consider replacement if the faucet is outdated, parts are discontinued, or the internal valve body shows corrosion. Modern faucets are more water-efficient and easier to maintain.







