
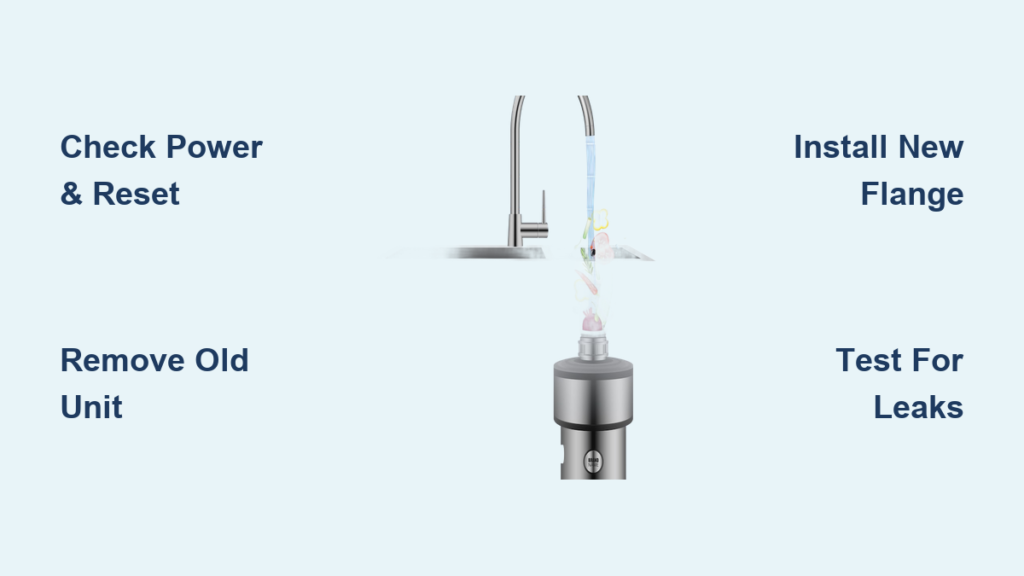
Replacing a sink disposal often takes less than an hour and saves you hundreds in plumber fees. If your garbage disposal hums but refuses to spin, leaks from the base, or has simply stopped working, you can swap it out yourself with basic tools and a clear plan. This guide on how to replace sink disposal walks you through every stage, from confirming the unit actually needs replacing to testing your new installation for leaks.
Before you unscrew anything, you’ll learn how to rule out simpler fixes like a tripped breaker or jammed motor. Then we cover the full removal process, new flange installation, electrical connections, mounting, and final testing. With the right preparation, this is one of the most cost-effective kitchen upgrades you can tackle on your own.
Check Power and Reset First
Test the Circuit Breaker and Reset Button
Before removing anything, confirm the disposal truly needs replacement. Many “dead” units simply tripped their breaker or overheated. Head to your electrical panel and locate the breaker labeled for the disposal. If it sits in the middle position, flip it fully off, wait 10 seconds, then switch it back on. Return under the sink and press the red reset button on the bottom of the unit until you hear a click.
Now run the disposal with water flowing. If it powers up normally, the problem was an overload, and you’ve just fixed it without any disassembly. Only proceed with replacement if resetting fails and the unit still refuses to operate.
Clear a Jam Before Replacing
A humming sound means electricity reaches the motor, but the grinding chamber is stuck. Most disposals include a hex wrench stored on the underside. Insert it into the hole on the bottom and turn the wrench back and forth to free the blades. Once the motor spins freely, press the reset button again and test the unit.
Lost the original wrench? Any 1/4-inch Allen key that fits snugly works just as well. Never reach into the drain with your hands or utensils. If the jam persists after several attempts, the motor may be damaged and replacement becomes necessary, but clearing it first could extend the unit’s life by years.
Gather Tools and Supplies
Essential Tools for Installation
Gather these tools before starting the job:
- Adjustable wrench for loosening slip nuts
- 20″ channel-lock pliers, since standard 12″ models lack reach for mounting hardware
- Spud wrench or oil filter wrench for tightening sink basket locknuts
- Flathead and Phillips screwdrivers for electrical covers and clamps
- Pipe wrench for stubborn drain connections
- Voltage tester to confirm power is off
- Bucket or towel to catch residual water
- Hacksaw or reciprocating saw for trimming pipes
- Flashlight to illuminate the cramped space under the sink
Required Materials and Parts
Stock up on these supplies before you begin:
- Plumber’s putty (about a ½-inch rope) for sealing the sink flange
- Silicone sealant as an alternative to putty
- Wire nuts (size 54) and electrical tape
- Worm gear clamp for the dishwasher hose
- Replacement drain kit with sink basket, gaskets, pipes, and fittings
- Dishwasher drain connector kit if applicable
- Power cord kit for converting hardwired setups
- Cable connector, which is not included with most disposals
Pro Tip: Buy two drain kits. Cutting pipes leaves little room for error, and a spare kit costs under $20 while saving major frustration.
Turn Off Power and Water
Cut the Electrical Supply Safely
Return to your circuit breaker and switch off the disposal’s dedicated circuit. Use a voltage tester on the disposal’s wires to confirm zero current flows. Never assume a breaker is labeled correctly; mislabeled panels are common in older homes.
For hardwired units, cap exposed wires with wire nuts after disconnecting. For corded models, simply unplug from the under-sink outlet. Skipping this verification risks serious shock, since even brief contact with live wires can cause injury.
Shut Off Water and Drain Lines
Close the shutoff valves beneath the sink. Disconnect the dishwasher hose if one is attached, and position a bucket under the drain trap. Loosen the slip nut connecting the disposal’s discharge tube to the drain pipe using your adjustable wrench.
Critical step: Cap the open drain pipe with a rubber plug or wrap it securely with duct tape. This blocks sewer gases and prevents spills during removal. Many DIYers skip this and end up with a flooded cabinet.
Remove the Old Disposal Unit
Disconnect Mounting and Drain
Support the disposal with one hand so it doesn’t crash down once loosened. Insert the wrenchette (included with most units) or a flathead screwdriver into the slot on the mounting ring. Rotate counterclockwise to loosen the lower ring and release the unit.
Let the disposal hang by the drain pipe momentarily. Disconnect the discharge tube from the drain trap, then remove the dishwasher hose from the side inlet. Carefully lower the unit from the mounting assembly and set it aside.
Disconnect the Electrical Wiring
Lay the disposal on its side for easier access. Remove the electrical cover plate on the bottom. Loosen the green grounding screw and disconnect the wires using wire nuts. Pull the supply wires free from the cable clamp.
Label each wire (black, white, ground) before removal if you’ll be reconnecting to a new unit. This avoids guessing later. For hardwired setups, ensure wires stay capped and tucked away from any moving parts.
Remove the Sink Flange and Clean the Area
Push the old sink flange up through the drain hole from below. Scrape away all old plumber’s putty with a putty knife, and clean the sink surface thoroughly. Any residue left behind prevents a proper seal on the new unit.
Inspect the mounting assembly while it’s exposed. If you spot corrosion or damage, replace it now. Otherwise, you can reuse it unless your new disposal requires a different model.
Install the New Sink Flange

Apply Sealant and Set the Flange
Roll a ½-inch rope of plumber’s putty and press it around the underside of the new sink flange. Drop the flange into the drain opening from above and press down firmly so the putty spreads evenly.
Place a weight (the new disposal works well) on top to hold the flange steady. Lay a towel between the weight and sink to protect the finish. This ensures even pressure while you secure things from below.
Secure the Mounting Assembly
From under the sink, slide the fiber gasket, backup flange, and mounting ring over the sink flange. Thread the three mounting screws through the assembly and tighten them evenly with a screwdriver.
Use a spud wrench or oil filter wrench to tighten the large locknut. Standard pliers often cannot open wide enough for this step. Turn until snug, but avoid overtightening and cracking the sink.
Remove the Dishwasher Knockout Plug
Tap Out the Plug If Needed
If your dishwasher drains into the disposal, the knockout plug must come out first. Lay the new disposal on its side and locate the small circular plug on the side inlet. Insert a screwdriver into the edge and tap with a hammer to break it loose, then shake the unit to remove the plug from inside.
Skip this step entirely if no dishwasher is connected. Forgetting to remove the plug causes dishwasher drainage problems, even when everything else is installed correctly.
Connect the Electrical Wires
Hardwired vs. Corded Setup
For hardwired units, turn the disposal upside down and remove the cover plate. Insert a cable connector into the base (not included with most units). Feed the supply wires through the connector, then match black to black, white to white, and ground to ground. Secure each connection with wire nuts and wrap with electrical tape before reinstalling the cover plate.
For corded units, simply plug the factory-installed cord into the under-sink outlet once mounting is complete.
Convert Hardwired to Corded
Want to switch from hardwired to plug-in? Use a power cord kit and attach the cord to the disposal’s terminal screws following the kit instructions. This makes future replacements safer and easier. Always double-check connections afterward, since loose wires create shock and fire hazards.
Mount the New Disposal

Hang and Lock Into Place
Align the three mounting tabs on the disposal with the ramps on the mounting ring. Push up and rotate the unit clockwise until it seats fully.
For standard models, use the wrenchette to tighten the lower mounting ring clockwise until snug. For Lift & Latch models, lift and turn clockwise until all three tabs lock into place. The unit should hang securely without wobbling. Misaligned mounting causes vibration and leaks.
Avoid Common Mounting Errors
Tighten mounting bolts evenly. Over-tightening one side distorts the seal. Confirm all three tabs engage before final tightening. If the disposal feels loose, reseat and retry. Never force the unit; misalignment means something isn’t seated properly.
Attach Drain and Discharge Pipes

Connect the Discharge Tube
Slide the rubber tailpipe gasket onto the disposal’s discharge outlet. Insert the discharge tube into the opening, then slide the worm clamp over and tighten it into the groove.
Rotate the disposal so the tube aligns with the drain trap. If it’s too long, trim with a hacksaw. If it’s too short, buy an extension. Test-fit all parts before final tightening.
Assemble the Drain Piping
Use the new drain kit to rebuild the P-trap system. Connect pipes with slip-joint fittings and hand-tighten all connections. Plastic joints don’t need sealant.
Ensure the dishwasher hose connects to the branch inlet on the drain kit and secure it with a worm gear clamp. Avoid kinks in the hose that restrict water flow.
Reconnect the Dishwasher Hose
Link to the Disposal Inlet
Attach the dishwasher drain hose to the side inlet on the disposal. Use a worm gear clamp to secure it tightly. Route the hose upward in a high loop under the sink to prevent backflow.
Never let the hose dip below the drain line. The high loop stops sink water from siphoning into the dishwasher.
Consider an Air Gap
For code compliance and added safety, install a dishwasher air gap. This small chrome fixture mounts on the sink deck and breaks the siphon to prevent contaminated water from entering the dishwasher. Check local plumbing codes, since air gaps are required in many areas.
Test for Leaks and Operation
Restore Power and Water
Turn the water supply back on and check all connections for drips. Flip the circuit breaker to restore power. For InSinkErator Evolution models, press the Quiet Collar Sink Baffle into place until it snaps.
Run a Full System Test
Turn on the disposal switch with water running. Watch closely for leaks at the sink flange, discharge tube, dishwasher connection, and P-trap joints. Listen for smooth operation; any grinding, humming, or vibration signals a problem.
If the unit doesn’t start, check the reset button and confirm the breaker is on. Run the dishwasher to verify drainage. If it backs up, double-check that the knockout plug was removed.
Final Checks and Maintenance Tips
Tighten and Inspect Connections
After running water for a minute, recheck all slip nuts and clamps. Some settle during initial use. Snug them slightly if leaking, but never over-tighten plastic fittings. Wipe down the unit and cabinet, then dispose of old parts responsibly.
Prevent Future Issues
Follow these habits to extend your disposal’s life:
- Run cold water whenever using the disposal
- Avoid fibrous foods like celery and onion skins, and never pour grease down the drain
- Clean monthly with ice and salt or a disposal cleaner
- Press the reset button if the motor overheats
- Expect 8 to 12 years of service before the next replacement
Keep the wrenchette stored under the sink for quick jam fixes.
Frequently Asked Questions About Sink Disposal Replacement
How long does it take to replace a sink disposal?
Most replacements take 30 to 60 minutes once you have the right tools and replacement unit on hand. Complex installations involving drain pipe modifications may take longer.
Can I install a new disposal myself, or do I need a plumber?
If you’re comfortable with basic plumbing and electrical connections, you can install a disposal yourself. If you’re unsure about wiring or local codes, consult a licensed electrician or plumber for the electrical portion.
What size hex wrench do I need to unjam a disposal?
Most disposals use a 1/4-inch hex wrench. The unit often comes with one stored on the bottom. If yours is missing, any snug-fitting 1/4-inch Allen key works.
Why is my new disposal leaking at the sink flange?
A leak at the sink flange usually means the plumber’s putty didn’t seal properly. Remove the disposal, scrape off all old putty, apply a fresh ½-inch rope, and reseat the flange with even pressure.
Do I need an air gap for my dishwasher?
Many local plumbing codes require an air gap. Even where not required, installing one prevents contaminated water from siphoning back into the dishwasher, which protects your health and appliance.
How do I know if my disposal needs replacement versus repair?
If resetting the breaker and clearing jams doesn’t restore operation, the motor or internal components are likely failed. Leaks from the unit body (not connections) also indicate replacement is needed.
Key Takeaways for Replacing Your Sink Disposal
Replacing a sink disposal is a manageable DIY project when you prepare properly. Always check the breaker and reset button before assuming the unit is dead; many “failed” disposals simply overheated. Use the right tools, including a 20″ channel-lock pliers and spud wrench, since standard pliers often lack the reach needed for mounting hardware. Seal the sink flange carefully with plumber’s putty, and don’t forget to remove the dishwasher knockout plug if applicable.
Once installed, test every connection for leaks and run the disposal with water flowing. Your next step is straightforward: gather your tools, pick up a new disposal and drain kit, and set aside an afternoon. With this guide in hand, you’ll have a fully functional kitchen disposal by dinner time.







