
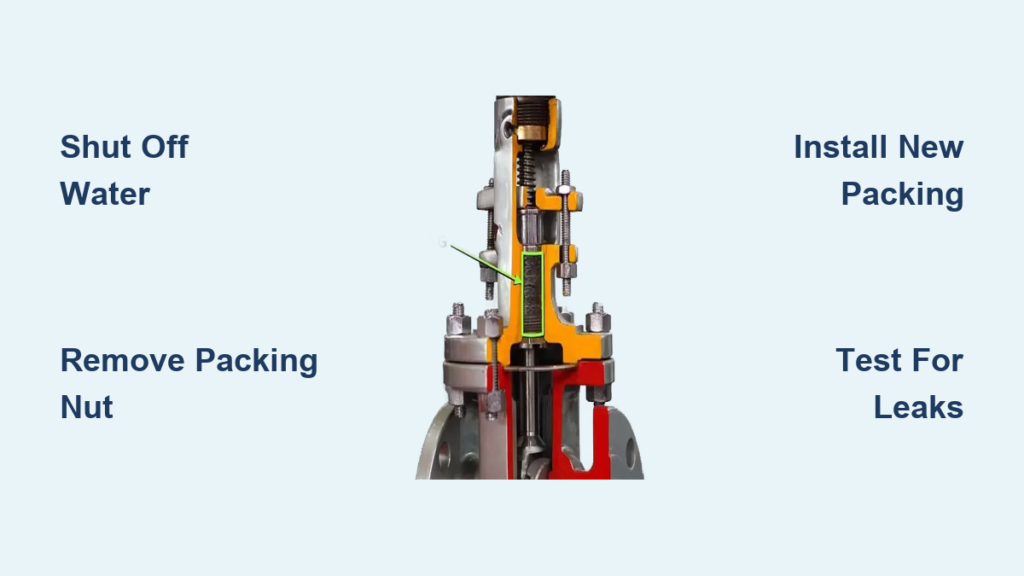
If your faucet is dripping from the handle base, the culprit is likely worn faucet packing. This small sealing material sits around the valve stem in compression-style faucets, preventing water from escaping when the faucet is turned on. Over time, packing dries out, compresses, or cracks, leading to leaks that waste water and damage cabinets. Replacing faucet packing is a straightforward DIY repair most homeowners can complete in under an hour with basic tools.
In this guide, you will learn how to diagnose packing failure, remove and replace the seal correctly, avoid common mistakes, and ensure long-term leak-free performance. You will also discover when to upgrade aging valves, how to handle emergency fixes, and why proper lubrication and torque matter more than you think.
Shut Off Water Supply Before Starting
Turning off the water is the first and most critical step before any faucet repair. Never attempt to work on a pressurized system.
Locate Under-Sink Shut-Off Valves
Most sinks have two shutoff valves beneath them, one for hot and one for cold water. Turn both valves clockwise until they are snug. Then open the faucet to release residual pressure and drain any leftover water.
Municipal water lines carry 50 to 70 PSI, which is enough to flood your cabinet in seconds if the valve body is opened under pressure. This is why shutting off the supply is non-negotiable.
No Local Valves? Shut Off Main Supply
If your sink lacks under-sink shutoff valves, locate the main water shutoff in your basement, crawl space, or near the water meter. Turn it clockwise to cut supply to the entire house.
Label your main valve now for future emergencies. A quick shutoff prevents costly water damage and makes urgent repairs much easier to handle.
Leaking Main Valve Stem Special Case
If your main shutoff valve itself leaks at the stem, do not attempt disassembly without stopping flow upstream. Contact your local water utility to shut off service at the street. Once isolated, replace the old multi-turn globe valve with a stainless steel quarter-turn ball valve, which is more reliable and less prone to stem leaks.
Remove the Packing Nut

With water off and pressure released, begin disassembly by removing the packing nut.
Expose the Packing Nut
Remove the decorative handle cap by gently prying with a flathead screwdriver. Unscrew the handle screw and lift off the handle. Use an adjustable wrench to loosen the packing nut, which is the hex-shaped fitting at the base of the stem.
Wrap the nut with a cloth or use jaw protectors to prevent scratching the finish. A damaged finish can hide cracks and compromise resealing when you reassemble the faucet.
What If the Packing Nut Is Stuck
Apply penetrating oil like WD-40 and wait 10 to 15 minutes. Tap lightly with a hammer to break corrosion. Avoid excessive force, because if the nut cracks during removal, full valve replacement becomes necessary.
Never force a seized nut with heat near flammable materials under the sink. Use mechanical leverage instead.
Extract and Inspect the Valve Stem

After removing the packing nut, pull the valve stem straight out of the faucet body.
Check for Wear and Damage
Lay the stem on a clean cloth and examine these critical parts.
Packing Washer or String Packing
Look for cracks, flattening, or dry rot. If the packing crumbles or feels brittle, it has failed and needs replacement.
Stem Condition
Inspect for pitting, corrosion, or worn threads. A scarred stem will cut new packing prematurely, so replace the entire stem if damaged.
O-Rings If Present
Some stems have O-rings near the bottom that can also leak at the handle base. Replace these with matching-size rubber rings if they appear cracked or stretched.
Even if the packing looks okay, replace it every 3 to 5 years as preventive maintenance. Hidden compression leads to sudden leaks at inconvenient times.
Install New Packing Material
Two main types of packing exist, and installation differs for each. Choose based on your faucet design.
Use String-Like Packing
String-like packing is common in older compression faucets.
Wrap the Stem Correctly
Cut 6 to 8 inches of plumber’s string packing. Wrap 2 to 3 tight, even turns around the stem, just below the handle area. Ensure no gaps or overlaps exist, because packing must sit flush in the groove to seal properly.
Dip the string in petroleum jelly before wrapping. This simple step improves sealing and reduces friction during handle operation.
Install Soft-Wire-Style Packing
Soft-wire-style packing is found in higher-end or commercial valves.
Single Wrap Only
This semi-rigid packing, often graphite-coated, needs only one snug wrap. Align it with the seat where the packing nut compresses the material.
Do not overpack the stem. Extra layers prevent the nut from seating fully and cause leaks instead of preventing them.
Lubricate Before Reassembly
Skipping lubrication guarantees early failure. Apply it to all moving parts before putting the faucet back together.
Apply Petroleum Jelly
Coat these areas lightly with petroleum jelly. Apply to stem threads, packing nut threads, and new O-rings if used.
Lubrication prevents galling, which is metal seizing caused by friction. It also ensures smooth handle operation and enhances seal integrity. In hard-water areas, plumber’s grease lasts longer than petroleum jelly and offers superior protection.
Reassemble the Faucet
Now put everything back together carefully to ensure a proper seal.
Insert the Stem
Slide the valve stem fully into the faucet body. Make sure it seats straight and aligned with the housing.
Hand-Tighten First
Place the packing nut back and tighten by hand. This step ensures proper alignment before applying final torque.
Final Tighten with Wrench
Use the adjustable wrench for a final quarter to half turn past hand-tight. Do not over-tighten, because excessive force crushes the packing, damages threads, and makes the handle hard to turn.
Correct tightness allows no wobble and smooth handle movement. If the handle feels stiff or resists turning, you have tightened too much.
Test for Leaks
Turn the water back on slowly and check for leaks.
Step-by-Step Check
Open the faucet gradually. Watch the handle base for any seepage. Close the faucet and check again for drips.
No visible leak means success. Turn off the faucet and enjoy drip-free use.
Still Leaking? Re-Evaluate
If leaks persist, examine these common causes.
Is the packing installed wrong? Remove and re-wrap with fresh material. Confirm the correct number of wraps, which is 2 to 3 for string packing and 1 for wire-style packing.
Could it be the O-ring? Some leaks come from the bottom O-ring, not the packing. Disassemble again and replace the O-ring with a matching size.
Is the stem damaged? Even slightly pitted or corroded stems leak. Replace the entire valve stem assembly if damage is visible.
If the valve body is cracked or the packing nut broke during repair, replace the entire faucet or shut-off valve. This is the safest and most cost-effective long-term solution.
Handle Special Cases
Not all packing issues are standard. Here is how to handle unique situations.
Fix a Leaking Main Shut-Off Valve
When the house main valve leaks at the stem, try tightening the packing nut slightly first. Often this stops minor seepage without further disassembly.
If tightening fails or the nut cracks, replace the old multi-turn valve with a stainless steel quarter-turn ball valve. These ball valves resist corrosion, last for decades, and often come with lifetime warranties from top brands. Coordinate with your water provider for a safe street-side shutoff during replacement.
Try Temporary Fixes for Emergency Situations
Need water restored fast? Use this emergency method as a temporary solution.
Stop Ball Valve Stem Leak Temporarily
Turn the valve fully open. Slide a matching O-ring over the stem. Add a stainless steel washer behind it. Reattach the handle and tighten the packing nut until dripping stops.
This temporary fix is not permanent. Schedule full valve replacement immediately. The average temporary seal lasts 1 to 4 weeks depending on water pressure and usage.
Extend Packing Life with Regular Maintenance
Prevent future leaks with simple annual habits.
Annual Inspection Routine
Once a year, check for handle wobble. Look for dampness at the base. Slightly tighten the packing nut if it feels loose, but do not overdo it.
Re-Lubricate During Every Service
Every time you open the faucet for repairs, clean old grease from threads and apply fresh petroleum jelly. Replace packing proactively every 5 years, even if no leaks are apparent.
Label replacement parts with the date installed. Future you will thank you when tracking maintenance history.
Know When to Replace the Whole Faucet
Sometimes packing replacement is not enough.
Signs It Is Time for a New Faucet
Frequent leaks despite repeated repairs indicate underlying problems. Rusty or corroded valve bodies cannot be sealed properly. Hard-to-turn handles suggest internal damage. A cracked or stripped packing nut means the hardware has reached end of life.
Modern ceramic cartridge faucets rarely need packing replacement. Consider upgrading if your fixture is over 10 years old. A mid-range faucet costing $100 to $200 pays for itself in reduced water waste and repair time.
Key Takeaways for Replacing Faucet Packing
Replacing faucet packing stops annoying leaks, saves water, and keeps your sink dry. The process requires shutting off water first, removing the packing nut, inspecting the stem for damage, installing the correct type and amount of packing, lubricating all threads, and reassembling without over-tightening.
Always match packing type and size exactly. Use petroleum jelly on threads, and test thoroughly before considering the job complete. If leaks persist after proper replacement, inspect the O-ring and stem for damage. For aging valves, upgrading to stainless steel ball valves provides decades of reliable service.
With the right tools, a few minutes, and this guide, you have everything needed to fix it right the first time.







