
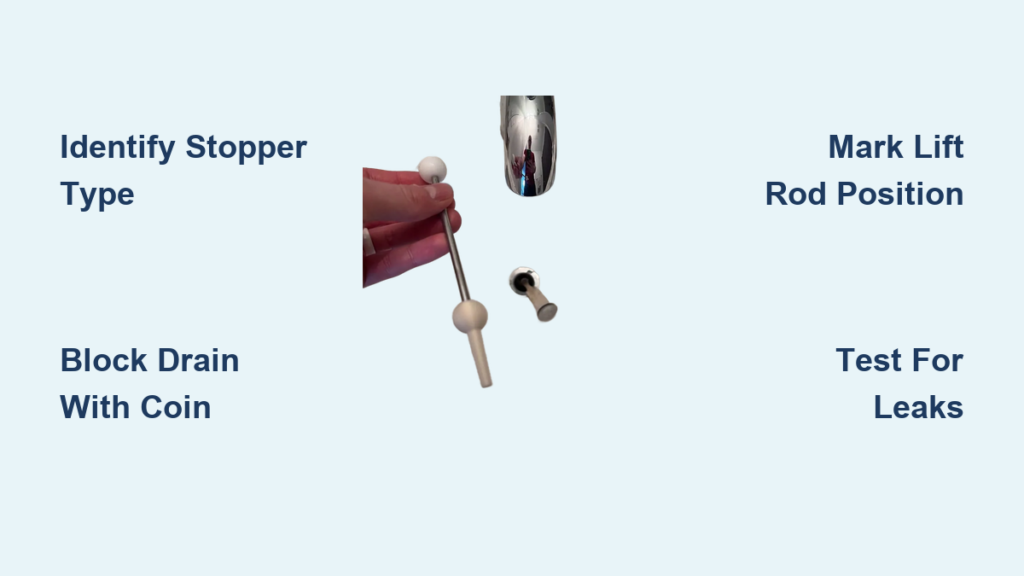
Is your bathroom sink stopper stuck, leaking, or just not holding water like it used to? A worn-out stopper is one of the most common (and most annoying) bathroom problems homeowners face. The good news: learning how to replace a bathroom sink stopper is a beginner-friendly DIY task that costs under $20 and takes less time than brewing a pot of coffee. You don’t need plumbing experience or specialty tools. This guide walks you through the entire process, from identifying your stopper type to testing the new one. Expect clear steps, pro tips, and quick fixes for common snags along the way.
Identify Your Bathroom Sink Stopper Type

Before grabbing any tools, figure out which stopper configuration you have. This determines exactly how you’ll disconnect and replace it.
Non-Removable Stopper Setup
In this design, the pivot rod passes directly through a loop on the stopper. You cannot lift the stopper out without first removing the pivot rod from under the sink.
Visual Cues:
– The stopper does not lift out freely
– You cannot rotate it to release it
– A horizontal metal rod extends into the drain body from the tailpiece
This style is common in older homes and standard pop-up assemblies.
Removable Stopper Setup
This type lets you lift the stopper out without disconnecting any internal parts. You simply rotate the stopper 90 degrees so the pivot rod rests on top of the loop instead of passing through it.
Benefits of this design:
– Easier routine cleaning
– Faster removal for maintenance
– No tools needed for simple extraction
Quick test: Try rotating the stopper. If a quarter-turn releases it, you have a removable configuration.
Gather the Tools You Need

You probably already have most of what you need sitting in a drawer.
What You’ll Need
- Adjustable wrench (only for metal nuts)
- Pliers (helpful for stubborn connections)
- Small suction cup (great for stuck stoppers)
- Coin or flat washer (to block the drain)
What You Can Skip
- Power drills
- Specialized plumbing tools
- Heavy-duty equipment
Most modern sink assemblies use hand-tightened plastic nuts, so you can often complete this job without grabbing a single tool.
Mark the Lift Rod Position Before Disassembly
Why This Step Saves Headaches Later
The lift rod connects to an adjustable strap under the sink. That connection point controls how far the stopper moves up and down. Reattach it in the wrong spot, and your stopper won’t seal or won’t lift properly.
How to Mark It Accurately
- Look under the sink and locate where the lift rod meets the strap.
- Use paint tape or a permanent marker to note the exact connection point.
- Count the visible threads on the rod for extra reference.
Pro Tip: Snap a quick photo with your phone. It serves as an instant visual backup during reassembly.
Block the Drain to Prevent Costly Mistakes
Use a Coin as a Stopper Safety Net
Before disconnecting anything, place a small coin or flat washer between the stopper and the sink basin.
Why this matters: If the stopper slips free while you’re working, it can fall straight into the drain pipe. Retrieving it usually means calling a plumber.
How to do it:
1. Lift the faucet handle to raise the stopper
2. Slide a coin into the gap between the stopper and the sink
3. The coin acts as a barrier, catching the stopper if it slips
This one-minute step can save you a $150 service call.
Remove the Old Bathroom Sink Stopper
Follow these steps in order for a smooth removal process.
Step 1: Disconnect the Lift Rod
- Find the nut connecting the lift rod to the strap under the sink.
- Turn it counterclockwise to loosen.
- Use your fingers for plastic nuts or pliers for metal ones.
- Slide the lift rod free once loose.
Keep your earlier mark handy for reconnection.
Step 2: Remove the Retaining Nut
- Locate the retaining nut that secures the pivot assembly to the drain body.
- Turn it counterclockwise to loosen.
- Remove it completely without forcing it.
This nut is the anchor that holds the entire mechanism in place.
Step 3: Pull Out the Pivot Rod
- Grasp the pivot rod firmly.
- Pull it straight out of the drain tailpiece.
- Watch for small washers or springs that may drop out.
Place all small parts in a bowl or tray so nothing gets lost.
Step 4: Extract the Old Stopper
With the pivot rod removed, the stopper should lift straight out of the drain.
If it’s stuck:
– Press a suction cup firmly onto the top
– Pull upward with steady, even pressure
– The suction breaks any seal from gunk or mineral buildup
A cloth wrapped around the stopper can also improve grip if it’s slippery.
Choose the Right Replacement Stopper
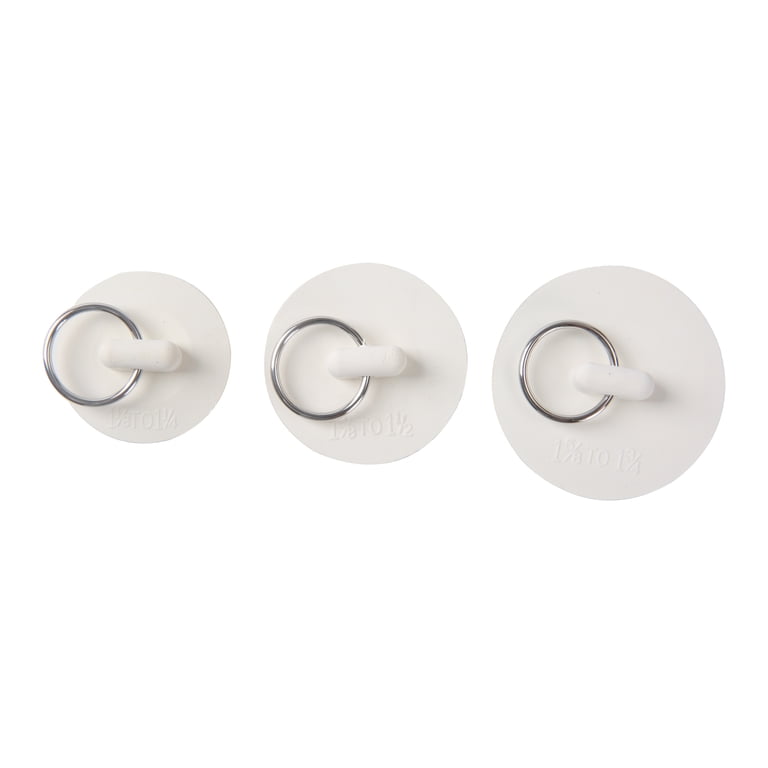
Match the Size Exactly
Most bathroom sink stoppers come in two standard sizes:
– 1.25-inch diameter (most common)
– 1.5-inch diameter
How to measure correctly:
– Remove the old stopper and measure its widest point
– Check the length from top to bottom if it sits deep
Tip: Bring the old stopper to the hardware store for a guaranteed match.
Check Compatibility
Make sure your new stopper:
– Fits your drain opening perfectly
– Matches the pivot rod loop size
– Works with your existing lift rod and strap
Pick a Finish That Matches Your Bathroom
Upgrade your sink’s style while you’re at it:
– Chrome – classic and widely compatible
– Brushed nickel – modern look, hides fingerprints
– Oil-rubbed bronze – warm and vintage-friendly
Install the New Bathroom Sink Stopper
Drop the New Stopper Into Place
- Insert the new stopper into the drain opening.
- Make sure it sits flush and aligns with the faucet.
Align Based on Your Configuration
For non-removable types:
– Position the stopper loop so the pivot rod can pass through it
– Confirm it’s seated inside the drain body
For removable types:
– Rotate the stopper 90 degrees so the pivot rod will rest on top of the loop
– This allows free movement without disassembly
The stopper should move smoothly when you nudge it.
Reconnect the Pivot Mechanism
Slide the Pivot Rod Back In
- Insert the pivot rod back through the drain body.
- Guide it through the stopper loop (or rest it on top for removable types).
- Confirm it’s fully seated and level.
Tighten the Pivot Rod Nut
- Reattach the nut at the end of the pivot rod.
- Turn it clockwise to tighten.
- Aim for snug, not forced. Overtightening restricts movement.
Use a wrench for metal nuts and hand-tighten plastic ones.
Reattach the Retaining Nut
- Slide the retaining nut back onto the pivot rod under the sink.
- Hand-tighten first, then add a slight turn with pliers if needed.
- Stop once it’s secure. Crushing the seal causes leaks.
This nut keeps the entire mechanism stable and aligned.
Reconnect the Lift Rod
Match Your Original Mark
- Reconnect the lift rod to the adjustable strap at your marked position.
- Secure with the nut, turning it clockwise.
Test the Range of Motion
- Move the faucet handle up and down
- The stopper should rise and lower smoothly
- If it binds or doesn’t close fully, adjust the strap
Adjust the Strap Length for Smooth Operation
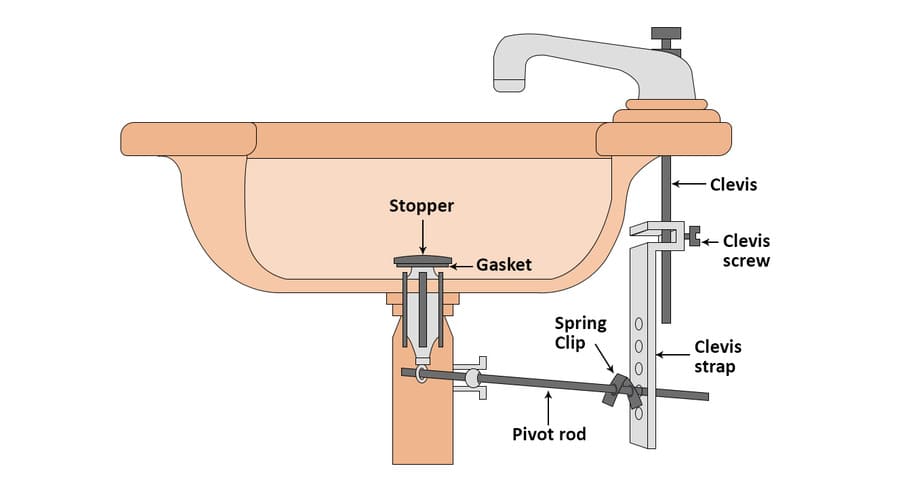
When Adjustment Is Needed
Adjust the strap if your stopper:
– Doesn’t close completely
– Stays half-open
– Requires too much force to operate
How to Fine-Tune
- Loosen the lift rod nut slightly.
- Slide the rod up or down on the strap:
– Higher = stopper lifts more
– Lower = stopper seals better - Re-tighten and test again.
Small adjustments make a big difference. One tweak usually solves the issue.
Test for Leaks and Proper Function
Check Smooth Operation
- Move the faucet handle through its full range.
- Confirm the stopper opens fully and closes completely.
- Watch for any sticking or resistance.
Run a Leak Test
- Close the stopper.
- Fill the sink halfway with water.
- Wait 1–2 minutes.
- Check under the sink for drips around the pivot rod or drain body.
If you spot a leak:
– Tighten the pivot rod nut slightly
– Make sure the stopper is seated properly
– Clear any debris from the drain opening
Troubleshoot Common Stopper Problems
Stopper Won’t Seal
Likely causes:
– Misaligned pivot rod
– Debris in the drain
– Incorrect strap length
Quick fix: Clean the drain, recheck alignment, and adjust the strap.
Stopper Sticks or Binds
Likely causes:
– Overtightened nuts
– Pivot rod not seated straight
– Mineral buildup
Quick fix: Loosen the nuts slightly and clean all parts before reassembly.
Stopper Won’t Stay Up
Likely causes:
– Lift rod too loose or too tight
– Worn spring or washer
Quick fix: Adjust the lift rod tension or replace small damaged parts.
Pro Tips for a Perfect Stopper Replacement
Use a Suction Cup for Stubborn Stoppers
A small plunger-style suction cup creates instant grip. Press firmly, pull straight up, and skip the prying.
Avoid Overtightening Every Nut
Snug is enough. Overtightening warps plastic parts, restricts movement, and shortens the life of your mechanism.
Upgrade to a Removable Stopper
If your sink allows it, switch to a removable configuration for easier future cleaning.
Replace Worn Washers
If you noticed damaged washers or springs during removal, swap them out. They’re cheap and prevent future leaks.
Final Checks Before You’re Done
- Stopper moves smoothly with the handle
- Full range of motion in both directions
- No leaks when the sink is full
- No unusual noises or grinding
- All nuts are snug but not over-tightened
All clear? You’ve just learned how to replace a bathroom sink stopper like a pro.
Why This DIY Fix Is Worth Your Time
Replacing a bathroom sink stopper saves money and improves daily function.
Save $100+ on Plumber Fees
Professional service calls start at $75–$150. Your total cost is under $20, and the job takes about 10 minutes.
Instant Results
No waiting for appointments or scheduling. Fix it tonight and use your sink normally by morning.
Better Sink Performance
A new stopper:
– Prevents water waste
– Stops slow leaks
– Reduces gunk buildup and odors
A Quick Visual Upgrade
A shiny new stopper can refresh the look of an entire bathroom sink area.
When to Call a Professional Plumber
Most stopper replacements are simple, but call a pro if you run into:
– A cracked drain body
– Corroded or stripped threads
– Persistent leaks after replacement
– No access under the sink (sealed vanity base)
These situations go beyond a basic stopper swap and may need deeper repairs.
Frequently Asked Questions About Bathroom Sink Stoppers
How long does it take to replace a bathroom sink stopper?
Most replacements take under 10 minutes once you know the steps. Marking the lift rod and choosing the correct replacement stopper are the parts that require the most attention.
What size stopper do I need for my bathroom sink?
The two standard sizes are 1.25 inches and 1.5 inches in diameter. Measure your old stopper’s widest point to confirm the right fit before buying a replacement.
Do I need to turn off the water to replace a sink stopper?
No. Replacing a bathroom sink stopper is a dry job. You’re only working on the drain mechanism under the sink, not the water supply lines.
Why does my new bathroom sink stopper leak after installation?
Leaks usually come from a misaligned pivot rod, an overtightened nut, or a stopper that isn’t fully seated. Loosen the nuts slightly, reposition the stopper, and retest.
Can I replace a bathroom sink stopper without tools?
Yes, in most cases. Modern assemblies often use hand-tightened plastic nuts. You’ll only need tools for metal nuts or stubborn connections.
What’s the difference between a removable and non-removable stopper?
A removable stopper lifts out after a 90-degree rotation without disconnecting any parts. A non-removable stopper requires pulling out the pivot rod from under the sink before the stopper can come out.
Key Takeaways for Replacing Your Bathroom Sink Stopper
Replacing a bathroom sink stopper is one of the easiest DIY plumbing wins you can tackle. Mark the lift rod position before disassembly, block the drain with a coin, and avoid overtightening any nuts. With the right replacement size and about 10 minutes of work, you’ll have a fully functional sink without spending a dime on a plumber. Next step: measure your old stopper, grab a matching replacement from the hardware store, and give your sink the refresh it deserves today.







