
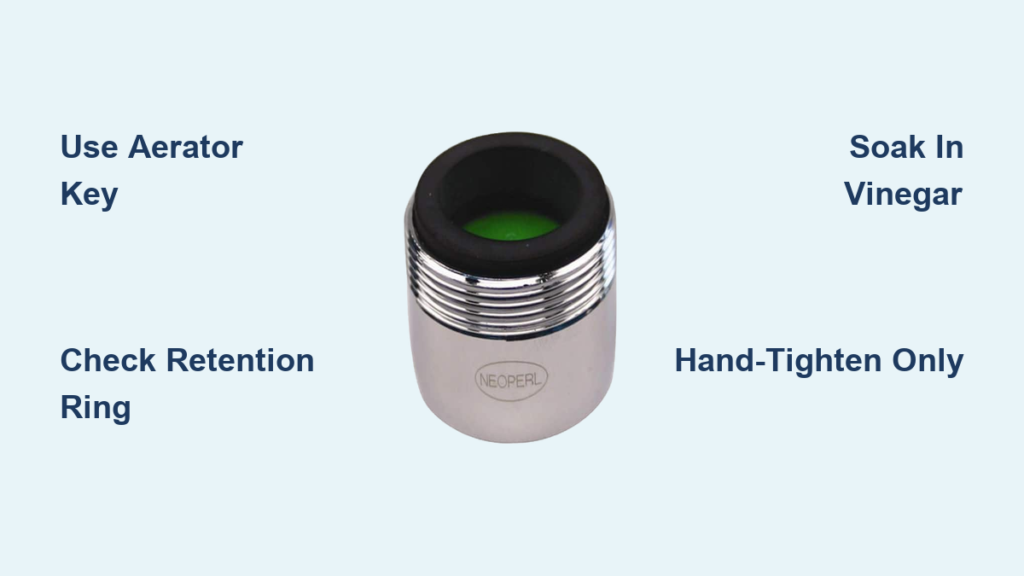
Low water pressure and uneven spray often point to a clogged aerator. Many modern faucets use a recessed faucet aerator—a hidden flow regulator sitting inside the spout tip. Unlike standard aerators you can unscrew by hand, these require specific tools and techniques. This guide shows you exactly how to remove recessed faucet aerator fixtures safely and restore full water flow.
Whether you’re dealing with mineral buildup, persistent clogs, or just performing routine maintenance, this step-by-step process covers identification, removal methods, cleaning, and reinstallation for all common designs.
Identify Your Recessed Aerator Type
Before removal, confirm your faucet has a recessed model.
Check for Flush-Mount Design
Look directly at the end of your faucet spout. If there’s no visible threading or hex nut protruding from the tip, you likely have a recessed aerator. These sit flush with or slightly below the spout opening. Shine a flashlight into the tip to spot a circular disc with small notches or slots around the edge.
Look for Tool Engagement Points
Most recessed aerators have two or more internal notches, holes, or grooves. These accept a specialized key or improvised tool. If you see no external grip surface, skip the pliers—they’ll scratch chrome finishes and likely won’t work anyway.
Confirm Brand and Retention Style
Some aerators are held by a threaded outer ring rather than internal threads. Delta and Pfister models often use this design. Inspect the rim around the spout tip. If it rotates independently, that’s your retention ring, not the aerator itself.
Choose the Right Removal Tool

Recessed aerators need specific tools—hand strength won’t work here.
Recessed Aerator Key
A recessed aerator key (also called an aerator wrench) features dual prongs that fit into internal notches. Insert it fully and turn counterclockwise. This is the safest, most effective method. Available at hardware stores and online for under $5.
Low-Profile and Universal Options
For deeply recessed units, use a low-profile key with shorter handles. A universal aerator tool adjusts to fit multiple sizes and brands, making it ideal for homes with mixed fixtures.
Brand-Specific Keys
Kohler 1130269 works on Kohler and some Pfister models. Pfister faucets often include a small plastic key at purchase—store it with your plumbing tools. Delta models may require model-specific keys or ring removal instead.
Pro Tip: Add your aerator key to the household tool kit. Losing it makes future cleaning much harder.
Improvised Tool Alternatives
No key available? Try these temporary solutions—but proceed with caution.
Needle-Nose Pliers
Insert tips into opposing notches. Gently squeeze inward while turning counterclockwise. Risk includes scratching metal or stripping soft plastic.
Blunt Scissors
Open blades slightly, insert into two notches, close gently to grip, then rotate. Works on durable models but carries damage risk.
Reverse Caliper Method
Adjust measuring jaws to fit snugly inside the recess. Use the caliper body as a handle to twist counterclockwise. Effective on deep-set aerators.
Warning: Improvised tools increase damage risk. Use only when necessary and stop immediately if resistance feels extreme.
Remove Aerator With Retention Ring
Not all recessed aerators unscrew from inside—some are held by an outer ring.
Check for Rotating Outer Ring
Inspect the rim around the spout tip. If it turns independently from the spout body, it’s a threaded retention ring. This configuration is common in Delta and other modern faucets.
Unscrew the Ring First
Wrap pliers jaws with electrical tape to prevent scratching. Grip the outer ring and turn counterclockwise. Once removed, the aerator lifts straight out—no internal threading required.
Pull Out the Aerator
After removing the ring, use tweezers or a fingertip to extract the aerator. Check for brand markings now—many only become visible after disassembly.
Step-by-Step Removal Process
Follow this sequence for safe, successful removal.
1. Cover the Drain
Place a towel or drain plug in the sink. Small parts like washers and screens easily fall into the drain and disappear.
2. Relieve Water Pressure
Turn off shutoff valves under the sink if accessible. Open the faucet briefly to release residual pressure.
3. Inspect and Select Tool
Shine a light into the spout. Match your tool to the notch pattern. Ensure prongs fully engage before turning.
4. Insert Tool Fully
Push the aerator key straight in until it seats completely. Misalignment causes slippage and damage.
5. Turn Counterclockwise
Apply steady, even pressure. Rotate left to loosen. If stuck, try these fixes:
Soak in white vinegar for 5-10 minutes to dissolve mineral bonds. Use a hair dryer on low heat to expand metal slightly. Apply penetrating oil sparingly if corrosion is suspected.
Success Tip: Expect a slight vacuum pop when the last thread releases.
6. Finish by Hand
Once loose, unscrew the rest manually. Set aside all components for cleaning.
Inspect and Clean Internal Parts
Even seemingly clean aerators restrict flow.
Disassemble If Possible
Some models break down into mesh screen, flow restrictor, diffuser plate, and rubber washer or O-ring. Remove each piece carefully and note the order for reassembly.
Soak in White Vinegar
Fill a bowl with white vinegar. Submerge parts for 30 minutes to dissolve lime and mineral scale. For heavy buildup, use the overnight bag method:
Fill a plastic bag with vinegar. Place over faucet spout. Secure with a rubber band. Soak for 8-12 hours.
Why It Works: Acetic acid breaks down calcium carbonate, the main component of hard water deposits.
Scrub and Rinse
Use an old toothbrush to gently scrub screens and crevices. Rinse all parts under clean water before reassembly.
Alternative Cleaners
CLR (Calcium, Lime & Rust Remover) works stronger than vinegar—follow label instructions. Lemon juice offers mild acid alternative, less effective but safer for sensitive finishes.
When to Replace Instead of Clean
Cleaning helps, but replacement is needed in these situations:
Screen is torn, corroded, or permanently clogged. Plastic housing is cracked or warped. Threads are stripped. O-ring is missing or degraded. Flow remains weak after thorough cleaning.
Free Replacement Tip: Delta, Pfister, and other brands offer lifetime warranties. Enter your model number on their website to request a free replacement.
Reinstall Correctly to Prevent Leaks
Improper reinstallation causes leaks and damage.
1. Reassemble Components
Ensure all washers, screens, and restrictors are present and seated properly. Missing a tiny O-ring leads to drips.
2. Hand-Tighten First
Screw the aerator in clockwise by hand until snug. Alignment matters—cross-threading ruins both aerator and spout.
3. Final Quarter-Turn With Tool
Use the aerator key for one-quarter to one-half turn more. Stop there.
Never Over-Tighten: Especially with plastic aerators. This causes cracking, stripping, or leaks.
4. Test For Leaks and Flow
Turn water back on. Check for even full spray pattern, no dripping at spout base, and no sputtering or pulsing. If leaking, remove and check for debris or damaged O-ring.
Brand-Specific Removal Tips

Different brands require different approaches.
Delta Faucets
Some models use threaded outer rings rather than internal threads. Remove ring first, then pull aerator out. Check for hidden model numbers under removable spout tips. Use Delta’s online lookup tool for free replacement parts.
Pfister Faucets
Often come with a small plastic aerator key. Store it with plumbing tools—easy to lose. Compatible with some universal keys, but brand-specific is best.
Kohler Faucets
Use Kohler 1130269 tool for most models. May require low-profile key for deep recesses. Shares design traits with Pfister—check fit carefully.
Moen and Other Brands
Usually compatible with universal aerator keys. Common sizes are 13mm, 15mm, 16mm, and 22mm. Confirm male versus female threading when buying replacements.
Troubleshooting Tip: If no tool fits, check for retention ring or brand-specific system. Don’t force it.
Prevent Future Clogs With Maintenance
Keep water flowing strong with regular care.
Establish a Cleaning Schedule
Average homes benefit from quarterly cleaning. Hard water or well systems need cleaning every 1-3 months.
Soak Quarterly With Vinegar
Even without visible issues, soak aerator in vinegar every few months to prevent buildup.
Replace Every 1-2 Years
Plastic degrades, screens clog, and O-rings fail. Proactively replace to avoid sudden flow loss.
User Insight: Well water users report needing monthly cleaning in high-mineral areas.
Measure for Correct Replacement
After removal, size it right.
Measure Diameter Accurately
Use calipers or ruler to measure across the base. Common sizes include 13mm, 15mm, 16mm, and 22mm. In inches, this translates to 13/16″ and 15/16″.
Check Thread Type
Some aerators are male-threaded, others female. Verify before purchasing replacement.
Use Compatibility Resources
Visit Aerator.com for sizing charts. Enter model number on manufacturer sites for exact matches.
Troubleshoot Common Problems
Fix issues fast with this guide.
Aerator Won’t Budge
Cause: Mineral lock, wrong tool, or retention ring. Fix: Soak in vinegar, try heat, or check for outer ring.
Tool Slips During Removal
Cause: Poor fit or misalignment. Fix: Try different key and ensure full insertion.
Low Flow After Cleaning
Cause: Debris in faucet body. Fix: Flush spout with water and inspect cartridge.
Leaking at Spout
Cause: Damaged O-ring or over-tightening. Fix: Replace washer and reinstall snug only.
Aerator Falls Out
Cause: Stripped threads or wrong size. Fix: Replace aerator and inspect spout for damage.
Store Tools and Spares Properly
Avoid future frustration.
Keep Original Key
Label it and store with household tools. Lost keys make cleaning difficult.
Save Old Aerator
Keep cleaned version as backup. Label with date and faucet location.
Invest in a Universal Kit
For under $10, get a multi-tool aerator removal set. Handles nearly every faucet type.
Use a Labeled Parts Bag
Store keys, spares, and washers together. Include installation date for maintenance tracking.
Frequently Asked Questions About Removing Recessed Faucet Aerators
Why can’t I remove my faucet aerator by hand?
Recessed aerators sit flush with or below the spout surface, leaving no grip surface for fingers. They require specialized keys with prongs that fit into internal notches, or improvised tools like needle-nose pliers.
What tool do I need to remove a recessed aerator?
A recessed aerator key (aerator wrench) is best. These small tools have dual prongs that insert into notches inside the spout. Universal keys work for multiple sizes, while brand-specific keys exist for Delta, Kohler, and Pfister models.
How do I remove a Delta faucet aerator?
Many Delta faucets use a threaded outer ring instead of internal threads. Wrap pliers with tape, grip the ring, turn counterclockwise, then pull the aerator straight out. Check Delta’s website for model-specific guidance.
Can I clean a clogged aerator instead of replacing it?
Yes in most cases. Soak in white vinegar for 30 minutes (or overnight for heavy buildup), scrub with a toothbrush, and rinse thoroughly. Replace if the screen is torn, plastic is cracked, or flow remains poor after cleaning.
How often should I clean my faucet aerator?
Clean every 3-6 months in average water conditions. Hard water or well water requires cleaning every 1-3 months. Quarterly vinegar soaks prevent buildup before it causes problems.
Key Takeaways for Removing Recessed Faucet Aerators
Removing a recessed faucet aerator takes minutes with the right approach. First, identify whether you have a standard recessed model or one held by a retention ring. Second, use a proper aerator key rather than forcing pliers, which damages finishes. Third, soak in white vinegar to dissolve mineral deposits before scrubbing clean. Finally, reinstall hand-tight plus a quarter-turn—over-tightening causes more problems than under-tightening.
Regular maintenance every three to six months prevents clogs and extends your faucet’s life. Many brands offer free replacements under warranty, so check before buying. Keep a universal aerator removal kit handy for any faucet in your home.
Ready to restore full water flow? Gather your tools, identify your aerator type, and follow these steps for a quick, effective fix.







