
A detached undermount sink is more than a minor annoyance; it is a countdown to potential water damage beneath your cabinetry. If you notice your sink pulling away from the granite countertop, immediate action matters. Most undermount sink failures happen between 6 and 10 years after installation because silicone and adhesives eventually dry out and weaken. The encouraging news is that you can reattach the sink yourself using the right combination of materials and technique. This guide covers every critical step, from assessing damage and prepping surfaces to applying epoxy, sealing with silicone, installing support bracing, and verifying a watertight bond.
Inspect Sink and Clip Condition
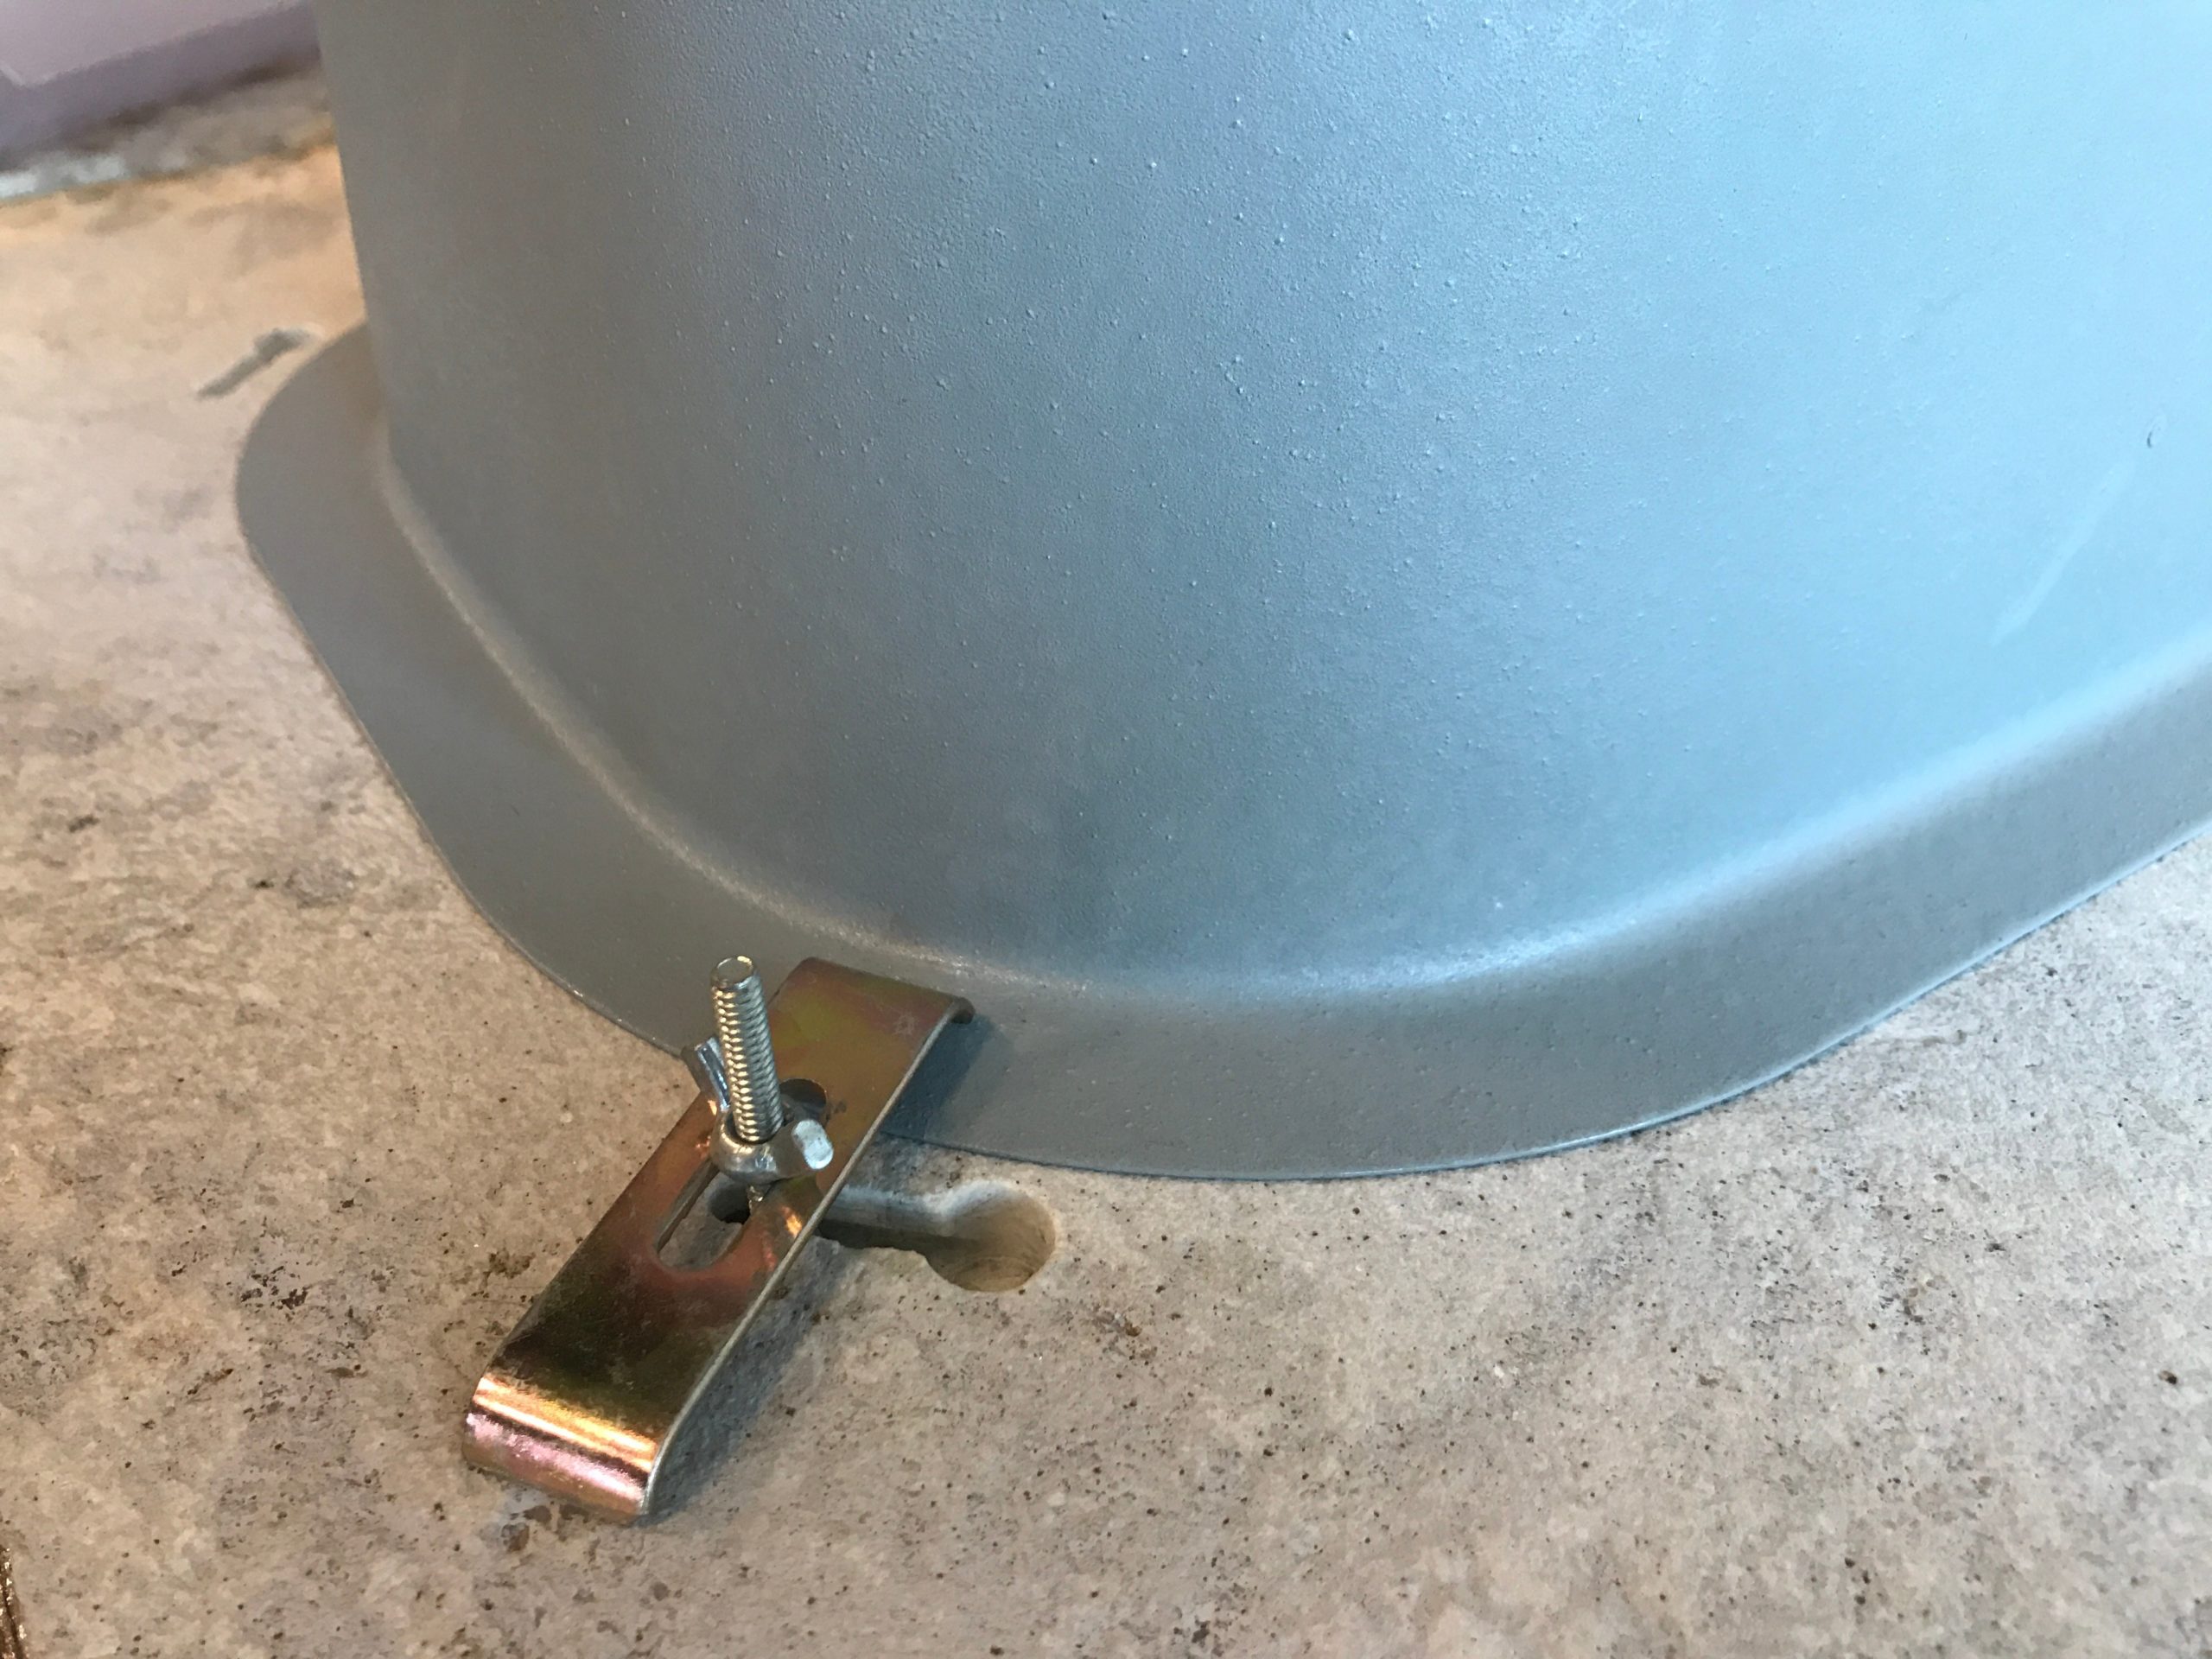
Check the Undermount Clips
Begin by examining the metal undermount clips currently supporting the sink. These brackets reinforce the bond but are not designed to carry the full sink weight on their own. Look for signs of rust, bending, or breakage around each clip. If the clips are functional and still gripping the sink, they provide helpful stability during the repair. However, never trust clips alone for permanent support; they must work together with adhesive. Test clip grip by gently pressing upward on the sink. Loose or shifting clips may need replacement or supplementation with wedge clips.
Identify Full Detachment Signs
If the sink has completely separated, determine how it is currently supported. Is it resting on the cabinet floor? Hanging by plumbing connections? Do not disconnect any pipes yet. A fully dropped sink demands careful repositioning using adjustable lifting tools such as twist-up clamps. Forcing the sink back into place without proper support can crack the countertop or warp the sink flange.
Evaluate Countertop and Flange Damage
Use a headlamp to inspect the granite underside and the sink flange closely. Check for cracks, chipped stone, or warped metal. Structural damage to the countertop may require professional repair before you attempt reattachment. Also remove any leftover wood blocks or debris from previous temporary supports so bonding surfaces stay clean.
Remove All Old Adhesive
Scrape Silicone and Residue
Start by using a razor blade to remove every trace of old silicone from both the granite underside and the sink’s top edge. Work slowly around the full perimeter and cut through the cured sealant carefully. Follow up with a putty knife to scrape off stubborn residue. Focus especially on the flange-to-granite contact zone; this area must be bare and smooth for new adhesives to bond properly.
Clean with Steel Wool and a Lint-Free Cloth
After scraping, use fine steel wool to lightly abrade both surfaces. This removes microscopic contaminants and improves adhesion. Wipe everything down with a lint-free cloth to eliminate dust and particles. Both the granite and stainless steel must be completely dry before you continue. Skipping this step is the leading cause of reattachment failure because moisture prevents a strong bond.
Install Support Bracing First
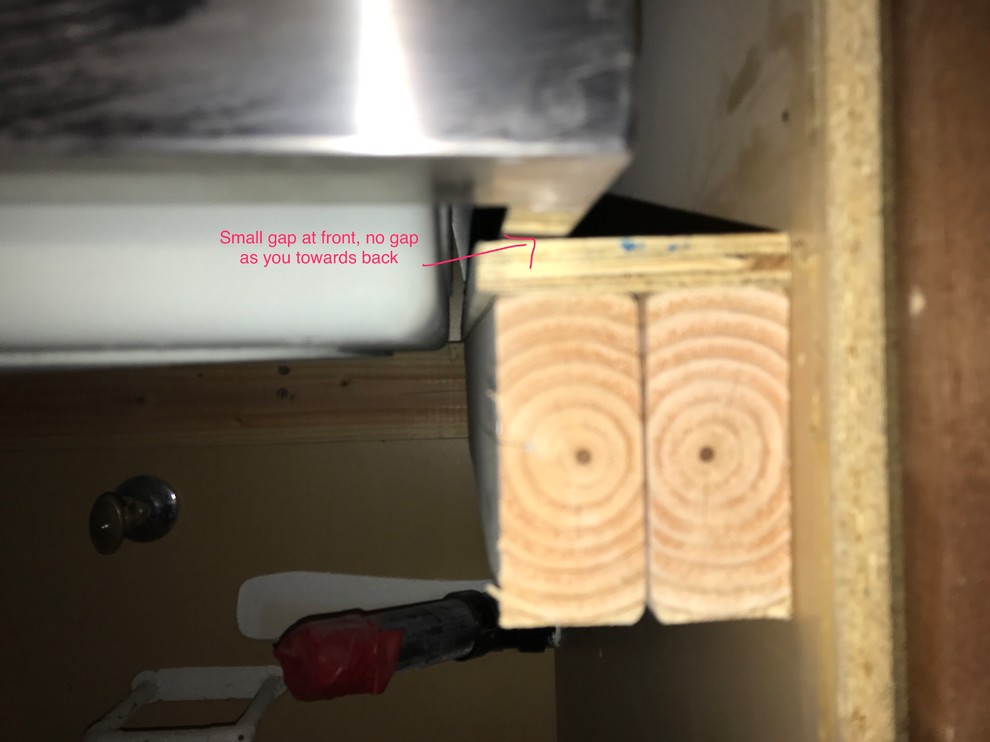
Position 2×4 Boards Under the Sink
Cut two 2×4 boards to fit snugly under the front and back edges of the sink. These boards distribute the sink’s weight and prevent future sagging. Install the bracing before applying any adhesive. Adjust the boards until the sink sits level and flush with the countertop. The supports should bear the sink’s load evenly, taking pressure off the clips and sealant.
Use Vinyl Blocks for Even Support
Alternatively, place vinyl blocks under each side of the sink. These non-compressive spacers prevent point loading and protect the granite from stress fractures. Position one block near each corner for balanced support. Unlike temporary jacks, vinyl blocks remain in place long-term and offer continuous reinforcement without damaging the cabinetry.
Apply Structural Epoxy Correctly

Mix the Epoxy in a 50/50 Ratio
Choose a high-strength epoxy rated at 3,500 to 5,500 PSI. A 3,900 PSI rating is sufficient for most undermount sinks. Mix equal parts resin and hardener on a piece of cardboard and work quickly. Most epoxies begin to set in about 5 minutes, so once you start mixing, you have a narrow window to apply the product and position the sink. Wear gloves and work in a well-ventilated area.
Spread Epoxy on the Granite Underside
Apply a thick, continuous layer of epoxy to the granite surface where the sink flange meets the stone. Cover the entire bonding zone without leaving gaps. Epoxy provides the structural strength that anchors the sink against gravity and daily use. Keep in mind that epoxy is not waterproof on its own; you must pair it with silicone for a complete, lasting repair.
Seal with Waterproof Silicone
Run a Continuous Bead Around the Sink Edge
Apply a clear, waterproof silicone bead along the top edge of the stainless steel sink. Use a caulk gun for consistent pressure and full coverage. The bead should be thick enough to compress when you press the sink upward, forming a watertight seal. Choose a silicone rated for undermount sinks; marine-grade versions offer superior moisture resistance and longevity.
Press the Sink Into Final Position
Gently lift the sink using clamps if needed and press it firmly against the granite. Align the sink precisely with the countertop opening. The silicone will squish slightly and fill any micro-gaps. Avoid shifting the sink after contact because this breaks the seal. Let the support bracing hold the sink at the correct height while adhesives cure.
Secure the Sink with Undermount Clips

Tighten Wing Nuts Evenly
Once the sink sits in position, engage the undermount clips. Tighten the wing nuts gradually and evenly without overtightening. Excessive force can crack granite or warp the sink flange. Clips should apply firm, uniform pressure without distorting the metal. If original clips are damaged, install wedge clips as backup reinforcement.
Add Wedge Clips for Extra Security
Wedge clips slide into place from the side and lock under the sink flange. They work well when the original hardware is compromised. Install them at intervals around the sink for added mechanical security. Wedge clips are optional, but they add valuable reinforcement in high-use kitchens.
Clean Excess Silicone Immediately
Wipe with a Damp Rag
Use a wet rag to wipe away any silicone that squeezes out along the seam. Do this right after positioning the sink, because once silicone dries, removal becomes nearly impossible. Smooth the joint for a clean, professional finish. Check all sides, including corners near the faucet and disposal.
Inspect for Gaps and Air Pockets
Run your finger around the entire perimeter to feel for gaps. If you detect any voids, apply a small amount of fresh silicone and smooth it in place. A continuous, unbroken seal prevents water infiltration that leads to mold, rot, and future detachment.
Allow a Full 24-Hour Cure Time
Keep the Sink Unused During Drying
Do not run water, place dishes, or operate the garbage disposal for at least 24 hours. Epoxy and silicone both need uninterrupted time to cure fully. Premature use can shift the bond and create leaks or complete failure. Mark the sink with tape or a note as a clear reminder for everyone in the household.
Avoid Reconnecting Plumbing Too Soon
Wait until the full cure period ends before reconnecting drain lines or water supply. Even slight movement during reassembly can compromise the seal. A little patience here prevents costly redo work later.
Test for Leaks Thoroughly
Run Water and Inspect the Joint
After 24 hours, reconnect the plumbing and slowly run water. Fill the sink partially and let it drain while you watch the underside. Shine a flashlight under the cabinet and check for any seepage. Look for droplets forming along the seam or pooling on the bracing.
Verify a Watertight Seal
A successful reattachment shows no moisture under the sink. If you spot a leak, dry the area completely and add a secondary silicone bead. Let it cure another 24 hours before retesting. Never ignore minor seepage because it will worsen over time and cause serious damage.
Prevent Future Detachment
Keep Permanent 2×4 Bracing in Place
The 2×4 boards installed during the repair should remain in place permanently. They distribute the sink’s weight across a broader surface and reduce stress on the adhesive. This simple addition significantly extends the life of the installation and prevents sagging.
Schedule Regular Maintenance Checks
Inspect the sink seal monthly for gaps or movement. Check clip tension quarterly. Examine the entire joint annually for signs of deterioration. Catching issues early, like a softening seal or slight shift, lets you address them before a full failure occurs.
Recognize Early Warning Signs
Watch for water stains under the sink, visible gaps between sink and countertop, or a spongy feel when pressing on the rim. These signals indicate impending failure. Address them immediately with resealing or clip adjustment to avoid another costly drop.
Frequently Asked Questions About Reattaching an Undermount Sink
How long does an undermount sink repair last?
A repair using epoxy, silicone, and proper bracing should last indefinitely when done correctly. The original installation typically fails because it relied on silicone alone, which dries out over time.
Can I use the sink immediately after reattaching it?
No. You must wait a full 24 hours for the adhesive and silicone to cure completely. Using the sink too soon can compromise the bond and lead to leaks or failure.
Should I use epoxy or silicone for undermount sink repair?
Both materials are essential. Epoxy provides structural strength while silicone creates the waterproof seal. Skipping either one compromises the durability of the repair.
What if my sink has fallen completely?
The repair process stays the same, but you will need adjustable lifting tools like twist-up clamps to raise the sink back into position against the countertop. Take extra care with alignment.
Can I reattach the sink without removing it?
Yes, if the sink is still partially attached or hanging by clips. The repair is performed from underneath the sink without removing the sink or countertop.
What type of silicone works best for undermount sinks?
Use clear, waterproof silicone rated specifically for undermount sink applications. Marine-grade silicone offers superior moisture resistance and is an excellent choice for long-term durability.
Key Takeaways for a Lasting Undermount Sink Repair
Reattaching an undermount sink successfully requires combining three elements: structural epoxy for strength, waterproof silicone for sealing, and mechanical support through clips and bracing. Skipping any one of these elements risks repeat failure. With proper materials, careful surface preparation, and a full 24-hour cure, this repair can last indefinitely and restore both safety and function to your kitchen. If you discover granite damage, extensive water intrusion, or feel uncertain about any step, consult a licensed contractor before proceeding.







