

Learning how to plumb a kitchen sink is a valuable skill that saves money and gives you control over one of your home’s most-used fixtures. A properly plumbed sink delivers reliable water flow, drains efficiently, and prevents costly water damage. Whether you’re replacing an old setup or installing a sink in a new kitchen, the process follows predictable steps that most homeowners can tackle with basic tools.
This article breaks down the entire plumbing process into manageable phases. You’ll learn which tools and materials to gather, how to prepare your workspace, and how to connect water supply lines and drain pipes correctly. We’ll also cover common mistakes to avoid, simple upgrades to consider, and maintenance habits that keep your sink working flawlessly for years.
Gather Tools and Materials Before You Begin

Walking into a project halfway through because you lack a part is frustrating. Preparation is the foundation of any successful plumbing job.
Core Plumbing Tools You’ll Need
- Adjustable wrench for tightening various fittings
- Putty knife for removing old sealant
- Hacksaw or tubing cutter for cutting pipe to length
- Plumber’s tape (Teflon tape) for sealing threaded connections
- Bucket and towels to catch residual water
- Flashlight or headlamp for working under the sink
You can buy or borrow specialty tools like a basin wrench, but an adjustable wrench handles most connections on standard kitchen sinks.
Plumbing Parts and Supplies
- P-trap kit (includes the U-bend, tailpiece, and wall arm)
- Water supply lines, typically braided stainless steel
- Drain assembly (strainer basket and flange)
- Plumber’s putty or silicone caulk
- Slip joint washers and nuts (usually included with the P-trap)
- Wood shims (if leveling the sink in the cabinet)
Pro Tip: Buy a P-trap kit with a cleanout port. That small access point saves hours when clearing future clogs.
Shut Off Water and Remove the Old Fixture
Skipping the setup work is a recipe for a wet floor and potential water damage. Always start by isolating the work area.
Turn Off the Water Supply
Locate the two shutoff valves beneath your sink, one for hot water and one for cold. Turn both clockwise until they stop. Open the faucet to release pressure and drain any water sitting in the lines. If the valves are old or corroded, replace them now while the water is already off.
Disconnect the Old Plumbing
Place a bucket under the P-trap to catch water. Unscrew the slip nuts by hand or with channel-lock pliers, turning counterclockwise. Remove the trap and drain arm. Disconnect the supply lines from the shutoff valves and from the faucet tailpieces underneath. Finally, unscrew any mounting clips holding the sink to the countertop and lift the sink out, or disconnect the faucet if you’re reusing it.
Expert Note: Take a photo of the existing plumbing before disconnecting anything. The reference image helps when installing the new sink, especially if the configuration is unusual.
Set the Sink and Faucet
Many pros install the faucet before setting the sink into the countertop. Working above the counter is far easier than reaching up from underneath.
Install the Faucet First
Most kitchen faucets come with a mounting plate or gasket. Feed the supply lines and mounting studs down through the holes in the sink or mounting plate. Secure the faucet underneath with the provided washers and nuts. Hand-tighten first, then snug with a basin wrench. Over-tightening cracks porcelain or stone sinks.
Mount the Sink in the Countertop
For top-mount sinks, apply a bead of silicone caulk around the edge of the countertop cutout. Drop the sink into place and press down firmly. For undermount sinks, secure them to the countertop substrate with the included brackets. Check that the sink sits level across both basins, front to back and side to side. A tilted sink pools water and looks uneven.
Connect the Drain Assembly

The drain assembly is the most leak-prone part of any sink installation. Getting it right requires patience and the right sealant.
Install the Drain Flange
Roll a rope of plumber’s putty about the thickness of a pencil and press it under the lip of the drain flange. Insert the flange into the sink’s drain hole from above. From below, slide the rubber gasket, cardboard or plastic friction ring, and locknut onto the tailpiece. Tighten the locknut by hand, then give it a quarter-turn with channel-lock pliers. Wipe away excess putty that squeezes out from the top.
Connect the P-Trap and Drain Pipes
The P-trap is the curved pipe beneath the sink that holds a small amount of water. That water barrier blocks sewer gases from rising into your kitchen.
Assemble the P-Trap
Every P-trap kit includes a few key pieces. The tailpiece attaches to the bottom of the drain flange. The U-bend (the actual “trap”) curves down and back up. The wall arm extends from the trap to the drain stub-out in your wall. Slip nuts and washers hold everything together.
Dry Fit Before Gluing or Sealing
Slide all the pieces together without tightening. Confirm the trap aligns with the wall drain opening. Cut the tailpiece or wall arm with a hacksaw if the fit is off. A clean, straight cut ensures a tight seal. Once everything lines up, tighten the slip nuts by hand, then snug them with channel-lock pliers. Aim for about a quarter-turn past hand-tight. Excessive force cracks the plastic nuts.
Hook Up the Water Supply Lines
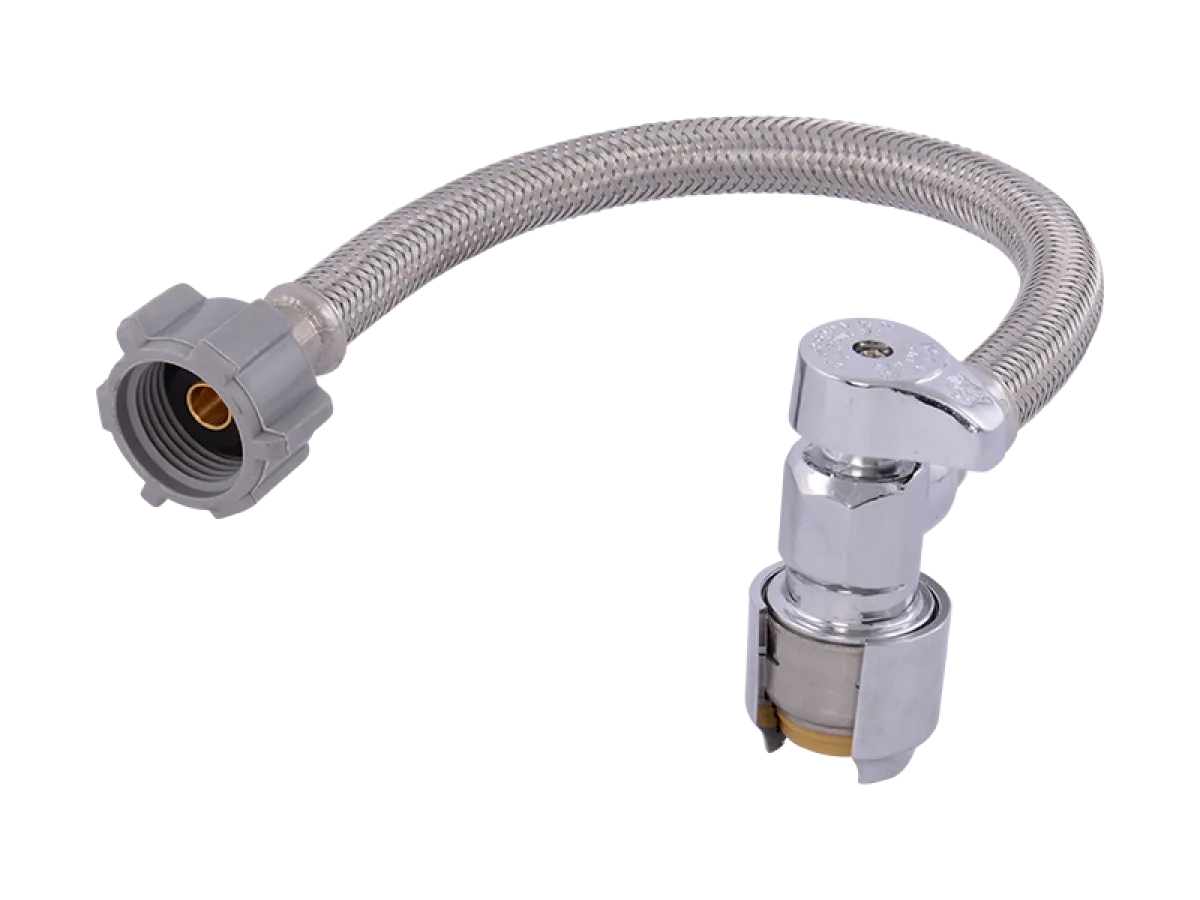
Supply lines carry pressurized water from the shutoff valves to the faucet. They’re simple to connect but must be sealed to handle constant pressure.
Attach the Supply Lines to the Valves
Wrap three to four turns of Teflon tape around the threaded outlet of each shutoff valve, wrapping clockwise. This compression on the top threads prevents unraveling when you screw on the supply line nut. Connect the hot water line to the left valve (hot) and the cold line to the right valve (cold). Hand-tighten the compression nut, then give it another half-turn with an adjustable wrench.
Connect the Lines to the Faucet
Repeat the Teflon tape process on the faucet inlet threads (if they are not already equipped with rubber seals). Thread the supply line nuts onto the faucet tailpieces and tighten. Do not kink the lines. A sharp bend restricts flow and weakens the hose over time.
Test for Leaks and Make Adjustments
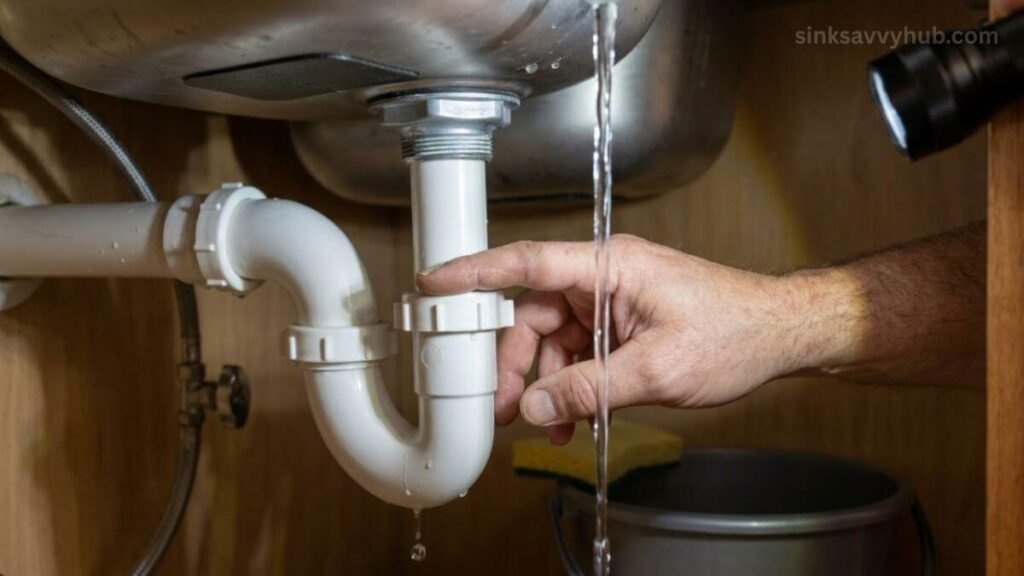
Testing is where you catch mistakes. A thorough test now prevents a cabinet full of water later.
Pressurize the System Slowly
Open both shutoff valves slowly, turning counterclockwise. Listen for hissing sounds and watch for drips at every joint. Let the water run through the faucet for a full minute. Then fill both sink basins and let the water sit while you inspect the drain, P-trap, and supply connections with a flashlight.
Address Any Leaks Found
If a connection drips, try tightening it slightly. If it still leaks, shut off the water, disassemble the joint, and inspect the washer. A misaligned, cracked, or dirty washer is the usual culprit. Reassemble with a new washer and Teflon tape if needed.
Maintain Your Sink for Long-Term Performance
A little maintenance extends the life of your plumbing and prevents emergencies.
Monthly Habits That Prevent Problems
- Clear the strainer basket regularly
- Run hot water for 30 seconds after each use to flush soap and grease
- Pour a kettle of boiling water down the drain monthly to dissolve buildup
- Clean faucet aerators every few months by unscrewing and soaking in vinegar
Seasonal Checks to Schedule
- Inspect supply lines for bulging, corrosion, or stiffness
- Test shutoff valves by closing and reopening them
- Check under the sink for moisture stains or musty smells
- Replace supply lines every 5 to 7 years, or sooner if they show wear
Frequently Asked Questions About How to Plumb a Kitchen Sink
How long does it take to plumb a kitchen sink?
Most DIYers complete a full plumbing job, including removing the old sink and installing the new one, in 3 to 5 hours. Experienced plumbers often finish in under 2 hours. The time depends on how much old plumbing needs modification and whether you’re also installing a new faucet or disposal.
Can I plumb a kitchen sink without shutting off the water?
No. You must shut off the water at the supply valves or the main shutoff. Attempting to work on live supply lines causes immediate flooding once you disconnect a fitting. The sink drain itself doesn’t require shutting off water, but supply line work absolutely does.
Do I need a permit to plumb a kitchen sink?
In most jurisdictions, replacing a sink with the same connections does not require a permit. However, moving plumbing lines, adding new supply lines, or installing a dishwasher connection often does require a permit and inspection. Check with your local building department before starting major work.
What is the most common mistake when plumbing a kitchen sink?
The most common mistake is failing to dry-fit the assembly. Plumbers who skip the dry-fit end up with misaligned pipes that leak or drain slowly. The second most common mistake is over-tightening slip nuts, which cracks the plastic and causes leaks that seem to come from nowhere.
How do I stop my P-trap from leaking?
Check that the washers are seated correctly and the slip nuts are snug but not over-tightened. Misaligned pipes put stress on the washers and cause leaks even when the nuts feel tight. Disassemble the trap, realign the pipes so they sit naturally without strain, and reassemble.
Can I use flexible pipe for the drain instead of a P-trap?
You should not use flexible corrugated drain pipe in place of a proper P-trap. Flexible pipe traps debris, slows drainage, and often violates plumbing code. A rigid PVC P-trap is inexpensive, durable, and required by code in nearly all areas.
Key Takeaways for Plumbing a Kitchen Sink Successfully
Plumbing a kitchen sink is a satisfying project when you approach it in clear phases: prepare the space, install the faucet and drain, connect the P-trap, attach the supply lines, and test thoroughly. The most important habits are dry-fitting before final assembly, using Teflon tape on threaded connections, and avoiding over-tightening. A slow, methodical pace beats rushing every time.
Your next step is to inspect your shutoff valves and supply lines. If they’re old or corroded, replace them before starting the new installation. Forgiving old parts with new connections is a false economy. Gather quality components, follow the sequence in this guide, and you’ll have a leak-free, reliable kitchen sink that performs well for years to come.







