
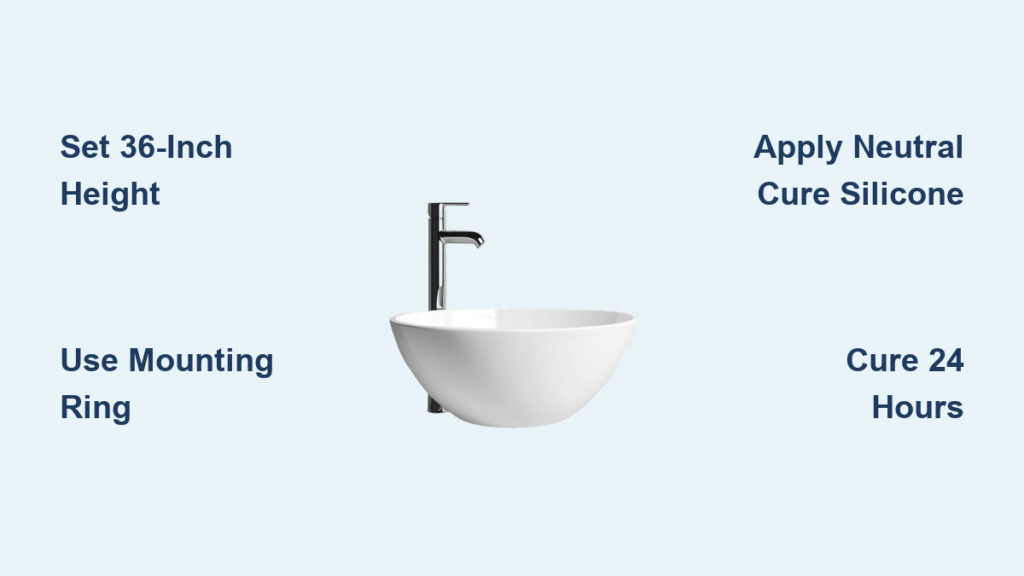
A vessel sink sits above the counter like a bowl, turning an ordinary vanity into a modern centerpiece. But that elevated design demands precise installation, since the weight rests entirely on the countertop and every seal must hold against daily splashing. Done wrong, you face cracked porcelain, wobbly bases, or slow leaks that damage cabinets over time.
This guide breaks down how to install a vessel sink from planning to final testing. You will learn how to pick the right vanity height, mount the sink using three proven methods, connect plumbing without leaks, and avoid the mistakes that ruin most DIY installations.
Choose the Right Vanity and Sink Height
Set the Standard 36-Inch Height
Position the top of the bowl 36 inches from the floor for comfortable daily use. This standard height matches most bathroom ergonomics and prevents wrist strain. For taller households or accessibility needs, adjust within a 34–38 inch range.
Match Sink Size to Countertop Space
Most vessel sinks measure 15 to 20 inches in diameter. Place the sink on the countertop before cutting any holes to confirm clearance. Leave at least 2 inches between the sink edge and any backsplash for easy cleaning.
Pick a Material That Fits Your Lifestyle
Each material has unique care needs:
– Glass: Elegant but fragile; avoid overtightening hardware
– Copper: Use only neutral cure silicone to prevent corrosion
– Natural stone: Seal annually; use stone-safe adhesives
– Bamboo: Requires waterproof coating; avoid prolonged moisture
Gather Your Tools and Materials
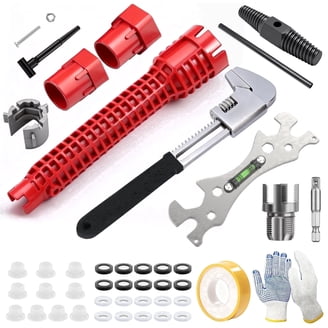
Essential Tools
Collect these before starting:
– Adjustable wrench
– Channel lock pliers
– Silicone sealant (neutral cure for copper)
– Level
– Measuring tape
– Drill with hole saw and jigsaw
– Utility knife
– Screwdriver
– Pipe thread tape (Teflon tape)
– Shims
– Sandpaper
Required Components
Your kit should include:
– Vessel sink
– Vessel-specific faucet (6+ inch spout height)
– Drain assembly with gaskets and lock nut
– Mounting ring (if applicable)
– Water supply lines
– P-trap and slip nuts
Pro Tip: Buy a complete vessel sink kit. It typically includes O-rings, washers, and drain hose, reducing the risk of mismatched parts.
Remove the Old Fixture Safely
Shut Off the Water Supply
Turn off both hot and cold shutoff valves beneath the sink. Open the faucet to drain remaining water and relieve pressure. Disconnect the supply lines using an adjustable wrench to loosen the half-inch nuts on each side.
Disconnect the Drain Plumbing
Loosen the slip nuts on the drain pipe and P-trap. Remove the drain assembly carefully. If the old sink is glued in, cut the connections with a hacksaw.
Take Out the Old Vanity
Slice through caulk along the backsplash with a utility knife. For wall-mounted units, remove the screws securing the top to the base. Pull the vanity forward and inspect for hidden nails or brackets. This is the ideal time to patch drywall, update flooring, or reroute plumbing.
Install and Secure the New Vanity
Locate Wall Studs
Use a stud finder to mark positions behind the planned vanity location. Studs provide the secure anchor points you need; never rely on drywall alone. Transfer plumbing rough-in locations from the wall to the back of the vanity using a tape measure.
Cut Holes in the Countertop
Drill a drain hole with a hole saw sized slightly larger than the pipe diameter. For the faucet, drill a second hole (usually 1–1.5 inches). Smooth rough edges with sandpaper, especially on wood or stone surfaces.
Level and Fasten the Vanity
Slide the vanity into position and check for levelness side-to-side and front-to-back. Insert shims beneath the corners as needed. Drill pilot holes through the back panel into the wall studs and fasten with screws. If no studs align, use heavy-duty wall anchors rated for the cabinet weight.
Mount the Faucet Before the Countertop
Attach the Faucet to the Vanity Top
Installing the faucet before placing the top gives you better access from below. Position the faucet body, then slide the rubber pad and U-shaped metal bracket underneath. Secure with bolts, keeping them snug but not fully tightened.
Apply Thread Seal Tape
Wrap all threaded connections with pipe thread tape to prevent leaks. Connect hot and cold supply lines loosely for now; you will finalize alignment after the sink is in place.
Warning: Never overtighten faucet bolts. Excessive force can crack stone or glass countertops.
Set the Vanity Top in Place
Apply Adhesive Bead
Run a continuous bead of silicone caulk or construction adhesive along the top edge of the vanity frame. Avoid gaps to prevent water intrusion.
Position and Secure
Carefully lower the countertop into place and press down evenly. Attach the backsplash with screws or adhesive, then seal the seam between the backsplash and countertop with additional silicone.
Mount the Vessel Sink Using the Best Method
Silicone Sealant Method
Apply a thick, unbroken bead of silicone around the drain hole on the sink’s underside. Flip the sink right-side up and set it onto the countertop, aligning the drain hole. Press gently to bond, then wipe away excess silicone with a damp cloth.
Countertop Edge Method
Run silicone around the top edge of the cutout on the countertop. Lower the sink into place and press down to form a watertight seal.
Mounting Ring Method (Strongest Hold)
- Place the mounting ring over the drilled hole and center it
- Replace the plastic washer with a silicone bead for a more secure seal
- Add one gasket on top of the sink flange and one beneath the bowl
- Align the overflow hole forward
- Thread the drain pipe through with 5–6 wraps of thread seal tape
- Slide on the rubber gasket and lock nut
- Tighten with channel locks, but do not overtighten
Expert Note: The mounting ring method offers the strongest hold, especially for heavy stone or glass sinks.
Cure for 24 Hours
Do not use the sink for a full 24 hours. Silicone needs this time to cure into a waterproof bond. Using the sink early risks leaks and misalignment.
Install the Drain Assembly
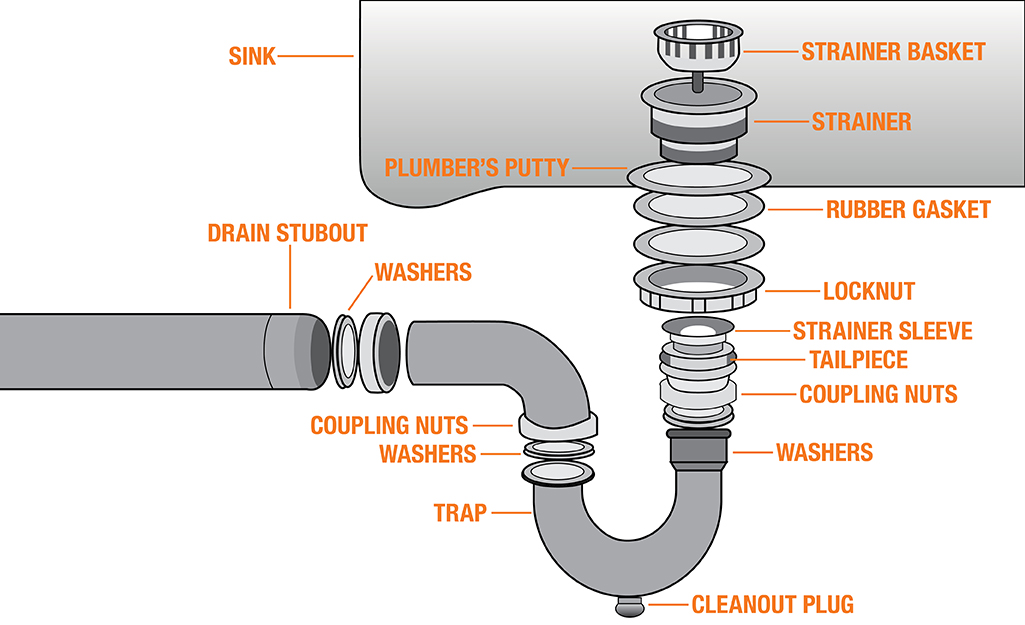
Assemble Components in Order
From top to bottom:
1. Drain flange (with silicone on the underside)
2. Rubber gasket
3. Friction washer
4. Lock nut
Tighten the lock nut from below with channel lock pliers. Stop when snug, since overtightening can crack porcelain or glass.
Adjust the Tailpiece Length
Measure from the sink drain to the P-trap. If the tailpiece is too long, cut it with a hacksaw and deburr the edge. Use a drain extension if needed.
Connect to the P-Trap
Attach the tailpiece to the P-trap with slip nuts. Ensure the trap is level and aligned, then wipe away any squeezed-out silicone.
Connect Water and Drain Lines

Reconnect Supply Lines
Attach the hot and cold water lines to the faucet tailpieces. Hand-tighten first, then give a quarter-turn with an adjustable wrench. Do not crank down, as this can damage valves.
Finalize the Drain Hookup
Double-check that the P-trap is secure and correctly sloped. The trap must hold a water seal to block sewer gases. Reconnect any drain extensions or hoses.
Test for Leaks and Finish the Job
Turn On the Water and Inspect
Open both shutoff valves slowly and let water run for 1–2 minutes. Check every connection:
– Base of the faucet
– Supply line joints
– Drain flange
– P-trap and slip nuts
If you spot a drip, tighten slightly or reapply thread seal tape. Never force connections.
Clean and Polish
Wipe away excess caulk with a damp cloth. Clean the sink with a non-abrasive cleaner, then install accessories like soap dispensers or towel bars.
Upgrade Mirror and Lighting
For a cohesive look, replace the mirror and lighting to match the sink’s style. A backlit mirror or matching sconces enhance both visibility and ambiance.
Special Tips by Sink Material
Copper Sinks
Always use neutral cure silicone. The acetic acid in standard silicone can corrode copper over time.
Glass Sinks
Handle with gloves to avoid fingerprints and stress cracks. Mount with extra care, since glass fractures easily under pressure.
Stone Sinks
Use sealants compatible with natural stone. Re-seal annually to prevent staining and water absorption.
DIY Bowl Sink Alternative
Convert a Ceramic Bowl into a Sink
A beautiful handmade bowl can become a functional sink with a few modifications:
1. Choose a deep, wide ceramic or glass bowl designed for water exposure
2. Drill a hole in the bottom using a glass/tile bit for glass bowls
3. Install a threaded drain kit with a waterproof gasket
4. Mount using silicone around the countertop edge
5. Connect to standard plumbing
Avoid thin or decorative ceramics that cannot handle daily water exposure.
Avoid These Common Installation Mistakes
Overtightening Drain Nuts
This is the leading cause of cracked sinks. Finger-tight plus a light wrench turn is enough.
Skipping the 24-Hour Cure
Using the sink too soon breaks the silicone seal. Patience prevents leaks.
Ignoring Overflow Alignment
The overflow hole must face forward. Misalignment blocks airflow and causes slow drainage.
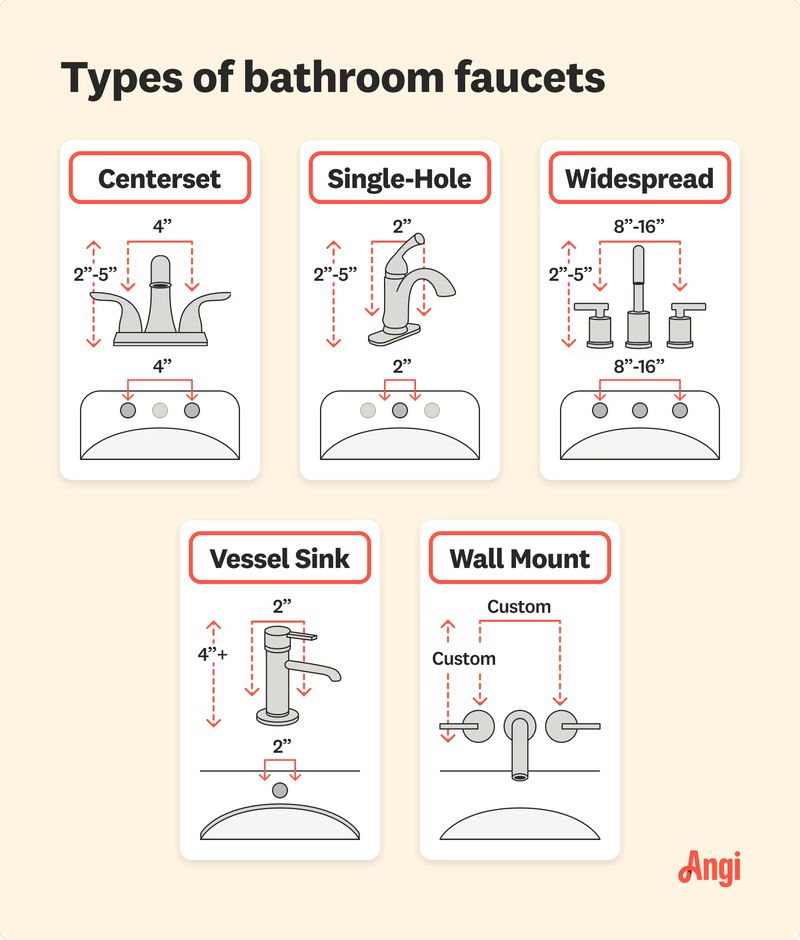
Using the Wrong Faucet
Standard faucets are too short. Use a vessel faucet with a 6+ inch spout height to prevent splashing.
Pre-Use Checklist
- Vanity is level and secured to studs
- Faucet is mounted and supply lines connected
- Sink is centered and sealed with silicone
- Drain flange is tight and tailpiece adjusted
- P-trap is installed and leak-free
- All connections tested under water pressure
- 24-hour cure time observed
Frequently Asked Questions About Vessel Sink Installation
How long does it take to install a vessel sink?
Most DIY installations take 3–5 hours of active work, plus a 24-hour curing period before the sink can be used. Complex plumbing modifications may extend the timeline.
Do vessel sinks need a special faucet?
Yes. Vessel faucets have taller spouts (6+ inches) to reach over the raised bowl. Standard faucets sit too low and cause water to splash outside the sink.
Can I install a vessel sink on any vanity?
Your vanity must be lower than standard (typically 30–32 inches) to compensate for the raised bowl, so the total height reaches the comfortable 36-inch mark. The countertop must also support the sink’s weight and have a properly sized drain hole.
What is the best adhesive for a vessel sink?
Neutral cure silicone is the safest choice for most materials. For copper sinks, it is essential, since standard silicone contains acetic acid that corrodes copper.
Why is my vessel sink wobbly after installation?
A wobbly sink usually means the countertop is uneven or the vanity needs shimming. Place a level across the surface and adjust shims beneath the vanity until the top is perfectly flat.
Can I convert a regular bowl into a vessel sink?
Yes, as long as the bowl is durable, deep enough for hand washing, and compatible with a standard drain assembly. Drill a drain hole carefully and seal with waterproof silicone.
Key Takeaways for a Successful Vessel Sink Installation
Installing a vessel sink comes down to three essentials: the right height, a watertight seal, and patience during curing. Set the vanity so the bowl top reaches 36 inches, choose the mounting ring method for heavy sinks, and always use neutral cure silicone on copper. Respect the 24-hour cure time, and your new sink will deliver years of style without leaks or cracks. Gather your tools, follow the sequence, and enjoy a bathroom upgrade that looks professionally done.







