
You open your kitchen cabinet and catch a whiff of something musty. When you look closer, there it is—dark, fuzzy patches growing on the underside of the cabinet. Mold. And worse, you spot a drip from a loose pipe connection. You’re not alone. Leaks under sinks are common, and where there’s moisture, mold follows. Learning how to get rid of mold under sink is essential for protecting your home and health.
Mold thrives in dark, damp spaces, and the area under your sink is a perfect breeding ground when leaks go unnoticed. Left untreated, mold can spread to surrounding wood, insulation, and even enter your home’s airflow. The good news? With the right steps, you can safely eliminate mold and fix the source of moisture yourself. This guide walks you through identifying the leak, removing mold safely, and preventing future outbreaks.
Stop the Leak First
Before cleaning mold, fix the water source. Cleaning mold on wet surfaces is pointless because it will return within days.
Shut Off Water Supply
Turn off the shutoff valves under the sink. Most sinks have two valves, one for hot water and one for cold. Turn them clockwise until tight. If valves are stuck or leaking, shut off the main water supply to your home.
Pro Tip: Test that water is off by turning on the faucet. No flow means it is safe to work.
Identify the Leak Source
Common culprits include:
- Loose supply line connections
- Worn washers or O-rings
- Corroded pipes
- Faulty P-trap seals
Inspect each joint carefully. Look for drips, mineral buildup, or damp insulation. The connection between the water supply line and faucet is a frequent failure point that requires attention.
Tighten or Replace Fittings
Use an adjustable wrench to gently tighten the nut connecting the supply line to the faucet. Do not over-tighten because this can damage the threads. If the leak persists:
- Replace the rubber washer inside the fitting
- Consider upgrading to a braided stainless steel supply line for better durability
If pipes are corroded or valves will not shut off, call a plumber. Do not risk flooding your kitchen.
Dry the Area Completely
Mold cannot grow without moisture. After stopping the leak, dry everything thoroughly before cleaning.
Remove Cabinet Contents
Take out cleaning supplies, trash cans, or stored items. Place them on a towel to check for dampness on the bottom.
Wipe and Ventilate
Use absorbent towels to soak up standing water. Then follow these drying steps:
- Open cabinet doors for airflow
- Place a fan nearby to speed drying
- Use a dehumidifier if humidity is high
Wait at least 24 hours before cleaning mold. Working on a damp surface spreads spores and reduces cleaner effectiveness.
Choose the Right Mold Removal Method
Not all cleaners kill mold. Some only bleach the color without addressing the root. Use products designed to eliminate mold completely.
Use EPA-Registered Mold Killers
Look for products labeled “mold and mildew remover” with active ingredients like:
- Sodium hypochlorite (bleach alternative)
- Hydrogen peroxide
- Concrobium Mold Control
- RMR-86
Avoid plain vinegar on porous wood because it may not penetrate deeply enough to kill root structures.
DIY Solution for Small Areas
Mix the following in a spray bottle or bucket:
- 1 cup household bleach (6% sodium hypochlorite)
- 1 gallon warm water
Only use bleach on non-porous surfaces like metal pipes or plastic tubing. Do not use it on wood or particleboard.
Clean Mold Safely
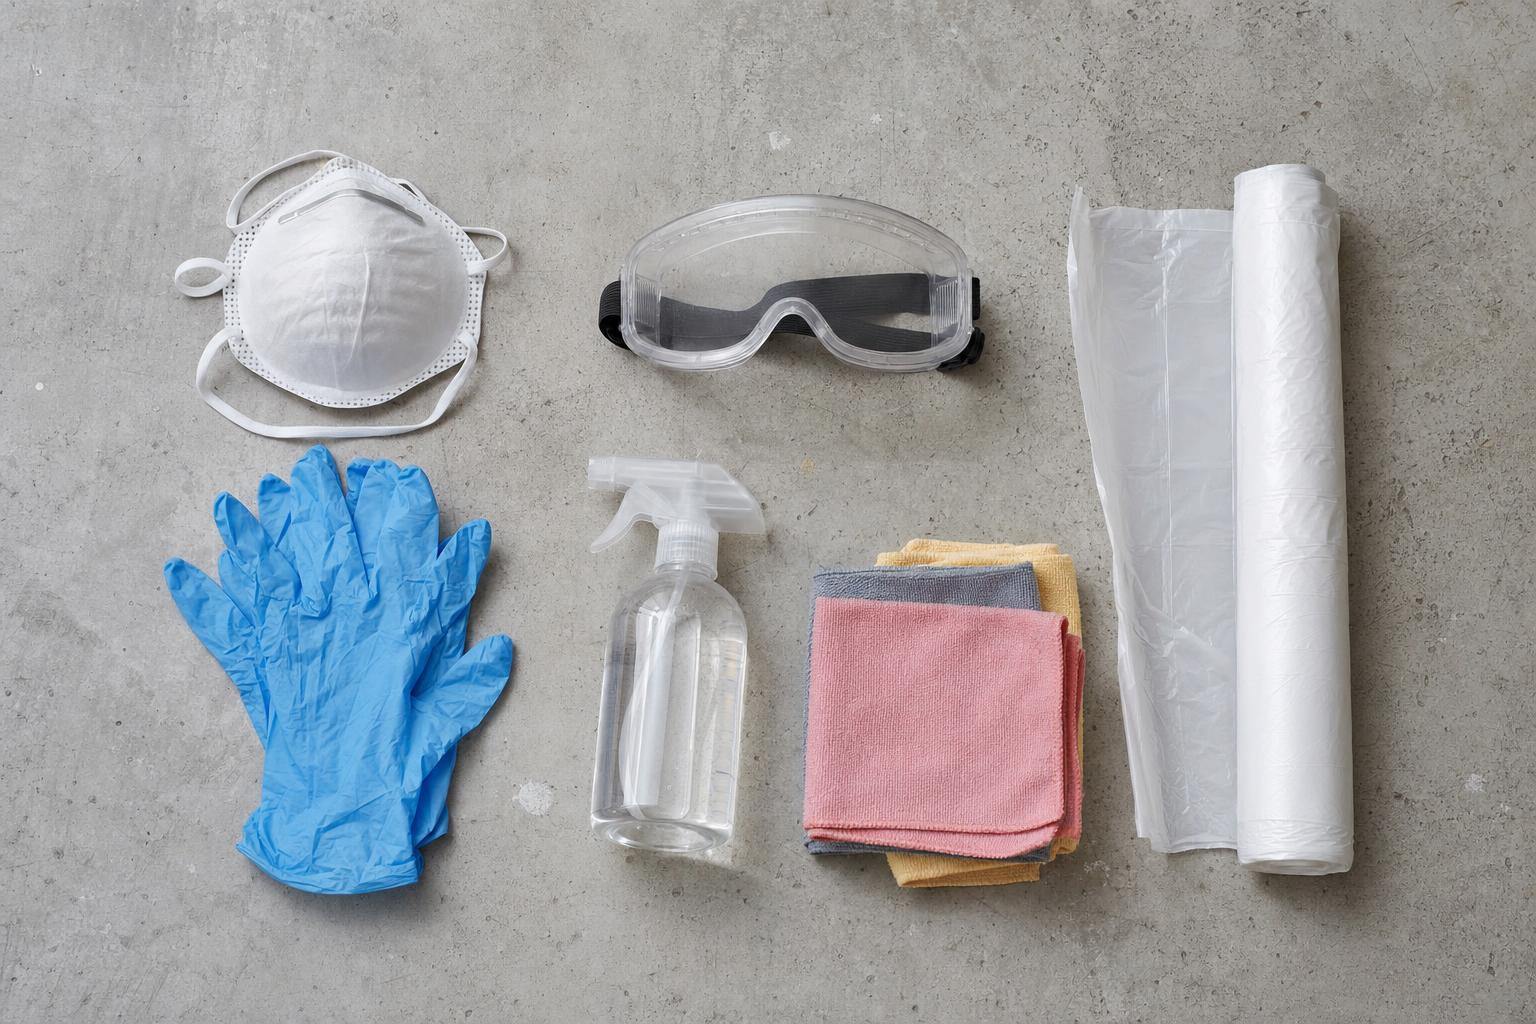
Protect yourself during cleanup. Mold spores can irritate lungs, especially for people with allergies or asthma.
Wear Protective Gear
Before scrubbing, put on the following items:
- Nitrile gloves
- N95 mask
- Safety goggles
Avoid cloth masks because they do not filter spores effectively.
Scrub Moldy Surfaces
Dip a stiff-bristle brush or sponge into your cleaner. Scrub all visible mold, focusing on these key areas:
- Underside of the sink base
- Cabinet walls and floor
- Pipe fittings and joints
Pay attention to corners and seams where moisture collects and mold hides.
Visual cue: Mold often looks black, green, or gray and feels slimy or fuzzy to the touch.
Rinse and Dry
Wipe surfaces with clean water if required by the product label. Then dry immediately with a clean towel. Run a fan or dehumidifier for 6 to 12 hours to ensure complete dryness.
Treat Porous Materials Differently

Cabinet wood, insulation, or cardboard boxes that stayed wet for over 48 hours may be beyond simple cleaning.
When to Remove Instead of Clean
Discard affected materials if:
- Wood is soft, warped, or crumbling
- Mold has penetrated deep into particleboard
- Insulation under the sink is damp or discolored
Cut out damaged sections with a utility knife and replace them with moisture-resistant materials.
Never sand moldy wood because this releases spores into the air and spreads contamination.
Prevent Future Mold Growth
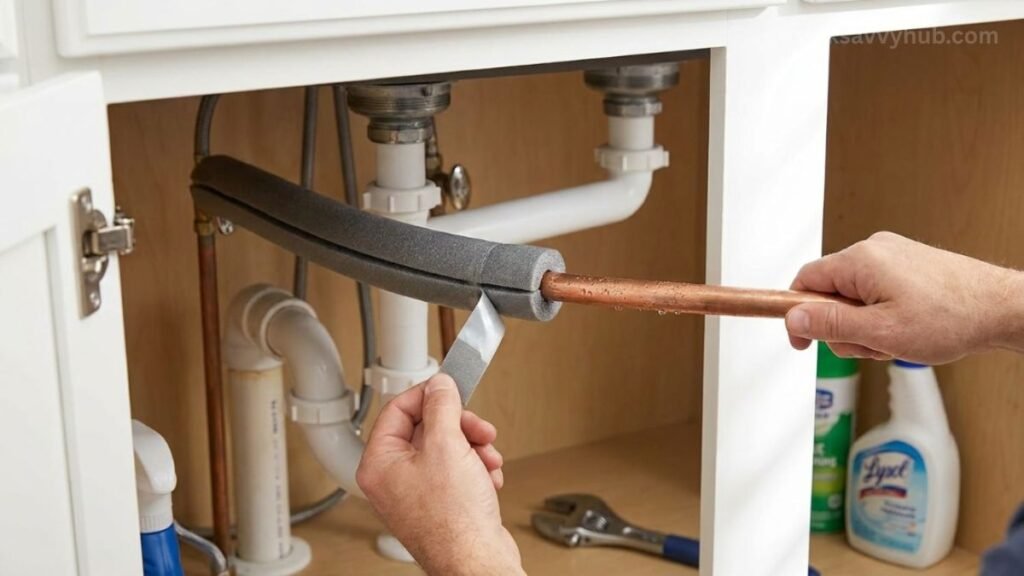
Stopping mold long-term means controlling moisture and monitoring for leaks regularly.
Install a Leak Detection Pad
Place a leak detection pad under the sink. It changes color when wet, giving you an early warning before mold starts to grow.
Insulate Cold Water Pipes
Condensation on cold pipes can drip and dampen cabinets. Wrap pipes with foam insulation sleeves to prevent sweating and moisture buildup.
Check Every 3 Months
Set a calendar reminder to perform these quick inspections:
- Inspect connections for drips
- Smell for mustiness
- Wipe down surfaces if humid
Pro Tip: Place a small moisture absorber like DampRid in the cabinet to reduce humidity levels.
Know When to Call a Professional
Some situations require expert help to ensure the problem does not cause health risks or structural damage.
Call a Plumber If:
- Shutoff valves are damaged
- Pipes are corroded or leaking at joints
- You cannot locate the leak source
Call a Mold Remediation Specialist If:
- Mold covers more than 10 square feet
- Mold returns after cleaning
- You suspect mold in walls or flooring
Professionals use HEPA vacuums, containment barriers, and air scrubbers to prevent cross-contamination throughout your home.
Repair and Reorganize the Cabinet
Once dry and mold-free, restore the space to a safe, functional condition.
Replace Old Plumbing Parts
Upgrade to these more durable options:
- Stainless steel supply lines
- Plastic or brass compression fittings
- Dielectric unions if mixing metals
These materials last longer and resist corrosion better than older components.
Use Mold-Resistant Storage
Store items in sealed plastic bins rather than cardboard. Elevate containers on a plastic tray to avoid direct floor contact with any residual moisture.
Add Ventilation
If the cabinet stays humid, install a small vent or leave doors slightly ajar when possible to improve airflow.
Monitor for Recurrence
Even after thorough cleanup, mold can come back if conditions allow. Stay alert for these warning signs:
- Musty odor returns
- Water stains reappear
- Condensation forms on pipes
Immediate action stops small issues from becoming big problems.
Test Air Quality (Optional)
Use a home mold test kit if you are concerned about spores in your kitchen air. Kits are affordable and send samples to a lab for analysis.
Frequently Asked Questions About Mold Under the Sink
Is mold under the sink dangerous?
Yes, mold under the sink can pose health risks, especially for people with allergies, asthma, or weakened immune systems. Mold spores can irritate lungs and trigger respiratory issues. Long-term exposure may cause chronic symptoms, so addressing mold promptly is important.
Can I remove mold under the sink myself?
You can remove mold yourself if the affected area is small (under 10 square feet) and you have the proper protective gear. Fix the leak source, dry the area completely, and use EPA-registered mold killers. For larger infestations, hire a professional.
What kills mold instantly?
Bleach-based products and EPA-registered mold removers kill mold on contact. However, instant killing does not replace thorough cleaning and moisture removal. Mold can regrow if the underlying dampness is not addressed.
How do I know if mold is behind my walls?
Signs of hidden mold include persistent musty odors, water stains on walls, peeling paint, or visible discoloration. If you suspect mold behind walls, call a remediation specialist. They use moisture meters and thermal imaging to detect hidden growth.
Should I replace the cabinet if it has mold?
Replace the cabinet if mold has penetrated deep into particleboard or if the structure is soft, warped, or crumbling. Surface mold on solid wood can often be cleaned. Cut out and replace only the damaged sections when possible.
How can I prevent mold from coming back?
Prevent mold by fixing leaks promptly, keeping the cabinet dry, improving ventilation, and inspecting every few months. Use moisture absorbers and leak detection pads for added protection against future outbreaks.
Final Thoughts on Removing Mold Under Your Sink
Learning how to get rid of mold under sink is about more than just scrubbing away visible spots. The real solution involves three critical steps: stopping the leak at its source, thoroughly drying the affected area, and taking preventive measures to keep moisture out. Most small mold issues can be handled safely with basic tools, protective gear, and EPA-registered cleaners.
The key is acting fast. Delay gives mold time to spread into wood, insulation, and your home’s air, increasing both health risks and repair costs. By following the steps outlined above, you protect your home, your health, and your wallet from the damage mold can cause. Start today by inspecting under your sink, addressing any leaks, and creating a dry, mold-free environment for the long term.







