
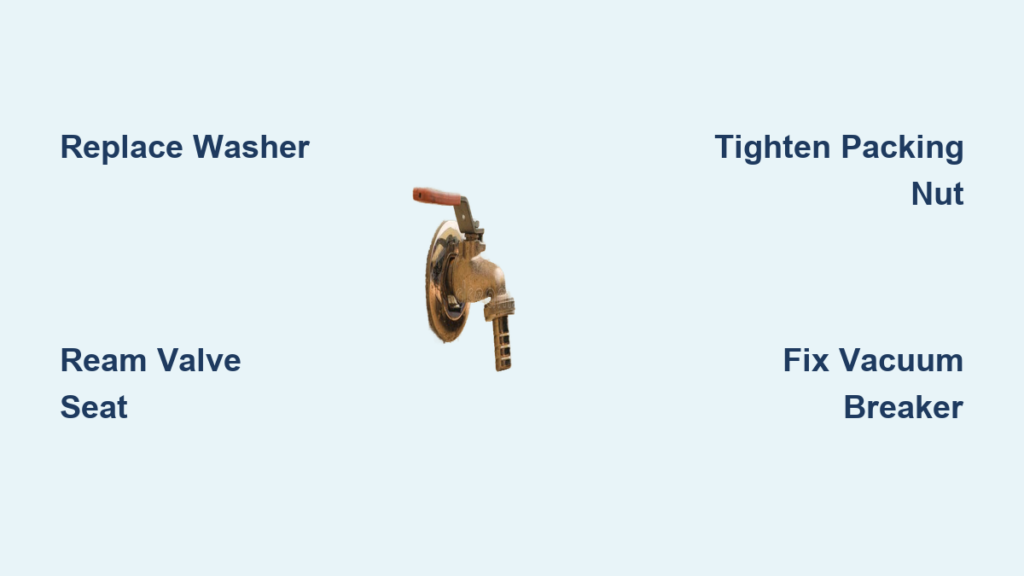
Is your outdoor faucet dripping, spraying, or refusing to shut off completely? A leaky hose bib faucet isn’t just annoying, it’s wasting water, increasing your utility bill, and potentially damaging your home’s foundation or siding. The good news: most hose bib repairs are simple, affordable, and can be done in under 30 minutes with basic tools. Whether it’s a slow spout drip, a spray from the handle, or a leak from the vacuum breaker, this guide shows you exactly how to fix a hose bib faucet step by step.
You’ll learn how to identify the type of leak, replace worn washers or packing, ream a damaged seat, fix vacuum breakers, and know when it’s time to replace the entire unit. We also cover preventive maintenance to avoid winter freeze damage, which is the leading cause of permanent failure.
Diagnose Where Your Hose Bib Leaks
Before disassembling anything, pinpoint exactly where the leak occurs. Each location points to a specific repair method.
Dripping from the Spout
If water drips from the nozzle even after fully closing the handle, the washer or valve seat is likely faulty. This is the most common leak type, affecting 75-80% of outdoor faucets. The rubber washer at the end of the stem wears out over time and fails to seal against the brass seat. You can confirm this if the drip continues for minutes after shutting off.
Spray from Handle or Stem
Water spraying or weeping around the handle area indicates a packing nut or stem seal failure. The bonnet packing that seals around the moving stem has degraded. This leak only appears when the faucet is open and under pressure. Left unattended, this can erode the stem or lead to full handle leakage.
Leak from Top or Side Vent
If water escapes from the top of the faucet or a small side opening, especially during use, the vacuum breaker is failing. Common on frost-free models, this part prevents contaminated water from backing into your home’s supply. These leaks often worsen with water pressure.
Moisture Near Handle Base
Minor moisture near the base of the handle on certain models points to a worn O-ring. Found in multi-turn or cartridge-style bibs, this small rubber ring degrades with age and use.
Shut Off Water and Prepare for Repair
Never start repairs without cutting the water supply first.
Locate and Close Indoor Shutoff
Find the dedicated indoor shutoff, usually in the basement, crawlspace, or utility room near the hose bib’s wall penetration. Turn it clockwise to close. If no dedicated valve exists, shut off the main water supply. Label future shutoffs for faster access during emergencies.
Drain the Line
Open the hose bib fully and let water drain out. Leave the handle open during repairs to prevent accidental pressurization when reassembling. This simple step prevents water spray when you reinstall components.
Gather Required Tools and Parts
Have these items on hand before starting:
- Adjustable wrench
- Phillips and flathead screwdrivers
- Pliers or basin wrench
- Flashlight
- Replacement washers (rubber and brass)
- Teflon tape
- Seat reamer (faucet seat dresser)
- Vacuum breaker kit
- O-rings
- Rag to protect finish
A full repair kit costs under $25 at most home improvement stores.
Replace the Washer to Fix Spout Drip
This is the number one fix for a dripping hose bib faucet.
Remove Bonnet and Stem
Use an adjustable wrench to loosen the bonnet nut. If the handle won’t turn, remove it first with a screwdriver by looking for a set screw underneath. Once the nut is off, pull the stem straight out. If stuck, gently twist while pulling. Forcible yanking can damage internal threads.
Inspect and Swap the Washer
At the base of the stem, you’ll find a quarter-inch Phillips-head screw holding the washer. Unscrew it carefully since stripped screws are common. Remove the old washer and look for cracks, flattening, brittleness, or uneven wear.
Install a new washer of identical size. Place the smooth side facing the seat (printed or marked side out). Tighten the screw firmly, but do not over-tighten. Consider using a brass washer for high-use faucets since it lasts 3-5 times longer than rubber.
Reinstall and Test
Slide the stem back in, replace the bonnet, and hand-tighten the nut. Snug it with a wrench but avoid brute force. Restore water, close the faucet, and check for drips. This fix resolves 70% of spout leaks.
Ream the Valve Seat If Drip Persists

If a new washer doesn’t stop the drip, the brass seat is likely pitted or corroded.
Use a Seat Reamer
With the stem removed, insert a seat reamer into the valve opening. Rotate it clockwise several times to smooth the surface. This tool cuts away imperfections, creating a flat, shiny sealing surface. Wipe out metal shavings with a rag or blow them out with compressed air before reinstalling the stem.
Stop once the surface is uniform since over-reaming soft brass seats can ruin them permanently.
Custom Tool for Deep Seats
On frost-free models like Woodford Model 19, the seat may be too deep for standard reamers. Create a custom tool by getting a 20-inch 3/8-inch all-thread rod, bending one end 90 degrees in a vise for a handle, and threading a seat cutter onto the rod. Insert and turn gently. This DIY solution reaches seats up to 12 inches inside the wall.
Fix Stem or Packing Leaks
Water spraying from the handle means the packing material has failed.
Try Tightening the Packing Nut
First, attempt to snug the packing nut just below the handle with a wrench. Turn clockwise slightly. Most minor leaks stop here. This works about 60% of the time, but stop if the handle becomes hard to turn.
Wrap Stem with Teflon Tape
If tightening fails, remove the bonnet and stem. Wrap 2-3 layers of Teflon tape around the stem where it passes through the packing. Reinsert the stem, reassemble, and tighten the nut. This fixes 75% of stem leaks and can be permanent in moderate-use settings.
Install New Bonnet Packing
For long-term reliability, replace with graphite-impregnated fiber string or Teflon packing. Wrap the material clockwise around the stem and compress it with the bonnet nut during reassembly. Use factory-specified packing when available.
Replace a Faulty Vacuum Breaker
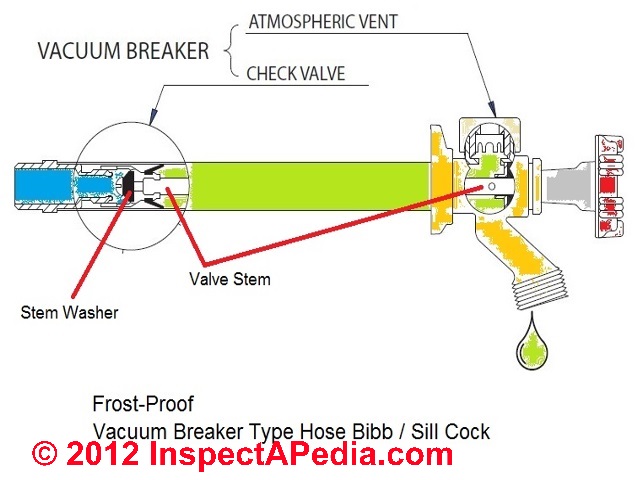
Essential on frost-free models to prevent backflow contamination.
Signs of Vacuum Breaker Failure
Water leaking from the top or side vent, reduced water flow, or gurgling sounds all indicate vacuum breaker problems. These devices prevent contaminated water from entering your home’s potable supply.
Remove and Replace Steps
Gently pry off the plastic cover on top. Unscrew the plastic body by hand and do not use pliers since they can crack it. Remove the old float and gasket. Install the new float included in repair kits. Place the new gasket with the rounded side up. Screw the body back on hand-tight and snap the cover into place.
Test under pressure. No leaks mean you’ve restored both function and safety. Use Cash Acme-type or model-specific kits like those for Woodford Model 19.
Replace a Faulty O-Ring
Found in some multi-turn or cartridge-style hose bibs.
Remove and Inspect
After pulling the stem, look for a small rubber O-ring near the top. If cracked, flattened, or missing, replace it. Use an identical size available in O-ring repair sets.
Install with Proper Lubrication
Lubricate with silicone grease before reassembly to extend life and ensure smooth operation. Never use petroleum-based grease since it degrades rubber.
When to Replace the Entire Hose Bib
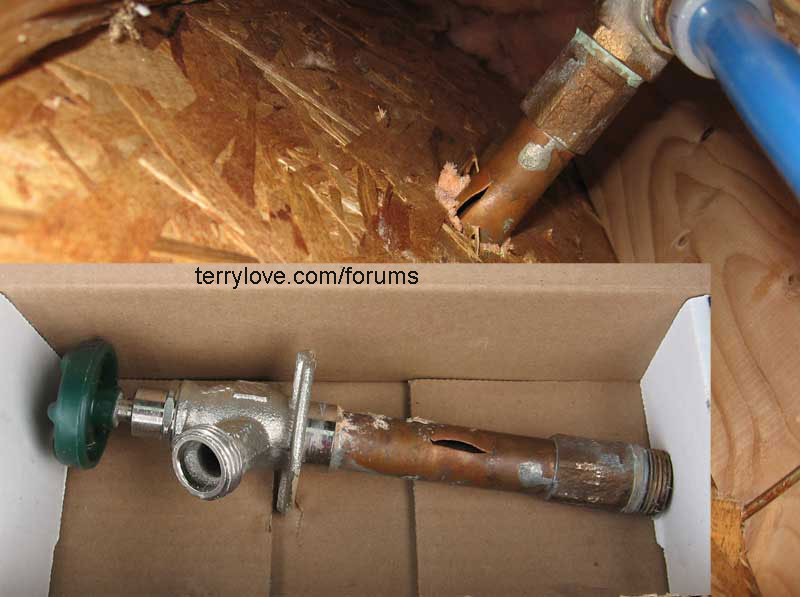
Some damage cannot be fixed with repairs alone.
Cracks from Freeze Damage
If the faucet body is cracked, bulging, or split, freezing has caused structural failure. Water trapped inside expands when frozen, breaking the brass or plastic housing. Install a frost-free sillcock where the valve seat is located 6-12 inches inside the heated part of your home.
Severe Corrosion or Pitting
Galvanized or non-DZR brass units corrode in humid or coastal areas. If the body is soft, powdery, or leaking at the wall, replacement is mandatory. Upgrade to DZR brass, lead-free, or stainless steel models.
Stripped Threads or Broken Internals
If the stem won’t seat, the handle spins freely, or the bonnet won’t tighten, internal damage is likely. Repeated repairs won’t help. Use push-to-connect hose bibs like SharkBite for a fast fix without soldering.
Recurring Leaks After Repairs
If you’ve replaced washers, packing, and seats but leaks persist, the unit is fatigued. Material stress leads to micro-leaks that are impossible to seal. Replace with a 25-year warranty model.
Prevent Future Hose Bib Problems
Avoid repairs with smart maintenance.
Winterize Annually
Critical in cold climates. Shut off the indoor water supply. Open the hose bib to drain. Leave the handle open until spring to prevent trapped water from freezing. Insulate supply pipes with foam pipe sleeves. Keep unheated areas above 55°F.
Remember that frost-free doesn’t mean freeze-proof. Without proper draining, they can still burst.
Install Frost-Free Sillcocks
Best defense against winter damage. The long stem moves the valve inside your home’s warm zone. Pitch the faucet slightly downward for full drainage.
Perform Annual Checkups
Every spring, tighten the packing nut, replace washers every 2-3 years, and inspect vacuum breakers and O-rings. Keep a repair kit handy with spare washers, O-rings, Teflon tape, seat reamer, and model-specific parts.
Cost and Time Summary
| Repair | Cost | Time |
|---|---|---|
| Washer or packing | $10-$20 | 20-30 min |
| Vacuum breaker | $15-$25 | 15-20 min |
| Seat reaming | $6-$10 tool | 45-60 min |
| Full replacement | $30-$80 | 1-2 hours |
Professional installation runs $120-$500 including labor and unit.
Consequences of Ignoring the Leak
A small drip adds up fast. The EPA estimates over 10,000 gallons wasted per year from household leaks, enough to fill 270 laundry loads. This causes wood rot, foundation damage, and frozen pipe bursts while increasing water bills by $100 or more annually.
When to Call a Plumber
DIY works for most issues, but call a pro if there’s no accessible shutoff valve, hidden pipe damage behind walls, freeze damage affected the wall structure, or you’re uncomfortable cutting or soldering pipes. Most home warranties exclude hose bibs, so check your policy.
Final Thoughts on Fixing Your Hose Bib Faucet
Fixing a hose bib faucet is one of the easiest, most cost-effective home repairs. With a $10 washer and 20 minutes of effort, you can stop leaks, save water, and prevent costly damage. The key steps are shutting off water first, identifying where the leak originates, replacing the washer or packing as needed, and reaming the seat if dripping persists.
Upgrade to frost-free or SharkBite models for long-term reliability. Stay proactive since annual maintenance prevents 90% of failures. Your faucet, wallet, and home will thank you.
Frequently Asked Questions About Fixing Hose Bib Faucets
Why does my hose bib faucet drip even when turned off?
This is usually caused by a worn washer or damaged valve seat. The rubber washer at the end of the stem loses its seal over time. Replace the washer first, and if dripping persists, ream the valve seat to remove pitting or corrosion.
Can I fix a hose bib leak myself without a plumber?
Yes, most hose bib leaks are DIY-friendly. The most common fixes (washer replacement, packing repair) require basic tools and cost under $25. However, call a professional if there’s no shutoff valve, hidden pipe damage, or you’re uncomfortable with plumbing work.
How often should I replace washers in my outdoor faucet?
Replace washers every 2-3 years as preventive maintenance, even if no leak is visible. Annual inspection helps catch wear before it causes dripping. High-use faucets may need more frequent replacement.
What is a frost-free sillcock and do I need one?
A frost-free sillcock has a long stem that places the valve seat 6-12 inches inside your home’s heated space. This prevents freeze damage in cold climates. If you live where temperatures drop below freezing, upgrading to a frost-free model eliminates most winter-related failures.
How much does it cost to replace a hose bib faucet?
DIY replacement costs $30-$80 for the unit itself. Professional installation runs $120-$500 including labor. Push-to-connect models like SharkBite make installation easier with no soldering required.







