
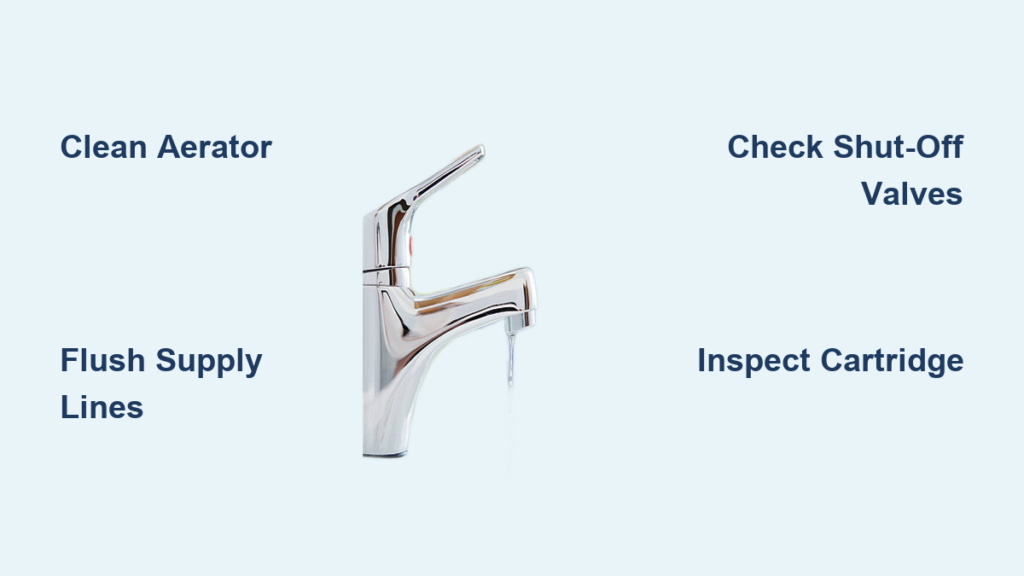
Is your faucet delivering a weak stream that takes forever to fill a pot or wash your hands? You’re not alone. Low water flow is one of the most common plumbing complaints, and the fix is often simpler than you think. The good news is that in over 90% of cases, adjusting water flow starts with the aerator, a small but mighty component at the tip of your faucet. This guide walks you through proven, step-by-step methods to restore optimal flow, whether you’re dealing with clogs, flow restrictors, or hidden debris.
You’ll learn how to test flow, clean critical parts, and make smart upgrades using just basic tools and household supplies. By understanding the key components that control water flow, you can diagnose issues quickly and implement the right solution without calling a plumber.
Clean the Faucet Aerator

The aerator is the number one culprit behind low faucet flow. Over time, mineral deposits from hard water clog its tiny holes, reducing output dramatically. Cleaning it often restores full performance in minutes.
Remove and Disassemble the Aerator
Start by turning off the water and wiping the spout dry. Wrap a cloth around the aerator to protect the finish, then unscrew it by hand. If stuck, use adjustable pliers gently. Never force it, as this can crack the plastic or damage the threads. Once removed, place the parts in a bowl to avoid losing small components.
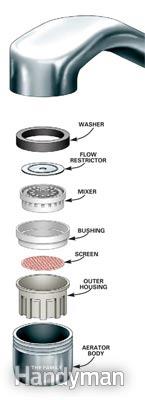
Most aerators contain three key pieces:
• A rubber washer that creates a seal
• A mesh screen that filters debris
• A plastic or metal diffuser, often blue, that mixes air with water
Lay them out in order for easy reassembly.
Soak in Vinegar to Remove Limescale
Fill a small container with white vinegar and submerge the aerator parts for at least 15 minutes. For heavy buildup, leave them overnight. Vinegar dissolves calcium and lime naturally without harsh chemicals. After soaking, scrub each piece with a stiff toothbrush to dislodge remaining particles.
Use a pin or needle to clear any blocked holes in the diffuser. This step is crucial because even a few clogged holes can significantly reduce flow. Rinse thoroughly with warm water before reassembly.
Reinstall and Test Water Flow
Reassemble the parts in reverse order: washer first, then screen and diffuser. Screw the aerator back onto the faucet by hand until snug. Finish with a quarter-turn using pliers. Over-tightening can crack plastic or damage threads.
Turn the water on briefly without the aerator to flush out any debris, then reinstall it. Run both hot and cold water to check for improved flow. If the stream is now strong and steady, you’ve solved the issue.
Pro Tip: Replace the aerator every 2 to 3 years, or annually in hard water areas. A new one costs $2 to $10 and ensures consistent performance.
Fix Pull-Out Faucet Flow Issues
If you have a kitchen faucet with a spray head, low flow may stem from a hidden filter inside the hose base, not the aerator. These filters trap sediment but clog easily, especially in well water systems.
Locate and Remove the Internal Filter
Pull the spray hose fully out. At the base, where it connects to the faucet, look for a small retaining nut. Use pliers to loosen it counterclockwise. Carefully remove the cap or handle to expose the cylindrical metal mesh filter inside. Pull it out gently. Don’t force it if stuck, as the mesh can tear.
Clean Filter and Flush Hose
Rinse the filter under warm water and scrub with a toothbrush. Soak in vinegar if mineral-coated. While it’s out, turn on the faucet briefly to flush water through the hose and clear any trapped debris. This reverse flush helps remove hidden buildup that you can’t see.
Once clean, reinsert the filter, replace the cap, and tighten the nut by hand, then with pliers. Test the spray function. Flow should be noticeably stronger.
Warning: Never operate the faucet without the filter in place. It protects internal valves from damage and debris that could cause leaks.
Flush Supply Lines to Clear Debris

Even with a clean aerator, sediment in supply lines can restrict flow, especially after plumbing repairs or in older homes with galvanized pipes.
Disconnect and Reverse-Flush the Hoses
Shut off both hot and cold water valves under the sink. Place a bucket beneath the hot supply line. Use a 17mm wrench to loosen the connection at the faucet end. Open the cold water valve briefly. This forces cold water backward through the hot line, pushing out debris.
Let it run for 10 to 30 seconds until the water runs clear. Reconnect and tighten, hand-tight first, then a quarter-turn with the wrench. Repeat for the cold line if needed.
Check for Kinks and Wear
While lines are accessible, inspect them for kinks, bulges, or corrosion. Collapsed rubber liners can block flow even if the outside looks fine. Replace old rubber hoses with braided stainless steel supply lines. They resist kinking, bursting, and degradation.
Visual Cue: Clear, uninterrupted water during flushing means lines are clean. Cloudy or gritty flow indicates ongoing sediment issues.
Adjust or Remove the Flow Restrictor
Many faucets come with built-in flow restrictors to meet federal water conservation standards, which limit bathroom faucet flow to 2.2 GPM at 60 PSI. While eco-friendly, they can reduce performance, especially with tankless water heaters.
Identify the Flow Restrictor
Inside the aerator or faucet body, look for a small plastic or metal disc with micro-perforations. It’s often marked with a GPM rating, such as 1.5. This component limits volume regardless of pressure.
Remove or Upgrade the Restrictor
To increase flow, remove the restrictor entirely or replace it with a higher GPM model, such as 2.2 GPM. Reassemble the aerator and test. If the stream improves, you’ve successfully adjusted flow.
Caution: Removing flow restrictors may violate local water regulations, especially in drought-prone states like California. Check local codes before modifying.
Tankless Heater Tip: Units need 0.5 to 0.8 GPM to ignite. If hot water won’t start, install a 0.8+ GPM aerator or remove the restrictor.
Inspect the Faucet Cartridge
If both hot and cold water flow weakly, and aerator, filters, and lines are clean, the issue may be internal to the faucet itself.
Remove and Examine the Cartridge
Shut off water supply. Remove the handle, often secured by a screw under a cap. Use pliers or a cartridge puller to extract the unit. Inspect for cracks, warping, or mineral buildup in the channels. Soak in vinegar for 30 minutes to dissolve scale.
If damaged, replace with an OEM part. Match the model number exactly to ensure compatibility.
Reinstall and Balance Flow
Insert the cleaned or new cartridge, reattach the handle, and turn water back on. Test both temperatures. Full handle extension should deliver maximum flow. If not, the cartridge isn’t seated properly or is incompatible.
Expert Note: Worn cartridges can restrict flow even when fully open. This is common in single-handle faucets after 5 to 10 years of use.
Verify Shut-Off Valve Operation
Partially closed valves are a silent cause of low flow and temperature imbalance. Many homeowners don’t realize their valves aren’t fully open.
Ensure Full Valve Opening
Under the sink, check both hot and cold shut-off valves. The handle should be aligned with the pipe when fully open. Turn each counterclockwise until it stops. If a valve won’t turn, it may be seized. Lubricate with penetrating oil or replace it.
Equalize Valve Settings
Mismatched valve positions can cause one side to dominate. For balanced flow and temperature, both valves should be equally open. This is crucial for single-handle faucets to reach full output.
Warning: Never operate a faucet with one valve closed. This creates backpressure and can damage the cartridge.
Regulate Whole-House Water Pressure
Excess pressure over 80 PSI increases flow but risks leaks, noise, and pipe damage. High pressure doesn’t always mean optimal performance.
Install a Pressure-Reducing Valve
If water sprays aggressively or you hear banging, install a pressure regulator on the main water line. This device maintains safe pressure, typically 60 PSI, regardless of municipal supply spikes.
Test Household PSI
Use a $10 pressure gauge attached to an outdoor spigot. Turn on the water. Ideal range is 40 to 60 PSI. Above 80 PSI? Call a plumber to install or adjust the regulator.
Benefit: A regulator extends fixture life, reduces water waste, and prevents costly bursts.
Measure and Optimize Flow Rate
Know your faucet’s actual performance with a simple test. Understanding your GPM helps you choose the right components.
Conduct a GPM Test
Place a 1-gallon container under the spout. Open the faucet fully and time how long it takes to fill. Calculate GPM using this formula:
GPM = 60 divided by seconds to fill
For example, 30 seconds equals 2.0 GPM.
Compare to standards:
• Bathroom sink: 1.0 to 1.5 GPM meets WaterSense standards
• Kitchen sink: 2.2 GPM ideal for high-demand tasks
Choose the Right Aerator
Match GPM to your use:
• 0.5 GPM for low-traffic bathroom use
• 1.2 GPM for general handwashing
• 2.2 GPM for kitchen or utility sink
• Spray aerators offer higher flow on demand
Pro Tip: Buy a universal aerator kit that includes adapters for different thread sizes.
Frequently Asked Questions About Adjusting Faucet Water Flow
Why is my faucet water flow suddenly weak?
The most common cause is a clogged aerator. Mineral deposits from hard water accumulate in the tiny holes, restricting flow. Remove and clean the aerator with vinegar to restore full performance.
How do I know if my flow restrictor is limiting water flow?
Check inside the aerator for a small plastic or metal disc with tiny holes. It’s often marked with a GPM rating. If your flow is weaker than expected and cleaning the aerator doesn’t help, the flow restrictor may be the culprit.
Can removing the flow restrictor cause problems?
Yes, it may violate local water conservation laws, especially in drought-prone areas. Additionally, removing it increases water waste and your utility bills. Check your local regulations before modifying.
What if both hot and cold water have low flow?
This suggests an issue with the faucet cartridge, supply lines, or shut-off valves. Inspect the cartridge for mineral buildup or damage. Check that both valves under the sink are fully open. Flush the supply lines to clear any debris.
Does low water flow affect tankless water heaters?
Yes, tankless units require a minimum flow rate of 0.5 to 0.8 GPM to ignite. If your faucet flow is too low, the heater won’t activate, and you’ll get cold water. Install a higher-flow aerator or remove the restrictor to solve this.
How often should I clean my faucet aerator?
Clean the aerator every 2 to 3 years under normal conditions. In hard water areas, clean it annually to prevent significant mineral buildup.
Key Takeaways for Adjusting Faucet Water Flow
Adjusting faucet water flow starts simple. Clean the aerator first, as it resolves over 90% of flow issues. Use white vinegar to dissolve mineral deposits safely and effectively. Flush supply lines and check shut-off valves to ensure nothing is restricting flow from the source.
For persistent problems, inspect internal components like the cartridge or install a whole-house pressure regulator. Always balance performance with conservation. High flow shouldn’t mean wasted water. Upgrade to WaterSense-certified models for proven efficiency without sacrificing function.
By following this guide, you’ll ensure reliable, strong flow for years. No plumber required.







