
Running a new water line to your refrigerator from the kitchen sink is one of the smartest DIY upgrades you can tackle in a weekend. It powers your ice maker and water dispenser using the cold water supply you already have, with no need to open walls or hire a plumber. This guide on how to install water line to fridge from sink breaks the project into clear, manageable steps using durable materials and proven plumbing techniques. You will learn how to tap into the sink’s cold water line with a compression tee, route a stainless steel braided hose behind your cabinets, and connect everything without leaks.
Shut Off the Water Supply Before You Start
Stopping the water flow is the single most important safety step in this project.
Close the Cold Water Valve
Look under your kitchen sink for the cold water shutoff valve, which is usually located on the right side. Turn the handle clockwise using a quarter-turn motion until it stops moving. Next, open the kitchen faucet to release any pressure trapped in the line. Let the faucet run until water stops flowing completely. This depressurizes the system and makes it safe to disconnect fittings.
Verify the Water Is Off
Test the faucet once more after closing the valve. If water still drips out, the shutoff valve may be worn out or partially stuck. Do not proceed with the installation until you confirm the flow is fully stopped. In rare cases, you may need to shut off your home’s main water supply to complete the work safely. Place a small towel or bucket under the sink to catch any residual water during disassembly.
Tap Into the Cold Water Line with a Compression Tee
A compression tee creates a leak-resistant branch off your existing cold water supply.
Choose the Right Tee and Adapters
Select a 3/8-inch compression tee rated for potable water. The tee splits flow in two directions: one outlet feeds your sink faucet, and the other feeds the new fridge line. Since most kitchen supply lines are 1/2 inch, you will also need a 1/2-inch to 3/8-inch adapter to connect the braided hose to the tee’s side outlet. Confirm your supply line size before purchasing.
Connect the Tee to the Supply Line
Disconnect the existing cold water supply line from the shutoff valve by loosening the compression nut with an adjustable wrench. Slide the tee onto the pipe, followed by the compression nut and ferrule. Hand-tighten the nut first to align the fitting, then finish with a wrench until snug. Reattach the original faucet supply line to the tee’s straight outlet. Avoid over-tightening, as this can crack fittings or strip threads.
Route the Stainless Steel Hose Behind Cabinets
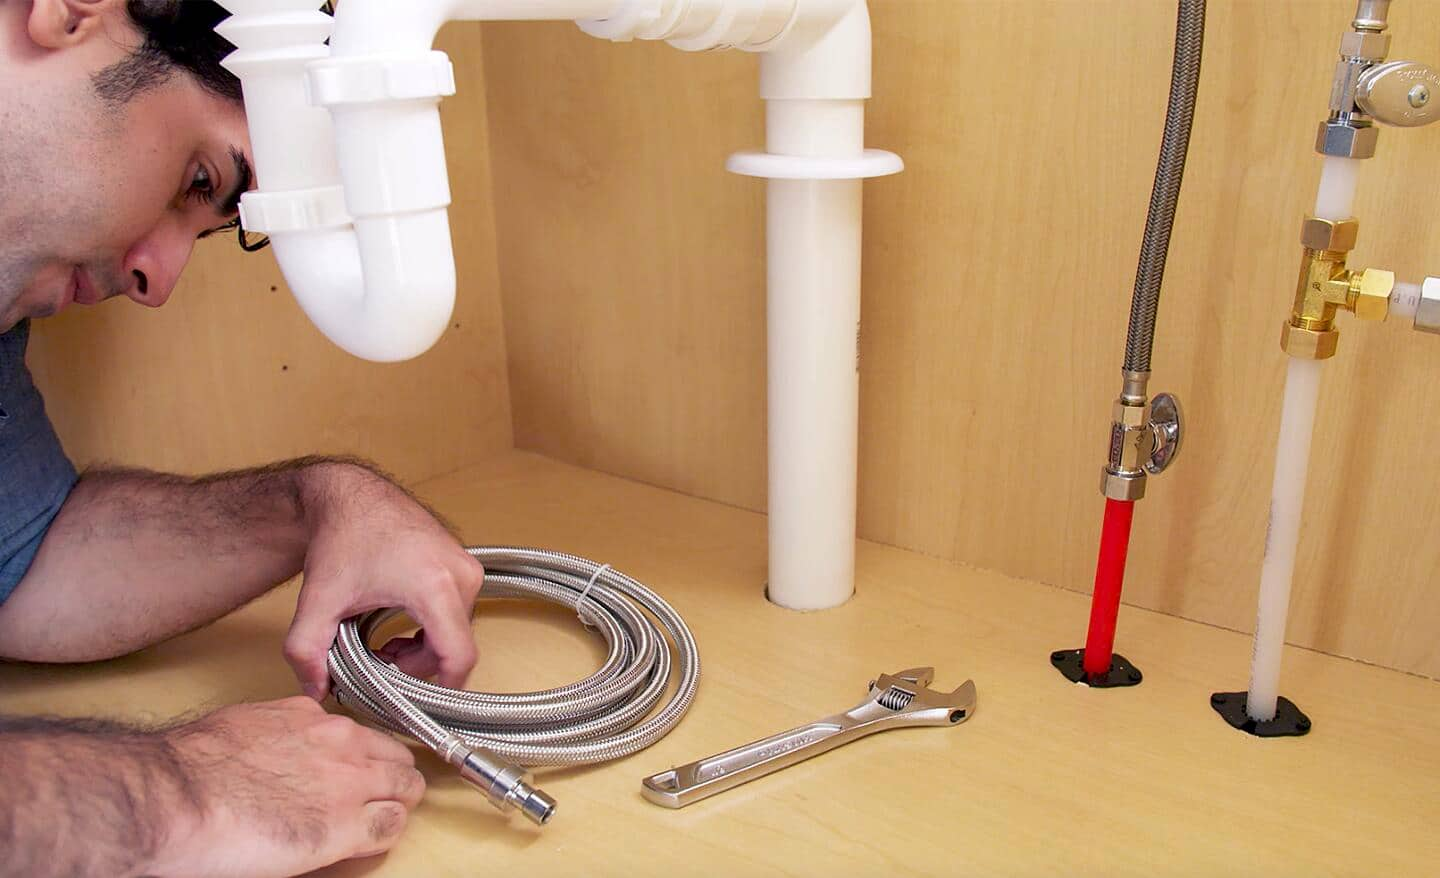
A clean, kink-free route keeps water flowing smoothly to your fridge.
Drill Aligned Holes Through Cabinet Backs
Plan a straight path from the sink cabinet to the fridge, going through the back panels of each base cabinet in between. Use a drill with a 1-inch bit to create holes at the same height, aligning them so the hose runs smoothly. Avoid drilling near electrical wires or existing plumbing lines. A direct path with minimal bends reduces restrictions and improves water pressure.
Use a Pull Line for Easy Routing
Feed a nylon pull cord or fish tape from the fridge side toward the sink. Attach the end of your 25-foot stainless steel braided hose to the pull line using electrical tape to prevent slipping. Have a helper gently push the hose from the sink end while you pull from the fridge side. Working with a second person prevents kinks and snags behind tight cabinet spaces.
Secure the Hose Every 12 to 18 Inches
Once the hose is in place, fasten it with cable straps or hose clips every 12 to 18 inches along the run. Attach the clips to cabinet frames or wall studs to keep the line stable. Keep the hose away from sharp edges, heat sources, and any moving parts. Maintain gentle curves rather than tight bends to ensure unrestricted water flow.
Connect the Water Line to the Refrigerator

The final connection brings water directly to your fridge’s inlet valve.
Locate the Fridge Water Inlet
Pull the refrigerator away from the wall and find the water inlet valve, usually located in the lower right corner on the back. It has a small 3/8-inch threaded port labeled “icemaker” or “water supply.” Make sure you have enough space to work comfortably behind the appliance.
Attach the Hose with the Correct Fitting
Slide the end of the braided hose onto the inlet valve and hand-tighten the connection. Finish with an adjustable wrench until snug, but avoid over-tightening, which can damage threads or seals. Ensure the fitting is straight and secure before pushing the fridge back into position.
Test for Leaks and Flush the System
This step confirms your installation is watertight and ready for daily use.
Slowly Restore the Water Supply
Turn the cold water shutoff valve back on slowly and watch every connection closely. Check the tee under the sink and the inlet valve behind the fridge for any drips. If you spot a leak, shut the water off and tighten the fitting slightly before retesting. Take your time during this step to catch small issues before they become big problems.
Inspect Every Connection Point
Look at the compression tee, all adapters, and the fridge inlet for moisture. Even a slow drip can lead to water damage over time. Check again after 5 and 15 minutes of operation to confirm everything stays dry. Once you are confident there are no leaks, move on to flushing the system.
Flush the First Two Gallons of Water
Run the water dispenser for 30 seconds at a time and discard the output. The first water often looks cloudy because of trapped air and carbon particles from the fridge’s filter. Continue flushing until the water runs clear, which usually takes about two full gallons. Also discard the first 3 to 5 batches of ice to ensure clean, fresh-tasting cubes.
Follow Best Practices to Prevent Leaks
Avoiding common mistakes keeps your installation reliable for years.
Skip the Teflon Tape on Compression Fittings
Compression fittings are pre-sealed and do not need any extra sealant. Adding Teflon tape can actually interfere with the seal and cause leaks. Simply tighten the nut until snug and trust the built-in design to do its job.
Choose Stainless Steel Over Plastic Tubing
Plastic and PEX lines may cost less upfront, but they are prone to cracking and kinking over time. Stainless steel braided hoses resist pressure changes, temperature swings, and physical damage far better. The small extra cost pays off in long-term peace of mind.
Consider a Fridge-Side Shut-Off Valve
Installing a small shut-off valve near the refrigerator makes future maintenance much easier. It lets you isolate the fridge without turning off the sink supply. You can add it inline using a saddle valve or push-fit fitting.
Troubleshoot Common Installation Issues
Quick fixes for the most frequent problems homeowners encounter.
No Water Reaching the Ice Maker
Check the line behind the fridge for kinks or sharp bends and straighten them out. Make sure the water valve is fully open and the fridge’s inlet screen is not clogged. Confirm the ice maker is turned on and not stuck in a delay cycle.
Cloudy Water After Installation
Cloudy water is completely normal during the first few uses. Air bubbles and carbon dust from the new filter cause the discoloration. Keep dispensing water until it clears, which usually happens within two gallons. If cloudiness persists, flush the system again or double-check the filter installation.
Leaks at the Tee Connection
Verify that you used the correct 1/2-inch to 3/8-inch adapter. A mismatched fitting will not seal properly and will drip under pressure. Confirm the compression nut is snug but not over-tightened. If the leak continues, disassemble the connection and inspect the ferrule for damage, replacing it if it looks deformed.
Finalize and Maintain Your New Water Line
A few finishing touches ensure long-term performance and easy upkeep.
Label the Water Line for Future Reference
Use a small tag or permanent marker to label the new line near both the sink and the fridge. This helps during future repairs, renovations, or appliance moves. Note the exact location of the shut-off valve in case of emergencies.
Schedule Periodic Leak Checks
Every 3 to 6 months, inspect all connections for signs of moisture or wear. Pay extra attention after moving the fridge for cleaning or maintenance. Make sure cable straps are still secure and the line is not rubbing against sharp cabinet edges. Early detection prevents costly water damage.
Know When to Call a Professional
If routing is blocked by a dishwasher, built-in cabinetry, or unusual wall construction, consider hiring a plumber. Complex layouts may require saddle valves or specialized wall routing that goes beyond a basic DIY project. When in doubt about fitting sizes or compatibility, a professional opinion is worth the cost.
Frequently Asked Questions About Installing a Fridge Water Line
What size water line do I need to run to my refrigerator?
A 3/8-inch stainless steel braided hose is the standard size for most residential refrigerators. The supply line under your sink is typically 1/2 inch, so you will need a 1/2-inch to 3/8-inch adapter to bridge the connection at the compression tee.
Can I use plastic tubing instead of stainless steel for the fridge water line?
While plastic and PEX tubing are cheaper, they are more prone to cracking, kinking, and long-term leaks. Stainless steel braided hoses are far more durable and resistant to pressure and temperature changes. For a reliable, long-lasting installation, stainless steel is the better choice.
How long does it take to install a water line from the sink to the fridge?
Most DIY installations take just a few hours from start to finish. The actual plumbing work is quick, but routing the hose behind cabinets and testing for leaks adds time. Having a helper on hand speeds up the process significantly.
Do I need to turn off the main water supply to install a fridge water line?
In most cases, you only need to shut off the cold water valve under the kitchen sink. However, if that valve is faulty or you cannot confirm the water is fully stopped, shutting off the home’s main supply is a safe alternative. Always verify zero flow before disconnecting any fittings.
Why is the water cloudy after installing my new fridge line?
Cloudy water is normal during the first few uses and is caused by trapped air bubbles and carbon particles from the refrigerator’s water filter. Flushing two full gallons through the dispenser will usually clear it up. If cloudiness persists beyond that, check the filter installation and flush again.
Should I use Teflon tape on compression fittings?
No. Compression fittings are pre-sealed and designed to create a watertight connection without any additional sealant. Using Teflon tape can actually prevent a proper seal and cause leaks. Simply tighten the nut until snug and trust the fitting’s design.
Key Takeaways for Installing a Fridge Water Line from the Sink
Learning how to install water line to fridge from sink is a straightforward project that delivers big convenience for a small investment. The three most important steps are shutting off the water supply completely, using a stainless steel braided hose instead of plastic, and flushing two full gallons before regular use. With the right tools, a helper for routing, and careful attention to leak testing, you can complete this upgrade in a few hours and enjoy fresh water and ice from your fridge for years to come. Start by gathering your materials, then work through each section methodically for a clean, professional result.







