
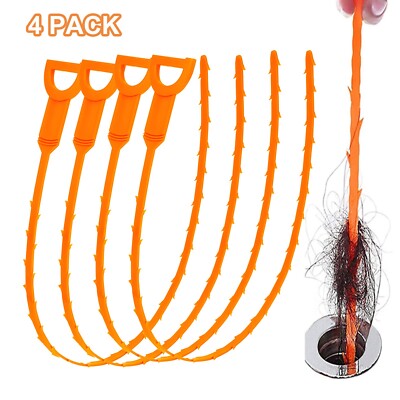
Is your sink draining slowly—or not at all? A clogged drain is one of the most common household plumbing issues, especially in bathrooms where hair, soap scum, and gunk build up inside pipes over time. Before calling a plumber, you can often clear the blockage yourself with a drain snake, also known as a plumber’s auger. This flexible tool reaches deep into pipes to break up or pull out clogs that plungers can’t touch.
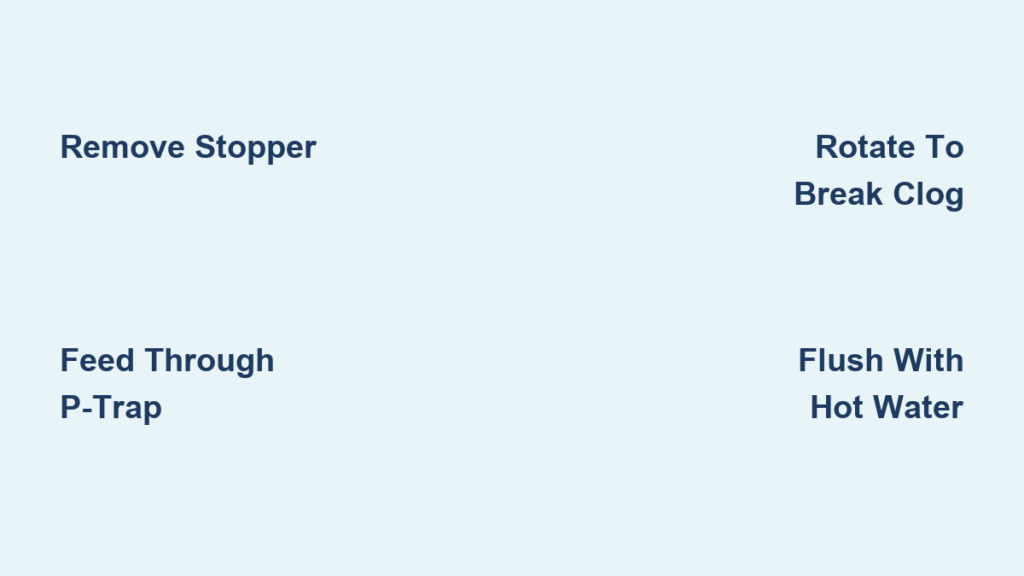
Learning how to snake a sink drain is a straightforward DIY task that takes 15–30 minutes with basic tools. Whether you’re dealing with a slow-draining bathroom sink or a completely blocked kitchen fixture, this guide walks you through every step—from diagnosing the clog to reassembling the drain. You’ll learn how to remove the pop-up stopper, feed the snake past the P-trap, break up the blockage, and flush the line for smooth drainage.
No more standing water. No more foul odors. With the right technique and a little patience, you can restore full flow and skip the costly service call.
Diagnose the Clog Before Snaking
Before you grab a snake, figure out how deep the blockage sits. This determines your approach and which tools you need.
Run water in the sink and time the drainage. If it drains fast, the clog is likely near the surface—possibly in the pop-up stopper or P-trap. If it drains slowly or backs up, the clog sits deeper, past the P-trap and into the main drain line.
Spot the Common Warning Signs
- Water pools and drains slowly even with the stopper open
- Sink fills quickly and empties over several minutes
- Gurgling sounds when water flows down
- Recurring clogs in the same sink
Hair and soap residue are the usual culprits in bathroom sinks. In kitchens, grease and food debris dominate. If multiple fixtures back up at once, the issue may be in your main sewer line—which means it’s time to call a professional.
Estimate Clog Depth in Seconds
Fast drainage = shallow clog (stopper or P-trap region).
Slow or no drainage = deep clog (main pipe).
Shallow clogs can sometimes be cleared by removing the stopper and pulling out hair by hand. Deep clogs require a drain snake. If you’ve already tried plunging with no success, it’s time to snake.
Gather the Right Tools for the Job
Using the correct tools makes snaking easier and prevents mess or damage to your pipes.
Essential Tools You Need
- Drain snake (plumber’s auger) – Manual for sinks, motorized for deep clogs
- Work gloves – Protect hands from grime and sharp edges
- Flashlight – Inspect the drain opening
- Bucket and towels – Catch spills from pipes
- Pliers – Loosen nuts on the pivot arm or lift rod
- Protective eyewear – Prevent splashback into your eyes
Choose a manual snake with at least 20 feet of flexible cable. The Ridgid Power Spin is a popular option featuring a drum handle and thumb screw to control cable feed.
Optional but Helpful Supplies
- Duct tape – Seal open pipe holes to prevent leaks
- Drain strainer – Prevent future clogs
- Natural drain cleaner – Monthly maintenance to keep pipes clear
Wear latex or rubber gloves under work gloves if you’re sensitive to moisture. Make sure your tools are clean and ready—especially the snake cable, which should move smoothly without kinks.
Prepare the Work Area Under the Sink
Clear and protect the space before you start working to avoid mess and injury.
Clear and Protect the Space
Remove cleaning supplies, baskets, or storage items from under the sink. Place a bucket directly beneath the P-trap to catch any water. Lay towels around the area to absorb drips.
Put on gloves and eyewear. Use a flashlight to look into the drain opening. You might see hair or debris near the surface—sometimes you can pull it out by hand without needing the snake at all.
Inspect the Drain Mechanism
Locate the pop-up stopper and its connecting parts. Most bathroom sinks use a pivot arm or lift rod system. The pivot arm connects the stopper to the lift rod via a retaining nut. The lift rod is held by a cap nut under the sink.
Knowing your setup helps you remove the stopper correctly. This is your access point for the drain snake.
Remove the Pop-Up Stopper
Clearing the drain starts with removing the stopper so you can reach the pipe.
Try a Direct Pull First
Some pop-up stoppers pull straight out. Lift the stopper to the open position. If it wiggles or feels loose, grip it with a paper towel for traction and pull upward. Check the bottom for tangled hair and gunk.
If it doesn’t come out freely, your sink uses a pivot arm or lift rod system.
Remove the Pivot Arm System
Locate the pivot arm behind the drain pipe. It’s a small rod that connects the stopper to the lift rod.
Use pliers to loosen the retaining nut at the base of the pivot arm. Once loose, pull the arm out. The stopper should now lift out of the drain.
Clean any debris from the arm and stopper before reassembly.
Detach the Lift Rod and Cap Nut
In some models, the lift rod holds the stopper in place. The rod is secured by a cap nut under the sink.
Loosen the cap nut with pliers, then unscrew it by hand. Pull the lift rod out of the drain stem. Now, pull the stopper straight up.
Cover the open hole with duct tape to prevent water or tools from falling in. This keeps your workspace clean and dry.
Insert the Drain Snake Into the Pipe
Now feed the snake into the drain to reach the clog.
Feed the Snake Through the Drain Opening
Hold the snake with the brake engaged (for manual models) to prevent uncontrolled cable release. Insert the auger head into the drain where the stopper was removed.
Push the cable straight down. It will bend at the P-trap, the U-shaped pipe under the sink. Keep pushing and turn the handle clockwise to help it navigate the curve.
Don’t retract the snake yet—push it as far as it will go.
Use the Ridgid Power Spin Correctly
For the Ridgid Power Spin, loosen the thumb screw and pull out 4–5 inches of cable. Tighten the screw, then turn the drum clockwise while pushing the tool into the drain.
Advance in 4–5 inch increments. After each push, loosen the thumb screw, extend more cable, then retighten and spin.
This controlled feed prevents kinking and gives you better control over the cable.
Navigate the P-Trap Curve
The P-trap is the first major bend. Resistance here is normal. Keep pushing and twisting to guide the cable around the curve.
If the snake catches, don’t force it. Rotate slowly and apply steady pressure. Let the auger head do the work.
Once past the P-trap, release the brake (if applicable) and continue feeding the snake deeper.
Break Up the Clog
When you hit resistance, you’ve likely reached the blockage.
Feel for Blockage Resistance
Keep advancing the snake until you can’t push further. This is usually the clog—often a tangled mass of hair, soap, and gunk.
Don’t stop too soon. Push gently and keep turning the handle. The auger head spins like a corkscrew, hooking or shredding the clog material.
If you feel a sudden release, you’ve broken through. Keep spinning to clear the entire pipe.
Rotate to Hook or Shred Debris
Turn the handle clockwise while maintaining light forward pressure. This wraps hair around the auger or cuts through grease buildup.
For the Ridgid Power Spin, keep turning the drum clockwise. Let the tool’s design do the work—don’t over-tighten the thumb screw.
After 10–15 seconds of rotation, slowly retract the cable while still twisting. This helps pull debris back out of the pipe.
Retrieve and Clean the Snake
Pulling out gunk is satisfying—and proof the job is working.
Pull Out Hair and Gunk
As you retract the snake, you’ll often bring up hair, soap scum, or sludge. Wipe the cable with a rag as it comes out. Use gloves—this material is dirty.
Even a small amount of debris can restore flow. If you don’t retrieve anything, repeat the process—push deeper and rotate again.
Some clogs require multiple passes to fully clear.
Clean the Snake After Use
Once done, wipe the entire cable with a damp rag. Use mild soap if needed. Dry thoroughly before storing.
For the Ridgid Power Spin, turn the drum counterclockwise to retract the cable fully. Loosen the thumb screw, push the cable back in, then retighten.
Store the tool in a dry place. Regular cleaning prevents rust and keeps the tool working smoothly for years.
Flush and Test the Drain
Now clear the pipe and check your results.
Run Hot Water to Flush the Line
After snaking, remove all visible debris. Turn on hot water and let it run for 30–60 seconds.
Hot water dissolves leftover grease and flushes loose particles down the line. This step is crucial—don’t skip it.
Test Drainage Performance
Fill the sink halfway and pull the stopper. Water should drain quickly and completely.
If it still drains slowly, repeat the snaking process. The clog may be deeper or more stubborn than expected.
Check for gurgling or backups—signs that the clog isn’t fully cleared.
Reassemble the Drain Components

Put everything back together properly to restore normal sink function.
Reinstall the Pop-Up Stopper
Insert the stopper back into the drain. If using a pivot arm, reattach it to the lift rod and secure the retaining nut by hand. Don’t overtighten—this can restrict movement.
For lift rod systems, remove the duct tape from the hole under the sink. Insert the lift rod through the plug stem, then thread on the cap nut. Tighten just enough to prevent leaks but allow smooth operation.
Align and Secure All Components
Ensure the stopper moves up and down freely. Test it by pulling the lift rod.
The stopper should seal tightly when closed and open fully when lifted. If it sticks, adjust the pivot arm or rod alignment until the motion is smooth.
Final Test and Leak Check
Complete the job with a full system check.
Run Water and Check for Leaks
Turn on the faucet fully. Watch under the sink for drips or leaks at the pivot arm, nuts, or pipe connections.
If you see leaks, gently tighten the nuts—but don’t strip them. Use pliers only if necessary.
Verify Smooth Drainage
Fill the sink and let it drain. Water should empty within seconds. No standing water. No slow gurgles.
If the sink drains fast and there are no leaks, you’ve successfully snaked the drain.
Frequently Asked Questions About Snaking a Sink Drain
How long does it take to snake a sink drain?
The entire process typically takes 15–30 minutes, including preparation, snaking, and reassembly. Most bathroom sink clogs can be cleared in just a few minutes once you start feeding the snake.
Can I snake a sink drain without removing the stopper?
Removing the pop-up stopper is the preferred method because it’s less messy and gives you direct access to the pipe. However, some people access the drain through the P-trap instead. The pop-up method is simpler and recommended for beginners.
What if the snake won’t go past the P-trap?
Resistance at the P-trap is normal because of the U-shaped curve. Keep pushing and spinning the cable to navigate the bend. If you encounter strong resistance, don’t force it—rotate slowly and apply steady pressure until the cable slides through.
How do I know if the clog is too deep for a manual snake?
If you feed 20 feet of cable and still feel resistance without retrieving debris, the clog may be too deep for a manual snake. At that point, consider a motorized drain snake or call a professional plumber to avoid pipe damage.
Is it safe to snake a sink drain myself?
Yes, snaking a sink drain is safe for most homeowners as long as you work slowly, wear protective gloves and eyewear, and don’t force the cable. Forcing the snake can damage pipes, especially older plumbing. If you’re unsure or the clog persists, call a professional.
How can I prevent future sink clogs?
Install a drain strainer to catch hair and debris before it enters the pipe. Use a natural drain cleaner monthly to break down buildup. Avoid pouring grease down kitchen sinks, and clean pop-up stoppers regularly to remove accumulated hair.
Key Takeaways for Snaking Your Sink Drain
Snaking a sink drain is a reliable DIY fix for slow or clogged drains. By removing the pop-up stopper and feeding a manual snake past the P-trap, you can break up hair and debris blockages in minutes without calling a plumber. Always work slowly, wear protective gear, and flush with hot water after snaking to clear residual buildup.
For recurring clogs, install a drain strainer and use natural cleaners monthly to keep pipes flowing freely. If snaking fails after multiple attempts, the clog may be too deep or caused by a structural issue—call a plumber before it becomes a bigger problem. Grab your drain snake, set aside 30 minutes, and restore your sink to full flow today.







