
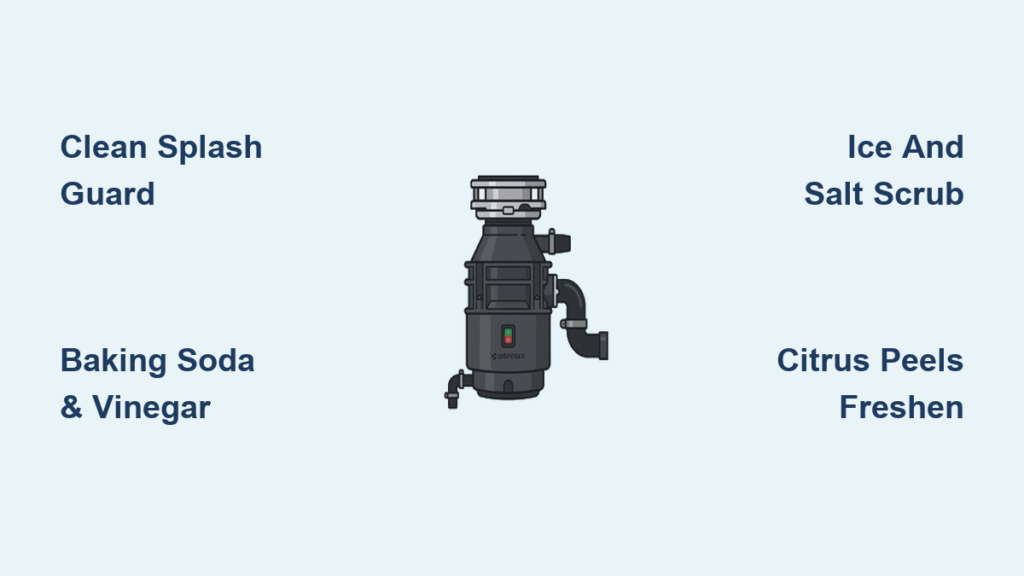
That awful smell rising from your kitchen sink is almost always a garbage disposal problem. Food residue gets trapped in the rubber flaps and drain seal, creating the perfect breeding ground for bacteria and foul odors. If you’ve ever winced when flipping on the disposal, the fix is easier than you think. Learning how to clean sink garbage disposal units properly takes just minutes and uses common household items. This guide walks you through proven methods, weekly maintenance tips, and troubleshooting fixes so your kitchen stays fresh year-round.
Baking Soda and Vinegar Deep Clean
The most effective way to deep clean a garbage disposal combines baking soda and vinegar. This classic duo creates a fizzing reaction that breaks down grease, kills bacteria, and neutralizes stubborn odors at the source.
Apply Baking Soda First
Start by pouring ½ cup of baking soda directly into the disposal drain. Let it sit for 5 to 10 minutes to absorb odors and begin breaking down grime. Baking soda naturally deodorizes and lifts acidic residues stuck in the chamber and rubber flaps.
Add White Vinegar
After the baking soda has settled, slowly pour 1 cup of white vinegar down the drain. The mixture will immediately begin to fizz and bubble. This chemical reaction helps dissolve organic buildup on blades and interior surfaces. For heavier buildup, use 2 cups of vinegar instead.
Let It Sit and Flush
Cover the drain with a plug or cloth to contain the reaction and let the mixture sit for 10 to 15 minutes. Then, briefly run the disposal for 1 to 2 seconds to spread the solution. Finally, flush with a full pot of boiling water to clear out loosened debris and prevent clogs. Run hot water for 1 to 2 minutes to ensure complete rinsing.
Pro Tip: For GE Disposall models, follow this method as part of monthly maintenance to keep performance optimal.
Ice and Salt Blade Scrub
Over time, food residue dulls disposal blades and reduces grinding efficiency. The ice and salt method cleans and sharpens them in under a minute, making it a must-know when learning how to clean sink garbage disposal units.
Load Ice and Salt
Drop a handful of ice cubes into the disposal, followed by 1 tablespoon to ½ cup of rock salt. The ice acts as a gentle abrasive, while the salt adds scrubbing power to dislodge stuck-on gunk.
Run with Cold Water
Turn on the disposal and immediately run cold water. Let it operate for 30 seconds while the ice and salt circulate. You’ll hear the crunching, which means the blades are being polished and cleared of debris.
Why it works: Cold water solidifies fats, making them easier to chop and flush. This method also prevents future clogs and keeps blades sharp.
Use Weekly for Maintenance
Repeat this scrub once a week to maintain smooth operation. It’s especially helpful if your disposal sounds sluggish or drains slowly.
Freshen With Citrus Peels
For a natural, long-lasting fresh scent, citrus peels are unmatched. They clean lightly while releasing essential oils that neutralize odors.
Feed Peels One at a Time
Cut a lemon, lime, or orange into small wedges. With the disposal running and cold water flowing, drop one wedge in at a time. Avoid large chunks to prevent jamming.
Run for 1–2 Minutes
Let the disposal grind the peels completely. The natural citric acid cuts through grease, while the oils leave a clean, fresh aroma behind.
Expert Note: Combine this with ice for a dual-action clean. Run ice first, then citrus for both scrubbing and deodorizing in one go.
Best for Weekly Use
Use citrus peels weekly or whenever odors return. Orange and lemon peels work equally well, so use whatever you have on hand.
Scrub the Rubber Splash Guard

Most odors come not from the blades but from the rubber splash guard, the flaps at the top of the disposal. This area traps food sludge and is often overlooked during routine cleaning.
Remove and Soak the Flap
Unsnap the rubber splash guard (it’s usually removable) and soak it in white vinegar for 10 to 15 minutes. The vinegar dissolves trapped grime and kills odor-causing bacteria.
Scrub In Place if Not Removable
If your model doesn’t allow removal, use a round-head scrub brush dipped in anti-grease dish soap. Scrub under and behind the flaps thoroughly. Spend 5 to 10 minutes working the brush around all crevices.
Focus on Hidden Areas
Pay special attention to:
– The underside of the flaps
– The groove where the guard meets the disposal
– The upper chamber walls
Warning: Never use metal tools. Stick to plastic or soft-bristle brushes to avoid damaging rubber or blades.
Physical Cleaning for Grease Buildup

When your disposal is caked with grease, surface treatments won’t cut it. A hands-on scrub is the only way to restore cleanliness.
Use a Dish Soap-Loaded Scrubber
Apply a few drops of heavy-duty dish soap to a tight-round scrub brush. Insert it into the disposal chamber and scrub the bottom, sides, and around the blades. The soap breaks down oily residue while the brush lifts it away.
Scrub for 5–10 Minutes
Spend at least 5 minutes scrubbing, and longer if buildup is severe. You’ll see dark gunk come off immediately. This step is crucial for older units or those used frequently.
Flush After Scrubbing
Once done, run cold water and turn on the disposal briefly to flush out loosened debris. Follow with hot water for 1 minute to clear the drain line.
Pro Tip: Pair this with the baking soda and vinegar method for a full deep clean every 2 to 3 months.
Quick Bleach Refresh (Use Sparingly)
For a fast disinfecting boost between deep cleans, bleach can help, but use it carefully.
Apply Small Amounts Only
Pour a few glugs of household bleach down the drain. Run the disposal for a few seconds, then flush with cold water for 30 seconds.
Avoid Overuse
Bleach can damage rubber seals and corrode pipes over time. Reserve this method for occasional use only, never weekly. It’s best for sanitizing after handling raw meat or strong-smelling foods.
Alternative: Use vinegar instead for safer, regular disinfection.
Weekly Maintenance Routine
Prevent odors and clogs with a simple weekly refresh. Consistency is key when learning how to clean sink garbage disposal units properly.
Try the Ice and Lemon Combo
Once a week:
1. Run a cup of ice cubes through the disposal with cold water
2. Follow with 2 to 3 lemon wedges
This routine sharpens blades, removes residue, and leaves a fresh scent.
Run Cold Water Always
Always use cold water before, during, and after running the disposal. It hardens grease so the blades can chop it up and flush it away, preventing pipe clogs.
Avoid Problem Foods
Keep these out of your disposal:
– Fibrous foods (celery, onion skins)
– Starchy peels (potatoes)
– Grease and oil
– Coffee grounds
– Large bones
Fact: These items are the top causes of clogs and odors.
Prevent Clogs and Odors
Smart habits go a long way in keeping your disposal running smoothly.
Never Pour Grease Down the Drain
Hot grease may look liquid, but it solidifies in pipes and causes major blockages. Always dispose of oil in a sealed container.
Use the Disposal Regularly
Running it at least once a week prevents rust, corrosion, and motor seizing, even if you don’t have much waste.
Flush Before and After
Run cold water for 15 to 30 seconds before turning on the disposal, and 1 to 2 minutes after to ensure all particles are cleared.
Troubleshoot Common Issues
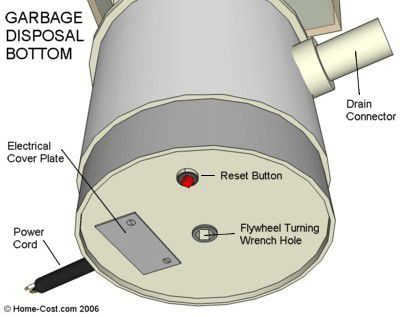
Disposal Won’t Turn On
Check the reset button on the bottom of the unit. If it’s tripped, press it firmly. If the unit still doesn’t run, unplug it or turn off the breaker and investigate further.
Still Smelling Bad
Odors usually mean the rubber splash guard wasn’t cleaned. Remove and soak it in vinegar, then repeat the baking soda and vinegar cycle.
Draining Slowly
Try the ice and salt method to dislodge debris. Shine a flashlight down the drain. If you see a blockage, use tongs (never hands) to remove it.
When to Call a Pro: If the disposal makes grinding noises, leaks, or won’t reset, contact a plumber. Electrical or mechanical issues require expert help.
Cleaning Frequency Guide
| Method | How Often | Purpose |
|---|---|---|
| Baking Soda & Vinegar | Every 2–3 months (monthly for heavy use) | Deep clean, deodorize |
| Ice & Salt | Weekly | Blade maintenance, prevent clogs |
| Citrus Peels | Weekly | Freshen scent, light clean |
| Rubber Flap Cleaning | With each deep clean | Eliminate odor source |
| Physical Scrubbing | As needed | Remove grease buildup |
| Bleach | Occasionally only | Quick disinfection |
Frequently Asked Questions About Cleaning a Sink Garbage Disposal
What causes garbage disposal odors?
Most smells come from food residue trapped in the rubber flaps and drain seal, not the blades themselves. Bacteria feed on this buildup and produce foul odors over time.
Is baking soda and vinegar safe for garbage disposals?
Yes, baking soda and vinegar are safe and effective for most disposal units. The fizzing reaction helps break down grease and neutralize odors without damaging seals or pipes.
How often should I clean my garbage disposal?
Deep clean with baking soda and vinegar every 2 to 3 months. For weekly maintenance, use the ice and salt scrub along with citrus peels to keep odors away.
Can I use bleach to clean my garbage disposal?
Bleach works for occasional disinfection, but use it sparingly. Overuse can damage rubber seals and corrode pipes. Vinegar is a safer alternative for regular cleaning.
Why is my garbage disposal not draining?
Slow drainage usually means a clog from grease, fibrous foods, or debris. Try the ice and salt method to dislodge buildup, or check for visible blockages with a flashlight and tongs.
When should I call a plumber for my garbage disposal?
Contact a professional if the unit leaks, makes loud grinding noises, or won’t reset. Electrical and mechanical failures require expert repair.
Key Takeaways for a Fresh, Clean Garbage Disposal
Keeping your garbage disposal clean comes down to three habits: target the rubber splash guard, which is the real source of most odors; avoid grease and problem foods that cause clogs; and use natural cleaners like baking soda, vinegar, and citrus regularly. A weekly ice and lemon routine paired with a monthly deep clean takes just minutes and prevents the buildup that leads to smells and slow drains. Start with the baking soda and vinegar method today, and your kitchen will smell fresher by tonight.







