
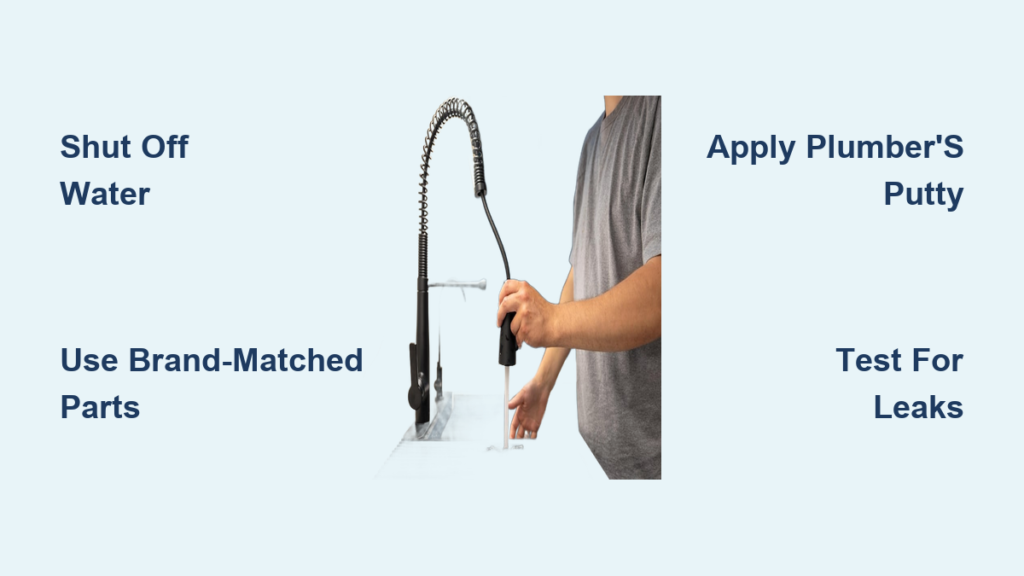
A weak, leaking, or completely broken kitchen sink sprayer can turn simple tasks like rinsing dishes or washing produce into frustrating chores. The good news is that learning how to install a kitchen sink sprayer is a straightforward DIY project that requires only basic hand tools and a little patience. Whether you’re swapping out a worn nozzle or installing a full sprayer assembly, this guide breaks down each step clearly so you can get your sink working like new without calling a plumber.
You’ll learn which tools to gather, how to shut off the water safely, the exact steps for removing and installing the sprayer, and how to test for leaks the right way.
Essential Tools and Materials
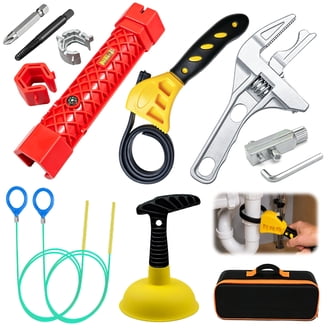
Gathering your supplies before starting prevents frustrating mid-project trips to the hardware store. Most of what you need is likely already in a basic toolbox.
Must-Have Tools
- Adjustable wrench for tightening nuts beneath the sink
- Flathead and Phillips screwdrivers for prying clips and securing parts
- Needle-nose pliers, vise-grip style preferred, for removing small retaining clips
- Small plastic pick or trim tool to safely remove clips without scratching
- Bucket or bowl to catch residual water when disconnecting lines
- Towel or rag to protect surfaces and catch tiny parts
Components You’ll Need
- Brand-matched sprayer head and hose for a guaranteed proper fit
- Plumber’s putty to create a watertight seal at the base
- Rubber gasket and washers, often included in kits, replace if worn
- Metal or plastic retaining clip that locks the hose in place
- Teflon pipe tape to seal threaded connections
Pro Tip: Keep spare washers and clips in your toolbox. They’re inexpensive and often the source of mysterious leaks.
Shut Off the Water Supply
Never begin plumbing work without first cutting off the water supply. Skipping this step can result in a soaked kitchen and unnecessary cleanup.
Locate Under-Sink Valves
Find the hot and cold shutoff valves directly beneath your sink. Turn both clockwise until tight, following the “righty-tighty” rule.
Verify Water Is Off
Turn on the faucet and let it run briefly. If no water flows, the supply is successfully shut off. Open the sprayer handle to release any remaining pressure in the lines.
No Shutoff Valves?
Turn off the main water supply at the home’s meter or street valve. Then open faucets throughout the house to drain the lines.
Place a towel or bucket under connections because residual water will always drip out when lines are opened.
Remove the Old Sprayer Assembly
Working from below the sink keeps the mess contained and protects your countertop from damage.
Disconnect the Hose from the Faucet
Locate the connector nipple at the base of the faucet. Use an adjustable wrench to loosen the nut connecting the sprayer hose, then slide the hose off the nipple. Remove the rubber gasket that sits between the hose and faucet, as it may stick to either surface.
Remove the Retaining Clip
The retaining clip is a small metal or plastic ring that locks the hose in place. Use a flathead screwdriver to gently pry it from its groove, then use needle-nose pliers to pull it free. This is the trickiest part of the job because clips are tiny and fragile.
Warning: Always plug the sink drain with a rag before working with the clip. Losing this small part down the drain can stop your installation in its tracks.
Remove the Mounting Nut and Extract the Hose
Loosen the metal mounting nut securing the sprayer to the sink. From above the sink, pull the sprayer out through the hole, then pull the hose down from underneath. You now have full access for the new installation.
Install the New Sprayer Assembly
The standard installation method works for most complete sprayer replacements. Follow these steps carefully for a leak-free result.
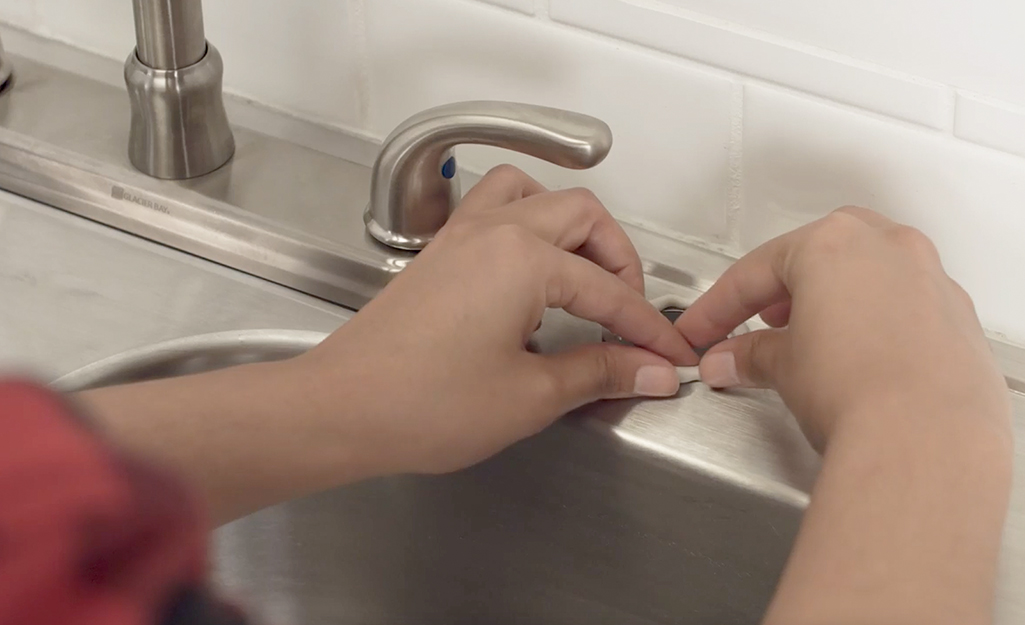
Apply Plumber’s Putty
Roll a quarter-inch bead of plumber’s putty around the bottom edge of the new sprayer base. This sealant prevents water from seeping beneath the sink surface. Some models use a rubber gasket instead, so check your kit’s instructions.
Insert the Sprayer Through the Sink Hole
From above, push the sprayer tailpiece through the sink hole, ensuring it sits straight and fully flush against the sink surface.
Secure from Below
Slide the friction washer onto the tailpiece from below the sink. Thread the metal mounting nut by hand, then use an adjustable wrench to snug it tight. Never overtighten because you can crack the nut or strip the threads. Wipe away any excess putty around the base for a clean finish.
Alternative: Hose-First Installation Method
Some sprayer kits require assembling the hose before mounting the head. This approach works when the sprayer head and hose connect separately.
Feed the Hose Through from the Top
Insert the new hose through the sink’s sprayer hole, then pull it down from underneath until you have enough slack to work with.
Attach Washers in the Correct Order
Slide the large plastic washer onto the hose first, then add the thin plastic washer, followed by the thick rubber washer. Push all washers firmly into the mounting base.
Lock with the Retaining Clip
Slide the metal or plastic clip into the groove on the hose and press until it snaps into place. You should hear or feel a distinct click. This clip must lock securely, and the washers must be fully seated to prevent leaks.
Attach the Sprayer Head
Thread the sprayer head onto the hose end, tightening first by hand and then with a wrench for a snug fit.
Nozzle-Only Replacement
If your hose is in good condition but the nozzle is damaged or clogged, a nozzle-only swap is the fastest fix.
Remove the Old Nozzle
Unscrew the old nozzle by hand or with adjustable pliers. If it feels stuck, check for a small plastic retaining clip inside that may need to be pried out first.
Install the New Nozzle
Slide the new nozzle onto the hose, then push it through the sink’s spray hole from below.
Secure with the Retaining Clip
Slide the new clip into the groove on the nozzle shaft and use a plastic pick to snap it into place. Hand-tight pressure is enough because over-tightening can crack plastic components.
Warning: Never force a universal nozzle. If it doesn’t slide on easily, it’s the wrong part. Stick with brand-specific replacements for leak-free performance.
Connect the Sprayer Hose Using Quick-Connect Fittings
Modern kitchen faucets often use push-fit connectors that make hose attachment simple and secure.
Attach the Quick-Connect Fitting
Thread the quick-connect fitting onto the faucet’s supply line by hand. Hold the nut steady with a wrench and tighten the fitting until snug.
Insert the Sprayer Hose
Push the hose end firmly into the quick-connect fitting until you hear a distinct click. Gently tug the hose to confirm it won’t come loose. If your setup doesn’t include a sprayer, use the included plug and tighten it with two wrenches.
Connect the Water Supply Lines

The final plumbing connections require careful attention to sealing and alignment.
Apply Teflon Tape
Wrap Teflon pipe tape clockwise around the threads of the shutoff valves, using three to four wraps. Applying tape in the same direction as the threads prevents unraveling when you tighten the connections.
Attach Supply Lines Correctly
Connect the blue line (cold water) to the right shutoff valve and the red line (hot water) to the left valve. Hand-tighten first, then secure with a wrench until snug. Quality supply lines like those from Kraus feature braided nylon construction and pre-installed dome washers that filter debris for cleaner water flow.
Test for Leaks and Function
This step is non-negotiable because even a small leak can cause significant water damage over time.
Restore the Water Supply
Slowly turn both shutoff valves counterclockwise to restore water flow. Open the faucet and flush the lines for 30 seconds to clear any debris that entered during installation.
Check All Five Connection Points
Inspect each of these areas carefully for drips or moisture:
- Sprayer handle base for water around the seal
- Hose connection under the sink where it meets the faucet
- Mounting nut and washer for signs of seepage
- Retaining clip and washers to confirm they’re dry
- Sprayer head connection while actively spraying
Fix Any Leaks Immediately
A slight leak can usually be resolved by tightening the connection slightly. Never overtighten because this often worsens the problem. If a leak persists, disassemble the connection and check washer alignment or replace damaged gaskets.
Brand Compatibility Matters
Choosing the right replacement parts saves you from leaks, frustration, and wasted money.
Why Brand Matching Is Crucial
Universal nozzles frequently don’t fit properly, even when measurements appear correct. Mismatched parts cause leaks, poor spray performance, and premature hose damage. As the saying goes, you get what you pay for, and cheap parts fail faster.
When to Replace the Full Kit
Replace the complete hose and nozzle assembly if the existing hose is cracked or kinked, if connections feel loose or leak, or when you’re unsure about compatibility. Recommended brands include Kraus for modern corrosion-resistant finishes and Danco for a wide range of replacement parts with helpful how-to videos.
Avoid Common Installation Mistakes
Steering clear of these frequent errors will save you time and headaches.
Overtightening Nuts and Clips
Excessive force can crack plastic components or strip threads. Hand-tight plus a quarter turn with a wrench is typically sufficient.
Forcing Ill-Fitting Parts
If the nozzle doesn’t slide on easily, it’s the wrong size. Never sand or modify parts because you’ll create leak paths. Always get the correct brand-specific fit.
Losing Small Clips
Always plug the drain before starting removal, and work over a towel to catch any falling parts.
Skipping Teflon Tape
Threaded connections will leak without proper sealing. Apply tape to all male threads on valves and fittings.
Troubleshoot Common Post-Installation Issues
If problems appear after installation, these quick fixes resolve most situations.
Sprayer Leaks at the Base
A loose nut or worn washer is the likely culprit. Tighten slightly or replace the rubber gasket.
Hose Doesn’t Stay Connected
An improperly seated quick-connect or missing clip usually causes this. Reinsert the hose until it clicks, or replace the clip.
Weak Spray
A clogged nozzle or kinked hose restricts flow. Soak the nozzle in vinegar to dissolve mineral buildup, or straighten any kinks in the hose.
Clip Won’t Snap In
The clip may be oriented incorrectly or damaged. Try rotating it 180 degrees, or replace it with a new one.
Final Checks and Maintenance Tips
Wrap up your installation with these finishing steps and keep your sprayer working smoothly for years.
Flush and Test
Run water through the sprayer for a full minute and verify the spray pattern is even and strong.
Wipe and Inspect
Dry all connections with a clean cloth and look for hidden drips that may appear as pressure builds in the lines.
Ongoing Maintenance
Clean the nozzle monthly to prevent clogs from mineral deposits. Keep spare washers and clips in your toolbox for quick repairs. Inspect all connections every six months to catch early signs of wear or leaks.
Frequently Asked Questions About Kitchen Sink Sprayer Installation
How long does it take to install a kitchen sink sprayer?
A complete sprayer replacement typically takes under one hour with basic hand tools. The faucet and side sprayer combination installation takes longer, especially if drilling additional sink holes is required.
Can I use a universal replacement nozzle with any brand?
Universal nozzles often don’t fit properly and can cause leaks, poor spray performance, or hose damage. Brand-specific replacements ensure a reliable, leak-free fit and longer lifespan.
Do I need to turn off the main water supply if my sink has shutoff valves?
If both hot and cold under-sink shutoff valves work properly, you only need to turn those off. If the valves are stuck, leaking, or missing, shut off the main water supply at the meter before beginning work.
What should I do if the sprayer leaks after installation?
First, try tightening the connection slightly. If the leak persists, disassemble the connection and check that washers are properly seated and undamaged. Replace any worn gaskets before reassembling.
How do I prevent losing the small retaining clip during removal?
Always plug the sink drain with a rag or towel before starting. Work over a towel on the floor of the cabinet to catch any dropped parts, and keep a small magnetic dish nearby for metal clips.
Is plumber’s putty necessary, or can I use silicone instead?
Plumber’s putty is the traditional choice for sink drains and sprayer bases because it remains pliable and allows easy disassembly. Some manufacturers include rubber gaskets as an alternative. Check your kit’s instructions to confirm the recommended sealant.
Final Takeaway for Installing a Kitchen Sink Sprayer
Learning how to install a kitchen sink sprayer comes down to three essentials: shut off the water properly, use brand-matched parts for a reliable fit, and test every connection thoroughly before calling the job complete. Gather your tools in advance, work patiently through each step, and avoid the temptation to overtighten plastic components.
Your next step is to identify your faucet brand and order a matching replacement kit. With the right parts on hand and this guide bookmarked, you’ll have your sprayer working perfectly in under an hour.







