
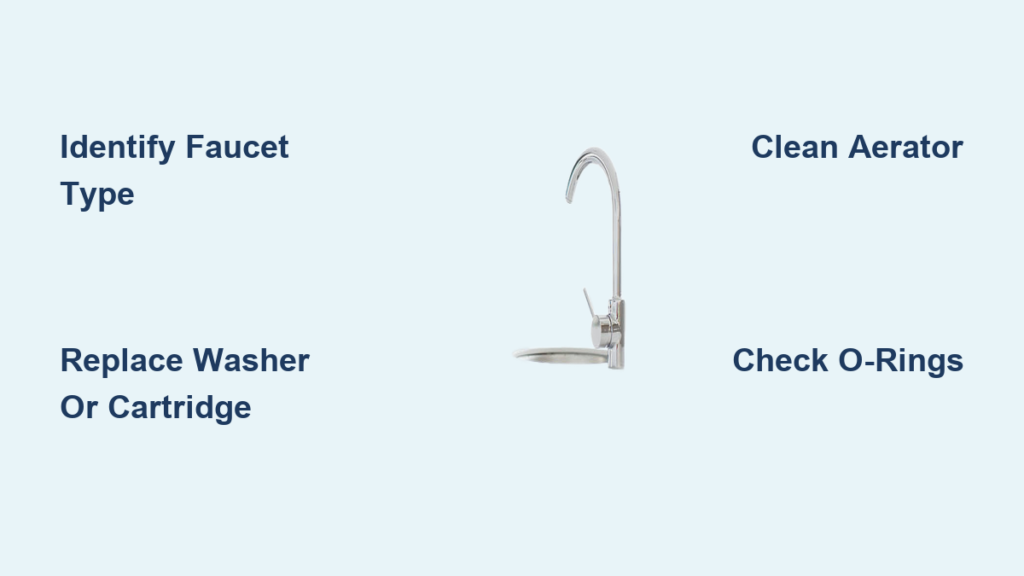
A steady drip from your kitchen faucet isn’t just annoying. It wastes thousands of gallons of water yearly and adds hundreds to your water bill. Most drips take under an hour to fix with basic tools and inexpensive replacement parts. This guide walks you through identifying your faucet type, replacing worn components, and stopping the drip for good without calling a plumber.
Identify Your Faucet Type First
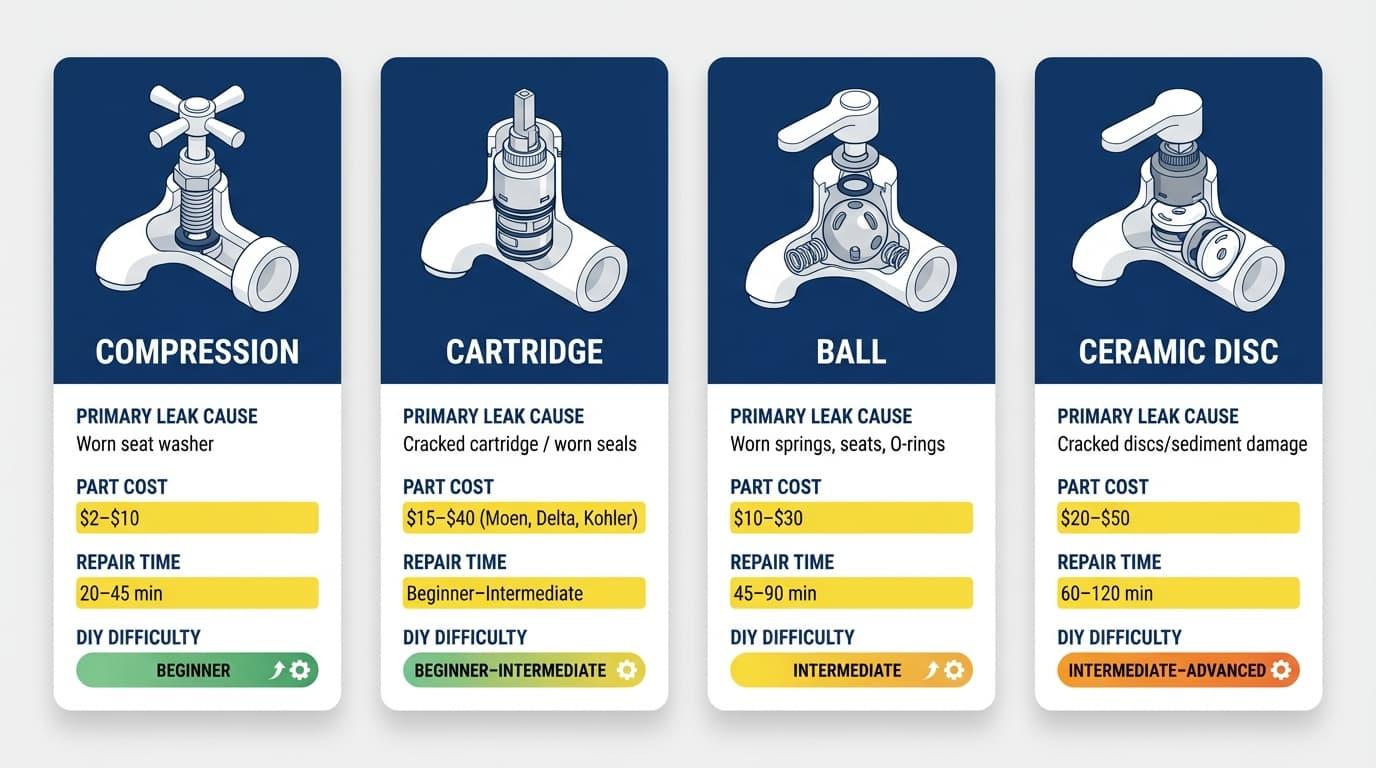
Knowing your faucet type determines which parts you need. Different styles use different internal mechanisms, and using the wrong part can make the leak worse.
Compression Faucets
These have two separate handles for hot and cold water. Turning a handle compresses a rubber washer against a metal seat to stop water flow. These are the most common cause of drips in older homes and require regular maintenance.
Cartridge Faucets
Modern faucets from brands like Moen, Delta, and Kohler use a replaceable cartridge. A worn cartridge or dried-out O-ring causes dripping. These require brand-specific parts. Moen uses 1225, 1222, or 1255 cartridges. Delta commonly uses RP50587.
Ball-Type Faucets
Older single-handle Delta Monitor models use a rotating ball with internal seals. Leaks come from worn O-rings, springs, or the ball itself. Handle wobble is a telltale sign.
Ceramic Disc Faucets
High-end models from Kohler and Grohe use two ceramic discs that slide over each other. Extremely durable but sensitive to debris or cracking. A small chip causes constant dripping.
Diagnose Where the Drip Comes From
Pinpointing the source saves time and prevents unnecessary repairs.
Dripping from the Spout
This most common issue usually points to internal failure. Compression faucets need a worn washer or pitted valve seat. Cartridge faucets have faulty cartridge seals. Ball faucets need worn ball or O-rings. Ceramic disc faucets may have a cracked disc or mineral buildup.
Leaking at the Handle Base
Water seeping around the handle when turned indicates a degraded O-ring or loose packing nut. Replace the O-ring and lubricate with plumber’s grease.
Moisture at the Spout Base
Leak appearing where the spout meets the sink deck means a failed spout O-ring. This is common in pull-down sprayer faucets.
Gather Tools and Parts Before Starting
Having everything ready prevents mid-repair delays.
Essential Tools
• Hex wrench (Allen key) for removing setscrews
• Adjustable wrench for loosening nuts
• Pliers with cloth to protect finish
• Flat-head screwdriver for prying caps
• Needle-nose pliers for extracting small O-rings
• Valve seat wrench for compression faucets
Replacement Parts You May Need
| Part | When to Replace |
|---|---|
| Rubber washers | Every 3-5 years or when cracked |
| O-rings | With every major repair |
| Cartridge | If dripping persists after other fixes |
| Ball kit | Includes ball, springs, O-rings |
| Aerator assembly | If clogged or damaged |
Bring the old part to the store for exact matching.
Shut Off Water and Prepare the Area
Skipping this step risks flooding your kitchen.
Step 1: Turn Off Under-Sink Valves
Locate hot and cold shutoff valves under the sink. Turn both clockwise until tight. Open the faucet to drain remaining water and relieve pressure.
Step 2: Plug the Drain
Place a rag under the valve area and cover the sink drain. This prevents dropping small parts into pipes.
Step 3: Protect the Sink Finish
Lay a towel in the sink basin to avoid scratching porcelain or stainless steel with tools.
Remove the Faucet Handle
This exposes internal components for repair.
Step 1: Pop Off the Decorative Cap
Look for H and C markings on handle tops. Use a flat-head screwdriver to gently pry off the cap.
Step 2: Unscrew the Setscrew
Most handles use a hex (Allen) or Phillips screw. Remove it and keep it in a labeled container.
Step 3: Pull Off the Handle
Gently lift straight up. If stuck, wiggle slightly. Take a photo before going further to help with reassembly.
Access and Inspect Internal Components
Now you can see what is causing the drip.
For Compression Faucets
Use an adjustable wrench to remove the packing nut. Unscrew and pull out the stem. Inspect the washer at the base for cracks, flattening, or looseness.
For Cartridge Faucets
After removing the handle, look for a retaining nut or clip. Use pliers to pull out the cartridge. Check for cracks, swelling, or worn seals.
For Ball-Type Faucets
Remove the cap over the ball. Lift out the rotating ball mechanism. Inspect for cracks, wear, or corrosion.
For Ceramic Disc Faucets
Remove mounting hardware holding the cylinder. Lift out the disc assembly. Look for chips, cracks, or grit between plates.
Clean and Replace Faulty Parts
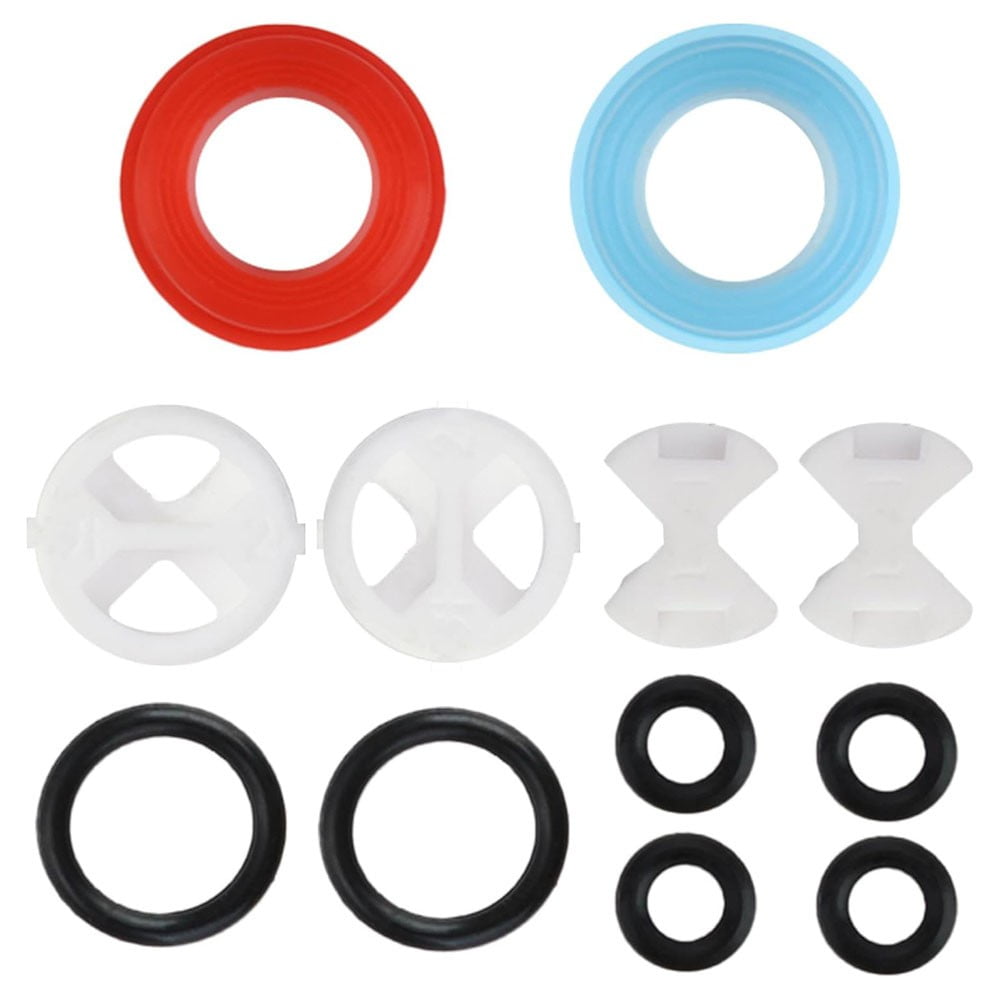
This is where the fix happens.
Replace the Washer (Compression Faucets)
- Remove the brass screw securing the old washer
- Take out the worn rubber piece
- Install a new washer of identical size and shape
- Reattach with screw but do not over-tighten
Fix the O-Ring
- Slide the old O-ring off the stem or cartridge
- Lubricate the new O-ring with plumber’s grease
- Slide into groove ensuring it sits flat and snug
- Reinstall stem or cartridge
Never use petroleum jelly. It degrades rubber over time.
Install a New Cartridge
- Take the old cartridge to Home Depot, Lowe’s, or Menards for exact match
- Or visit Moen.com or Deltafaucet.com to identify your model
- Align tabs, notches, or guides with faucet body
- Push in firmly. Most cartridges fit only one way.
Replace the Ball Mechanism
- Remove ball and inspect for wear
- Replace with new ball and repair kit including O-rings and springs
- Reassemble in reverse order
- Test handle movement. It should be smooth.
Swap the Ceramic Disc Cylinder
- Extract old cylinder carefully
- Clean housing with white vinegar
- Insert new cylinder and align precisely
- Secure with mounting hardware
Clean or Replace the Aerator
Sometimes the drip is just backpressure from a clogged tip.
Step 1: Unscrew the Aerator
Twist off by hand or use pliers with a cloth to protect finish. Disassemble into screen, flow restrictor, and washer.
Step 2: Soak in Vinegar
Place parts in white vinegar for 1-4 hours. Gently scrub with an old toothbrush. Rinse thoroughly.
Step 3: Reassemble and Reattach
Rebuild the aerator in correct order. Screw back onto spout hand-tighten only.
Reassemble and Test the Faucet
Put it all back together and check if the fix worked.
Step 1: Reinstall Components
Insert stem or cartridge fully. Replace packing nut or retaining nut. Tighten with wrench snug but not forced.
Step 2: Reattach Handle
Slide handle back on straight. Insert setscrew and tighten. Snap decorative cap into place.
Step 3: Turn Water Back On
Slowly open shutoff valves. Open faucet gradually to release air. Let water run for 2-3 minutes to flush debris.
Step 4: Check for Leaks
Operate faucet multiple times. Look for drips at spout, handle base, and spout base. If leak persists, recheck alignment or replace additional parts.
Troubleshoot If the Drip Continues
Some leaks linger after careful repair.
Double-Check Cartridge Alignment
Misaligned tabs prevent full closure. Remove and reinsert ensuring it clicks into place.
Inspect Hidden O-Rings
Some faucets have secondary O-rings on stems or cartridges. Replace all rubber seals during repair.
Tighten Connections (But Not Over-Do It)
Loose nuts cause seepage. Over-tightening cracks plastic parts. Use hand plus 1/4 turn with wrench.
Test Water Pressure
High pressure above 80 psi can prevent seals from closing. Install a pressure regulator if needed.
Consider Systemic Issues
If multiple faucets drip, the problem may be hard water, aging plumbing, or main supply line corrosion. Install a water softener in high-mineral areas.
Prevent Future Drips with Maintenance
A one-time fix is not enough. Prevent recurrence with simple habits.
Clean the Aerator Every 3-6 Months
Prevents clogs and backpressure. Takes less than 10 minutes.
Soak Internal Parts Annually
Especially in hard-water regions. Use vinegar soak during routine repairs.
Lubricate O-Rings with Plumber’s Grease
Keeps seals flexible. Reduces friction and wear.
Avoid Over-Tightening Handles
Does not stop leaks. It just damages washers and cartridges. Turn until snug then stop.
Replace Rubber Parts Every 3-5 Years
Even if no drip yet. Proactive replacement saves future hassle.
Know When to Call a Plumber
DIY works for most leaks, but some situations need a pro.
Call a Plumber If
• Cartridge or stem is seized and won’t budge
• Faucet body is cracked or leaking at the base
• No shutoff valves under sink
• Multiple fixtures leak indicating systemic issue
• You are unsure about reassembly risking water damage
DIY repair costs $10-30. A plumber charges $150-300 per visit.
Get Warranty Parts for Free
Many brands offer free replacements under warranty.
Moen
Lifetime warranty on faucets. 5-year warranty on parts. Visit Moen.com/support or call 1-800-BUY-MOEN.
Delta
Lifetime limited warranty. Free cartridge replacements like RP50587. Use online tool to identify your model.
Kohler
Lifetime warranty on function and finish. Register product online for faster service.
Take photos of your faucet and bring them to the store or upload online for support.
Frequently Asked Questions About Kitchen Faucet Drips
Why does my kitchen faucet drip even when turned off?
The most common cause is a worn washer in compression faucets or a faulty cartridge in modern faucets. The internal seal is not fully closing, allowing water to seep through.
How much does a dripping faucet cost in water bills?
A single drip per second wastes approximately 3,200 gallons annually, costing about $192 per year at average rates. Severe leaks can cost hundreds of dollars yearly.
Can I fix a dripping faucet myself?
Yes. Most drips take under an hour to fix with basic tools and replacement parts costing $10-30. The process involves shutting off water, removing the handle, and replacing the worn component.
What causes a faucet to start dripping?
Drips result from degraded internal seals due to regular use, hard water mineral buildup, or improper handling. Rubber washers, O-rings, and cartridges all wear out over time.
How do I know if I need a new faucet or just repairs?
If the faucet body is cracked or the internal mechanism is seized, replacement may be needed. Otherwise, replacing washers, O-rings, or cartridges almost always solves the problem at a fraction of the cost.
Do I need special tools to fix a dripping faucet?
Basic tools like an adjustable wrench, hex wrench, and screwdriver handle most repairs. A valve seat wrench is needed for compression faucet seat replacement, but this is optional for most homeowners.
Key Takeaways for Fixing Your Dripping Kitchen Faucet
Fixing a kitchen faucet drip is one of the easiest and most rewarding DIY tasks. With the right approach, you can silence that annoying drip in under an hour and save hundreds in water costs.
The process starts with identifying your faucet type. Compression, cartridge, ball, and ceramic disc faucets each require different parts and repair approaches. Always shut off water before starting and take photos during disassembly for reference.
Replace worn washers, O-rings, or cartridges based on your faucet type. Clean mineral buildup with vinegar and lubricate rubber parts with plumber’s grease. Reassemble carefully, test slowly, and check for leaks at all connection points.
Proactive maintenance extends faucet life. Clean the aerator every few months, replace rubber parts every 3-5 years, and avoid over-tightening handles. For persistent leaks or complex issues, consider warranty coverage or professional help.







