
Is your shower too cold in winter or dangerously hot in summer? You’re not alone. A common household frustration, especially in homes with children or elderly users, is inconsistent or unsafe water temperature from shower and tub faucets. The good news: most modern faucets come with built-in temperature limit stops to control maximum heat, and adjusting them is easier than you think. Whether you own a Delta, Peerless, Embather, or Pfister model, this guide shows you exactly how to adjust water temperature on your faucet in minutes, no plumber required.
You’ll learn step-by-step procedures for each brand, what tools you need, how to avoid common mistakes, and how to maintain safe, comfortable water year-round. Each section covers specific adjustment methods, troubleshooting tips, and safety considerations to help you get complete control over your shower’s temperature.
Identify Your Faucet Type Before Starting
Before making any adjustments, identify whether your faucet comes from a plumbing supply house or a big-box retailer. This determines how easy or difficult the adjustment will be.
Supply-House vs Retailer Faucets
Faucets purchased through plumbing suppliers like Delta and Peerless professional lines are designed for serviceability. They feature accessible cartridges with clear pull and turn markings and standardized parts. In contrast, models sold at Home Depot or Lowe’s often lack visible adjustment points, require full disassembly, and use proprietary components that slow repairs.
The key differences include:
• Supply-house models have intuitive temperature adjustment mechanisms
• Big-box versions hide limiters behind complex assemblies
• Interchangeable parts make supply-house faucets easier to repair
Locate the Temperature Limit Stop
All pressure-balancing and thermostatic faucets include a mechanical stop that limits how far the handle can rotate into the hot zone. This safety feature prevents scalding but can be adjusted when more heat is needed.
Look for these indicators:
• A removable handle
• A visible plastic ring or stop
• Markings like pull and turn
• A screw beneath the handle
Once located, you’re ready to proceed with your specific brand’s adjustment method.
Adjust Delta Faucet Temperature
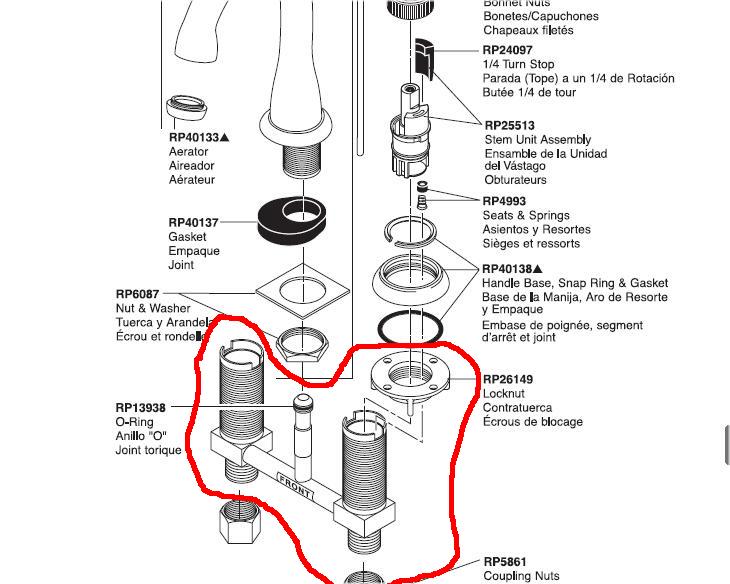
Delta faucets from supply houses are among the easiest to adjust thanks to their intuitive pull and turn cartridge system. The entire process takes about 5 to 8 minutes.
Remove the Handle
Use a Phillips screwdriver to remove the screw on the underside of the handle. If there’s a decorative cap, gently pry it off with a flat-head screwdriver. Pull the handle straight off the stem.
Warning: Do not force a stuck handle. Wiggle gently or apply penetrating oil. Never use pliers, which can damage plastic components.
Rotate the Cartridge
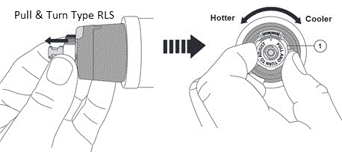
Expose the cartridge and look for the words pull and turn stamped on the side. The adjustment mechanism works as follows:
• To increase hot water: Pull the cartridge toward you and rotate left (counterclockwise)
• To decrease hot water: Pull and rotate right (clockwise)
Each quarter-turn adjusts the maximum temperature by several degrees. Make small increments and test after each adjustment.
Reassemble and Test
Slide the cartridge back in, reattach the handle, and tighten the screw. Replace the decorative cap. Turn on the water and test the temperature with a thermometer. Safe shower temperatures range from 104 to 108 degrees Fahrenheit.
Expert Note: Delta rough-in valves are compatible with Peerless trim kits. Use this to your advantage if replacement parts are unavailable.
Adjust Peerless Faucet Temperature
Peerless models from plumbing suppliers use the same cartridge design as Delta, making the process nearly identical. Because Peerless and Delta share interchangeable components, repair kits and tools work across both brands.
Follow Delta Steps for Peerless
Remove the handle with a Phillips screwdriver. Pull and rotate the cartridge using the same method. Turn left to increase heat, right to reduce.
Time-Saver: If your Peerless faucet lacks markings, assume it is a Delta-compatible valve. Test the pull-and-turn method. It likely applies.
Adjust Embather Faucet Temperature
Embather faucets stand out for their tool-free design and fast access, making adjustments quick and simple. The entire process takes under 5 minutes.
Pull Off the Handle
Grasp the handle and pull straight off. Some models have a small set screw. Loosen it first if present. Most Embather handles use a friction fit that releases with firm, even pressure.
Rotate the Red Collar
Under the handle, you will see a red plastic temperature limit collar around the stem. This collar controls how far the handle can move toward hot water.
• To allow hotter water: Rotate collar clockwise
• To limit heat: Rotate counterclockwise
Each position incrementally changes the maximum temperature output.
Reinstall and Verify
Push the handle back on, aligning it vertically. Turn on the shower and test the water. If too hot or too cold, repeat the adjustment in small steps.
Maintenance Tip: Soak the red collar and stem in white vinegar annually to dissolve mineral buildup that can restrict movement.
Adjust Pfister Faucet Temperature
Pfister faucets require slightly more precision due to their notched stop mechanism, but the process remains straightforward. Plan for 10 to 12 minutes to complete this adjustment.
Remove Handle and Cap
Check if the handle has a set screw. If so, loosen it with a Phillips screwdriver. Some models twist off by hand. Once the handle is off, unscrew the plastic cap beneath to expose the internal components.
Remove the Gray Stop Piece
Locate the gray plastic temperature stop held by a Phillips screw. Loosen the screw but do not remove it completely. Lift out the gray piece. It is press-fit, so it should come free easily.
Rotate the Notch for More Heat
The bottom of the piece has a notch that controls handle travel. To increase temperature, rotate the piece clockwise so the notch extends further down. This allows the handle to move farther into the hot side.
Ensure the drain hole faces downward when reinstalling to prevent water accumulation.
Reassemble with Care
Press the stop back in, replace the cap, and secure the screw. Reattach the handle, aligning it straight down. Avoid over-tightening. Pfister uses plastic components that crack under excessive torque.
Pro Tip: Misaligned notches cause failed adjustments. Double-check orientation before reassembling.
Compare Adjustment Methods Across Brands
Different brands use different mechanisms, but the goal is the same: control maximum hot water output. Here is how they compare.
Delta and Peerless: Pull and Turn
This is the fastest method, taking 5 to 8 minutes. The integrated cartridge eliminates extra parts. Turning left increases heat, right decreases.
Embather: Red Collar Rotation
This takes under 5 minutes and requires no tools. Clockwise rotation makes water hotter. It is the most user-friendly method for frequent adjustments.
Pfister: Notched Stop Piece
This takes 10 to 12 minutes due to precise alignment needs. Clockwise rotation of the notch allows more hot water. It is best for one-time calibration.
User Insight: Over 80 percent of homeowners with accessible limiters report improved comfort and safety, especially in mixed-age households.
Fix Common Adjustment Problems

Even simple adjustments can go wrong. Here is how to troubleshoot the most frequent issues.
Handle Will not Turn Smoothly
Cause: Mineral buildup in the cartridge.
Fix: Disassemble and soak components in white vinegar for 30 minutes. Rinse and reassemble. Repeat if needed.
Prevention: Descale annually, especially in hard water areas.
No Change After Adjustment
Cause: Stop mechanism not properly seated or misaligned.
Fix: Reopen the faucet and verify the following:
• Delta/Peerless: Cartridge fully engaged after turning
• Pfister: Notch facing correct direction, drain hole down
• Embather: Collar snapped into correct groove
Water Too Hot After Adjustment
Cause: Stop rotated too far clockwise.
Fix: Reopen and rotate counterclockwise to reduce heat. Test with a thermometer. Safe shower temps are 104 to 108 degrees Fahrenheit.
Leaking Around Handle
Cause: Damaged O-ring or over-tightened screw.
Fix: Replace O-ring with one from a universal repair kit. Tighten screws until snug, no more.
Maintain Safe Water Temperatures
Adjusting temperature is not just about comfort. It is about safety.
Set Safe Maximum Limits
Never disable the limiter. Scalding can occur in seconds.
• At 120 degrees Fahrenheit: Burns skin in 5 minutes
• At 130 degrees Fahrenheit: Burns in 30 seconds
• At 140 degrees Fahrenheit: Causes injury in 5 seconds
Set maximum temperature to 108 degrees Fahrenheit for households with kids or elderly users.
Test with a Thermometer
After adjustment, run water for 1 minute and test with a digital thermometer. Hold it under the flow for an accurate reading.
Alternative: Use your elbow. It is more heat-sensitive than hands. Water should feel warm, not hot.
Consider Anti-Scald Devices
For added safety, consider installing pressure-balancing valves, thermostatic mixing valves, or digital faucets with preset modes. These automatically regulate temperature during pressure drops, such as when a toilet flushes.
Tools and Tips for Success
Required Tools by Brand
Different brands require different tools for the adjustment process.
• Delta: Phillips screwdriver, flat-head screwdriver
• Peerless: Phillips screwdriver
• Embather: None (hand-adjusted)
• Pfister: Phillips screwdriver, optional wrench
Keep a small toolkit in your bathroom cabinet for quick fixes.
Best Adjustment Practices
Follow these guidelines for successful temperature adjustment.
- Shut off water if replacing cartridges or dealing with leaks
- Make small changes and test after each adjustment
- Align components properly, especially notches and drain holes
- Avoid over-tightening because plastic breaks easily
- Clean annually using vinegar or commercial descaler
Pro Advice: Label your final setting with a small dot of nail polish on the stop and handle. This marks your ideal position for future reference.
When to Call a Plumber
While most adjustments are DIY-friendly, some situations require professional help.
Professional Help Needed
Call a plumber if you encounter these issues:
• Cartridge is stuck or broken
• Valve leaks after reassembly
• No hot water despite full adjustment
• Faucet is electronic or digital (like Moen U or Kohler Konnect)
These models use software or hidden thermostats and are not serviceable with standard methods.
Note: This guide applies only to mechanical pressure-balancing and thermostatic faucets. Digital systems require app-based calibration.
Frequently Asked Questions About Faucet Temperature Adjustment
Can I adjust the temperature on any faucet?
Most pressure-balancing and thermostatic faucets have temperature limit stops. However, electronic or digital faucets require app-based calibration, not mechanical adjustment. Check your model before attempting any changes.
Why is my water still too hot after adjustment?
The stop mechanism may have been rotated too far clockwise. Reopen the faucet and rotate the limit stop counterclockwise to reduce the maximum temperature. Test with a thermometer after each adjustment.
How do I know if my faucet has a temperature limit stop?
Look for a removable handle, a visible plastic ring or stop, markings like pull and turn, or a screw beneath the handle. All modern thermostatic and pressure-balancing faucets include this safety feature.
What is the safest water temperature for a shower?
The recommended maximum is 104 to 108 degrees Fahrenheit (40 to 42 degrees Celsius). This temperature provides comfort while minimizing scalding risk, especially for children and elderly household members.
How often should I descale my faucet?
Descale annually, or more frequently in areas with hard water. Mineral buildup can restrict handle movement and affect temperature consistency. White vinegar or commercial descaling solutions work well.
Is it safe to disable the temperature limit stop?
Never disable the limiter entirely. It exists to prevent scalding. If you need higher temperatures for specific tasks, adjust the stop incrementally and always test with a thermometer before use.
Key Takeaways for Adjusting Faucet Temperature
Adjusting water temperature on your faucet is a quick, effective way to improve comfort and safety in your home. With the right steps, you can raise or lower heat in under 10 minutes whether you have a Delta, Peerless, Embather, or Pfister model. The key is identifying your faucet type first, then following the brand-specific procedure that matches your setup.
Remember to make small incremental adjustments and test after each change. Use a thermometer to verify safe temperatures between 104 and 108 degrees Fahrenheit. Annual maintenance, including descaling and O-ring inspection, keeps your faucet working smoothly for years.
Now you are in control of your shower’s temperature without calling a plumber.







