
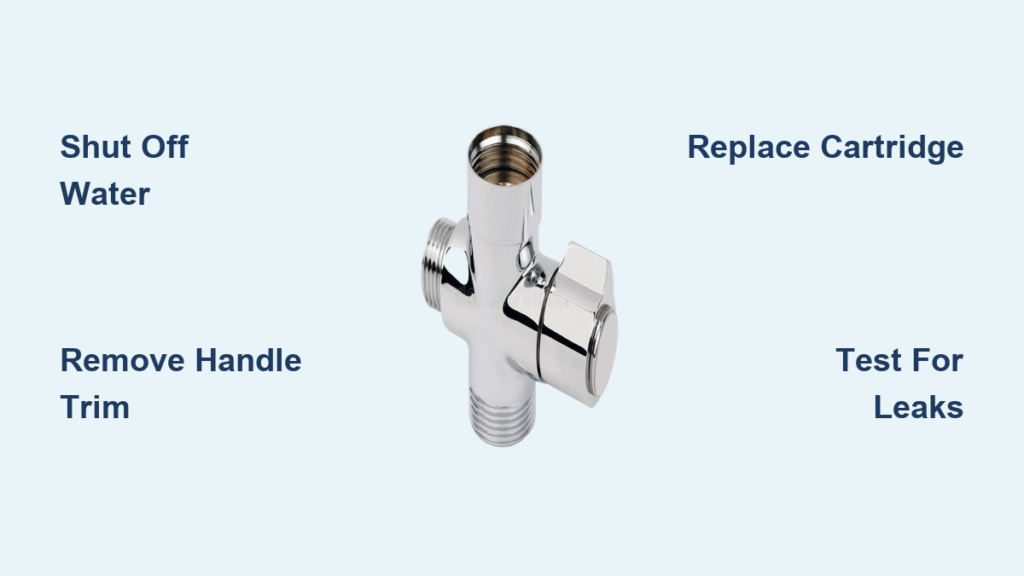
A dripping shower, sudden temperature swings, or weak water pressure? You are not alone. These are classic signs of a failing shower faucet valve. This component controls water flow, mixes hot and cold water, and ensures safe shower temperatures. When it fails, the fix is often simpler than you think. In most cases, replacing a worn cartridge or seal restores full function without tearing into your walls.
This guide walks you through every step to diagnose, repair, or replace a shower faucet valve, whether it is a Moen, Delta, or Ferguson ProFlo system. You will learn how to identify the problem, choose the right parts, and complete the repair with common tools. We will cover removing stubborn cartridges, setting temperature limits, and preventing future issues.
Identify Common Valve Problems
Recognizing symptoms early prevents water damage and scalding risks. Most shower valve issues stem from worn internal parts, not broken pipes behind the wall.
Dripping After Shutting Off
A persistent drip from the showerhead means the cartridge or seals are not sealing fully. This usually happens because of worn O-rings, mineral buildup preventing full closure, or a cracked cartridge. This is fixable with a $20 to $30 cartridge replacement in 30 to 60 minutes.
Sudden Hot or Cold Surges
If water temperature spikes when someone flushes a toilet, your pressure-balancing valve is failing. This valve adjusts hot and cold flow to maintain stability. A faulty one cannot respond to pressure drops, creating a scald hazard. Replace the cartridge or rebuild the internal mechanism to fix this.
Weak Shower Flow
Low pressure when using the shower, but normal flow at the tub spout, points to a faulty diverter valve. In tub/shower combinations, this component redirects water upward. If it leaks or sticks, flow to the shower drops. Try removing and cleaning the diverter first, as it is often clogged with debris.
Leaking at Tub Spout When Shower Is On
Water coming out of the spout while the shower runs means the diverter is not closing properly. This can be part of the main valve or a separate mechanism in the spout. Do not replace the entire valve; check the spout diverter first.
Stiff or Loose Handle
A handle that is hard to turn usually means corrosion or lack of lubrication. If it feels loose or wobbly, internal springs or tension rings are worn. This is common in Delta valves. Lubricate with food-grade silicone paste, never petroleum-based grease.
Know Your Valve Type

Different valves require different repairs. Identifying yours saves time and ensures you buy the right parts.
Pressure-Balancing Valves
Most common in standard homes. These automatically adjust hot and cold mix when water pressure changes, such as when a dishwasher starts. Brands include Moen, Delta, American Standard, and Ferguson ProFlo. Repair involves replacing the cartridge or internal seals. Handle motion is typically 1/4 to 1/2 turn from cold to hot.
Thermostatic Mixing Valves
These maintain exact temperature regardless of pressure. They are found in high-end or safety-focused bathrooms. They use a thermal element that expands and contracts to regulate flow. They require calibration after installation and cost more, but offer superior comfort and safety. Ideal for homes with children or elderly users.
Diverter Valves
These direct water between tub spout and showerhead. They can be integrated into the main valve or separate in the tub spout. A failing diverter causes weak shower flow or spout leaks. Do not confuse diverter failure with main valve failure.
Gather Essential Tools and Parts

You do not need a full plumber kit, but having the right tools prevents damage and frustration.
Must-Have Tools
• Adjustable wrench
• Phillips and flathead screwdrivers
• Allen wrench (3/32 inch or 1/8 inch)
• Needle-nose pliers
• Channel locks (wrap with cloth to protect finish)
• Utility knife (to pry off caps)
• Flashlight (to see behind trim)
• Cartridge puller (Posi-Temp puller for Moen valves)
Rent or buy a cartridge puller; it pays for itself after one use.
Key Replacement Parts
• Cartridge (brand- and model-specific)
• O-rings, washers, springs (often in rebuild kits)
• Stainless steel ball and cam (for Delta valves)
• Plumber grease or silicone paste (food-grade only)
• Teflon tape and pipe dope (for spout and showerhead)
Always buy OEM parts. Generic cartridges fail faster, especially for Moen.
Shut Off Water and Depressurize
Skipping this step risks flooding. Never begin disassembly without cutting water and releasing pressure.
Turn Off Main Supply
Locate the main water shutoff valve, usually in the basement or utility room. Turn it clockwise until fully closed.
Drain Residual Water
Open nearby faucets, like a sink, to let trapped water escape. Run the shower briefly to confirm no flow. Never skip depressurizing. Trapped water can burst out under pressure when you loosen fittings.
Remove Handle and Trim
Access begins with removing the handle and decorative parts. Take photos as you go; reassembly is easier with visual references.
Pry Off Decorative Cap
Use a utility knife or flathead screwdriver. Gently lift the cap on the handle, often marked “H/C” or with a Delta button.
Unscrew Set-Screw
Insert an Allen wrench into the exposed screw. Turn counterclockwise to remove. Pull the handle straight off. If stuck, tap gently with a rubber mallet. Take a photo of the temperature limit stop before removing the next piece.
Remove Handle Adapter and Temperature Stop
Unscrew the Phillips screw holding the adapter. Slide it off; this contains the heat limiter that caps maximum hot water. Note its orientation; you will reinstall it in the same position.
Take Off Collar and Escutcheon
For Delta valves, remove the dome nut using channel locks wrapped with cloth. For Moen, slide off the pull-type collar. Unscrew and remove the escutcheon plate, the wall ring. Label parts if working on multiple fixtures.
Extract the Cartridge or Internal Parts
Now you can access the valve core. The method depends on brand and type.
Moen Posi-Temp Valves
- Use an adjustable wrench to remove the brass retaining nut.
- Pull out the cartridge by hand.
- If stuck, spray penetrating oil and wait 10 minutes.
- Use a Posi-Temp puller tool; tighten and pull evenly.
- Rotate slightly to break mineral bonds.
Take a photo of the cartridge H and C orientation before removal.
Delta Ball-and-Cam Valves
- After removing dome nut, expose the valve assembly.
- Remove the stainless steel ball, cam, and bonnet gasket.
- Extract two internal seals at 11:00 and 1:00 positions using a Phillips screwdriver.
- Do not touch the center hole; it is a pressure balance port.
- Remove cups and springs, noting which spring goes where.
Delta repair kits include all these parts; match exactly.
Clean and Inspect the Valve Body
A dirty valve ruins new parts. Cleaning ensures a proper seal and long life.
Check for Damage
Look for cracks, corrosion, or scoring on sealing surfaces. If the body is damaged, replace the entire valve; repair will not hold.
Remove Mineral Buildup
Scrub with fine steel wool or a green 3M Scotch-Brite pad. Avoid abrasive pads; they scratch metal. Soak metal parts in white vinegar for 15 minutes to dissolve limescale. Flush the valve body with water to clear debris. Hard water areas need annual cleaning to prevent premature wear.
Install New Cartridge or Components
Fresh parts must be lubricated and aligned correctly, or the problem returns fast.
Moen Cartridge Installation
- Apply food-grade silicone paste to O-rings and moving parts.
- Align the new cartridge with H and C matching the valve body.
- If H and C are on the bottom, install with H and C down.
- Push in firmly until seated.
- Reinstall the retaining clip; snap into both side slots.
Never force it; misalignment causes leaks and handle binding.
Delta Reassembly
- Insert cup and spring into 11:00 recess; press until it moves freely.
- Repeat for 1:00 position.
- Drop in the stainless steel ball.
- Place cam on top, aligning its notch with the valve body.
- Hold in place while screwing on dome nut.
- Do not over-tighten; it can crush internal tubes.
Lightly coat dome nut threads with silicone paste for easier future access.
Adjust Handle Tension (Delta Only)
Delta valves need precise tension to seal properly and turn smoothly.
Use Delta Adjustment Tool
Insert the tool into the center of the cam. Turn clockwise to increase tension. Test handle after each 1/4 turn. Too loose causes dripping. Too tight causes handle binding or restricts flow. Goal is smooth rotation with full shutoff, no resistance.
Reattach Handle and Trim
Now rebuild the visible parts in reverse order.
Slide on Escutcheon
Position over the valve body. Secure with screws.
Reinstall Handle Adapter
Place temperature limit stop in original position. Screw in with Phillips driver.
Attach New Handle
Align the brooch (keyway) with the stem post. Push on and secure with Allen screw from the bottom. For Delta, rotate handle so notch aligns with top of button. Delta handles are not universal; verify fit before purchase.
Seal and Finish the Repair
A clean seal prevents water from seeping behind the wall.
Apply DAP Caulk
Run a bead around the gap between escutcheon and wall. Smooth with a wet finger for a professional finish. Let cure per instructions, usually 24 hours. Skip this step, and moisture can cause mold or drywall damage.
Restore Water and Test Operation
The final test confirms your success.
Turn On Water Slowly
Open the main shutoff valve gradually. This prevents water hammer, a sudden pressure surge that can damage pipes.
Test Full Range of Motion
Turn handle from off to cold to warm to hot to off. Check for no dripping when off, smooth handle movement, consistent temperature with no surges, and no leaks at spout, showerhead, or trim.
If dripping continues, recheck cartridge alignment, verify tension (Delta), or ensure temperature stop is not blocking full closure. If hot water comes on first, rotate cartridge stem 180 degrees; no need to shut off water.
Set Temperature Limit for Safety
Prevent scalding by capping maximum hot water.
Adjust the Mechanical Stop
- With handle off, position the temperature limiter to restrict rotation.
- Aim for 120 degrees Fahrenheit, safe for most households.
- Reinstall handle and test.
- Run water at full hot.
- Measure temperature with a thermometer.
- Adjust stop if too hot or cold.
Never disable the limiter, especially with kids or elderly.
When to Replace the Entire Valve
Sometimes repair is not enough. Full replacement is needed if the valve body is cracked or corroded, leaks persist after cartridge replacement, no compatible parts are available, or you are upgrading to thermostatic control.
Access the Valve Behind the Wall
- Remove all trim.
- Drill a long bit through drywall on the opposite side to locate the valve.
- Cut a 12 by 12 inch access panel with a multi-tool.
Plan to patch and paint afterward.
Solder New Valve Assembly
- Cut copper pipes with pipe cutters.
- Solder new tub/shower combo kit.
- Install hammer arresters to prevent water hammer.
- Remove cartridge before soldering; heat can melt internal parts.
Use a wet rag on adjacent pipes to prevent accidental soldering.
Prevent Future Valve Problems
Extend your valve life with simple habits.
Replace Cartridge Every 5 to 7 Years
Even if no symptoms appear, this prevents sudden failure. OEM cartridges like Moen often have lifetime warranties.
Clean Mineral Buildup Annually
Soak parts in vinegar. Flush valve body.
Use a Water Softener
This reduces scale by 60% in hard water areas.
Inspect Seals Every 1 to 2 Years
Replace O-rings and washers proactively. Keep old packaging and receipts for warranty claims.
Know When to Call a Plumber
DIY works for most cartridge issues, but some jobs need a pro.
Call a Licensed Plumber If
• Cartridge is fused in place despite puller use
• Leak is behind the wall, not at trim
• Pipe soldering is required and you are inexperienced
• Valve body is cracked
• You are unsure of valve type or part match
Wall access is only needed for pipe or body leaks, not cartridge issues.
Frequently Asked Questions About Shower Faucet Valve Repair
How Do I Know If My Shower Valve Needs Repair?
Look for a dripping showerhead after turning off, sudden temperature changes, weak water pressure, or a stiff handle. These symptoms indicate worn cartridges, seals, or mineral buildup inside the valve.
Can I Replace a Shower Valve Without Removing Tile?
Yes. You can access the valve through an access panel behind the wall. For cartridge replacement, you only need to remove the handle and escutcheon, not the tile.
What Is the Average Cost to Fix a Shower Faucet Valve?
DIY cartridge replacement costs $45 to $70, including the cartridge and tools. Professional repair runs $175 to $300. Full valve replacement costs $150 to $250 DIY or $400 to $800 professionally.
How Long Does a Shower Valve Last?
Brass and stainless steel valves last 15 to 20 years. Plastic valves last 5 to 7 years. Cartridges typically need replacement every 5 to 7 years, even without symptoms.
Do I Need Special Tools to Replace a Shower Cartridge?
You need basic tools like an adjustable wrench, screwdrivers, and an Allen wrench. For Moen Posi-Temp valves, a cartridge puller tool is highly recommended. You can rent one or buy one for $25 to $40.
Why Does My Shower Get Hot When Someone Flushes the Toilet?
This indicates a failing pressure-balancing valve. The valve cannot adjust hot and cold mix when system pressure changes. Replace the cartridge to restore temperature stability.
Key Takeaways for Fixing Your Shower Faucet Valve
A properly repaired shower faucet valve should deliver smooth handle operation, cold-to-hot transition in 1/4 to 1/2 turn, no leaks at any setting, stable temperature without surges, and maximum temperature capped at 120 degrees Fahrenheit. Follow these core steps to fix it right the first time.
First, shut off water and relieve pressure before starting any work. Second, remove handle, adapter, and escutcheon to access the valve body. Third, extract the old cartridge using a puller if stuck, then clean and inspect for damage. Fourth, lubricate and install the new cartridge with correct H and C alignment. Fifth, reassemble trim and seal with caulk. Sixth, restore water slowly and test thoroughly.
With the right parts and careful lubrication, most shower valve issues can be fixed in under an hour. By fixing it yourself, you will save $150 to $300, gain confidence in home repairs, and enjoy a quiet, drip-free shower starting today.







