
Nothing is more frustrating than turning on your kitchen or bathroom faucet and getting only a weak dribble instead of a strong, steady stream. If you are dealing with low flow faucet problems, you are not alone. This is one of the most common plumbing complaints in homes across the country. The good news? In over 90% of cases, the fix is simple, fast, and costs less than $10. Most often, a clogged aerator is to blame, especially if only one faucet is affected. This guide walks you through every possible cause, from the simplest DIY fixes to component replacements, so you can restore full water pressure without calling a plumber.
Clean the Clogged Aerator First
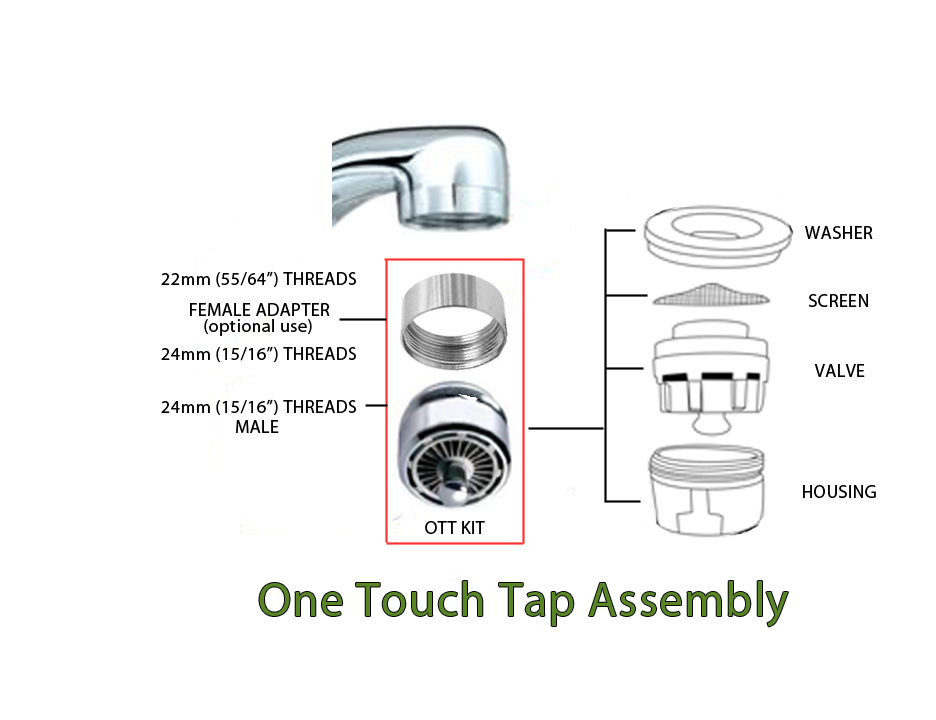
The aerator is a small mesh screen located at the tip of your faucet spout, and it is the number one culprit behind low flow faucet issues. This component mixes air with water to create a steady, splash-free stream, but over time, mineral deposits, sediment, and rust can clog its tiny openings. This problem is especially common in homes with hard water, well water, or recent plumbing work.
Remove and Soak the Aerator
Follow these steps to clean your aerator and restore flow.
- Turn off the faucet and close the drain to prevent losing small parts.
- Wrap a soft cloth around the aerator to protect the finish.
- Unscrew the aerator by hand or use pliers with the cloth to prevent scratches.
- Disassemble all parts, noting the exact order of components.
- Soak everything in white vinegar for 30 minutes to overnight, depending on buildup.
- Scrub the mesh screen gently with an old toothbrush.
- Clear individual holes with a pin or needle, avoiding metal tools that could widen openings.
- Rinse thoroughly, dry completely, reassemble in the correct order, and reinstall hand-tight.
Pro Tip: Place the aerator in a vinegar-filled plastic bag and secure it around the faucet spout with a rubber band for hands-free soaking.
Check for Flow Restrictor Issues
Many aerators contain a plastic flow restrictor designed to meet EPA WaterSense standards. While environmentally friendly, these can become clogged or overly restrictive.
If flow remains low after cleaning, you have two options. Remove the restrictor entirely for maximum flow, or replace it with a higher-flow aerator of 2.5 GPM. However, verify local code compliance before modifying the restrictor, as this may increase splashing or violate water efficiency regulations.
Test the Shut-Off Valves
If cleaning the aerator does not solve the problem, the issue may lie upstream at the shut-off valves under your sink. Partially closed or malfunctioning valves can restrict water flow to just one faucet, and this is especially likely if hot and cold flows are uneven.
Check Valve Flow Output
- Turn off the water supply at the valves under the sink.
- Disconnect both hot and cold supply lines from the faucet.
- Place a bucket under each valve outlet.
- Briefly open the valves and observe the flow directly from the valve.
- Strong flow means the valves are functioning properly. Weak or sputtering flow indicates the valve is clogged, corroded, or not fully open.
Replace Old Compression Valves
Many older homes use multi-turn compression valves with rubber washers that degrade over time. Fragments can break off and block the water lines.
Upgrade to quarter-turn ball valves, which are more reliable and less prone to clogging. If working with copper lines, replace the compression rings during installation for a leak-free seal. Reconnect the supply lines and test flow again.
Inspect Supply Lines for Clogs or Kinks

Flexible braided stainless steel or plastic supply lines can develop internal buildup, kinks, or collapsed linings, especially after years of service. These restrictions can cause significant low flow faucet problems.
Flush or Replace the Lines
- With valves open and lines disconnected, flush each line by running water through them.
- Look for sediment discharge, reduced flow, or visible kinks and bulging.
- Replace any line that shows obstruction or damage.
Upgrade for Longevity
Install anti-kink braided stainless steel lines and choose the correct length to avoid bending or strain. Replace supply lines every 5 to 10 years, even if no visible issues appear, to prevent gradual flow reduction.
Clean In-Line Filters (Moen and Similar Faucets)
Some faucet brands, particularly Moen models, have in-line filters inside the brass fittings of the supply lines. These small mesh screens trap debris before it enters the cartridge.
Remove and Rinse the Filter
- Turn off water supply.
- Use two wrenches to unthread the filter housing, preventing the supply lines from twisting.
- Pull out the mesh screen and rinse under running water.
- Soak in vinegar if mineral buildup is heavy.
- Reinstall and tighten securely.
Diagnose Cartridge Problems
If both hot and cold water flow are reduced, and you have already cleaned the aerator, valves, and lines, the problem may be inside the faucet body itself.
Remove and Clean the Cartridge
- Shut off water supply and remove the handle.
- Unscrew the retaining nut and pull out the cartridge.
- Soak in vinegar for 30 to 60 minutes.
- Gently scrub with a soft brush.
- Inspect for cracks or wear, and replace if damaged.
- Reinstall and restore water flow.
When to Replace the Cartridge
Replace the cartridge if flow remains restricted, the handle is stiff or leaking, or temperature control is erratic. Cartridges typically last 5 to 7 years before performance degrades.
Fix Spray Head and Hose Clogs (Kitchen Faucets)
For pull-down or pull-out kitchen faucets, low flow faucet issues may stem from the spray head or hose rather than the main faucet body.
Unclog the Spray Nozzles
- Unscrew the spray head from the hose.
- Soak in vinegar overnight.
- Use a pin to clear individual jets.
- Flush the hose with water or blow air through it.
- Reattach and test both stream and spray modes.
Check the Diverter Valve
A worn diverter valve can fail to switch water correctly between spray and stream modes, causing weak flow. If only one mode works, replace the diverter using a model-specific replacement kit.
Rule Out System-Wide Issues
If multiple fixtures in your home have low flow, the problem is not isolated to one faucet and requires different troubleshooting.
Investigate Whole-House Causes
Check the main shut-off valve to ensure it is fully open. Look for clogged main lines due to aging pipes or hidden leaks that divert water pressure. Contact your local water utility to check for municipal supply issues or maintenance outages.
Diagnostic Steps
- Test flow at other faucets, the shower, and outdoor spigots.
- Ask neighbors if they are experiencing similar issues.
- Contact your water utility for service updates if needed.
Prevent Future Low Flow Problems
Regular maintenance prevents recurring low flow faucet issues and extends the life of your plumbing components.
Clean Aerator Every 3 to 6 Months
This is especially important in hard water or well water homes. Use a vinegar soak and soft brush, and clean the aerator after any plumbing work.
Upgrade to Quarter-Turn Valves
Quarter-turn ball valves are more reliable than compression valves, less likely to clog or leak, and easier to operate. Consider upgrading during any repair work.
Install a Water Softener
In hard water areas, a water softener reduces limescale buildup in aerators, cartridges, and pipes, significantly extending the lifespan of all plumbing components.
Use Self-Cleaning Aerators
Look for models with anti-clog nozzles, removable flow restrictors, and easy-flush designs. These maintain optimal flow with less maintenance over time.
Tools and Materials You Will Need
Gather these basic supplies before starting your repair.
• Towel to protect faucet finish
• Pliers or wrench with cloth wrap
• Small bowl or container
• White vinegar or CLR
• Old toothbrush
• Pin or needle
• Replacement aerator if needed
• Bucket for testing valves
• Two wrenches for in-line filters
• Compressed air for drying
When to Replace Components
Replace the aerator if it is cracked, corroded, or flow stays low after cleaning. Replace shut-off valves if they are leaking, not closing fully, or repeatedly clogging. Replace supply lines if they are kinked, bulging, leaking, or internally clogged. Replace the cartridge if it is worn, cracked, or causing flow issues. Replace the spray head if nozzles are permanently clogged or the hose is damaged.
Real Results and User Success
Most low flow faucet repairs take under 10 minutes to complete. The cost ranges from $0 using vinegar to $10 for a replacement aerator. Over 90% of single-faucet low flow cases are resolved by cleaning the aerator alone. Users report immediate 80 to 100% flow restoration after proper cleaning or replacement.
Final Tips and Pro Advice
Always shut off water before disassembling any component. Use a tray or container to keep small parts organized during disassembly. Bring the old aerator to the hardware store for perfect matching when buying a replacement. Refer to manufacturer guides for model-specific help. Consider upgrading old valves and lines while you are already under the sink.
By starting simple and working upstream, from aerator to valves to cartridge, you can diagnose and fix low flow faucet issues like a pro. Regular maintenance keeps your water pressure strong and avoids future headaches.
Frequently Asked Questions About Low Flow Faucet
What is the most common cause of low flow faucets?
The clogged aerator is responsible for over 80% of single-faucet low flow cases. Mineral deposits, sediment, and rust accumulate in the mesh screen and restrict water flow.
Can I fix a low flow faucet without calling a plumber?
Yes. Most low flow faucet issues can be resolved with simple DIY steps like cleaning the aerator, which takes under 10 minutes and costs less than $10.
How do I know if the shut-off valves are causing the problem?
Disconnect the supply lines and test flow directly from the valves into a bucket. Strong flow means the valves are fine. Weak or sputtering flow indicates a clogged or failing valve.
Does hard water cause low flow faucets?
Yes. Hard water contains high mineral content that builds up in aerators, cartridges, and supply lines, gradually restricting flow. Regular cleaning or a water softener prevents this buildup.
How often should I clean my faucet aerator?
Clean the aerator every 3 to 6 months, or more frequently if you have hard water or well water. Clean it immediately after any plumbing work.
Key Takeaways for Fixing Your Low Flow Faucet
Start with the simplest solution first. Clean the aerator before attempting more complex repairs, as this resolves over 90% of single-faucet low flow cases. Work systematically from the aerator upstream to the shut-off valves, supply lines, and finally the cartridge. Regular maintenance, including quarterly aerator cleaning and periodic valve inspection, prevents future low flow problems and extends the life of your faucet components.


