
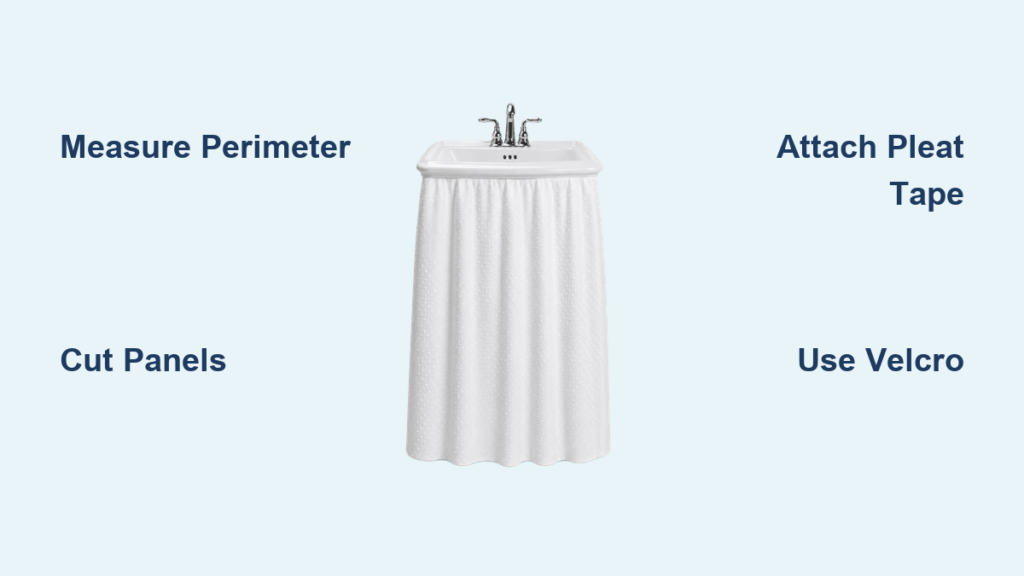
A bare pedestal sink can make even a beautifully designed bathroom feel unfinished. Sewing a sink skirt offers a practical, stylish solution that hides plumbing and adds softness to hard surfaces. This beginner-friendly project uses pleat tape and fabric Velcro to create a tailored, removable cover that looks custom-made.
In just a weekend, you can transform a utilitarian sink into a charming focal point. You will learn how to measure, cut, sew, and hang a sink skirt that fits perfectly, washes easily, and elevates your bathroom’s overall style.
Measure the Sink Base
Find the Widest Perimeter
Wrap a tape measure around the widest part of the pedestal sink, focusing on the deepest section where the skirt will rest. This measurement sets the target circumference for your finished gathered skirt. For instance, a sink measuring 60 inches around gives you a clear number to work toward after pleating.
Calculate Fabric Width Needed
Multiply the sink’s perimeter by 2.5 to 3 times to allow room for full pinch pleats and seam allowances. A 60-inch sink typically needs 150 to 180 inches of fabric width. Choose the higher multiplier for heavier fabrics like linen, since they do not gather as tightly as lighter materials.
Determine Skirt Length
Measure from the floor up to where you want the top of the skirt to sit on the sink. Add 10 to 16 inches for hems and pleat depth. Use 10 inches for minimal hems and 16 inches for generous double hems, especially with heavy fabrics.
Cut and Join Fabric Panels
Cut Three Identical Panels
With 58-inch wide fabric, cut three panels of your calculated length. Fold the fabric lengthwise with the pattern side facing inward, then mark each panel across the full width. Always pre-wash and iron fabric before cutting to prevent post-sewing shrinkage.
Sew Panels into One Piece
Place two panels with right sides together, aligning patterns and grain carefully. Pin along one long edge and sew with a half-inch to one-inch seam allowance. Repeat with the third panel. Rolling the fabric as you sew keeps things manageable and prevents dragging.
Create Clean Hems
Finish Side Edges
Fold each short end up half an inch, press with an iron, then fold another half an inch to encase the raw edge. Pin and sew along the inner fold for a neat double hem. This step prevents fraying and gives the skirt a polished look once it wraps around the sink.
Sew the Top Hem for Pleat Tape
Fold the top raw edge up half an inch, press, then fold down 4 inches from that line for a total hem depth of 4.5 inches. Pin along the half-inch fold line and sew through both layers. This deep hem provides structure for attaching pleat tape securely while hiding all stitching.
Hem the Bottom Edge
Measure down from the top to your final skirt length, mark at intervals, and draw a straight line. Fold up 1 inch, press, then fold another half inch for a double hem. Sew along the inner fold to create a crisp, professional finish that resists wear.
Attach Pleat Tape
Cut and Position Tape
Measure your full fabric width and cut pleat tape to match. Center it on the inside of the top hem, leaving a small gap at the top so it will not show. The tape has printed guide lines that align with your sewing lines for accuracy.
Stitch Along Guide Lines
Pin the pleat tape in place, leaving the ends open so you can access the pull strings later. Sew along both the top and bottom guide lines to secure it. Do not sew the sides closed, since these openings are needed for gathering later.
Form Pinch Pleats
Pull Strings Evenly
Gently pull the strings on both ends of the pleat tape at the same time. Push the fabric toward the center as you pull, forming tight, uniform pinch pleats. Working from both sides simultaneously keeps everything symmetrical.
Match Skirt to Sink Size
Continue gathering until the total width matches your sink’s original perimeter. Tie the strings with a slip knot so they can be adjusted later if needed. Coil excess string and tuck it into the tape casing to keep the interior tidy.
Install Velcro for Easy Removal

Apply Soft Side to Skirt
Attach the soft loop side of fabric Velcro to the inside of the top hem, just below the pleat tape. Use a straight stitch to sew it in place for durability. This side will connect to the sink-mounted hook strip.
Mount Hook Side on Sink
Stick the tough hook side of Velcro directly onto the pedestal sink. Position it so the skirt hangs at the correct height and aligns evenly. If you plan to machine-wash the skirt, leave the sink-mounted Velcro in place so only the soft side detaches with the fabric.
Reinforce Heavy Fabrics
For 100% linen or other heavy fabrics, add a small dab of super glue between the pleat tape and Velcro. This prevents slippage under the weight of tightly gathered fabric and keeps the skirt securely in place.
Hang and Adjust the Skirt

Slide Skirt Over the Pedestal
Lower the gathered skirt over the sink base, aligning the Velcro strips. Press firmly to attach. The pleats should fall naturally around the sink, creating a soft, tailored look that hides plumbing and adds visual weight to the space.
Even Out the Pleats
Adjust each pleat by hand so they drape uniformly. Smooth any wrinkles and ensure the bottom hem rests evenly on the floor. The skirt should sit snugly without stretching the Velcro.
Troubleshoot Common Issues
Fabric Too Heavy or Too Light
Heavy fabrics like linen may sag under their own weight when pleated. Prevent this by reinforcing the top hem with interfacing or using super glue at the Velcro attachment point. Lightweight fabrics may look flimsy, so add a lining or interfacing to give them structure.
Pleats Look Uneven
If pleats appear lopsided, re-tie the strings and gather again from both sides simultaneously. Pull slowly and push fabric evenly toward the center. Use a ruler to check consistent pleat spacing before securing.
Velcro Won’t Stick to Sink
Test adhesion on a small area first. Standard fabric Velcro usually holds well on smooth porcelain or glazed ceramic. For glossy or non-porous surfaces, use adhesive-backed Velcro or a stronger mounting tape designed for bathrooms.
Skirt Shrinks After Washing
Always pre-wash fabric before cutting. Skipping this step can lead to post-sewing shrinkage, making the skirt too small or misshapen. Use the same wash cycle you plan to use for ongoing cleaning.
Customize Your Design
Match Fabric to Decor
Use the same pattern or color as your shower curtain, towels, or window treatments for a cohesive look. A sink skirt becomes part of the room’s design story rather than just a cover-up.
Try Different Lengths
Create a tea-length skirt ending 6 to 8 inches above the floor for a modern twist, or go floor-length for drama. Adjust the length calculation accordingly and modify hem depths to suit your preference.
Adapt for Other Sinks
This method works for console sinks, vintage pedestal styles, or even exposed vanity bases. Measure the widest section and follow the same pleating process. Just ensure the mounting surface can support Velcro.
Care and Maintenance Tips
Remove Before Washing
Unhook the skirt from the sink and machine-wash the fabric only. The hook strip stays on the sink. Use cold water and a gentle cycle to preserve pleats.
Iron After Washing
Pleats may flatten after washing. Restore crispness by ironing gently on the reverse side. Use steam and a pressing cloth if working with delicate or printed fabrics.
Store Seasonally
Have multiple skirts for seasonal decor? Store cleaned, dry skirts rolled around a cardboard tube to prevent deep creases. Keep them in a dry, dark place to avoid fading.
Frequently Asked Questions About Sewing a Sink Skirt
What type of fabric works best for a sink skirt?
Medium-weight home decor fabrics like cotton prints, linen blends, or quilting cotton work well. Pure linen can be quite heavy when gathered, so consider reinforcement if you choose it.
How much fabric do I need for a standard pedestal sink?
Most standard pedestal sinks require about 4 yards of 58-inch wide fabric. This accounts for three panels sewn together plus hems and pleat allowance.
Can I machine-wash the sink skirt?
Yes. Attach only the soft side of Velcro to the skirt, and leave the hook side on the sink. Remove the skirt for washing, then reattach once dry.
Do I need advanced sewing skills to make a sink skirt?
No. This project suits beginners with basic sewing skills. The pleat tape simplifies gathering, and straight seams are the main construction technique required.
How do I keep pleats looking crisp after washing?
Iron the skirt gently on the reverse side after washing. Use steam and a pressing cloth for delicate fabrics to restore sharp pleat definition.
Can I use this method for sinks other than pedestal styles?
Yes. The same approach works for console sinks, vanity sinks with exposed bases, and other similar designs. Just measure the widest point and ensure the surface can hold Velcro.
Key Takeaways for Sewing a Sink Skirt
Sewing a sink skirt is one of the most satisfying bathroom upgrades you can tackle in a weekend. Accurate measuring, clean hems, and symmetrical pleats create a professional-looking result. Using pleat tape and Velcro keeps the process beginner-friendly while allowing easy removal for washing.
Gather your materials, measure your sink, and start cutting your fabric panels today. In just a few hours, you will have a custom-fitted skirt that transforms your bathroom into a more polished, intentional space.







