
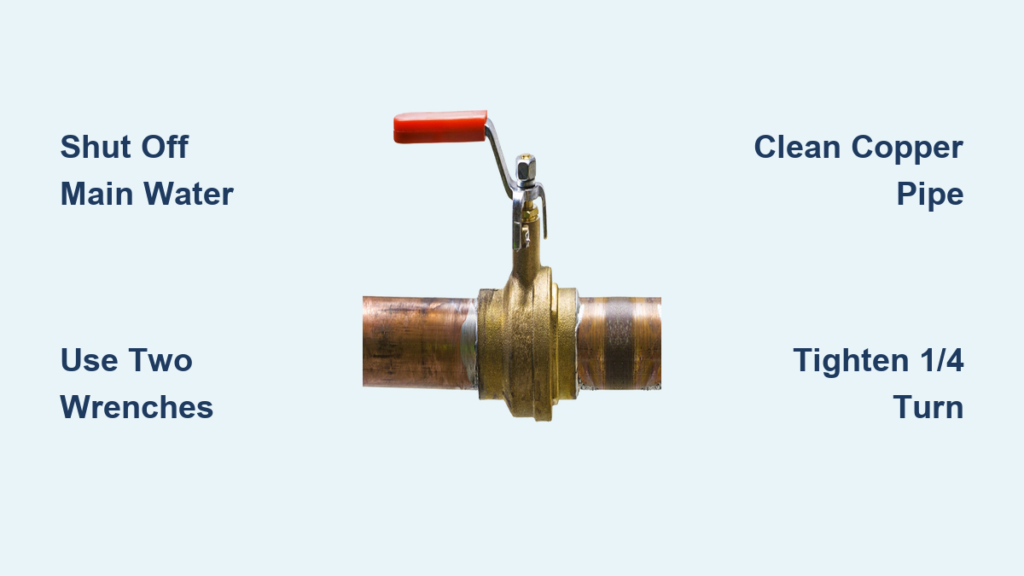
A leaking or stuck shut-off valve under your sink can quickly escalate into a flooded kitchen or bathroom. Many homeowners ignore a hard-to-turn valve until it fails completely, often at the worst possible moment. Learning how to replace shut-off valve under sink components yourself takes under 30 minutes and requires only basic tools.
This guide covers compression, soldered, and push-fit valve types. You’ll find step-by-step instructions, tool recommendations, and the mistakes that turn a $20 fix into a $5,000 plumbing disaster. Whether you’re dealing with a corroded valve or upgrading during a renovation, you can handle this DIY project with confidence.
Understanding Shut-Off Valves and When to Replace Them

Why Valves Fail
Shut-off valves control water flow to individual fixtures without shutting off water to your entire home. Over time, corrosion builds up inside the valve, making it stiff or impossible to turn. Once a valve starts leaking around the handle or stem, replacement is the only reliable fix. Patching a corroded valve with plumber’s tape or tightening the packing nut is a temporary measure at best.
A valve that won’t turn easily should be replaced before it fails. In an emergency, a seized valve means you can’t stop water flow during a burst pipe or overflow. This small component protects your home from catastrophic water damage.
Common Valve Types Under Sinks
Three valve types appear under most residential sinks:
- Compression valves use a brass ferrule and nut to seal against the copper pipe. These are the most common and easiest for DIY replacement.
- Soldered (sweated) valves are permanently bonded to the pipe with heat and solder. Removing them requires a torch and more experience.
- Push-fit valves like SharkBite connect with an internal O-ring and locking mechanism. Installation requires no tools, but removal can be tricky.
Identify your valve type before buying a replacement. Most homes have 1/2-inch compression valves under sinks.
Shutting Off Water and Preparing Your Workspace
Turn Off the Main Water Supply
Locate your main water shut-off before touching any plumbing. In most homes, the main valve sits where the water line enters the house, often in a basement, crawlspace, or utility area. If you can’t find an indoor shutoff, use the outdoor meter valve near your property line.
Turn the valve fully clockwise until it stops. Never assume a partial turn is enough.
Drain the Lines Completely
After shutting the main, open the lowest faucet in your home, such as a basement sink or outdoor spigot. Then open the sink faucet above the valve you’re replacing. This relieves pressure and drains residual water from the lines.
Confirm drainage by checking that no water flows from the open faucet. If water still runs, your main valve isn’t fully closed, and you need to verify this before proceeding.
Set Up Your Workspace
Place a bucket or thick towel under the valve to catch drips when you disconnect the supply line. If you’re soldering, drape a fire-resistant blanket over nearby drywall and clear flammable items from the area. Keep a flashlight nearby since under-sink work often happens in tight, dark spaces.
Gathering the Right Tools
Essential Tools for the Job
Most shut-off valve replacements require these tools:
- Two adjustable wrenches (Crescent and Channellock work well)
- Compression ring puller (around $15, absolutely critical for clean removal)
- Tubing cutter or hacksaw for damaged pipes
- Propane torch (only for soldered valves)
- 150–180 grit sandpaper or emery cloth
- Deburring tool
- Bucket and rags
For push-fit valve removal, add a PEX Go/No-Go gauge, a bicycle wrench, or two flathead screwdrivers to your kit.
Why Two Wrenches Matter
Always use one wrench to hold the valve body and another to turn the compression nut. This prevents you from accidentally twisting the copper pipe, which can crack solder joints hidden inside the wall. That hidden damage can cause leaks behind drywall weeks after your repair seems successful. Using only one tool is one of the most expensive mistakes DIYers make.
Removing the Old Shut-Off Valve
Disconnect the Supply Line
Loosen the flexible supply hose from the valve outlet using an adjustable wrench. A small drip is normal, so keep your rag or bucket positioned underneath. Set the hose aside once disconnected.
Loosen the Compression Nut
Hold the valve body steady with one wrench while using a second wrench to loosen the compression nut connecting the valve to the copper pipe. Turn counterclockwise until the nut slides freely. Then remove the valve from the pipe.
Resist any urge to twist the pipe itself. If the valve won’t budge, apply penetrating oil and wait 10 minutes before trying again.
Remove the Old Brass Ferrule
The brass ferrule (compression ring) will stay stuck on the pipe after you remove the valve. This small ring must come off before you can install a new valve.
Use a compression ring puller for clean removal:
- Thread the puller onto the pipe
- Screw the old nut onto the back of the puller
- Turn the handle clockwise until the ferrule slides off
Never use a hacksaw or pliers to cut or twist the ferrule off. These methods dent the copper pipe and guarantee a leaky seal with your new valve.
Inspecting and Preparing the Copper Pipe
Check for Damage
Hold the pipe up to good light and inspect the end where the old ferrule sat. The pipe must be clean, smooth, and perfectly round. Look for burrs, dents, ovality, or corrosion.
If you see any damage, cut out the affected section with a tubing cutter. Leave at least 1.5 inches of pipe extending past the finished wall to ensure enough room for the new valve.
Clean the Pipe Surface
Wrap 150–180 grit sandpaper around the pipe end and rotate to remove oxidation, debris, and burrs. The surface should shine bright copper when finished. Wipe with a clean, dry rag.
For freshly cut pipe ends, run a deburring tool around both the inside and outside edges. No valve will seal properly on a dirty or damaged pipe. This step determines whether your repair lasts or fails.
Installing Your New Shut-Off Valve
Slide On the Escutcheon First
The escutcheon (decorative plate) covers the hole where the pipe enters the wall. It must go on before the valve. If you forget, you’ll need a split escutcheon as a backup.
Slide the escutcheon onto the pipe and push it against the wall. Metal escutcheons last longer; plastic versions resist rust.
Compression Valve Installation
Assemble components in this exact order:
- Escutcheon plate
- Compression nut
- Brass ferrule
- Valve body
Push the valve fully onto the pipe. Hand-tighten the compression nut first to avoid cross-threading. Then use two wrenches to tighten an additional 1/4 to 1/2 turn past hand-tight.
Do not over-tighten. Crushing the ferrule causes leaks that are difficult to fix without starting over. Under-tightening is safer and easier to adjust if needed.
Soldered Valve Installation
Open the valve before soldering to allow trapped water to evaporate and prevent steam buildup. Slide the escutcheon onto the pipe and protect it with aluminum foil (cut slits with a utility knife). Apply flux to both the pipe and valve fitting, then heat with a propane torch and apply solder until it flows evenly around the joint. Let the joint cool completely before testing.
Push-Fit Valve Installation
Ensure the pipe end is cut square, clean, and deburred. Push the valve firmly onto the pipe until you feel it click into the internal locking mechanism. Verify full seating by checking that no gap exists between the valve and the pipe shoulder.
Never install a push-fit valve on a damaged, dented, or angled pipe. This guarantees a leak.
Reconnecting the Supply Line
Screw the supply hose back onto the new valve outlet. Hand-tighten first, then add 1/4 to 1/2 turn with a wrench. The connection should feel snug but not strained.
If the fitting doesn’t screw on smoothly, stop immediately. Cross-threading damages the threads and creates an unreliable seal. Disconnect, inspect the threads, and try again.
Testing for Leaks
Turn the Water Back On Slowly
Open the main water supply valve gradually. Sudden pressure can stress your new connections. Once the main is fully open, turn the new shut-off valve to the open position. Then turn on the sink faucet to purge air from the lines. Some sputtering is normal as trapped air escapes.
Inspect Every Connection Point
Check these areas carefully for drips:
- Valve-to-pipe joint
- Supply line connection
- Base of the valve
Run your hand (or a dry paper towel) around each connection. Even tiny drips become big problems over time.
Fix Minor Leaks
A small drip at the compression nut often resolves with a quarter-turn tighter. If the leak persists, shut off the water, disassemble the connection, and inspect the ferrule for damage. Replace the ferrule if it looks deformed or crushed, then reassemble and retest.
Common Mistakes That Cause Failures

Twisting the Copper Pipe
Using only one wrench during removal twists the pipe and risks breaking solder joints inside the wall. This damage may not show up immediately but can cause slow leaks behind drywall months later. Always use two wrenches.
Over-Tightening Compression Nuts
More force does not mean a better seal. Tightening beyond 1/2 turn past hand-tight crushes the ferrule and creates leaks. Hand-tight plus a slight wrench turn is enough.
Using Teflon Tape on Compression Fittings
Compression joints seal through metal-to-metal contact. Teflon tape or pipe dope interferes with this seal and should never be applied to compression threads.
Skipping Pipe Cleaning
Dirt, oxidation, or burrs on the pipe surface prevent a proper seal. Spending two minutes cleaning the pipe saves hours of troubleshooting later.
Forgetting the Escutcheon
Installing the valve before the escutcheon means you can’t add a standard plate later. Always slide the escutcheon on first, or keep a split escutcheon available as backup.
Maintaining Your New Valve
Test shut-off valves every 6–12 months by turning them off and on. This prevents internal corrosion from seizing the mechanism. If a valve starts feeling stiff or shows mineral buildup, replace it before it fails completely.
Label each valve clearly, especially in homes with multiple shutoffs. “Kitchen Sink Hot” and “Kitchen Sink Cold” tags save precious seconds during emergencies.
When to Call a Professional
Some situations require a licensed plumber:
- The pipe behind the wall is damaged or corroded
- Water still flows after shutting off the main valve
- You’re uncomfortable using a propane torch
- Multiple attempts haven’t stopped a persistent leak
The cost of professional service is small compared to the water damage from a failed repair.
Frequently Asked Questions About How to Replace Shut-Off Valve Under Sink
How long does it take to replace a shut-off valve under a sink?
Most replacements take 20–30 minutes once the water is shut off and the workspace is prepared. Soldered valves take longer due to heating and cooling time. Add another 10–15 minutes for gathering tools if this is your first attempt.
Can I replace a shut-off valve without turning off the main water?
No. You must shut off the main water supply before disconnecting any valve. Without this step, water will spray from the open pipe once you loosen the connection. If your main valve doesn’t stop water flow completely, call a plumber to replace the main shutoff before attempting any fixture work.
Do I need to replace the ferrule when installing a new valve?
Yes. Even if the old ferrule looks intact, its profile may not match the new valve’s seat. Using the old ferrule risks leaks that are difficult to diagnose. New ferrules are inexpensive and ensure a reliable seal.
What is the difference between a compression valve and a push-fit valve?
Compression valves use a brass ferrule and nut that you tighten with wrenches to create a seal. Push-fit valves (like SharkBite) use an internal O-ring and locking mechanism that grips the pipe when you push the valve on. Compression valves require tools but are easier to remove. Push-fit valves install in seconds but can be harder to disconnect, especially in tight spaces.
How do I know what size valve to buy?
Most residential sinks use 1/2-inch valves. Measure the diameter of the copper pipe or bring the old valve to the hardware store for matching. Also note whether the outlet matches your supply line thread size, which is typically 3/8-inch compression.
Is it worth replacing old valves that still work?
Yes, if the valve is difficult to turn or shows visible corrosion. Valves that haven’t been operated in years often seize when finally needed. Proactive replacement during renovations or before selling a home prevents emergencies and adds value.
Key Takeaways for a Leak-Free Shut-Off Valve Replacement
Replacing a shut-off valve under your sink protects your home from water damage while saving money on plumber fees. The most important steps are shutting off the main water supply, using two wrenches to avoid twisting the pipe, cleaning the copper thoroughly, and tightening compression nuts only 1/4 to 1/2 turn past hand-tight. Skipping the compression ring puller or over-tightening connections are the two mistakes that turn a simple repair into a costly disaster.
Gather your tools, pick up a $15 compression ring puller, and set aside 30 minutes this weekend. A working shut-off valve gives you control over your plumbing and peace of mind during every future repair.







