
Is your outdoor faucet dripping, leaking, or frozen solid after winter? A failing hose bib isn’t just a nuisance. It can waste water, damage your foundation, and burst during cold months. Replacing an outdoor faucet, also called a sillcock, spigot, or hose bib, is a manageable DIY project that takes under three hours and costs as little as $20. Whether you’re upgrading to a frost-proof model or simply replacing a corroded unit, this guide walks you through every step from shutting off the water to final testing.
You’ll learn how to identify your faucet type, choose the right replacement, avoid common mistakes, and ensure a leak-free installation. We’ll cover the tools you need, connection methods for different pipe types, and maintenance tips to protect your investment for years to come.
Identify Your Faucet Type and Failure Signs
Before grabbing tools, confirm whether your faucet needs repair or full replacement. Many leaks stem from worn washers or loose packing nuts, fixable in minutes. But if you see cracks, severe rust, or freeze damage, replacement is essential.
Common Failure Symptoms
Watch for these telltale signs that your outdoor faucet has failed.
- Dripping spout after shutoff means a worn washer, which is repairable
- Leak at handle base indicates degraded packing material or loose bonnet nut
- Low water pressure suggests internal clogging or mineral buildup
- No flow at all points to a frozen pipe, blocked valve seat, or complete failure
- Visible cracks or corrosion means structural compromise requiring immediate replacement
Pro Tip: Over 80% of faucet issues come from replaceable parts like washers. But once the body is cracked or pitted, only full replacement will fix it long-term.
Standard vs Frost-Proof Sillcocks
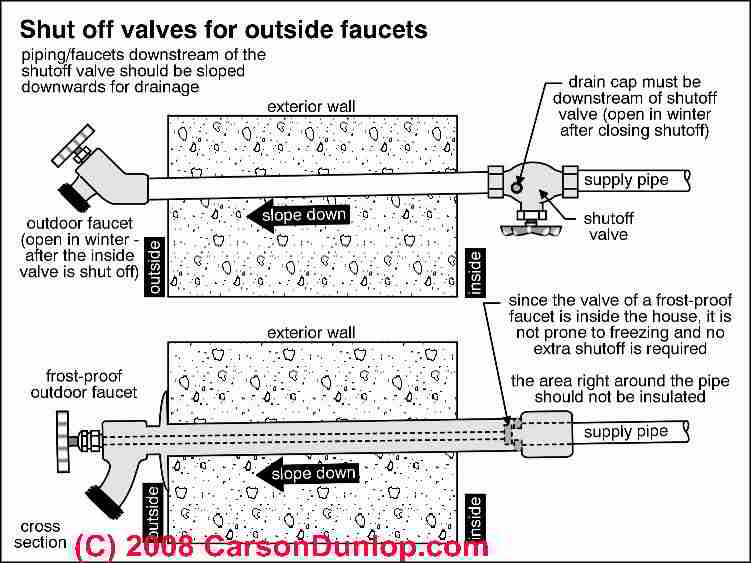
| Feature | Standard Faucet | Frost-Proof Faucet |
|---|---|---|
| Valve Location | At spout | 12 to 16 inches inside home |
| Freeze Risk | High | Very low |
| Pitch Required | None | 1/4 inch per foot downward |
| Backflow Protection | Requires external vacuum breaker | Usually built-in |
| Best For | Warm climates | All cold regions |
Key Insight: Frost-proof models now cost the same as standard ones, making them the smart choice for any climate.
Gather Tools and Materials for the Job
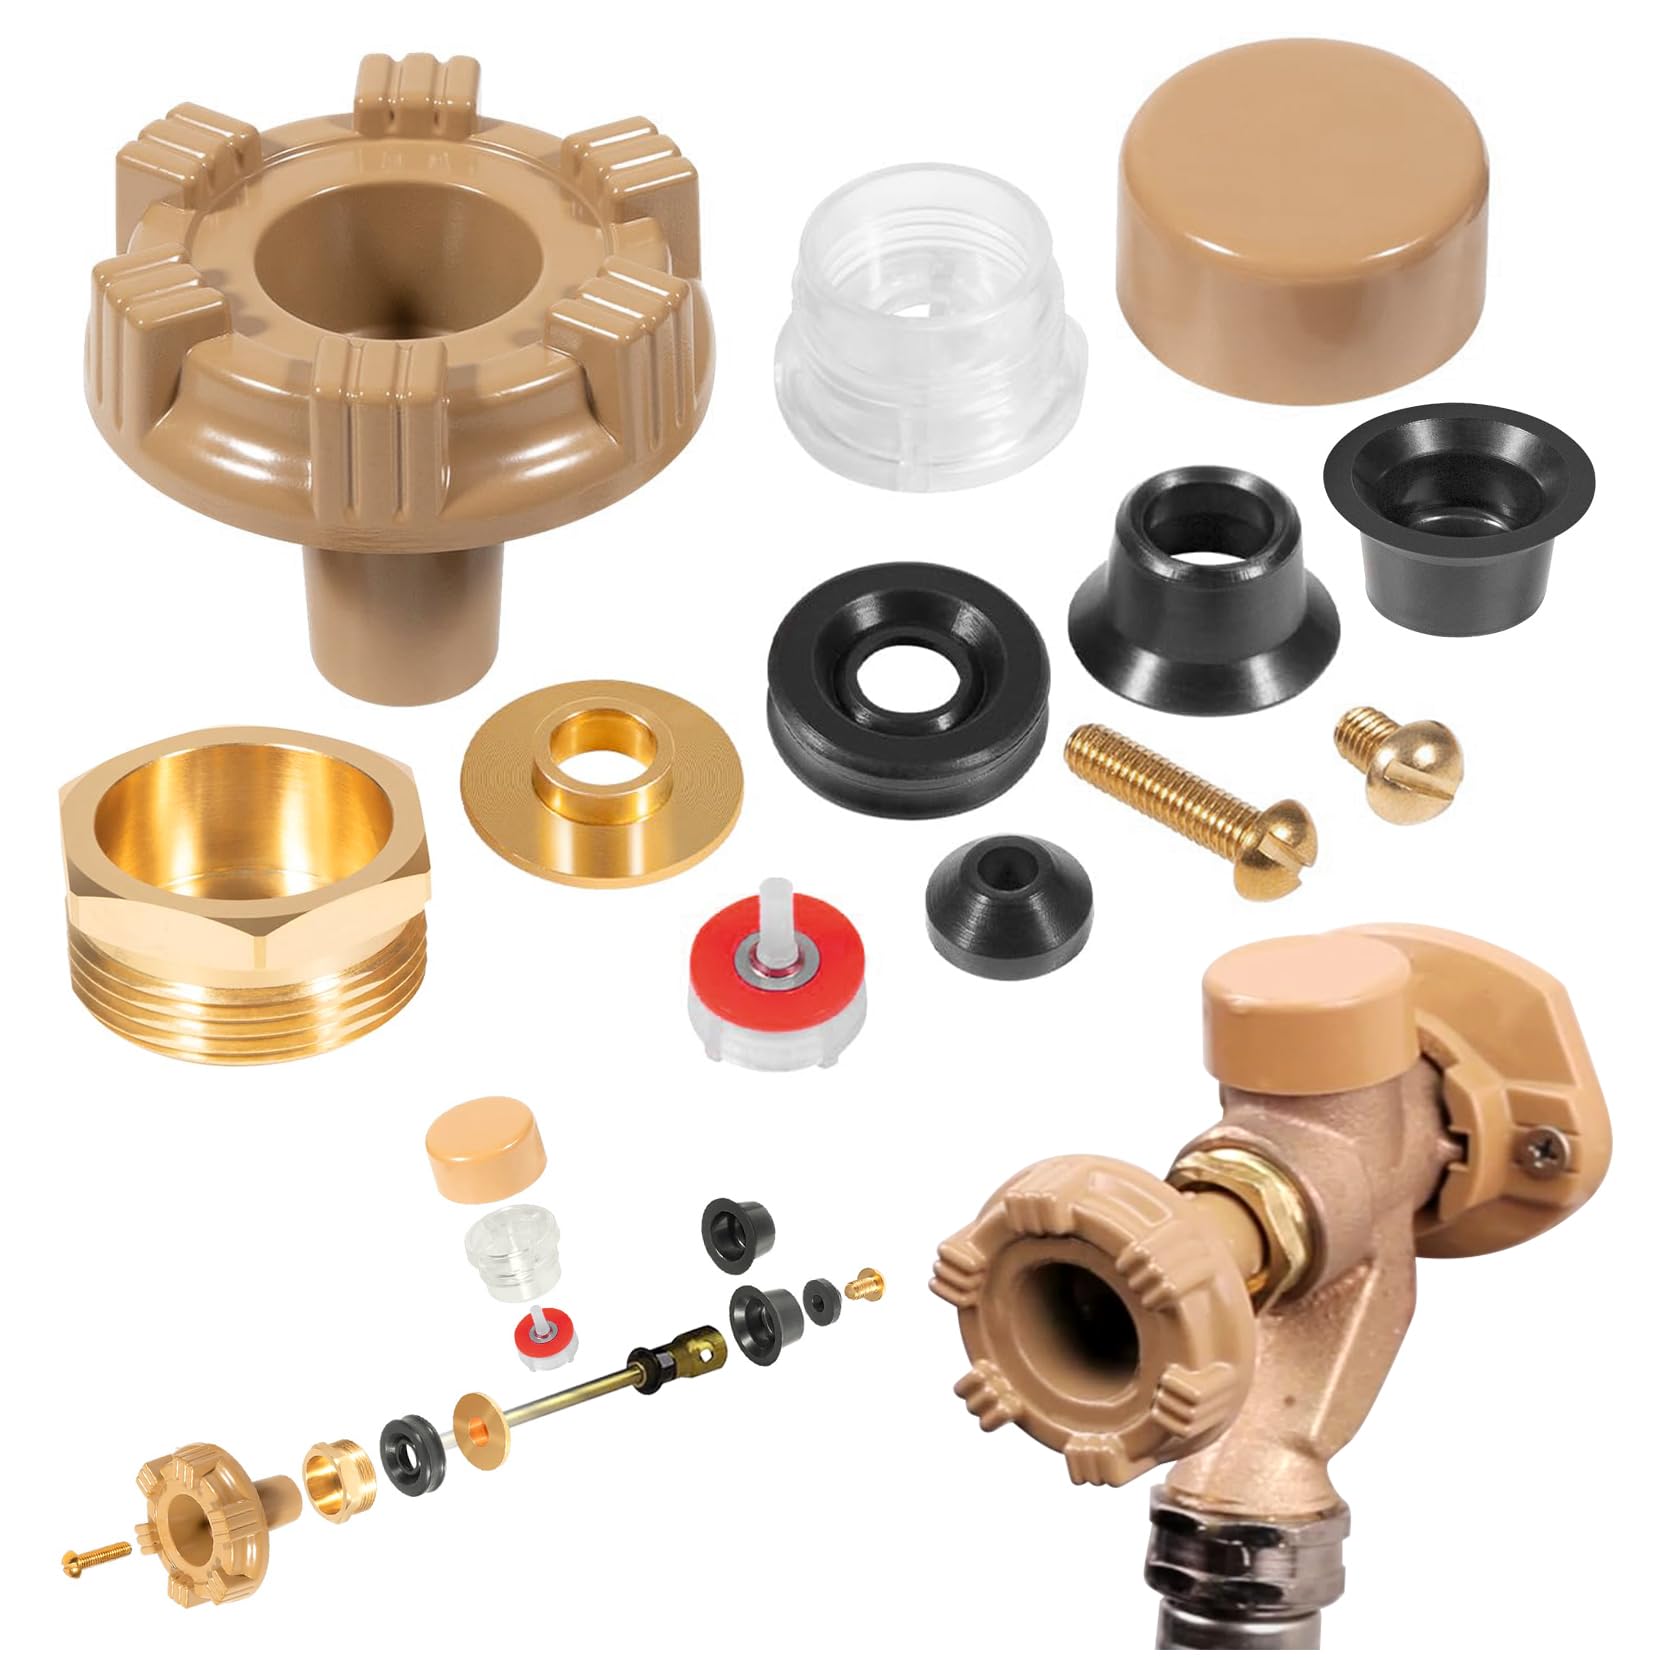
Having the right gear prevents delays and damage. Most tasks require basic plumbing tools, but connection type determines complexity.
Essential Tools
You will need several wrenches and specialized tools to complete this project.
- Pipe wrench or adjustable wrench for loosening tight fittings
- Channel locks for gripping rounded connections
- Rubber strap wrench to protect finish on decorative faucets
- Tubing cutter for copper or PEX pipe
- Phillips screwdriver for handle removal
- Bubble level to verify proper pitch
- Metal-bristle brush for cleaning threads
- Bucket to catch residual water
Required Materials
Stock up on these supplies before starting your replacement.
- Replacement outdoor faucet, frost-proof recommended
- Plumber’s tape for sealing threaded connections
- Pipe dope as an alternative to tape, never use both
- 100% silicone sealant for exterior wall penetration
- Exterior deck screws for mounting
- Vacuum breaker if not built into your faucet
- Push connectors like SharkBite to skip soldering
Smart Choice: Use a push-fit faucet to skip soldering entirely. No torch, no risk, ideal for beginners.
Shut Off Water Supply and Drain Lines
Skipping this step risks flooding your home. Always cut the supply before disassembly begins.
Locate the Shut-Off Valve
Find the valve that controls water to your outdoor faucet.
- Dedicated interior valve is often in the basement, crawl space, or utility room near the wall penetration
- Main house shutoff is located near the water heater, meter, or entry point
- Curb stop sits at the street edge and requires a water meter key costing $15 to $25
Warning: If interior valves are stuck or missing, shut off at the curb to avoid leaks.
Drain Residual Water
Follow these steps to safely depressurize the system.
- Open the outdoor faucet fully
- Turn off the interior shutoff valve
- Leave the faucet open during replacement
- Confirm no water flows when the valve is off
This ensures lines are depressurized and helps drain any leftover water.
Remove the Old Outdoor Faucet
Work carefully to avoid damaging the supply pipe inside the wall.
Support the Supply Pipe
Use a second wrench on the pipe behind the faucet to prevent twisting internal joints. This protects soldered or PEX connections inside your wall.
Disconnect the Faucet
The removal method depends on your connection type.
Threaded Connection
- Apply penetrating oil if the faucet is stuck
- Turn the faucet body counter-clockwise with a pipe wrench
- Remove mounting screws from the exterior wall
- Pull the faucet free from the wall
Soldered Copper Joint
- Cut the pipe 2 to 3 inches behind the faucet using a tubing cutter
- Place a bucket underneath to catch drips
- Ream and deburr the cut end
- Inspect for freeze breaks or hidden damage
Visual Cue: If the pipe shows signs of previous overheating like discoloration, the joint may still be intact.
Inspect for Hidden Damage
Check the supply line for freeze breaks, which appear as cracks in copper behind the wall. If found, repair may require accessing drywall or siding.
Prepare the Supply Line for New Installation
Clean, smooth connections ensure a watertight seal that lasts for years.
For Threaded or Push Connections
Clean the exposed pipe thoroughly before attaching the new faucet.
- Scrub threads with a metal-bristle brush
- Remove old plumber’s tape and mineral deposits
- Ensure the pipe is straight and undamaged
- Ream the pipe end if recently cut
For Copper Soldered Joints
Preparing copper requires careful cleaning and flux application.
- Cut the pipe square with a tubing cutter
- Ream the inside to remove burrs
- Sand the pipe and fitting until shiny
- Apply flux evenly to both surfaces
- Assemble temporarily before final connection
Safety First: Use a heat shield on nearby wood framing when soldering to prevent fire damage.
Install the New Outdoor Faucet
Choose the method that matches your home’s plumbing system.
Test Fit and Check Slope
Slide the new faucet through the wall to verify fit. Most frost-proof models need a 1/4 inch per foot downward pitch from inside to outside.
- Use a bubble level to confirm proper slope
- Install the siding wedge if included with your faucet
- Enlarge the mounting hole slightly if needed, typically 1 inch to 1-1/8 inches
Seal Wall Penetration
Apply 100% silicone sealant around the interior wall opening before inserting the faucet. This stops air and water infiltration, but do not block the drainage path.
Connect Plumbing Based on Your Pipe Type
Match your connection method to your home’s existing plumbing.
Threaded Connection
- Wrap plumber’s tape clockwise, 3 or more wraps on male threads
- Hand-tighten the faucet onto the pipe
- Finish with a pipe wrench while supporting the supply line with a second wrench
- Use a rubber strap wrench if no flat surfaces exist
Avoid: Over-tightening can crack brass fittings.
Push Connector Installation
Push-fit fittings like SharkBite make installation simple.
- Cut the pipe clean and square
- Insert a spacer into PEX if used
- Push the connector straight on until fully seated
- Verify with the inspection notch if visible
PEX System Connection
- Use a crimp, clamp, or expansion tool for your PEX system
- Install a threaded adapter onto the PEX end
- Apply plumber’s tape to the adapter threads
- Attach the faucet as you would with a threaded connection
Soldered Copper Joints
- Slide a 1/2-inch coupling onto the prepared pipe
- Insert the faucet inlet into the coupling
- Heat evenly with a propane torch
- Apply solder opposite the flame and let capillary action draw it in
- Keep the faucet handle open during soldering to protect the internal washer
Cool Down: Let the joint cool completely before testing.
Mount and Secure the Faucet
Proper mounting prevents movement and maintains the critical downward pitch.
- Position the faucet and mark screw holes
- Drill pilot holes in the siding
- Secure with exterior-grade deck screws
- Double-check the downward slope with a level
Ensure the gasket or rubber washer seals between the faucet and wall to prevent water intrusion.
Install Vacuum Breaker for Backflow Protection
Protect your drinking water from contamination with a vacuum breaker.
Why It’s Required
Without a vacuum breaker, dirty water from a submerged hose can siphon back into your home’s plumbing. This happens when you leave a hose in a bucket or pond.
Code Requirement: Most jurisdictions mandate backflow prevention.
Installation Steps
- Check if your new faucet has a built-in vacuum breaker
- If not, wrap plumber’s tape on the male threads
- Screw on the vacuum breaker by hand
- Tighten snugly with a wrench and stop at resistance
Note: Most frost-proof faucets have built-in anti-siphon protection. Verify before adding an external device.
Test for Leaks and Verify Proper Function
Never skip testing. A small leak today can cause big damage tomorrow.
Pressurize the System
- Close the outdoor faucet
- Turn the water supply back on
- Open nearby indoor faucets briefly to purge air
Check for Leaks
Inspect all connection points carefully.
- Interior joints including copper, PEX, and push fittings
- Threaded connections at the faucet body
- Wall penetration where the faucet enters the home
- The area underneath the faucet
Look for drips, seepage, or moisture over 5 to 10 minutes.
Verify Function
- Open the faucet and check for steady water flow
- Close the faucet and confirm residual water drains out due to proper pitch
- Attach a garden hose with a spray nozzle and hold pressure for 5 to 10 minutes
Success Signal: Water draining from the spout after closure proves the pitch is correct.
Final Seal
Apply a bead of clear silicone around the exterior wall opening. Smooth it with your finger for a clean, weatherproof finish.
Maintain and Winterize Your Faucet
Even frost-proof faucets need care to last for decades.
Prevent Freeze Damage
Take these steps every winter to avoid costly pipe bursts.
- Disconnect all hoses in winter because trapped water expands and can burst pipes
- Ensure the downward pitch remains intact
- Use an insulated faucet cover in extreme climates
Proactive Step: Shut off the interior valve if equipped, open the outdoor faucet, and leave it open all winter.
Long-Term Maintenance
Keep your faucet working properly with routine care.
- Replace washers every few years if the handle leaks
- Clean the aerator screen annually if equipped
- Inspect sealant and screws every 1 to 2 years
- Lubricate the stem with waterproof grease every 2 to 3 years
Know When to Call a Professional
Some situations demand expert help rather than DIY attempts.
Call a Plumber If
- You cannot locate or shut off the water supply
- You need to solder in a tight or flammable space
- Pipe damage occurs during removal
- Multiple faucets need replacement
- Code compliance or warranty matters
Service Tip: Companies like Mr. Rooter Plumbing offer full replacement with warranties and diagnostic checks.
Cost and Time Summary
| Factor | Estimate |
|---|---|
| DIY Cost, Faucet Only | $20 to $80 |
| DIY Cost, With Tools and Materials | $50 to $150 |
| Professional Installation | $150 to $300 |
| Time Required, DIY | 45 minutes to 3 hours |
| Skill Level | Moderate |
Money Saver: Choose a push-fit faucet to skip soldering, no torch, no stress.
Avoid These Common Mistakes
Learn from others’ errors to ensure your installation succeeds.
- Over-tightening connections cracks fittings and causes leaks
- Installing without downward pitch leads to freeze failure
- Forgetting to disconnect hoses in winter guarantees burst risk
- Skipping vacuum breaker violates code and risks contamination
- Using indoor caulk fails under UV exposure and weather
Final Reminder: Use only plumber’s tape OR pipe dope, never both. The combination can cause leaks.
Frequently Asked Questions About Replacing Outdoor Faucets
How do I know if my outdoor faucet needs replacement or repair?
If your faucet drips from the spout after shutting off, the washer likely needs replacing. This is a simple repair. However, if you see cracks in the faucet body, severe rust, or freeze damage, replacement is necessary. A cracked body cannot be repaired effectively.
Can I replace an outdoor faucet myself?
Yes, most homeowners with basic DIY skills can replace an outdoor faucet. The project takes 45 minutes to 3 hours depending on your connection type. Threaded and push-fit connections are easiest. Soldered copper joints require more experience.
What is the difference between a standard and frost-proof outdoor faucet?
A standard faucet has the valve at the spout outside your home. A frost-proof faucet has the valve 12 to 16 inches inside your home, where it’s warm. When closed, water drains out due to proper pitch, preventing freeze damage.
Do I need a vacuum breaker on my outdoor faucet?
Yes, most plumbing codes require backflow prevention. Without a vacuum breaker, contaminated water from hoses left in pools or fertilizer tanks can siphon back into your clean water supply. Many frost-proof faucets have this built in.
How much does it cost to replace an outdoor faucet?
DIY costs range from $20 to $150 depending on whether you already own tools. Professional installation typically costs $150 to $300. The faucet itself costs $20 to $80 for quality models.
Key Takeaways for Replacing Your Outdoor Faucet
Replacing an outdoor faucet is a achievable DIY project that protects your home from water damage and freeze bursts. The most important steps are shutting off water before starting, choosing a frost-proof model for cold climates, maintaining proper downward pitch, and testing thoroughly for leaks before finishing. Use plumber’s tape or pipe dope, never both, and always install a vacuum breaker unless your faucet has built-in backflow protection. With the right tools and this guide, you can complete the job in under three hours and save hundreds of dollars over professional service. Your home and water bill will thank you.







