
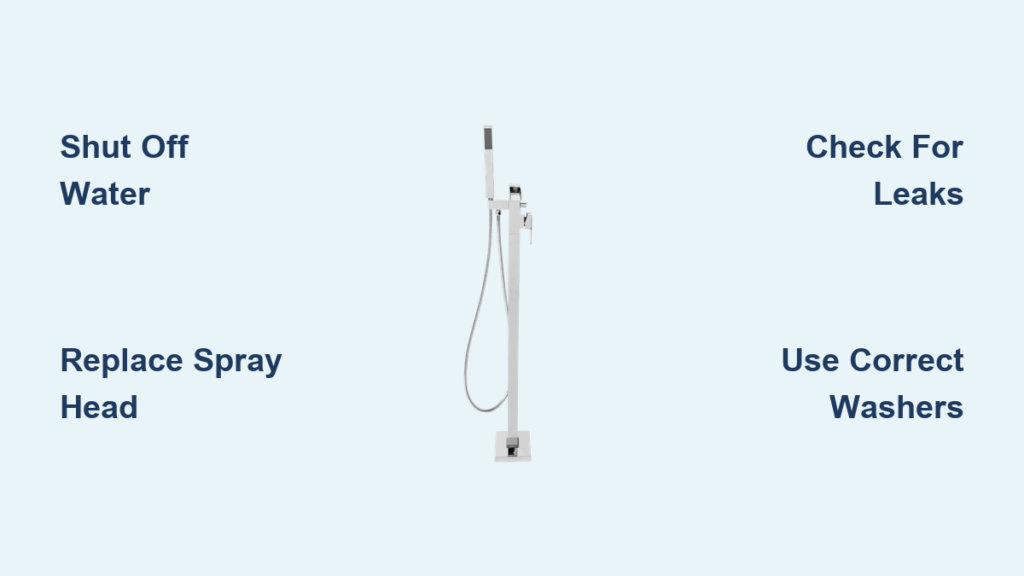
A malfunctioning faucet sprayer can turn simple kitchen tasks into frustrating chores. Whether it’s leaking, sputtering, or refusing to shut off, replacing the sprayer is a quick and affordable fix that restores full functionality to your sink. The good news? You don’t need to be a plumber. Replacing a faucet sprayer is a DIY-friendly task that most homeowners can complete in under an hour with basic tools.
This guide walks you through every step of how to replace a faucet sprayer, whether you’re swapping just the spray head or installing a full hose and mounting kit. From identifying the right parts to avoiding common installation mistakes, you’ll learn how to ensure a leak-free, secure fit every time.
Identify the Problem and Replacement Scope
Before grabbing tools, determine whether you need to replace just the spray head or the entire sprayer assembly. The decision depends on the symptoms and component condition.
Check for Common Failure Signs
Replace the sprayer if you notice:
• Dripping or continuous spraying after releasing the trigger
• Low water pressure or uneven spray patterns
• Cracks, clogs, or mineral buildup in the nozzle
• A kinked, swollen, or brittle hose
• Leaks at the mounting base or under the sink
Pro Tip: If water leaks from the base or the hose feels stiff, the internal hose is likely failing. Replace the full assembly.
Head-Only vs. Full Assembly Replacement
| Condition | Recommended Action |
|---|---|
| Spray head damaged, hose intact | Replace spray head only |
| Hose kinked, cracked, or leaking | Replace entire hose and head assembly |
| Mounting flange corroded or loose | Replace flange and gasket |
Expert Note: When in doubt, replace the complete sprayer kit. Mixing old and new parts often leads to leaks and early failure.
Gather Tools and Replacement Parts
Having the right tools and components on hand prevents mid-job delays and ensures a proper fit.
Essential Tools
• Adjustable wrench or pliers
• Needle-nose pliers
• Small flathead screwdriver
• Flashlight for under-sink visibility
• Rag or towel to plug drain
• Small bucket to collect residual water
• Rubber band or chip clip to secure hose
Replacement Components
Choose based on your faucet brand and replacement scope:
• Spray head only: Ideal for minor nozzle damage
• Full sprayer assembly kit: Includes hose, flange, gasket, and head
• Universal replacement kit: Contains multiple washers, O-rings, and snap rings
• OEM part: Best for exact fit and long-term durability
Key Tip: Universal kits often include 5/16″ and 3/8″ washers and snap rings. Bring your old parts to compare sizes.
Shut Off Water and Prepare the Area
Skipping this step risks flooding your cabinet. Always start with proper preparation.
Turn Off Water Supply
- Locate the hot and cold shutoff valves under the sink.
- Turn both valves clockwise until tight.
- Open the main faucet and squeeze the sprayer trigger to release pressure and drain remaining water.
Critical Check: Confirm no water flows before disconnecting anything.
Protect the Work Zone
• Plug the sink drain with a rag to prevent small parts from falling in.
• Place a towel and small bucket under the diverter and hose connections.
• Use a flashlight to inspect under-sink components clearly.
Warning: Never skip draining. Residual water can spill into electrical outlets or cabinet walls.
Replace Spray Head Only (Quick Fix)
If the hose is in good condition, replacing just the head is fast and effective.
Remove the Old Spray Head
- Pull the sprayer down to access the hose.
- Grip the hose firmly to prevent retraction into the faucet neck.
- Twist the head clockwise to loosen. Many sprayer heads use reverse-threaded connections.
- Set the old head aside.
Pro Tip: If you must release the hose, secure it with a rubber band or chip clip to stop it from slipping back.
Install the New Spray Head
Fast Method (Minimal Disassembly)
- Select a soft rubber washer that fits snugly over the hose nib.
- Slide it onto the hose end.
- Screw the new head on by turning counter-clockwise (tightens).
- Hand-tighten only. Do not use tools.
Note: This method may leave a small gap between head and hose. It’s functional but less polished.
Full Method (Secure, Leak-Free Fit)
- Remove the metal snap ring from the hose end using a flathead screwdriver.
- Extract the O-ring and clean the hose nib.
- Slide on the new bottom cap if included.
- Insert the new O-ring and reattach the snap ring using needle-nose pliers.
- Add a hard plastic washer, then one or two soft rubber washers.
- Ensure washer hole is equal to or larger than the head’s inlet to avoid restricting flow.
- Screw on the new head counter-clockwise until snug.
Avoid Over-Tightening: Plastic threads can crack under excessive force.
Replace Entire Sprayer Assembly
For damaged hoses or persistent leaks, a full replacement is the best long-term solution.
Disconnect Hose from Diverter
- Locate the diverter valve, a T-shaped fitting on the faucet supply line.
- Disconnect the hose. Some models unscrew by hand. Others require an adjustable wrench.
- Capture any remaining water in your bucket.
Visual Cue: Look for a threaded or push-fit connection with a rubber O-ring.
Remove Old Hose and Mounting Flange
- Pull the entire hose up through the sink opening.
- From under the sink, hold the flange steady from above to prevent spinning.
- Use a wrench to loosen the mounting nut securing the flange.
- Remove the nut, flange, and old rubber gasket.
Challenge: If the flange spins, wrap tape around it or ask someone to hold it from above.
Install New Gasket and Flange
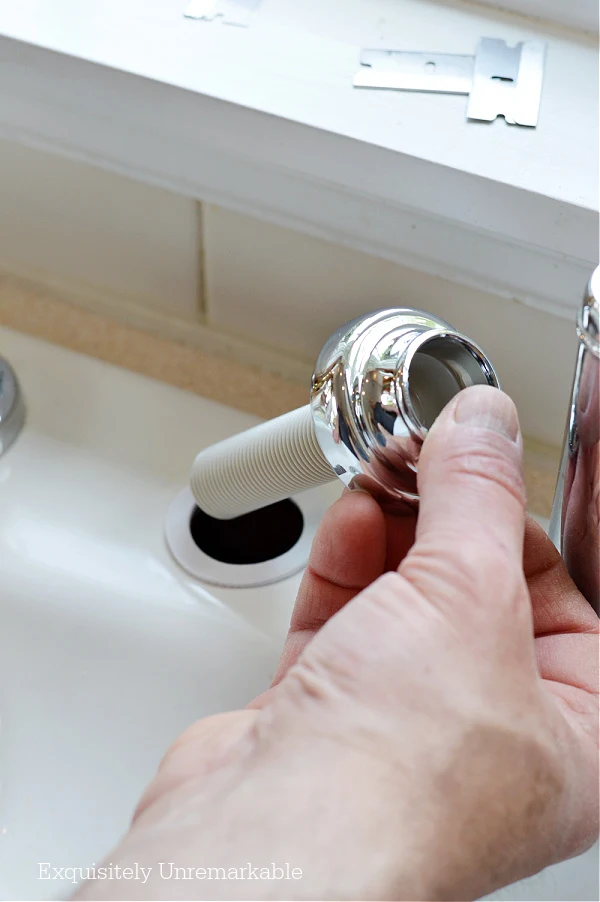
- Clean the sink hole with vinegar and baking soda or degreaser.
- Dry thoroughly.
- Place the new rubber gasket around the sink opening.
- Insert the new flange into the hole.
- From below, thread on the mounting nut and tighten by hand.
- Finish with pliers. Do not over-tighten (risk of cracking).
Sealing Tip: For stone or metal countertops, apply a thin ring of plumber’s putty under the gasket.
Feed and Connect the New Hose
- Feed the new hose through the flange from above.
- Pull it down into the cabinet.
- Connect the hose end to the diverter valve.
- Hand-tighten first, then use a wrench if needed.
- Avoid cross-threading.
Universal Fit Tip: If the connection is loose, add a plumber’s tape wrap or use an included adapter washer.
Reattach the Spray Head
- Use the full washer and snap ring method from earlier.
- Ensure all components are seated properly.
- Screw on the new head counter-clockwise until snug.
Final Check: The head should sit flush with the hose. No gaps or wobble.
Test for Leaks and Proper Function
Never skip testing. This confirms your work was successful.
Restore Water Supply
- Slowly turn on both shutoff valves.
- Watch for leaks at the diverter connection, mounting flange, and spray head.
Leak Fix: If water seeps, tighten connections slightly or add a washer.
Operate the Sprayer
- Squeeze the trigger and release multiple times.
- Confirm water flows only when triggered.
- Confirm sprayer shuts off completely.
- Confirm no dripping at the head or base.
- Confirm full water pressure and even spray pattern.
If it won’t shut off: Disassemble and check for debris or missing O-ring.
Ensure Compatibility and Long-Term Fit
Using the wrong part is the number one cause of post-installation leaks.
Match to Your Faucet Brand
• Moen, Delta, Kohler, Pfister: Look up your faucet model number (often on the base or aerator).
• Search for OEM sprayer parts online or contact customer service. Some brands offer free replacements.
Example: Moen 7594, Delta RP44278, Kohler G975808
Universal Kit Setup Tips
- Measure your hose diameter. 5/16″ or 3/8″ is standard.
- Test-fit washers and snap rings before final assembly.
- Use multiple soft rubber washers if the head doesn’t seal.
Warning: Universal sprayers may not match your faucet finish or shape. Check photos before buying.
Prevent Future Issues with Maintenance
A little care extends your sprayer’s life and prevents future replacements.
Monthly Cleaning Routine
- Soak the spray head in white vinegar for 30 minutes.
- Use an old toothbrush to scrub the nozzle.
- Rinse and reattach.
Hard Water Areas: Do this every two to three weeks to prevent clogs.
Annual Inspection
Check for:
• Kinks or bulges in the hose
• Cracked or worn O-rings
• Loose mounting nut
• Mineral buildup in the diverter
Pro Tip: Lubricate O-rings annually with silicone-based grease. Never use petroleum-based products.
Troubleshoot Common Post-Install Problems
Even careful installations can have hiccups. Here’s how to fix them fast.
Spray Head Leaks
• Cause: Missing or incorrect washer
• Fix: Disassemble and add a soft rubber washer inside the head
Sprayer Won’t Shut Off
• Cause: Worn internal valve or debris in diverter
• Fix: Replace the head or clean the diverter with vinegar
Low Water Pressure
• Cause: Clogged nozzle or kinked hose
• Fix: Soak head in vinegar or straighten and re-route hose
Hose Retracts During Install
• Cause: Not secured
• Fix: Use a rubber band or chip clip to anchor the hose
Mounting Flange Leaks
• Cause: Damaged gasket or loose nut
• Fix: Replace gasket and re-tighten. Apply plumber’s putty if needed.
Key Takeaways for Replacing Your Faucet Sprayer
Replacing a faucet sprayer is one of the easiest plumbing fixes you can do at home. Focus on three critical success factors. First, verify compatibility by matching your faucet brand and model number or choosing a quality universal kit with the correct washer and O-ring sizes. Second, ensure proper sealing by using every washer included in your kit, seating O-rings fully, and hand-tightening only to avoid cracking plastic threads. Third, always test thoroughly by restoring water slowly and checking every connection for leaks before finishing.
With the right parts, a few basic tools, and this step-by-step guide, you can restore full function to your kitchen sink in less than an hour. A properly installed sprayer will deliver years of reliable performance, saving you money on professional plumbers and keeping your kitchen running smoothly.
Frequently Asked Questions About Replacing a Faucet Sprayer
How do I know if I need to replace just the spray head or the entire assembly?
Replace only the spray head if the hose is in good condition with no kinks, cracks, or leaks. Replace the entire assembly if the hose is damaged, the mounting flange is corroded, or you’ve had persistent leaks at multiple connection points.
Can I use a universal replacement sprayer on any faucet brand?
Universal sprayers are designed to fit most standard faucets, but they may not match your faucet’s finish or exact dimensions. For the best fit and longest lifespan, source an OEM part specific to your faucet model when possible.
Why does my new sprayer still leak after installation?
Leaks usually occur from missing or incorrectly seated washers, over-tightened plastic threads, or incompatible parts. Disassemble the connection, verify all washers and O-rings are present, and hand-tighten rather than using tools on plastic components.
How long does it take to replace a faucet sprayer?
Most homeowners complete the job in 15 to 45 minutes. Spray head-only replacements take 15 to 25 minutes. Full assembly replacements take 30 to 45 minutes.
How often should I clean my faucet sprayer to prevent clogs?
Soak the spray head in white vinegar for 30 minutes once a month. In hard water areas, clean every two to three weeks to prevent mineral buildup from restricting water flow.







