
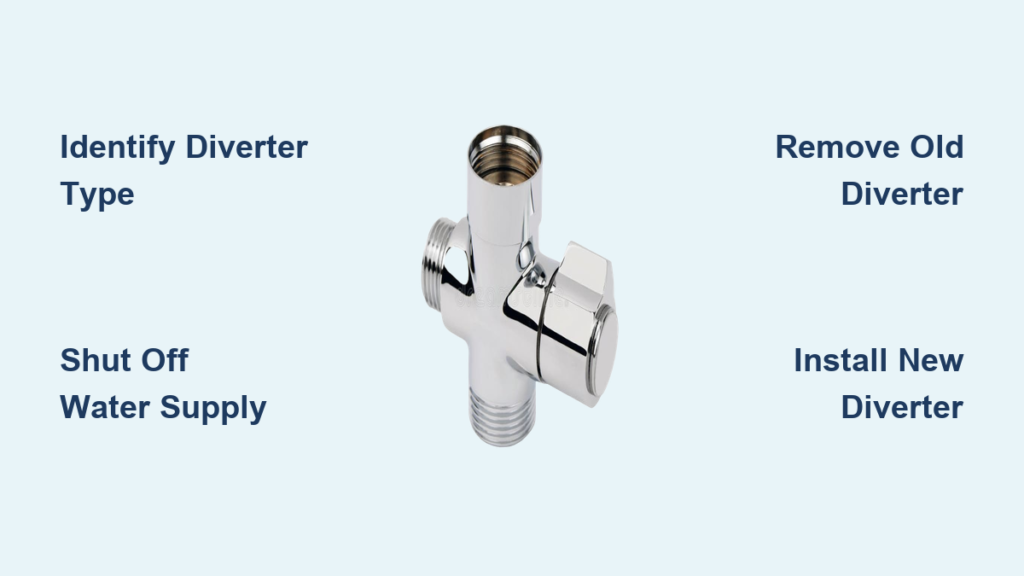
Is your shower suddenly losing pressure or water still trickling from the spout when you turn on the shower? You’re not alone. These are classic signs of a failing faucet diverter, the small component that redirects water from the sink spout to your showerhead or hand sprayer. When it wears out, performance suffers, water gets wasted, and frustration builds.
The good news is that replacing a faucet diverter is a DIY-friendly plumbing fix that usually takes less than an hour and costs under $50 in parts. This guide walks you through every step, from identifying your diverter type to testing the final result.
Identify Your Diverter Type

Before disassembling anything, determine where your diverter is located. The replacement process varies significantly by type.
Spout-Mounted Diverter
Found in many kitchen and bathroom sinks, this diverter is built into the spout. A pull-up pin or push-button on the spout activates it. When pulled, it blocks water from flowing out the spout and sends it up to the shower or sprayer.
How to confirm: If the diverter control is on the spout itself, you likely have a spout-mounted model.
Handle-Integrated Diverter
Common in single-handle or two-handle bathroom faucets, the diverter is inside the faucet body or cartridge. Turning or lifting the handle engages the diverter to redirect water.
How to confirm: No button or pin on the spout. Diverting happens when you operate the faucet handle.
Three-Handle Tub Diverter
In older bathtubs, a center handle or knob between hot and cold acts as the diverter. This standalone valve switches flow from tub spout to showerhead.
How to confirm: A separate center handle that does not control temperature but switches water outlets.
Knowing your type ensures you buy the right replacement and use the correct removal method.
Gather Tools and Parts
Having everything ready prevents mid-job delays and dropped screws.
Essential Tools
• Adjustable wrench for loosening nuts and fittings
• Channel-lock pliers to grip smooth spouts without scratching
• Allen wrench (hex key) as most set-screw spouts use 1/8″ or 5/32″ size
• Screwdriver (flathead or Phillips) to remove handle caps and screws
• Plumber’s tape (Teflon tape) to seal threaded connections
• Plumber’s grease to lubricate O-rings and moving parts
• Rag or towel to protect chrome or polished finishes
• Bucket or towel to catch residual water
Replacement Parts
• New diverter valve or cartridge matching your brand and model
• O-rings and washers to replace worn seals even if not included
• Thread sealant (optional) for extra protection on threaded joints
Pro Tip: Remove the old part and bring it to the hardware store for exact matching. Take photos of your setup if shopping online.
Shut Off Water Supply
Never work on plumbing with water pressure active.
- Locate shut-off valves under the sink or near the tub.
- Turn both hot and cold valves clockwise until tight.
- Turn on the faucet to drain remaining water and relieve pressure.
- If no local shut-offs exist, turn off the main water supply to the house.
Warning: Always test that water is off by trying to run the faucet. Residual pressure can cause sudden sprays.
Access the Diverter Mechanism
Method depends on your diverter type.
Remove Spout-Mounted Diverter
- Look under the spout base for a small set screw.
- Insert Allen wrench and turn counterclockwise to remove.
- Gently wiggle the spout and pull it straight off the copper or plastic pipe.
- The diverter valve is housed inside the spout base.
Visual Cue: If no set screw, your spout may be threaded. Use channel-lock pliers (with a rag to protect finish) and twist counterclockwise to unscrew.
Disassemble Handle-Integrated Diverter
- Pry off the decorative cap on the handle (marked “H” or “C”) with a flathead screwdriver.
- Unscrew the handle screw and lift the handle off.
- Use an adjustable wrench to loosen the packing nut beneath.
- Pull out the cartridge or stem, which contains the diverter.
Expert Note: Take a photo before removing parts. Reassembly is easier when you remember the orientation.
Remove Tub Spout Diverter (Three-Handle)
- Shut off main water supply.
- Inspect spout base. Look for a set screw.
- If present, remove with Allen wrench, then pull off spout.
- If absent, the spout is threaded. Wrap spout with a rag and use channel-lock pliers to unscrew it counterclockwise.
- Extract the diverter mechanism from inside the spout.
Remove and Inspect Old Diverter
Once accessed, take out the diverter assembly from the spout or cartridge. Check for:
• Cracked plastic housing
• Worn or flattened rubber washers/O-rings
• Mineral buildup (white or green crust)
• Broken spring or plunger
Common Cause: Hard water leaves calcium deposits that prevent the diverter from sealing fully, leading to leaks and weak flow.
Use white vinegar to soak parts for 15 to 30 minutes. Scrub gently with an old toothbrush to remove scale.
Install New Diverter
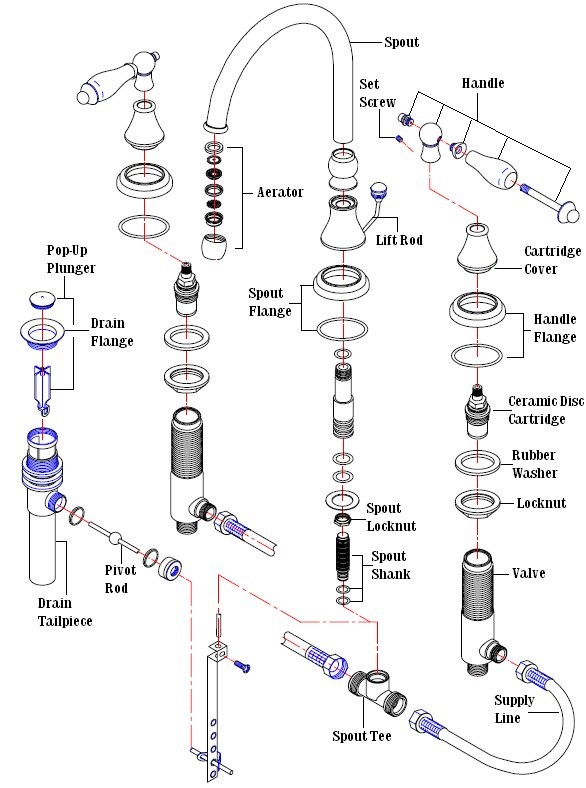
For Spout-Mounted Units
- Apply plumber’s grease to new O-rings and moving parts.
- Insert the new diverter into the spout base, aligning it correctly.
- Replace any old O-rings in the housing with new ones.
- Wrap Teflon tape around the pipe (2 to 3 wraps clockwise).
- Slide spout back on and tighten the set screw securely.
Tighten Tip: Do not over-tighten. Snug is enough. Excess force can crack brass or strip threads.
For Cartridge-Based Diverters
- Lubricate new cartridge’s O-rings with plumber’s grease.
- Insert the new cartridge into the valve body, matching the original orientation.
- Reinstall the packing nut and tighten gently with a wrench.
- Slide the handle back on and secure with the screw.
- Snap the decorative cap into place.
Brand Match: Use only manufacturer-specific cartridges (Moen, Delta, or others) to ensure proper fit and function.
Reassemble and Restore Water
- Double-check all connections are tight but not over-torqued.
- Remove rags from the drain.
- Slowly turn water back on at the shut-off valves or main supply.
- Watch for leaks around the spout base, handle, and diverter button or pin.
Test the Diverter Function
- Run water through the spout to confirm normal flow.
- Activate the diverter by pulling the pin or pressing the button, or by turning the diverter handle.
- Observe that water stops flowing from the spout and full flow goes to showerhead or sprayer.
- Check for no sputtering, leaks, or low pressure.
Test Tip: Switch back and forth 3 to 4 times. A smooth, consistent action means the install was successful.
Troubleshoot Common Issues
Even after replacement, problems can occur. Here is how to fix them fast.
Water Leaks from Spout When Shower Is On
Cause: Improper seal, debris, or misaligned diverter
Fix:
• Shut off water and recheck diverter seating
• Clean valve seat with vinegar
• Replace O-rings if pinched or torn
Low Pressure in Showerhead
Cause: Blockage in diverter or showerhead
Fix:
• Remove and clean showerhead aerator
• Flush diverter with vinegar
• Check for kinks in shower hose
Diverter Button Will Not Stay Engaged
Cause: Broken spring or worn mechanism
Fix:
• Disassemble and inspect internal spring
• Replace entire diverter unit. Partial repairs rarely work.
Squeaking or Stiff Operation
Cause: Dry or worn parts
Fix:
• Apply plumber’s grease to moving components
• Replace cracked O-rings
No Diversion at All
Cause: Severe mineral buildup or wrong part installed
Fix:
• Soak diverter in vinegar overnight
• Confirm replacement matches original model
• Consider upgrading to a more durable diverter (brass over plastic)
Prevent Future Failures
Extend your diverter life with simple maintenance.
Clean Monthly
Run distilled white vinegar through the system:
- Fill a plastic bag with vinegar.
- Submerge the showerhead or sprayer.
- Tape it in place for 30 minutes.
- Rinse thoroughly.
Bonus: This also cleans the showerhead and removes mold.
Replace Seals Proactively
Swap out O-rings and washers every 2 to 3 years, even if they look fine. Preventive replacement avoids sudden leaks.
Use Plumber’s Grease
Lubricate moving parts during installation. It reduces friction and prevents rubber from drying out.
Install a Water Softener
If you have hard water, scale builds up fast. A water softener dramatically reduces mineral deposits in all plumbing components.
Brand-Specific Tips
Moen Diverter Replacement
Most Moen diverters use set-screw spouts, making them easy to remove. Cartridge models (Chateau, Kingsley) require exact match. Look for part number on cartridge and replace with the same (1222, 1225).
Delta Diverter Fix
Monitor and Trinsic series use RP46074 or RP61073 cartridges. Tub spout buttons can sometimes be replaced individually. Use Delta online model lookup tool for accuracy.
Kohler Diverter Issues
Many models (K-T219, K-T397) require full spout replacement. Diverter is molded inside with no standalone part available. Use Kohler-approved parts to maintain warranty.
Pfister Diverter Solutions
Modular system allows swap-in diverter modules. Compatible with MasterShower and LifeShine series. No need to replace entire faucet.
Know When to Call a Pro
Some situations are best left to licensed plumbers.
Call a Plumber If
• Pipes are corroded or leaking beyond the diverter
• You cannot identify or access the diverter
• Water leaks persist after replacement
• Job requires soldering or pipe cutting
• You are working with a complex multi-handle tub valve
Cost Note: Plumbers charge $100 to $200 per hour, but most diverter jobs take under an hour. DIY saves 50 to 75 percent.
Cost Breakdown
| Item | Price Range |
|---|---|
| Diverter cartridge or valve | $15 to $50 |
| Full spout (with diverter) | $40 to $120 |
| O-ring or washer kit | $5 to $15 |
| Plumber’s tape | $3 to $10 |
| Professional labor | $100 to $200 per hour |
DIY Savings: Replacing a spout-mounted diverter yourself costs under $30 and takes 30 minutes.
Safety and Best Practices
Follow these rules for a safe, successful repair.
Always Shut Off Water
Never skip this step. Water under pressure can flood cabinets or walls in seconds.
Protect Fixture Finishes
Wrap pliers and wrenches with a rag to avoid scratching chrome, nickel, or brass.
Do Not Overtighten
Snug is sufficient. Over-tightening cracks porcelain, strips threads, or damages internal seals.
Label Hot and Cold Lines
If disconnecting supply lines, use tape and markers to label them. This prevents confusion during reassembly.
Test for Leaks Thoroughly
Check connections after 5, 15, and 30 minutes of operation. Some leaks appear slowly.
Key Takeaways for Fixing Your Faucet Diverter
Replacing a faucet diverter is a straightforward fix that restores full function to your sink, shower, or tub. By identifying your diverter type, using the right tools, and following a step-by-step approach, you can complete the job with confidence and save time and money.
Key takeaways to remember:
• Spout-mounted diverters are easiest to replace. Often just a set screw and pull.
• Cartridge types require handle removal but are still DIY-friendly.
• Always match the model and use plumber’s grease for smooth operation.
• Clean and exercise the diverter monthly to prevent future issues.
With proper care, your new diverter can last 5 to 10 years. And when it is time again, you will know exactly what to do.
Next Step: If you are replacing a leaky faucet entirely, check our guide on how to install a bathroom sink faucet, a natural follow-up to upgrading your plumbing system.
Frequently Asked Questions About Replacing a Faucet Diverter
How do I know if my faucet diverter is bad?
Common signs include water continuing to flow from the spout while the shower is on, weak or no water flow to the showerhead, leaking around the diverter button or spout, and sputtering or inconsistent pressure when switching outlets.
Can I replace just the diverter or do I need to replace the whole faucet?
In most cases, you can replace just the diverter valve or cartridge. Some brands like Kohler may require full spout replacement for certain models, but spout-mounted diverters are typically sold as separate parts.
How long does it take to replace a faucet diverter?
Most DIYers complete the job in 30 to 60 minutes. The time depends on your diverter type and how accessible the plumbing is.
What tools do I need to replace a faucet diverter?
You will need an adjustable wrench, channel-lock pliers, Allen wrench, screwdriver, plumber’s tape, plumber’s grease, and a rag to protect finishes. Replacement O-rings and washers are also recommended.
How much does a replacement diverter cost?
Faucet diverter valves or cartridges cost $15 to $50. A full tub spout with integrated diverter runs $40 to $120. DIY replacement saves 50 to 75 percent compared to professional labor.







