

Is your faucet gushing more water than you need? You’re not alone. Excessive water flow wastes resources, inflates utility bills, and increases splashback, especially in older homes with outdated fixtures. The good news: reducing faucet water flow is simple, affordable, and highly effective. Whether you’re aiming for sustainability, cost savings, or better control in the sink, this guide delivers actionable solutions backed by technical data and real-world results.
Let’s dive into the most effective, low-cost ways to reduce water flow from your faucet, step by step.
Adjust Under-Sink Shutoff Valves for Immediate Results
One of the fastest ways to reduce water flow is by partially closing the hot and cold shutoff valves beneath your sink. This method requires no tools and delivers immediate results.
Turn Valves Clockwise in Small Steps
- Open the faucet fully (hot, cold, or both).
- Locate the shutoff valves under the sink.
- Turn both valves clockwise slightly, starting with a quarter turn.
- Test the flow at the tap.
- Repeat in small increments until desired flow is achieved.
Pro Tip: Adjust both valves equally to maintain balanced water temperature and prevent scalding.
This simple tweak can reduce flow by up to 75 percent, especially in homes with high water pressure above 80 PSI. Since the restriction is built into the system, every user gets the same reduced flow without requiring behavior change.
Avoid Overtightening Valves
While effective, do not crank the valves shut completely unless necessary. Overtightening can damage rubber seals, leading to leaks or valve failure. Use tape on valve handles if using pliers to prevent scratching.
Warning: Uneven adjustment, such as closing only the hot water valve, may cause sudden temperature shifts and increase scald risk.
Install a Low-Flow Faucet Aerator

The faucet aerator is the single most effective tool for reducing water flow. It screws onto the spout tip, mixes air into the stream, and maintains strong perceived pressure while using less water.
Choose the Right Flow Rate
Aerators come in standard flow rates:
- Standard: 2.2 GPM (8.3 L/min)
- Low-flow: 1.5 to 1.8 GPM (5.7 to 6.8 L/min)
- Ultra-low-flow: 1.0 GPM or less (3.8 L/min)
- WaterSense-certified: 1.5 GPM or less (meets EPA efficiency standards)
Replacing a 2.5 GPM aerator with a 1.5 GPM model cuts water use by 40 percent instantly, ideal for bathrooms and utility sinks.
Remove Old Aerator Safely
- Turn off water supply.
- Unscrew the existing aerator by hand.
- If stuck, wrap pliers with tape and gently loosen.
- Clean the aerator seat and threads inside the spout.
Check for Debris: A clogged aerator often causes low flow, so clean it before assuming replacement is needed.
Install New Aerator
- Hand-tighten the new aerator.
- Finish with a quarter turn using pliers with tape protection.
- Turn water back on and check for leaks.
Most aerators cost under five dollars and pay for themselves in water savings within months.
Use Pressure Reduction Washers Inside the Spout
If your faucet lacks standard threading or an aerator, pressure reduction washers offer a discreet alternative.
Insert Washers Inside Spout Outlet
These small rubber or plastic inserts sit inside the faucet spout and restrict flow by up to 50 percent. They are ideal for:
- Decorative faucets with non-standard threads
- Fixtures where aerators do not fit
- Temporary flow control solutions
Limitations to Consider
- Not all faucets have space for washer installation
- May require partial disassembly
- Less durable than full aerators
Still, they are a low-cost option when aerators are not feasible.
Replace High-Flow Spouts with Aerated Models
Some older or specialty faucets, especially kitchen models, lack aerators entirely and can push nine or more GPM, wasting massive amounts of water.
Upgrade to Built-In Aerator Spout
Replacing the entire spout with a modern aerated version can cut flow from 36 L/min to 8 L/min, a 78 percent reduction.
Installation Steps
- Shut off water supply.
- Disconnect supply lines.
- Remove old spout.
- Apply Teflon tape to threads of new spout.
- Install and reconnect lines.
- Test for leaks and flow.
Best Choice: Select a WaterSense-certified spout for guaranteed efficiency and performance.
This is a moderate DIY job but well worth it for high-use kitchen faucets.
Install a Whole-House Pressure Regulator
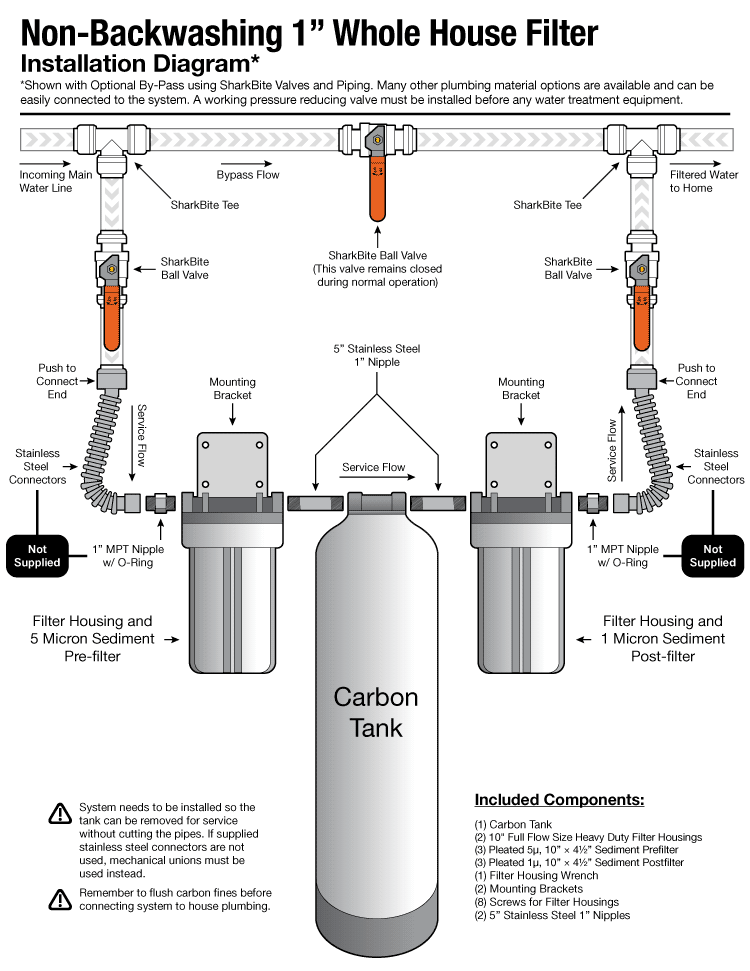
If multiple fixtures have high flow, the issue is likely excessive water pressure rather than individual faucets.
Set System Pressure to 60 PSI
Municipal lines often deliver 80 to 100 PSI, far above the 60 PSI standard for safe plumbing operation. A pressure regulator installed at the main water line reduces pressure system-wide.
Benefits of Pressure Regulation
- Reduces flow across all faucets, showers, and appliances
- Prevents pipe stress, leaks, and premature fixture failure
- Lowers water and energy bills
Professional Required: Only a licensed plumber should install or adjust a main pressure regulator.
Use a pressure gauge on an outdoor spigot to test your home’s current pressure before deciding on this solution.
Diagnose Unexpectedly Low Flow
Reduced flow is not always intentional. If water trickles despite full valve opening, diagnose these common issues.
Clean the Aerator First
Mineral buildup is the number one cause of unintended low flow.
Quick Cleaning Process
- Unscrew aerator.
- Disassemble if possible.
- Soak in white vinegar for 30 minutes.
- Rinse and reassemble.
- Reinstall and test.
Test: Run water without the aerator. If flow improves, the clog was confirmed.
Repeat every three to six months in hard water areas.
Check Supply Line Inlet Screens
Many faucets have tiny screens inside the hot and cold supply line connections under the sink.
How to Clean Inlet Screens
- Shut off water.
- Disconnect supply lines.
- Remove screens with a screwdriver.
- Rinse thoroughly.
- Flush lines into a bucket for 30 seconds.
- Reconnect.
These screens are often overlooked but can block up to 90 percent of flow when clogged.
Replace Old Supply Lines
Flexible hoses can develop kinks, internal corrosion, or collapsed liners.
Upgrade to Braided Stainless Steel
- Resists kinking and bursting
- Lasts 10 or more years
- Ensures full flow capacity
Replace every five to seven years or if lines show bulges or leaks.
Inspect Faucet Cartridge and Internal Valves
Internal wear can restrict flow, especially in faucets older than five years.
Remove and Clean the Cartridge
- Shut off water.
- Remove handle (use 3/32 inch Allen wrench for set-screw types).
- Take out retainer ring and extract cartridge.
- Soak in vinegar if limescale is present.
- Inspect for cracks or debris.
Use OEM Parts: Generic cartridges may not seal properly, causing leaks or low flow.
Replace every five to seven years or as needed.
Test Shut-Off Valves
Even when open, old valves can restrict flow due to deteriorated seals.
Quick Test Method
- Disconnect supply line.
- Open valve into a bucket.
- If flow is weak, the valve is faulty.
Upgrade to Quarter-Turn Ball Valves
- Open fully with 90 degree turn
- Less prone to wear
- Provide full flow when open
Handle Special Faucet Types
Not all faucets are standard. Adjust your approach based on design.
Clean Spray Heads on Kitchen Faucets
Pull-down and pull-out sprays often have internal filters.
Steps to Clean Spray Heads
- Unscrew spray head.
- Remove and clean mesh screens.
- Flush hose by running water through it.
- Reassemble.
Some Moen models have aerators inside the spray head, so check manufacturer guides.
Service Concealed Aerators
High-end faucets may have non-removable aerators inside the spout. Use manufacturer-specific tools and contact customer support. Avoid DIY disassembly unless trained.
Maintain Open Spout Faucets
Faucets without visible aerators often have inlet screens at the base. Clean every three to six months to prevent gradual flow decline.
Measure Flow Rate Before and After
Verify your results with a simple test.
Use the Timed Container Method
- Place a one-liter jug under the faucet.
- Open fully.
- Time flow for 41 seconds.
- Multiply collected volume by 1.46 to get L/min.
Example: 9.2 liters in 41 seconds equals 13.5 L/min, approximately 3.6 GPM. Compare before and after to quantify savings.
Target Flow Rates
- Ideal for handwashing: 1.5 to 2.1 GPM (5.7 to 8 L/min)
- Excessive flow: above 2.5 GPM (9.5 L/min)
- WaterSense standard: 1.5 GPM or less
Flows above 8 L/min are unnecessary for most tasks.
Maintain Long-Term Efficiency
Conservation is not a one-time fix. Regular maintenance keeps flow optimized.
Clean Aerators Every Three to Six Months
- Soak in vinegar if hard water is present
- Use a soft brush to remove debris
- Reinstall tightly to prevent leaks
Flush Supply Lines Annually
This prevents buildup in lines and inlet screens.
Replace Cartridges Every Five Years
This ensures smooth operation and full flow capacity.
Know When to Call a Plumber
Seek professional help if:
- Flow remains low after cleaning aerator and screens
- Multiple fixtures are affected
- Shut-off valves leak or fail
- Main pressure regulator needs installation
- Faucet is old and requires internal repair
A plumber can diagnose hidden issues and ensure code-compliant repairs.
Frequently Asked Questions About Reducing Faucet Water Flow
Does reducing faucet flow affect cleaning performance?
No. Low-flow aerators mix air with water to maintain strong perceived pressure while using less water. You can still wash dishes and rinse hands effectively at 1.5 GPM or less.
How much can I save by reducing faucet water flow?
Installing a 1.5 GPM aerator instead of a standard 2.5 GPM model can reduce water use by 40 percent per faucet. Combined with valve adjustments, savings can reach 50 to 75 percent.
What is the best flow rate for bathroom faucets?
The ideal flow rate for most bathroom faucets is 1.5 to 2.1 GPM. This meets WaterSense standards while providing sufficient pressure for handwashing and routine tasks.
Can I reduce flow on my kitchen faucet without replacing it?
Yes. Start by cleaning or replacing the aerator. If your faucet lacks an aerator, install a pressure reduction washer inside the spout outlet. Adjusting under-sink shutoff valves also works.
Why does my faucet have low flow even at full open?
This usually indicates a clogged aerator, dirty inlet screen, or faulty cartridge. Clean these components first. If the problem persists, check for kinks in supply lines or worn shut-off valves.
How often should I clean my faucet aerator?
Clean aerators every three to six months, or more frequently in hard water areas. Soaking in white vinegar for 30 minutes removes mineral buildup effectively.
Key Takeaways for Reducing Faucet Water Flow

Reducing faucet water flow is one of the easiest, most impactful home upgrades you can make. Start with free valve adjustments and five-dollar aerators, then scale up to system-wide solutions if needed. By engineering conservation into your plumbing, you save water, money, and energy automatically. Whether you are in a drought zone, off-grid, or just eco-conscious, the tools are simple, the savings are real, and the results are immediate. Measure your flow before and after changes to track savings, and maintain aerators regularly for long-term efficiency.







