

A dull, spotty stainless steel sink can make even the cleanest kitchen feel grimy. Water marks, grease smudges, and tiny scratches build up fast, stealing that factory-fresh gleam. The good news? You can polish a stainless steel sink back to brilliance using simple supplies and proven techniques. No harsh chemicals or expensive tools required for most results.
This guide covers everything from a 10-minute weekly clean to a full mirror-finish restoration. You’ll learn which products actually work, how to follow the grain like a pro, and which mistakes cause permanent damage. By the end, your sink will look sharper, stay cleaner longer, and resist the daily wear that dulls lesser finishes.
Deep Clean the Sink Before Polishing
Polishing over grime traps debris and scratches the steel. Always start with a spotless surface so the final buff actually shines instead of smearing.
Clear and Rinse the Basin
Remove dishes, sponges, and strainers. Pull out the garbage disposal splash guard if possible. Rinse with warm water to wash away loose food particles and coffee grounds that could scratch during scrubbing.
Degrease with Dawn Powerwash
Spray Dawn Powerwash generously across every surface. It cuts through kitchen oils far better than regular dish soap. Scrub with a non-scratch sponge like a Scrub Daddy, paying extra attention to the drain area and the lip beneath the garbage disposal. If the splash guard stays in place, flip it and scrub underneath with an old toothbrush.
Treat Stains with Bar Keepers Friend
Apply Bar Keepers Friend Soft Cleanser directly to hard water spots, rust marks, or discoloration. The oxalic acid dissolves mineral deposits that regular cleaners leave behind. Scrub gently with a soft sponge. Watch for foam turning brown; that signals grime lifting. Do not let it sit longer than one minute, or it may etch the steel. Rinse thoroughly.
Scrub the Faucet with CLR
Dip a toothbrush in CLR (Calcium, Lime & Rust Remover) and scrub the faucet head, especially the underside where minerals collect. Let it sit for two to three minutes, then rinse well. Avoid splashing CLR onto nearby stone counters or grout.
Dry and Buff with Microfiber
Wipe the entire sink dry using a clean microfiber towel. Always move in the direction of the grain, those fine lines visible on the surface. This prevents micro-scratches and starts building shine before you even begin polishing.
Pick the Right Finish for Your Sink
Not every shiny sink needs a true mirror polish. Your finish choice affects daily maintenance, scratch visibility, and long-term appearance.
Brushed vs. Mirror Finish
A brushed (matte) finish follows the factory grain and hides everyday wear. It is the standard for most kitchen sinks and forgives small scratches. A mirror finish looks dramatic but reveals every fingerprint, water drop, and scuff. It demands constant attention to stay looking sharp.
Which Finish Makes Sense for Sinks
For a working kitchen sink, a finely brushed finish is the smartest choice. It looks clean and professional without becoming a full-time cleaning job. Reserve mirror finishes for decorative items or sinks that see very light use. One user polished motorcycle parts to a mirror shine over two weekends, the same process, but a much smaller project than a full sink.
Assess the Current Condition
Look closely at your sink. If the original grain is still visible and uniform, you can restore the brushed look easily. If past scrubbing went circular or used the wrong pads, the pattern may be damaged. Once disrupted, the true brushed appearance cannot be fully rebuilt without refinishing.
Restore a Worn Brushed Finish
If the grain is intact but the surface looks tired, a simple wet-sanding step brings it back to life.
Use 150-Grit Wet Sandpaper
Grab 150-grit wet/dry sandpaper or emery cloth. Wet both the paper and the sink surface to reduce friction and prevent clogging. Sand strictly in the direction of the grain. Never go circular or cross-grain. This technique has restored food service equipment to like-new condition.
Work One Section at a Time
Divide the sink into zones: basin bottom, sides, drain area. Use light, even strokes on each section. Rinse often to check your progress. Stop when scratches fade and the grain looks consistent across the surface.
Use Only Dedicated Stainless Tools
Never use sanding discs that previously touched carbon steel. Iron particles transfer into the stainless surface and cause rust spots. Always keep separate tools reserved for stainless work. This rule is confirmed by professional welders and fabricators.
Achieve a True Mirror Shine (Optional)
Want a showroom-level reflection? A mirror finish is possible, but it is a multi-stage project, not an afternoon task. Plan for several hours and ongoing upkeep.
Start with Heavy Smoothing
For deep scratches or pitting, begin with a flap disc on an angle grinder to level the surface. Switch to Scotch Brite discs, moving from coarse to medium to fine. Use a 2-inch screw-lock pad on a mandrel for tight curves and corners. Always work with the grain.
Progress Through Fine Grits
Move to wet/dry sandpaper starting at 400 grit and increasing to 2500 grit. Wet sand every stage to prevent overheating and clogging. Rinse and dry between grits so you can feel the smoothness. The surface should feel glassy before you reach the final polish.
Buff with Rouge and a Cotton Wheel
Attach a cotton buffing wheel to a drill or wheel buffer. Apply rouge polishing compound in stages, starting with coarser rouge and finishing with fine. Buff in slow, even passes along the grain. For extra depth, apply Flitz metal polish before the final buff.
Set Realistic Time Expectations
A full mirror polish on a large kitchen sink can take multiple weekends. Budget for material costs, as some sanding discs wear out in as little as 20 seconds on stainless steel. Black Carbon discs from Online Industrial Supply tend to last longer than GoldStar or 3M Purple Clean discs.
Gather the Right Tools and Materials
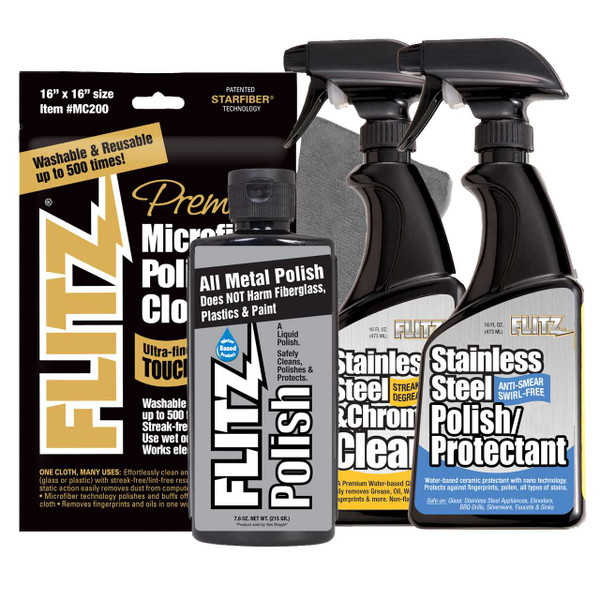
Using the correct supplies makes the difference between a flawless finish and permanent damage. Stick with products designed for stainless steel.
Best Abrasive Pads
3M Scotch Brite pads are the top choice among professionals. Use coarse for heavy buildup, medium for smoothing, and fine for final prep. Avoid steel wool and green scrub pads, as they scratch and leave behind particles that cause rust.
Sandpaper That Holds Up
Standard sanding discs wear out fast on stainless steel. Black Carbon hook-and-loop discs offer better durability. Have extras on hand because finer grits wear out even faster than coarse ones.
Polishing Compounds
- Flitz metal polish: Adds shine and a light protective layer
- Rouge compounds: Used with buffing wheels for high luster
- Diamond paste: Available from McMaster Carr, best for small detail work
Power Tool Setup
- Angle grinder: Handles large areas with Scotch Brite or flap discs
- Random orbital sander: Offers controlled material removal
- Drill with buffing wheel: Works for the final polish stage
- Wheel buffer from Harbor Freight: An affordable option for home users
Follow Critical Safety Rules

Polishing stainless steel safely protects both you and the sink. Skipping these steps can cause permanent etching, contamination, or injury.
Never Use Carbon Steel Tools on Stainless
Abrasive discs previously used on carbon steel transfer iron particles into the stainless surface. These embedded particles rust and stain the sink. Always use dedicated tools reserved for stainless steel only. Professional fabricators confirm this rule without exception.
Avoid Harsh Chemicals
Never use bleach, ammonia, or aggressive household cleaners. They break down the passive layer that protects stainless steel, leading to pitting and discoloration. Stick with pH-balanced or stainless-specific products like Bar Keepers Friend and CLR.
Respect Bar Keepers Friend Timing
Bar Keepers Friend contains oxalic acid, which is powerful but can etch the surface if left too long. Apply, scrub gently, and rinse within 60 seconds. Longer contact risks dull spots that are hard to fix.
Always Follow the Grain
Every cleaning, sanding, and polishing motion must run parallel to the grain lines. Cross-grain scrubbing creates visible scratches that stand out under light. Take a moment to identify the grain direction before you start any step.
Prevent Water Spots and Fingerprints
Even a perfect polish dulls quickly without aftercare. A few daily habits keep the shine locked in.
Rinse with Distilled Water
Tap water leaves mineral deposits that show as spots. For the final rinse after cleaning, wipe with a cloth dampened with distilled water. This single step eliminates most water-mark issues.
Dry the Sink Every Time
After each use, dry the sink with a clean microfiber towel. Standing water promotes spotting and mineral buildup. Make this part of your post-dishwashing routine.
Wipe Fingerprints Weekly
Oils from skin attract dust and dull the finish. Once a week, wipe the sink with a 1:1 vinegar-water mix to remove smudges, then buff dry. This keeps the surface looking fresh between deep cleans.
Maintain the Shine with a Simple Routine
Polishing is not a one-time fix. A consistent schedule preserves the finish and reduces the need for heavy restoration later.
Daily Habits
- Rinse the sink after every use
- Dry with a microfiber cloth
- Quick wipe to catch splashes before they dry
Weekly Deep Clean
Spend 5 to 10 minutes with the professional method:
1. Spray Dawn Powerwash and scrub with a non-scratch sponge
2. Treat stubborn spots with Bar Keepers Friend (max one minute)
3. Clean the faucet with CLR
4. Rinse well and buff dry
Monthly Touch-Ups
Apply Bar Keepers Friend to prevent mineral buildup. Use CLR on the faucet aerator if water flow slows. Inspect for new scratches or finish damage while you work.
Annual Assessment
Once a year, evaluate the sink under good light. If scratches have deepened or the finish has dulled, consider a full restoration. Mirror finishes may need a re-polish to stay reflective.
Troubleshoot Common Sink Problems
Even with good care, issues pop up. Here is how to handle them quickly.
Light Scratches Appear
Buff them out with 150-grit wet sandpaper, moving strictly along the grain. Follow up with finer grits if needed, then re-polish. Avoid circular motions at all costs.
Rust Spots Show Up
These usually come from iron contamination. Remove them with a stainless steel cleaner or diluted vinegar. Prevent recurrence by using only dedicated stainless tools on the sink.
Surface Looks Dull
Dullness means buildup or micro-scratches. Clean with Dawn Powerwash first, then treat with Bar Keepers Friend. If shine still lags, restore the brushed finish with a light wet sanding.
Water Spots Will Not Budge
Hard water stains need Bar Keepers Friend. Apply, scrub gently, and rinse within 60 seconds. For the faucet, use CLR with a toothbrush. Always dry afterward to stop new spots from forming.
Frequently Asked Questions About Polishing a Stainless Steel Sink
Can a stainless steel sink be polished to a mirror finish?
Yes, a mirror finish is achievable with proper abrasives, rouge compounds, and a buffing wheel. However, it requires multiple stages and ongoing maintenance. For most kitchen sinks, a finely brushed finish is more practical and hides everyday wear better.
What is the best product to polish a stainless steel sink?
Bar Keepers Friend is the top choice for routine stain removal and shine restoration. For true mirror polishing, use Flitz metal polish followed by rouge and a cotton buffing wheel. Always finish by buffing with a clean microfiber cloth.
How do I remove scratches from a stainless steel sink?
Light scratches respond to 150-grit wet sandpaper used along the grain. Deeper scratches require progressing through finer grits up to 2500, then re-polishing. Always sand in the same direction as the existing grain to avoid making marks worse.
How often should I polish my stainless steel sink?
For routine maintenance, deep clean once a week using the professional method. A full polish (brushed or mirror restoration) is needed only when the finish looks worn or scratched, typically once a year for most households.
Is Bar Keepers Friend safe for stainless steel sinks?
Yes, when used correctly. Apply it to stains, scrub gently, and rinse within one minute. Leaving it on longer can etch the surface. Never mix it with bleach or other harsh chemicals.
Can I use steel wool on a stainless steel sink?
No. Steel wool scratches the surface and leaves iron particles that cause rust spots. Use non-scratch sponges, microfiber cloths, or Scotch Brite pads instead. Keep all tools dedicated to stainless steel only.
Final Takeaways for a Gleaming Stainless Steel Sink
Polishing a stainless steel sink comes down to three essentials: clean thoroughly first, always work with the grain, and use only stainless-safe products. A weekly 10-minute routine with Dawn Powerwash, Bar Keepers Friend, and a microfiber towel keeps most sinks looking sharp. Reserve deeper restoration for scratches or a worn finish, and consider a brushed look over a mirror finish for everyday durability.
Start with a deep clean this week. Once your sink is spotless and dry, decide whether a light polish or a full restoration fits your goals. With the right habits, your sink can stay gleaming for years without constant heavy work.







