

A wobbly faucet isn’t just annoying. It signals mechanical instability that can lead to leaks, water damage, and premature component failure. The good news? Over 90% of faucet wobble issues can be fixed with basic tools and 15 to 30 minutes of effort. Whether the base, handle, or spout is moving, this guide walks you through every step to restore stability and prevent future issues without calling a plumber.
In this article, you will learn how to identify the source of the wobble, tighten mounting hardware, repair loose handles and spouts, and perform final verification checks to ensure your fix lasts.
Identify Where the Wobble Comes From
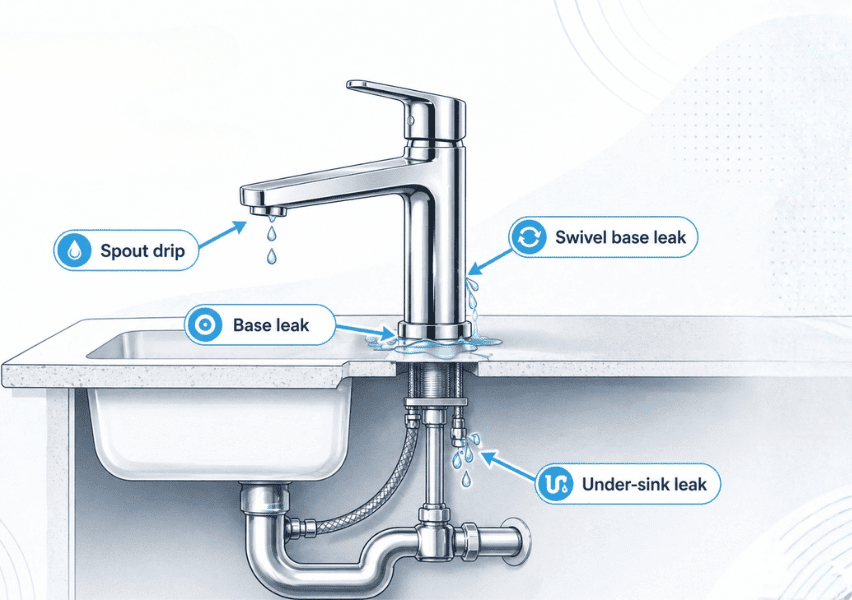
Before grabbing tools, pinpoint exactly where movement occurs. Different wobbles require different fixes.
Check the Faucet Base First
Grasp the faucet near the sink surface and gently wiggle it. If the entire unit moves, the mounting hardware is loose or damaged. Look for gaps or water stains around the base, as these indicate prior leaks or deteriorating support.
Test the Handle Separately
Turn off the water and remove the decorative cap, usually labeled H or C. If only the handle wobbles, the set screw is likely loose or stripped. This is common in single-handle models and often mistaken for a loose faucet base.
Inspect Spout Movement
For pull-down or swivel spouts, lift and twist the spout to check for side-to-side play. Wobble in this area usually means worn O-rings or loose internal threads. Knowing the source prevents wasted effort and ensures the right repair.
Prepare the Workspace Safely
Never skip safety steps, even for a simple fix.
Turn Off the Water Supply
Close hot and cold shut-off valves under the sink. If valves are stuck or missing, shut off the main water supply to the house. Open the faucet briefly to drain residual water and relieve pressure.
Clear the Area Under the Sink
Remove cleaning supplies, trash cans, or storage from under the sink. Place a towel or cushion on the floor for comfort. Use a headlamp or flashlight to illuminate tight spaces, as both hands will be busy during the repair.
Gather Essential Tools
You will need these items before starting:
- Basin wrench for tight spaces
- Hex key for set screws
- Adjustable wrench or slip-joint pliers
- Flathead screwdriver to remove caps
- Replacement O-rings or gaskets
- Plumber’s putty or silicone sealant
Having everything ready speeds up the job significantly.
Tighten Loose Mounting Hardware
Most wobbles stem from loose base hardware. This is the number one fix.
Locate the Mounting Nuts
Under the sink, find one or two threaded rods extending from the faucet base. At the end of each rod is a mounting nut, often plastic, brass, or a barrel-style nut. Barrel nuts are common on Delta faucets and feature a cylindrical brass body with an outer sleeve.
Use the Right Tool
A basin wrench grips nuts in tight spaces without slipping. A rigid multi-tool offers better leverage in awkward angles. Avoid pliers, as they can strip plastic nuts and damage finishes.
Tighten Clockwise Without Overtightening
Turn each nut clockwise until snug. Check alignment from above periodically. Stop when the faucet feels solid with no movement when wiggled.
Overtightening risks cracking porcelain sinks, warping thin stainless steel, and damaging plastic components. Snug is sufficient.
Add a Stabilizer for Thin Sinks
If the sink flexes under pressure, install a faucet stabilizer plate between the nut and sink. Alternatively, apply a pea-sized bead of plumber’s putty or silicone under the base flange. Plumber’s putty does not secure the faucet mechanically but blocks water intrusion and protects the countertop long-term.
Repair a Loose Handle
A shaky handle often feels like a wobbly faucet, but the fix is simpler.
Remove the Decorative Cap
Use a flathead screwdriver to gently pry off the H or C cap. Some caps twist or lift off with light pressure. Work carefully to avoid scratching the finish.
Tighten the Set Screw
Insert a hex key into the exposed screw. Turn clockwise until snug. Do not force it. If the screw spins freely, it is stripped and needs replacement with an identical size.
Reattach the Cap
Snap or press the cap back into place. Test the handle. No wobble should remain. Keep spare set screws on hand, as they are inexpensive and fail frequently.
Fix a Wobbly Pull-Down Spout
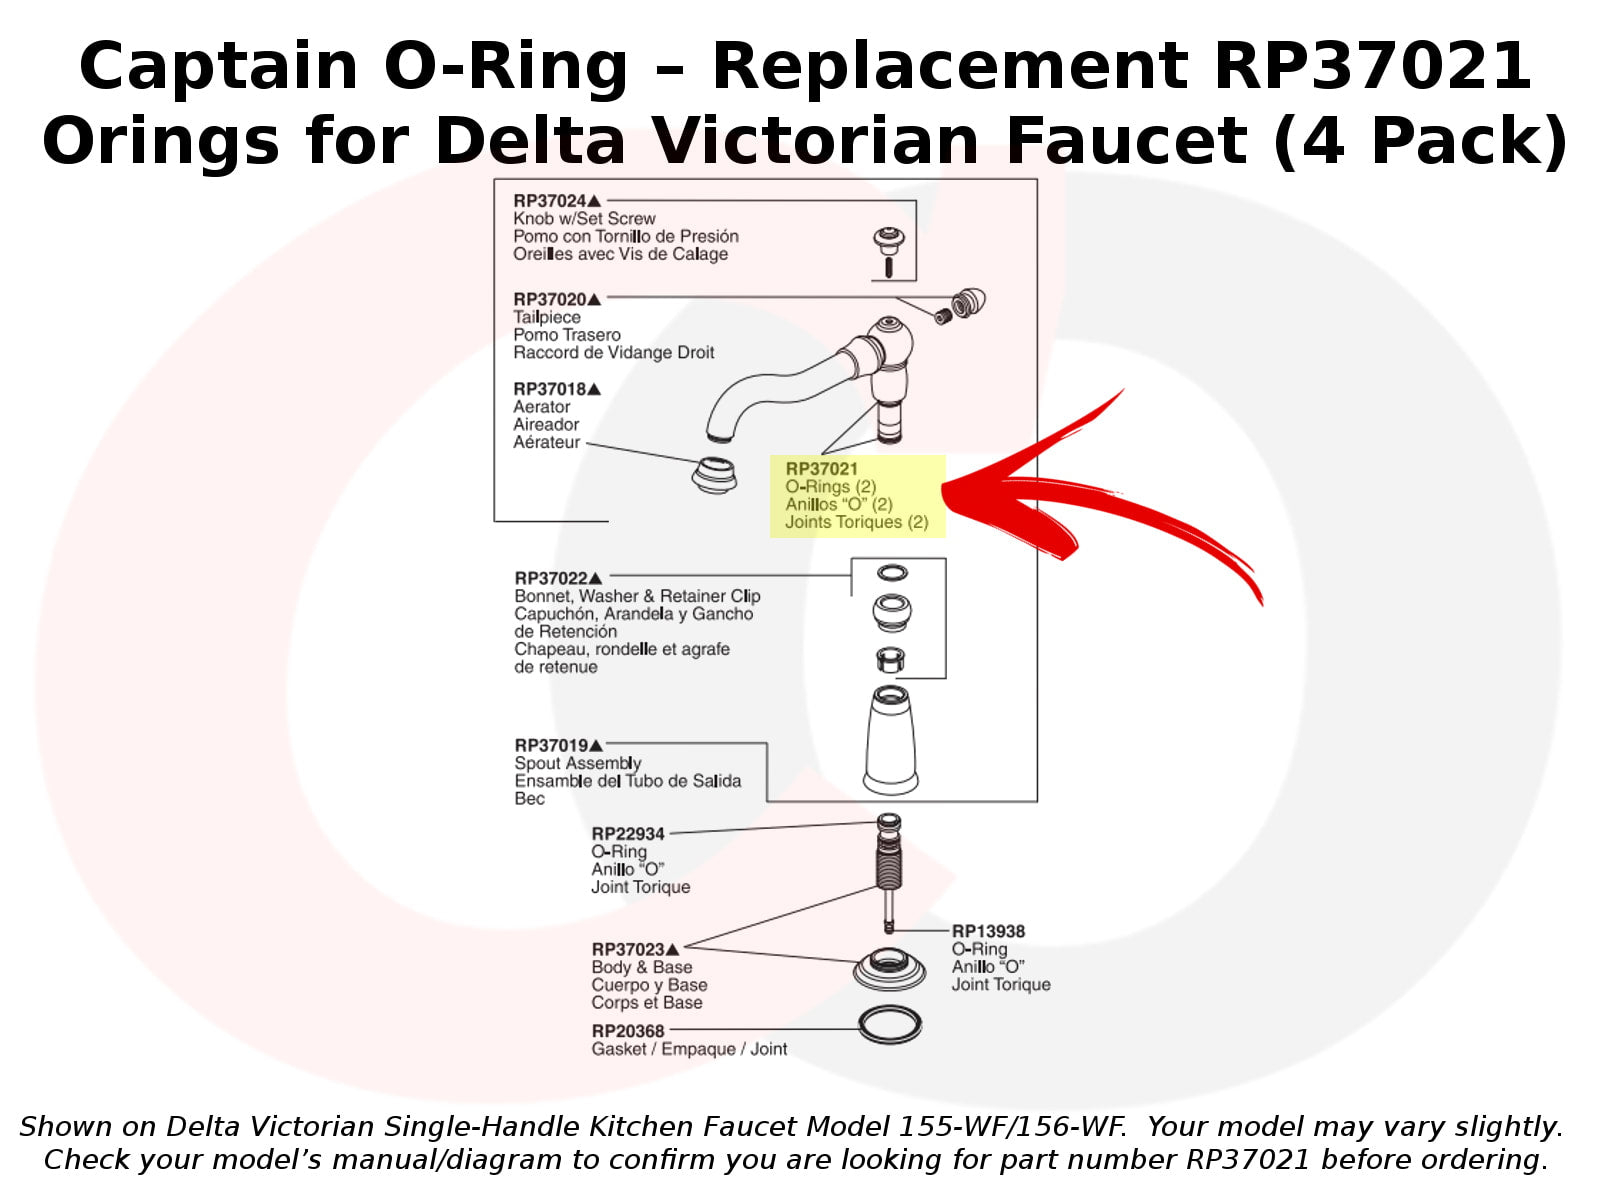
Spout wobble is common in kitchen faucets with detachable sprayers.
Remove the Spout
Most pull-down spouts lift straight up or twist counterclockwise slightly before removal. Consult your model manual if unsure about the removal process.
Inspect and Replace O-Rings
Look for rubber O-rings at the base or inside the swivel joint. Replace them if they are cracked, flattened, or swollen from chemical exposure. Use an O-ring kit or order OEM parts from Delta, Moen, or Kohler.
Clean Mineral Buildup
Soak the spout and joint in white vinegar for 30 minutes. Use a soft brush to scrub away limescale in threads and grooves. Rinse thoroughly before reinstalling.
Reinstall and Test
Reinsert the spout fully. Swivel it side to side. Movement should be smooth with no lateral play. If wobble persists, the internal threading may be damaged, requiring spout assembly replacement.
Address Internal Thread Loosening
Sometimes the base is tight, but the upper section still wobbles.
Access the Internal Thread
Loosen the mounting nut slightly to reach the internal threaded piece. This may require sliding out a bracket or collar. Work carefully to avoid dropping small parts.
Re-Thread and Secure
Carefully screw the component back into the faucet body. Reinstall the locking washer and hand-tighten. Slide the bracket back and twist the nut clockwise.
Final Tightening
Use a rigid multi-tool for a secure grip. Avoid slipping, as damaged threads are difficult to repair. Check from above to ensure proper alignment.
Check for Structural Damage
If the faucet still wobbles after tightening, the problem may be underneath.
Inspect the Countertop
Feel for soft spots, sponginess, or crumbling under the sink. Look for discoloration or water stains, which are signs of long-term leakage. This damage is common in particle board, MDF, or laminated countertops.
Repair or Reinforce
Apply epoxy filler or wood hardener for small soft spots. For severe damage, cut out and replace the affected section, or reinforce with a backing plate. Reinstall the faucet only after the surface is solid and dry.
Perform Post-Repair Verification
Do not skip the final test. Ensure your fix lasts.
Conduct a Wiggle Test
Grasp the base and spout. No detectable movement should occur when gently shaken.
Run Water and Test Operation
Turn on hot and cold water. Adjust temperature and spray mode. Movement should remain smooth and stable throughout operation.
Check for Leaks
Inspect the base for seepage, the spout joint for drips, and the supply lines under the sink for leaks. While under the sink, check supply lines for bulges. Consider upgrading rubber hoses to braided stainless steel for improved durability.
Prevent Future Faucet Wobble
A one-time fix is not enough. Prevent recurrence with simple habits.
Inspect Every Three to Six Months
Gently wiggle the faucet to check for looseness. Catching problems early prevents damage from developing.
Replace Worn Parts Early
Swap out O-rings, gaskets, and set screws at the first sign of wear. Keep spares in your toolkit for quick replacements.
Avoid Overtightening
Snug is always enough. Tighter increases the risk of cracks and stripped threads.
Re-Tighten Periodically
Daily use causes vibration. Re-tighten mounting nuts every year to maintain stability.
Never Use the Spout as a Handle
Lifting pots or pulling on the spout accelerates wear. Teach household members to avoid this common mistake.
Troubleshoot Common Problems
Faucet Loosens Repeatedly
Vibration or thin sink flex causes this issue. Install a stabilizer plate or apply silicone sealant under the base to resolve it.
Cannot Reach the Mounting Nut
Tight spaces require the right tools. Use a basin wrench or rigid multi-tool designed for confined areas.
Set Screw Is Stripped
Over-tightening or wear causes stripped screws. Replace the screw and consider applying thread-locking compound sparingly on the new one.
Leaking After Tightening
Over-tightening or a damaged gasket causes leaks. Loosen slightly, reseat the component, or replace the rubber washer.
No Visible Mounting Nut
Older or specialty designs may not have visible nuts. Consult the manufacturer manual, as disassembly from above may be required.
Source Replacement Parts Easily
Get the right parts fast to complete your repair.
Common Replacement Items
- O-ring kits, universal or model-specific
- Mounting nuts and gaskets
- Complete faucet mounting kits for corroded hardware
Brand Resources
Delta offers online help centers with exploded diagrams. Moen, Kohler, and Pfister provide repair kits and support through their official websites. Take photos and note model numbers before disassembling to ensure correct ordering.
Frequently Asked Questions About Wobbly Faucets
Do I need to shut off water to fix a wobbly faucet?
Yes. If you are removing parts or disconnecting lines, always shut off water. Even for tightening alone, turning off the supply is safer.
Can plumber’s tape fix a loose faucet?
No. Teflon tape seals pipe threads, not mechanical looseness. It will not stop wobble.
Why does my faucet keep coming loose?
Common causes include vibration from water flow, thin sink flex, worn plastic hardware, or a missing stabilizer. Fix this by adding a plate, upgrading to metal parts, or resealing the base.
How tight should the mounting nut be?
Tighten until snug and wobble-free. No more. Over-tightening risks cracking sinks and damaging seals.
Can I fix this without a plumber?
Yes. Most wobbles are DIY-friendly. Only structural damage or complex internal failures require a professional.
Key Takeaways for Fixing Your Wobbly Faucet
A properly fixed faucet should have zero play when shaken, show no leaks during use, operate smoothly without vibration, and stay stable for months or years. The core repair involves identifying whether the base, handle, or spout is moving, then applying the appropriate fix with common tools.
Tighten mounting hardware using a basin wrench or rigid multi-tool. Replace worn O-rings, gaskets, or set screws at the first sign of wear. Address underlying structural damage, especially in particle board or MDF substrates. Use plumber’s putty or silicone to protect the mounting surface, not to mechanically secure the faucet.
With the right tools and steps, you have not only silenced the wobble. You have prevented future leaks, saved money, and extended your faucet’s life. Regular checks and simple maintenance keep it solid for years. Now turn on the tap and enjoy the peace of mind that comes with a rock-solid fixture.







