
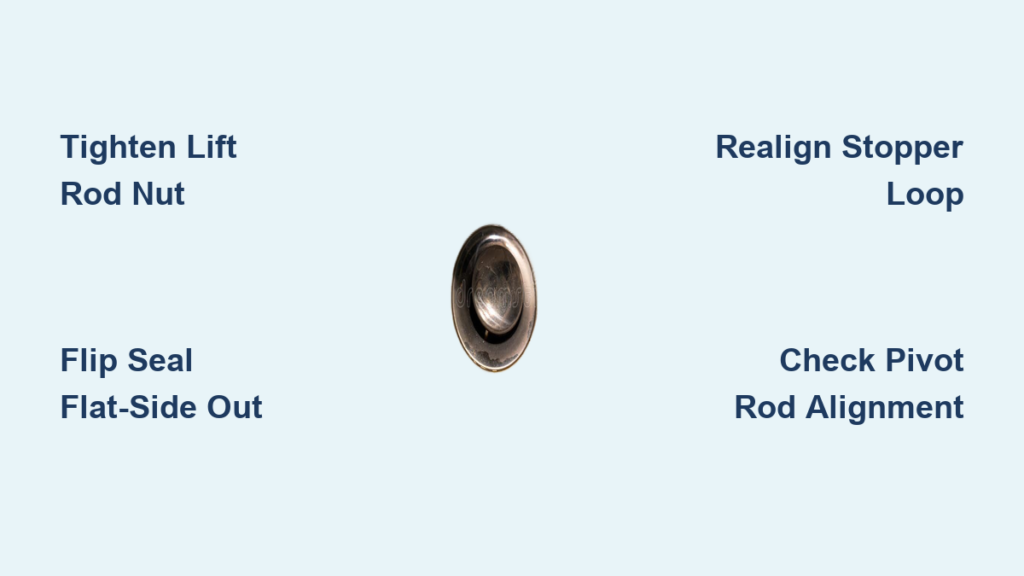
A bathroom sink stopper that won’t stay down, won’t pop up, or refuses to budge is more than just an annoyance—it can lead to slow drainage, standing water, and even leaks under the cabinet. The good news is that how to fix a bathroom sink stopper rarely requires a plumber. Most issues trace back to a handful of common culprits: a loose lift rod strap, a backward seal, a misaligned stopper loop, or a corroded pivot rod.
In this guide, you’ll learn to diagnose the exact failure point, make quick mechanical adjustments, and replace the full drain assembly when needed. With clear steps, pro tips, and a troubleshooting roadmap, you can restore smooth stopper function in under an hour using basic tools.
Diagnose the Bathroom Sink Stopper Problem
Before reaching for a wrench, take a minute to observe how the stopper behaves. Most failures fall into predictable patterns based on how the lift rod, strap, and stopper respond.
Lift Rod Slides Out or Feels Loose
If the lever pulls out without moving the stopper, the tightening nut on the lift rod strap is loose. This nut secures the strap that connects the lift rod to the pivot mechanism under the sink.
Fix it in three steps:
1. Locate the strap and nut beneath the sink.
2. Tighten the nut with pliers or a wrench.
3. Test the lever—movement should now transfer to the stopper.
Pro Tip: Snug is enough. Over-tightening can strip the threads or crack the nut.
Strap Moves but Stopper Stays Put
If you can see the strap and pivot rod moving, yet the stopper doesn’t respond, the problem lies downstream. Check the pivot rod clip, the stopper seal orientation, and the alignment between the stopper loop and pivot rod.
Stopper Won’t Seal or Drain Leaks
A stopper that won’t stay closed often points to incorrect seal orientation. The rubber gasket must sit with the flat side facing out toward the drain. If the concave or sloped side faces outward, the seal won’t compress properly and may even jam the mechanism.
Quick fix:
1. Pull out the stopper.
2. Flip the seal so the flat side faces outward.
3. Reinstall and test the lever.
Access the Stopper Mechanism Under the Sink

To inspect internal parts, you need to remove the pivot rod and lift the stopper out of the drain.
Remove the Pivot Rod Clip
The pivot rod clip is a small metal fastener on the horizontal pivot rod. Slide it off, then gently pull the pivot rod out from the tailpiece.
Pull Out and Inspect the Stopper
Reach into the drain and pull the stopper straight up. Examine the stopper loop—the small hole or hook at the bottom where the pivot rod engages. Look for corrosion, mineral buildup, cracks, or bending.
If buildup is present, soak the parts in vinegar or a descaling solution for 30 minutes before reassembly.
Adjust or Replace the Pivot Rod
The pivot rod transfers motion from the lift rod to the stopper. Even a small misalignment or bend can halt the entire system.
Realign the Stopper Loop
The pivot rod must hook into the stopper loop to pull it down. If the loop is rotated or bent, the rod can’t engage.
Steps:
1. Rotate the stopper so the loop faces the pivot rod opening.
2. Reinsert the pivot rod through the tailpiece and into the loop.
3. Secure with the pivot rod clip.
Push the lift rod down. The stopper should lower smoothly.
Bend the Pivot Rod for Extra Friction (Optional)
If the rod slips out during normal use, gently bend the end slightly upward with pliers. A small 5–10° bend increases friction against the stopper loop.
Warning: Over-bending restricts movement and can snap the rod.
Replace the Drain Assembly When Repair Isn’t Enough
If the fulcrum is broken, the drain body is cracked, or multiple parts are corroded, a replacement is the smarter long-term move. A full kit typically costs $20–$50.
Disconnect the Tailpiece
Use pliers to unscrew the tailpiece from the drain body. If corrosion has seized the threads, cut through the tailpiece cleanly with a hacksaw.
Remove the Chrome Strainer Nut
The strainer is held by a chrome nut beneath the sink. Insert two screwdrivers into the strainer’s side slots to prevent spinning, then loosen the nut with a wrench. Holding the strainer steady is critical—without it, the strainer simply rotates and the nut won’t budge.
Extract the Old Strainer
Push the strainer up from below and lift it out. Peel off the old gasket and clean the sink surface thoroughly to remove residue and mineral buildup.
Install the New Strainer for a Watertight Seal

A proper seal here prevents leaks and keeps the assembly stable for years.
Apply Plumber’s Putty
Roll a half-inch rope of plumber’s putty and press it around the underside lip of the new strainer. Insert the strainer into the drain hole from above.
Pro Tip: Use plumber’s putty rather than silicone. Putty allows easier removal during future repairs.
Secure the Strainer Nut
Slide the new nut over the strainer from below. Hold the strainer steady with screwdrivers, then tighten the nut until putty oozes out around the edges. This confirms a full, even seal. Wipe away the excess.
Reconnect the Drain System with Proper Alignment
Rebuilding the drainage path correctly ensures everything lines up for smooth stopper operation.
Cut and Reinstall the Tailpiece
Measure the old tailpiece and cut the new one ½ inch shorter to ensure proper trap alignment. Apply pipe dope to the threads, then screw the tailpiece into the drain body—hand-tighten first, then snug with a wrench. Avoid over-tightening, which can crack plastic or strip metal threads.
Align the Drain Body Perpendicular
The drain body must sit perfectly perpendicular to the wall. Even a slight angle throws off the pivot rod and prevents the stopper loop from engaging.
Check alignment with a small level or by sighting along the body.
Connect the Trap Arm
Slide the compression nut onto the trap arm and tighten it with a wrench. Secure, but not forced.
Reassemble the Stopper Mechanism

Now bring the stopper back into action.
Install the Linkage Rod and Clip
Slide the linkage rod through the lift rod and pivot hole. Attach the pivot rod to the tailpiece, hook it into the stopper loop, and secure with the pivot rod clip. The rod should move freely up and down.
Insert and Test the Stopper
Drop the stopper into the drain and operate the lift rod. The stopper should rise and fall smoothly. If movement feels stiff or incomplete, adjust the rod length or clip position.
Final Test and Leak Check
Never skip this step. Water damage under a sink is expensive and easy to overlook.
Run Water and Inspect All Joints
Turn on the faucet, fill the sink, and close the stopper. Check carefully for leaks at the strainer-to-sink joint, tailpiece connection, and trap arm compression nut. If you spot any seepage, tighten slightly or reapply pipe dope.
Confirm Full Function
Verify that the stopper rises completely with the lever up, seals tightly when closed, and shows no wobbling or sticking. Test multiple cycles to confirm reliability.
Troubleshooting Common Bathroom Sink Stopper Failures
Even after repair, issues can persist. Use this quick-reference guide to resolve stubborn problems.
Stopper Won’t Go Down
Likely causes:
– Seal installed with concave side out
– Pivot rod not hooked into the loop
– Debris blocking the drain
Fix: Reinstall the seal flat-side out, realign the loop, and clean the drain.
Stopper Won’t Pop Up
Likely causes:
– Linkage rod too tight or misaligned
– Clip positioned incorrectly
– Corrosion in the pivot joint
Fix: Loosen the clip, realign the rod, and lubricate moving parts with plumber’s grease.
Stopper Moves Stiffly
Likely cause: Mineral buildup or lack of lubrication.
Fix:
1. Disassemble the affected parts.
2. Soak them in vinegar for 30 minutes.
3. Reassemble with a light coat of grease on moving joints.
When to Repair vs. Replace the Full Assembly
Repair if:
– Lift rod is loose
– Seal is misoriented
– Pivot rod is slightly misaligned
– Corrosion is minor
Most repairs take 15–30 minutes.
Replace the entire assembly if:
– The fulcrum is broken
– The drain body is cracked
– Multiple components are corroded
– Repairs keep failing
A complete kit costs $20–$50 and provides long-term reliability.
Pro Tips for Long-Term Bathroom Sink Stopper Performance
Keep your stopper working smoothly with these expert habits.
- Use pipe dope on threads, not Teflon tape. Pipe dope seals better and resists water washout.
- Check alignment monthly. A shifting drain body can misalign the pivot rod.
- Clean the stopper monthly. Remove buildup on the seal and loop to extend component life.
- Replace worn seals early. Rubber degrades. Swap a cracked or hardened seal before it fails.
Frequently Asked Questions About Fixing a Bathroom Sink Stopper
Why does my bathroom sink stopper not stay down?
The most common cause is incorrect seal orientation. The rubber gasket must be installed with the flat side facing outward toward the drain. If the concave side faces out, the seal won’t compress and the stopper cannot hold water.
How do I fix a loose lift rod on a bathroom sink?
Locate the lift rod strap nut under the sink. Tighten it with pliers until snug. This re-secures the connection between the lift rod and pivot mechanism, restoring normal lever function.
What tools do I need to fix a bathroom sink stopper?
Basic repairs require pliers, a wrench, and a screwdriver. Full drain assembly replacement may also require a hacksaw for cutting a seized tailpiece and two screwdrivers to hold the strainer steady during nut removal.
Can I replace a bathroom sink stopper without a plumber?
Yes. Most stopper repairs and full drain assembly replacements are DIY-friendly for homeowners with basic tool proficiency. The work typically takes 30–60 minutes and saves the cost of a plumber visit.
How do I know if my stopper problem needs a full replacement?
Replace the entire assembly if the fulcrum is broken, the drain body is cracked, multiple parts show heavy corrosion, or repairs keep failing within weeks. Otherwise, targeted adjustments usually solve the problem.
How often should I clean my bathroom sink stopper?
Clean the stopper and seal monthly to prevent mineral buildup. Soak parts in vinegar if movement becomes stiff, and inspect the seal for cracks or hardening during each cleaning.
Key Takeaways for Fixing Your Bathroom Sink Stopper
Fixing a bathroom sink stopper is a straightforward DIY task once you know what to check. Most issues come down to three things: a loose lift rod strap nut, an incorrectly oriented seal, or a misaligned stopper loop. Tightening connections, flipping the seal flat-side out, and realigning the pivot rod solve the majority of problems in minutes.
For more stubborn cases, replacing the entire drain assembly with a $20–$50 kit is faster and more reliable than chasing one failed repair after another. Either way, you can resolve most stopper issues in under an hour—no plumber required.
Next step: Lay out your tools, clear the cabinet under your sink, and start with the diagnostic section above. Within an hour, you’ll have a stopper that opens, closes, and seals exactly as it should.







