
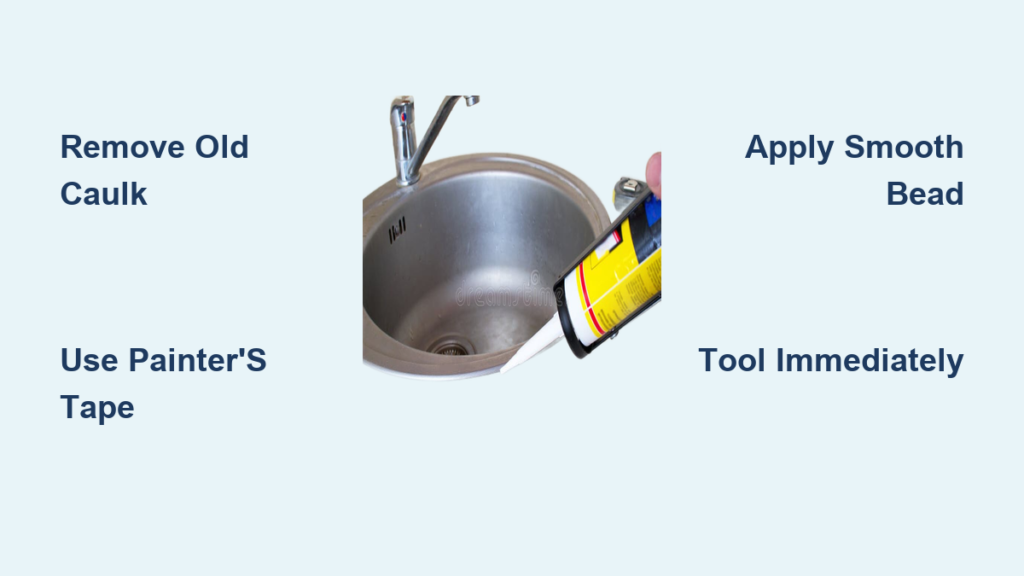
Water pooling around your kitchen sink? That small gap between the sink and countertop might seem harmless, but without a proper seal, moisture can sneak underneath, leading to warped cabinets, mold growth, and costly countertop damage. Caulking a sink is a quick, affordable fix, taking just 30–60 minutes and costing only a few dollars, that protects your kitchen from long-term water damage.
Whether you’re replacing cracked, peeling caulk or sealing a newly installed sink, this guide walks you through every step to achieve a clean, watertight, professional-looking seal. You’ll learn how to remove old caulk safely, prepare the surface, apply a perfect bead, and tool it smoothly, all while avoiding the most common mistakes DIYers make.
Remove Old Caulk Completely
Before new caulk can adhere properly, all old material must be removed. Skipping or rushing this step leads to poor sealing and premature failure.
Use the Right Tools for Safe Scraping
Start with a flat razor blade to gently scrape along the seam where the sink meets the countertop. Hold the blade at a shallow angle and work in short strokes, going only 1/8 to 1/4 inch deep to avoid scratching granite, quartz, or laminate surfaces. For tight corners or stubborn residue, switch to an angled razor knife. This tool lets you cut downward along the sink’s edge, breaking the bond of old caulk without damaging surrounding materials. Alternate between tools as needed, but never force the blade. Let it do the work.
Clean the Area Thoroughly
Once the bulk of the old caulk is gone, wipe away debris with a dry cloth. Then clean the seam with an all-purpose cleaner to remove grease, soap scum, and moisture. A clean, dry surface is essential because caulk won’t stick to dirt or dampness. Let the area air dry completely before moving on. If you’re working in a humid environment, use a hairdryer on a cool setting to speed up drying.
Pro Tip: Test adhesion by pressing a small piece of painter’s tape into the seam. If it lifts easily, the surface is ready. If it sticks or pulls up residue, clean again.
Apply Painter’s Tape for Clean Lines
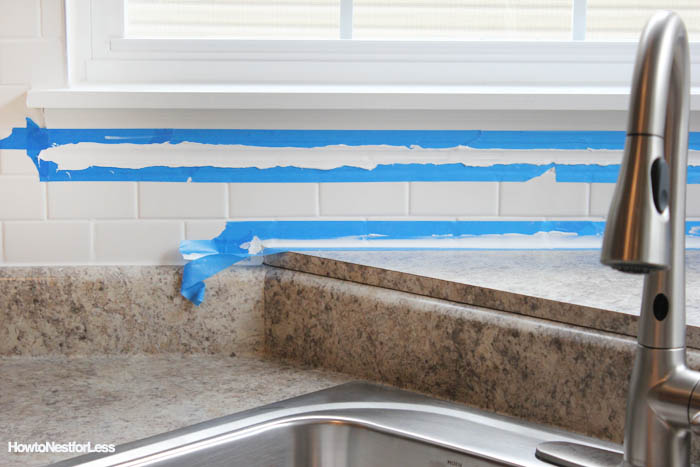
A flawless caulk line depends on precise masking. Painter’s tape ensures sharp edges and prevents messy overflow on your sink or countertop.
Position Tape with Precision
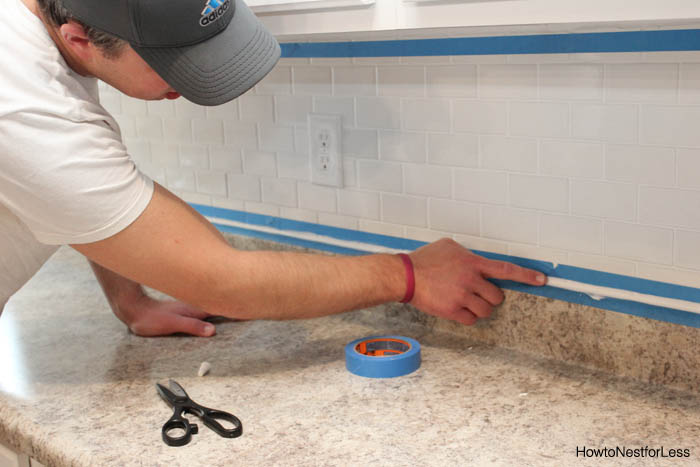
Use painter’s tape to outline both sides of the gap: one strip on the countertop and one on the sink edge. Shape the tape to follow the sink’s contour, especially at corners. Leave a 1/8-inch gap between the two strips so this narrow opening will contain the caulk bead. Press the tape down firmly with your finger or a putty knife to seal the edges. This prevents caulk from bleeding underneath, which can create ragged lines.
Avoid Common Taping Mistakes
Don’t skip pressing the tape. Loose edges are the leading cause of messy results. Use fresh tape because old or stretched tape won’t adhere well. If you’re working on a textured countertop, take extra care to ensure full contact. For curved sinks, make small snips in the tape every inch to help it bend smoothly.
Warning: Never use duct tape or masking tape. These can leave residue or pull up during removal.
Apply a Smooth, Consistent Bead
The key to a professional seal is a uniform caulk bead applied in one smooth motion. Technique matters more than speed.
Prepare the Caulk Tube Correctly
Cut the tip of the caulk tube at a 45-degree angle using scissors or a utility knife. Start with a small opening, about the size of a toothpick. You can always enlarge it, but you can’t undo a cut that’s too big. If using a caulk gun, load the tube and cut the tip before puncturing the inner seal with the gun’s metal rod.
Use the Pull Technique for Even Flow
Hold the tube at a slight angle, pointing the tip into the gap. Squeeze the trigger gently and pull the tube toward you in a steady, continuous motion. This allows even pressure and consistent bead size. Never push the tube away because that causes uneven flow and gaps. If you need to stop, restart just before your previous endpoint to overlap and avoid breaks.
When reaching the opposite side, reverse direction and start from the top of the sink, pulling toward you again. This ensures a continuous, even bead. For tight spots behind the faucet, hold the tube almost upright to reach behind the sink edge. Work slowly around corners to maintain control.
Expert Note: Use a mold-resistant silicone caulk labeled for kitchen/bathroom use. It adheres better and lasts longer than latex.
Tool and Finish the Seal
A freshly applied bead looks messy until it’s smoothed. Tooling shapes the caulk and ensures it bonds fully with both surfaces.
Smooth with a Moistened Finger
Immediately after applying, dip your finger lightly in water or oil to prevent the caulk from sticking. Run your finger along the bead in one smooth pass, pressing the caulk into the gap. Use a gloved finger if you prefer to avoid direct contact. Repeat if needed, rinsing your finger between passes to keep it clean.
Remove Tape While Wet
Pull the tape off immediately. Don’t wait. If you let the caulk skin over, the tape will tear the edge. Peel it back at a 45-degree angle, moving away from the caulk line. This leaves a crisp, clean border. Inspect the seam for gaps or thin spots. If needed, add a small touch-up bead and retool.
Pro Tip: For an even smoother finish, drag a plastic spoon or a caulk smoothing tool instead of your finger.
Fix Common Application Issues
Even careful work can go wrong. Knowing how to troubleshoot saves time and avoids redoing the entire job.
Address Bead Inconsistencies
If the bead is too thick or thin, check the size of the hole in the caulk tube. A larger opening creates a fatter bead, which is useful for wide gaps. Maintain steady pressure on the trigger. If the flow stops, the tube may be clogged. Re-puncture the inner seal and try again.
Stop Caulk from Bleeding Under Tape
If caulk seeps under the tape, it means the tape wasn’t pressed down firmly. Remove the tape, clean off the excess, and reapply. Make sure the surface is dry and free of oils before retaping.
Handle Sticky or Tearing Caulk
If the caulk sticks to your finger during tooling, add more moisture or switch to a light coating of mineral oil. If the caulk is skinning over too fast, work in smaller sections. Expired caulk can also cause issues, so use fresh product and ensure good ventilation.
Prevent Future Damage with Proper Maintenance
A well-caulked sink can last years, but only if you maintain it.
Inspect and Clean Regularly
Check the caulk line every few months for cracking, peeling, or discoloration. Wipe it gently during routine cleaning to prevent grime buildup. Avoid harsh scrubbing, which can degrade the seal.
Recaulk Every 3–5 Years
Even if it looks fine, replace the caulk every 3–5 years as preventive maintenance. Over time, temperature changes and daily use cause it to shrink and lose adhesion. When recaulking, always remove all old material because new caulk over old won’t bond properly.
Warning: If you notice water stains under the sink or a musty smell, the seal has likely failed. Address it immediately to prevent structural damage.
Choose the Right Caulk and Tools

Using the correct materials makes the job easier and the results longer-lasting.
Select Mold-Resistant Kitchen Caulk
Use a 100% silicone or silicone-latex hybrid caulk labeled for kitchen and bathroom use. These resist mold, mildew, and shrinking. Avoid basic latex because it’s not waterproof enough for sink edges. Look for “kitchen-safe” or “low-VOC” labels if you’re sensitive to fumes.
Gather Essential Supplies
Make sure you have the following before starting:
• Flat razor blade
• Angled utility knife
• Painter’s tape
• Caulk tube (silicone-based)
• Caulk gun (optional, but helpful)
• Clean cloth
• All-purpose cleaner
• Water or oil for tooling
Pro Tip: Buy more caulk than you think you need. One tube usually covers one sink, but extras help with touch-ups.
Know When to Caulk Your Sink
Timing matters. Don’t wait for visible damage. Act before problems start.
Signs It’s Time to Recaulk
Watch for these warning signs around your sink:
• Visible gaps or cracks in the existing seal
• Peeling or bubbling caulk
• Discoloration or black mold in the seam
• Water pooling around the sink base
• Spongy or swollen cabinet wood underneath
Even if none of these are present, schedule recaulking every 3–5 years as part of routine kitchen maintenance.
Ideal Conditions for Application
Work in a dry, well-ventilated area. Avoid high humidity or cold temperatures because they slow curing. Most caulks need 24 hours to fully cure before exposure to water. Check the manufacturer’s instructions for exact drying times.
Note: Never caulk over wet surfaces or damp materials. This traps moisture and promotes mold.
Frequently Asked Questions About Caulking a Sink
How long does it take to caulk a kitchen sink?
The entire process typically takes 30–60 minutes, including removal of old caulk, surface preparation, taping, application, and tooling. However, you should wait approximately 24 hours after application before exposing the caulk to water so it can fully cure.
How often should I recaulk my kitchen sink?
You should recaulk your kitchen sink every 3–5 years as preventive maintenance. Additionally, inspect the caulk regularly for cracking, peeling, discoloration, or mold, and recaulk immediately if you notice any of these signs or water damage beneath the sink.
What type of caulk is best for a kitchen sink?
A 100% silicone or silicone-latex hybrid caulk labeled for kitchen and bathroom use is best. These formulas resist mold, mildew, and shrinking, making them ideal for wet environments. Avoid basic latex caulk because it’s not waterproof enough for sink edges.
Can I apply new caulk over old caulk?
No, you should not remove all old caulk completely before applying new material. New caulk will not bond properly to old caulk, leading to poor adhesion and premature seal failure. Take the time to scrape away every trace of the old material before starting.
Why is my caulk peeling or not sticking?
Peeling or poor adhesion usually results from one of three issues: the surface wasn’t clean and dry before application, the old caulk wasn’t fully removed, or the tape wasn’t pressed firmly enough to prevent bleeding. Always ensure a clean, dry surface and use fresh caulk for best results.
Is it okay to caulk a sink in cold or humid weather?
It’s best to avoid high humidity or cold temperatures because they slow the curing process and can affect adhesion. Work in a dry, well-ventilated area with moderate temperature for optimal results. Most caulks require 24 hours to fully cure before water exposure.
Key Takeaways for a Long-Lasting Sink Seal
Caulking a sink is one of the easiest and most effective ways to protect your kitchen from water damage. The process takes less than an hour, costs only a few dollars, and prevents costly repairs down the road. Focus on three critical steps: removing all old caulk completely, taping precisely for clean lines, and applying a smooth, consistent bead using the pull technique. Then maintain your work by inspecting the seal regularly and recaulking every 3–5 years.
Ready to get started? Gather your supplies, set aside an hour, and follow this guide step by step. Your sink will have a durable, invisible seal that keeps water out and your countertops intact for years to come.







