
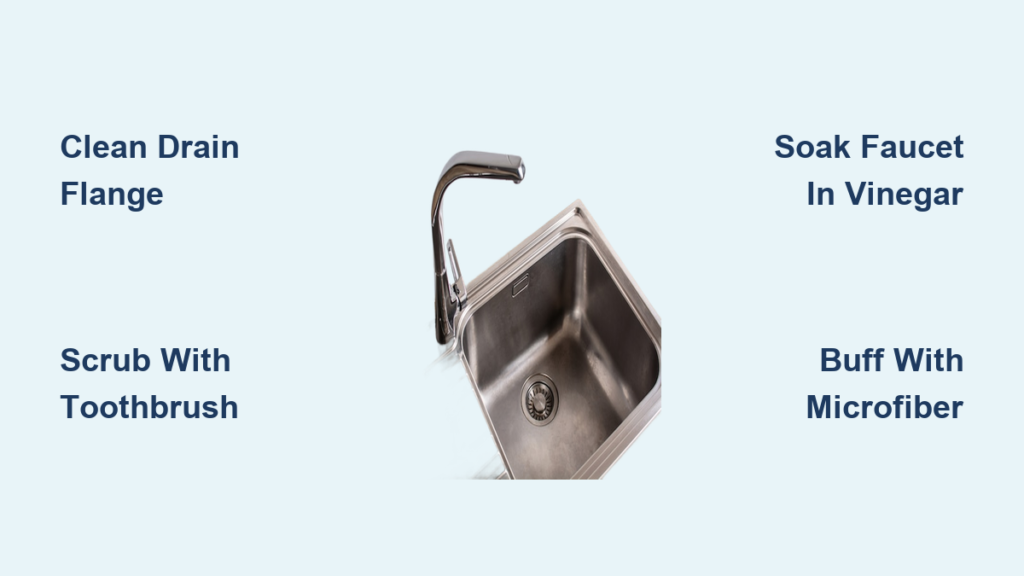
A dirty kitchen sink is more than an eyesore. It is a breeding ground for bacteria, odors, and hidden grime. Despite constant use, many people only wipe the surface, missing seams, crevices, and splash guards where food particles and moisture linger. Learning how to clean kitchen sink properly transforms it from a dull, stained fixture into a gleaming, hygienic centerpiece. This guide reveals professional-grade methods used to train cleaners since 2006, combining natural ingredients and targeted products for deep cleaning, odor removal, and long-term shine.
You will learn step-by-step routines, product-specific hacks, and time-saving strategies that deliver results in as little as 5 minutes or during a full deep clean. Whether you have a stainless steel undermount sink with a garbage disposal or a basic drop-in model, these techniques work across all types. We will cover everything from degreasing with Dawn Powerwash to dissolving hard water buildup with vinegar soaks, and why the toothbrush is your secret weapon.
Clear and Prep the Sink
Remove All Items and Debris
Start by emptying the sink completely. Take out dishes, scrubbers, drain stoppers, and any tools. Pull out the rubber splash guard if removable, as this often-harbored spot traps food and moisture, leading to odors and mold. For non-removable guards, plan extra attention during cleaning.
Clearing everything gives full access to all surfaces, especially tight areas around the drain and faucet base. This step ensures no residue gets pushed around during scrubbing and sets the stage for a thorough clean.
Rinse Away Loose Particles
Flush the sink with hot water to wash away crumbs, coffee grounds, and dried food. Use the spray nozzle if available to reach corners and crevices. This pre-rinse prevents scratching during scrubbing by removing abrasive debris.
Skipping this step can grind particles into the surface, especially on stainless steel. A quick rinse takes seconds but makes the entire cleaning process more effective and safer for your sink finish.
Deodorize Drains With Baking Soda
Pour ½ cup of baking soda down each drain before starting. This begins neutralizing odors and breaking down organic buildup deep in the pipes. Let it sit throughout the cleaning process. It is a passive yet powerful first step.
This simple move tackles one of the most common sink problems: lingering smells from trapped food. It works especially well if your sink connects to a garbage disposal, where debris often accumulates unseen.
Choose the Right Cleaning Agents
Use All-Purpose Cleaner as Base
Apply an all-purpose cleaner liberally across the entire sink surface. This serves as the foundation for most professional cleaning methods, cutting through everyday grime and preparing the surface for deeper treatment.
For enhanced sanitation, add a few drops of tea tree oil, a natural antimicrobial that fights bacteria without harsh fumes. The combination lifts grease, disinfects, and leaves a fresh scent, making it ideal for food-contact zones.
Boost With Baking Soda Scour
After applying the cleaner, sprinkle a generous layer of baking soda over the wet surface. It acts as a gentle abrasive, lifting stains, film, and residue without scratching stainless steel or porcelain.
Do not skimp. Use more than you think you need. Baking soda is safe, cheap, and highly effective. When mixed with liquid cleaner, it forms a foaming paste that clings to vertical areas like the sink sides and faucet base.
Tackle Grease With Dawn Powerwash
For greasy buildup, common near the garbage disposal lip or splash guard, spray Dawn Powerwash directly onto the surface. Its concentrated formula cuts through oil and food residue fast.
Use with a non-scratch sponge like Scrub Daddy to avoid damaging finishes. Focus on high-grease zones: under the faucet, around the drain, and along the back edge where splatter collects daily.
Dissolve Hard Water With Vinegar
White vinegar is your go-to for water spots, lime scale, and mineral deposits. Spray it directly on stained areas or soak a paper towel in vinegar and wrap it around the faucet for 5 to 10 minutes.
For stubborn buildup, fill a Ziploc bag with vinegar, secure it around the faucet head with a rubber band, and let it soak 2 to 3 hours, or overnight. The acid dissolves calcium and rust without damaging metal finishes.
Restore Shine With Bar Keepers Friend
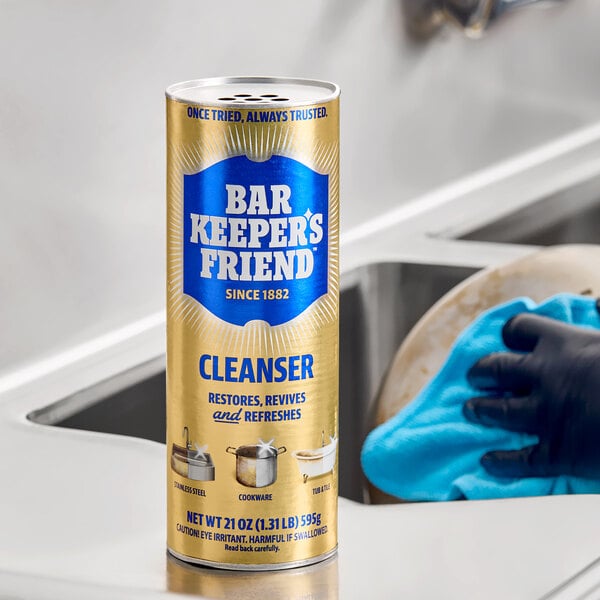
Apply Bar Keepers Friend (soft cleanser or powder) to discolored or stained areas. Its oxalic acid content breaks down mineral deposits and restores shine to dull stainless steel.
Focus on the faucet base, drain rim, and backside of the sink. If the cleaner turns brown while scrubbing, that is a good sign. It is pulling out embedded grime. But never leave it on longer than 1 minute.
Remove Rust and Lime With CLR
For severe calcium, lime, or rust buildup, especially inside the faucet aerator, use CLR (Calcium, Lime & Rust Remover). Dip a toothbrush in CLR and insert it into the spray head or nozzle.
Let it sit 2 to 3 minutes, then gently scrub. Rinse thoroughly immediately after. CLR is stronger than vinegar and ideal when natural methods are not enough, but always follow label instructions to protect your sink.
Use the Right Tools for Every Job

Scrub With Non-Scratch Sponge
Use a double-sided sponge: the rough side for general scrubbing, the soft side for delicate areas. For stainless steel, opt for a non-scratch scrub sponge like Scrub Daddy to prevent swirl marks.
Avoid steel wool or abrasive pads. They scratch and dull the finish permanently. A quality sponge lifts grime effectively without damaging the surface, even with repeated use.
Detail With a Toothbrush
A toothbrush is the pro secret for reaching tight spaces. Dip it in cleaner and use it to scrub:
- The seam where sink meets countertop, especially undermount sinks
- Around the drain edge
- Faucet bases and grooves
- Splash guard crevices
- Inside the faucet head
This small tool accesses areas sponges cannot, eliminating hidden bacteria and preventing odor buildup. Keep an old one dedicated to sink cleaning for best results.
Polish With Microfiber Cloth
Finish with a large, ultra-plush microfiber towel. Buff the entire sink in circular motions to dry and polish. This removes water spots, enhances shine, and prevents streaks.
For stubborn water marks, spray white vinegar directly on the cloth and buff like a natural eraser. The vinegar dissolves mineral residue without re-wetting the surface.
Soak Faucet With Paper Towel or Bag
To remove hard water crust from the faucet, soak a paper towel in white vinegar and wrap it around the spout. Let it sit 5 to 10 minutes while you work on other areas.
For heavier buildup, use a Ziploc bag filled with vinegar. Secure it around the faucet with a rubber band and let it soak 2 to 3 hours. No scrubbing needed. Just rinse and dry for a like-new finish.
Follow the Pro Cleaning Process
Step 1: Deodorize Drains First
Begin by pouring ½ cup baking soda down each drain. This starts breaking down organic matter and neutralizing odors while you clean the visible parts. Let it sit the entire time.
If odors persist, follow with 1 cup of vinegar after cleaning. This creates a fizzing reaction that clears deeper buildup. But during the main clean, let the baking soda do its job passively.
Step 2: Deep Clean With Cleaner and Baking Soda
Drench the sink in all-purpose cleaner, then sprinkle baking soda generously over it. Let the mixture foam and cling to surfaces for a few minutes. This combo lifts grime and sanitizes without harsh scrubbing.
Add a drop of dish soap to the mix if needed. It enhances cleaning power and helps cut through film. Use this paste-like solution to scrub high-traffic zones like the disposal lip and splash guard area.
Step 3: Soak Faucet in Vinegar
While the baking soda works, wrap a vinegar-soaked paper towel around the faucet. Focus on areas with visible hard water stains. The dwell time allows the acid to penetrate mineral deposits.
This multitasking step saves time. You are not waiting idly. While the vinegar softens buildup, you can detail crevices with a toothbrush.
Step 4: Scrub All Surfaces Thoroughly
Use a sponge to scrub the entire sink in a spiral motion, from top to bottom. Cover every inch, including the base, sides, and back edge. Apply pressure where needed, but avoid abrasives.
Pay extra attention to:
- The garbage disposal flange
- Drain stopper area
- Faucet mounting base
- Any decorative grooves
The combination of cleaner, baking soda, and dish soap creates a powerful scrubbing paste that removes years of buildup with minimal effort.
Step 5: Rinse With Hot Water
Rinse thoroughly with hot water, preferably using the spray setting. Start at the top and work down to the drain to ensure all residue flows out.
Skipping the rinse leaves behind cleaner and baking soda, which can dull the finish and attract more dirt. A complete rinse is non-negotiable for a truly clean sink.
Step 6: Re-Scrub Tight Spaces
After the main rinse, go back with a vinegar-soaked toothbrush. Target the drain edge, faucet joints, and any crevices where gunk hides. Wedge a cloth into corners and wipe gently.
This second pass removes what the sponge missed. It is especially important for undermount sinks, where the seam can trap moisture and food particles.
Step 7: Buff to a Streak-Free Shine
Dry and polish the entire sink with a microfiber cloth. Buff in circular motions to bring out the shine and eliminate water spots.
This final step transforms a “clean” sink into a “sparkling” one. Most people skip it, but it is the difference between functional and professional results.
Focus on Problem Areas
Clean the Sink-Countertop Seam
For undermount sinks, the seam where the sink meets the countertop is a major trap for food and moisture. Use a toothbrush dipped in all-purpose cleaner to scrub the joint.
Follow with a vinegar-dampened cloth to disinfect and dry. Prevent mold and mildew by keeping this area dry after each use. Wipe it daily with a microfiber towel.
Scrub Around the Drain
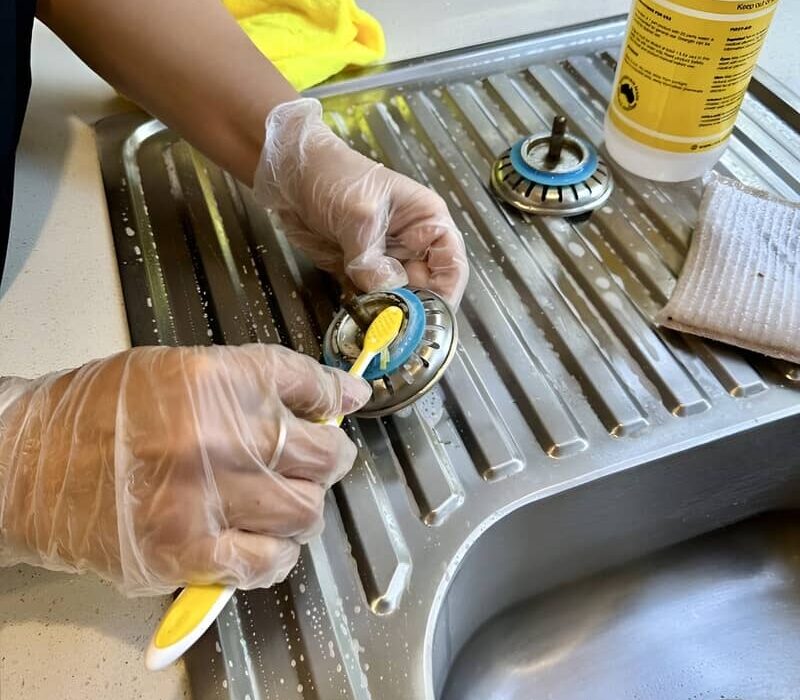
The drain edge collects hair, grease, and food scraps. Use a toothbrush with dish soap to scrub around the stopper and flange. Lift the stopper if possible to clean underneath.
For garbage disposals, scrub the rubber splash guard and the lip beneath it. This prevents odors caused by decomposing food particles trapped in crevices.
Detail the Faucet Base and Head
Mineral buildup often hides at the base of the faucet. Apply Bar Keepers Friend and scrub with a soft brush. For the aerator, use CLR on a toothbrush or vinegar bag soak.
If water flow is weak, soak the entire faucet head in vinegar overnight. This clears internal blockages and restores full pressure without disassembly.
Handle the Splash Guard
If removable, pull out the splash guard and wash it separately with soap and water. Scrub both sides and let it air dry before reinserting.
For fixed guards, lift the edges and clean the underside with a toothbrush. Store removable guards in a dry place when not in use to prevent mold and bacterial growth.
Maintain a Clean Sink Weekly
Clean Weekly to Prevent Buildup
Aim for a full clean once a week. Regular maintenance prevents hard water stains, grease accumulation, and odor development. Even a 5-minute wipe-down helps.
Consistent cleaning means you will rarely need intensive treatments. A little effort weekly saves 30+ minutes of deep scrubbing later.
Avoid Harsh Tools and Chemicals
Never use steel wool, abrasive pads, or bleach on stainless steel. These scratch the surface and accelerate staining. Stick to non-scratch sponges and pH-balanced cleaners.
Harsh chemicals can also damage seals and finishes over time. When in doubt, test a small area first or choose natural alternatives like vinegar and baking soda.
Rinse After Acidic Cleaners
Always rinse thoroughly after using Bar Keepers Friend, CLR, or vinegar. Residue left behind can dull the finish and attract more grime.
Follow up with a damp microfiber towel to wipe away any leftover film. This extra step protects your sink luster and prolongs the clean.
Store Splash Guard Properly
If your sink has a removable splash guard, take it out when not in use. Store it in a dry spot to prevent mold and mildew from forming in damp crevices.
Cleaning it weekly and allowing it to dry fully stops odors before they start. This small habit makes a big difference in sink hygiene.
Troubleshoot Common Issues
Fix Persistent Hard Water Stains
If vinegar wraps do not work, try an extended soak. Fill a Ziploc bag with white vinegar, secure it around the faucet, and leave it for 2 to 3 hours or overnight.
For interior blockages, use CLR with a toothbrush or disassemble the aerator. Soak metal parts in vinegar for 30 minutes, then rinse and reassemble.
Eliminate Lingering Odors
Odors usually come from trapped food in the splash guard, disposal flange, or drain. Clean all crevices with a toothbrush and dish soap.
Flush the drain with baking soda followed by boiling water weekly. For stronger odors, use the baking soda and vinegar fizz method monthly.
Remove Water Spots After Cleaning
Water spots mean minerals were left behind. Spray white vinegar directly on a microfiber cloth and buff the affected area like an eraser.
Always dry the sink completely after cleaning. Buffing with a dry microfiber towel prevents spots before they form.
Restore a Dull Finish
A dull sink often means cleaner residue is coating the surface. Rinse thoroughly, then wipe with a damp microfiber cloth to remove film.
Use Bar Keepers Friend for oxidation or discoloration, but never exceed 1 minute of dwell time. Always follow with a full rinse and dry buff.
Frequently Asked Questions About Cleaning Kitchen Sinks
What is the fastest way to clean a kitchen sink?
The fastest method takes 5 to 10 minutes. Spray Dawn Powerwash across the surface, scrub with a non-scratch sponge, then apply Bar Keepers Friend to problem areas for no more than 1 minute. Rinse, clean the faucet head with CLR, and buff dry with a microfiber cloth.
How often should I clean my kitchen sink?
Clean your kitchen sink weekly for routine maintenance. A quick daily wipe-down after use prevents buildup, while a deeper weekly clean tackles grime, bacteria, and odors before they become stubborn.
Can I use bleach to clean my kitchen sink?
Bleach is not recommended for stainless steel sinks, as it can damage the finish and accelerate corrosion. Safer alternatives include baking soda, white vinegar, Bar Keepers Friend, and CLR for specific stain removal.
How do I remove hard water stains from my faucet?
Wrap a vinegar-soaked paper towel around the faucet for 5 to 10 minutes. For heavier buildup, fill a Ziploc bag with vinegar, secure it around the faucet with a rubber band, and let it soak 2 to 3 hours or overnight. Rinse and buff dry.
Why does my kitchen sink smell bad even after cleaning?
Lingering odors usually come from trapped food in the splash guard, disposal flange, or drain. Clean all crevices with a toothbrush, then flush the drain with ½ cup baking soda followed by boiling water. Repeat weekly for prevention.
Is it safe to mix baking soda and vinegar?
Yes, mixing baking soda and vinegar is safe and effective for drain deodorizing. The fizzing reaction helps dislodge organic buildup. Use them sequentially rather than as a long-term mixture, since the combination neutralizes quickly.
Key Takeaways for a Spotless Kitchen Sink

Knowing how to clean kitchen sink properly goes beyond wiping the surface. It involves targeting hidden grime, using the right products, and finishing with a polish that prevents future stains. The three most important habits are: always detail tight spaces with a toothbrush, never skip the final buff with a microfiber cloth, and maintain weekly cleaning to prevent stubborn buildup.
Start by choosing one method that fits your schedule. A 5-minute degrease works for busy days, while a full deep clean delivers professional results monthly. Grab your baking soda, white vinegar, and a dedicated toothbrush tonight. Your sink will stay fresh, odor-free, and shining like new with minimal effort.







