
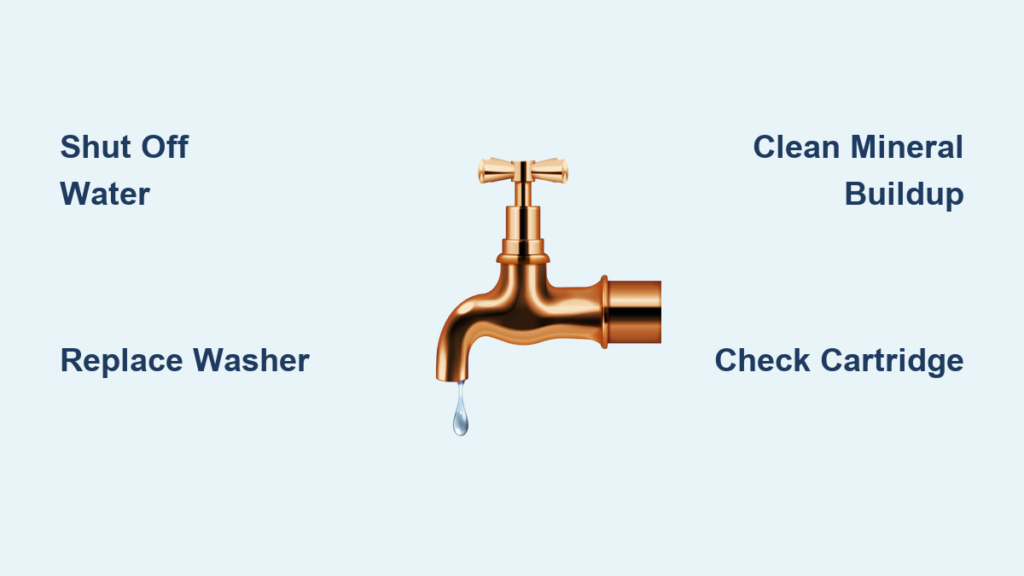
You turn the handle, but the water keeps flowing. A faucet that won’t turn off is more than just an annoyance—it wastes hundreds of gallons daily, drives up your utility bills, and creates serious risks for mold growth and water damage behind walls. Whether it’s a slow drip or a full stream, the root cause usually lies in worn internal seals, mineral buildup from hard water, or a misaligned handle mechanism. The good news? Most of these issues take under an hour to fix with basic tools and a few replacement parts.
This guide walks you through diagnosing and repairing a faucet that won’t turn off, step by step. You’ll learn to identify your faucet type, replace faulty components like washers and cartridges, clean away mineral deposits, and prevent future leaks. By the end, you’ll have the confidence to stop the flow for good without calling a plumber.
Identify Your Faucet Type Before Starting Repairs
Each faucet type uses a different internal mechanism, and using the wrong parts leads to failed repairs. Identifying your faucet correctly is the first and most critical step.
Compression Faucets: Two-Handle Design
Compression faucets are common in older homes built before the 1980s. They feature two separate handles for hot and cold water, and they work by pressing a rubber washer against a valve seat to stop flow.
Signs you have a compression faucet:
– Two knobs labeled hot and cold
– Handle requires multiple full turns to open or close
– Often found in bathroom sinks in older homes
The rubber washer at the base of the stem wears out first, causing leaks or complete failure to shut off water.
Ball, Cartridge, and Disc Faucets: Modern Single-Handle Types
Most modern faucets use one of three cartridge-based systems. Ball faucets have a single lever that rotates 360 degrees and use a chrome ball with internal chambers and springs. Cartridge faucets, common in Moen and Delta brands, use a removable plastic or brass cartridge. Disc faucets feature a single handle with two ceramic discs that slide to regulate flow, typically found in high-end kitchen faucets.
Pro tip: Look for brand markings on your faucet or take a photo before shopping for replacement parts.
Shut Off Water Supply Before Disassembly
Never work on a faucet without turning off the water first. This simple step prevents flooding and makes repairs much safer.
Locate and Close Under-Sink Valves
Most sinks have shutoff valves located under the basin. Turn both hot and cold handles clockwise until they are tight. Then open the faucet to release remaining water pressure and drain any residual flow.
No Valves? Use the Main Supply
If your sink lacks individual shutoff valves, find your home’s main water shutoff—usually near the water meter or in the basement. Turn it off completely and verify water has stopped at the faucet before proceeding.
Warning: Never remove faucet parts while the water supply is still pressurized.
Disassemble the Faucet Safely
With water supply cut off, begin taking apart the faucet. Photograph each step to remember how parts reinstall.
Remove the Handle
Start by prying off the decorative cap on the handle with a flathead screwdriver. Underneath, you’ll find a screw—remove it with a Phillips head screwdriver or Allen wrench.
For stubborn handles:
– Use a faucet puller tool or wrap pliers in cloth to prevent scratching
– Some bathtub faucets unscrew counterclockwise by hand with no visible screw
Extract the Internal Mechanism
Once the handle is removed:
– Remove the retaining nut or clip using pliers or a wrench
– Pull out the valve stem, cartridge, ball, or disc assembly depending on your faucet type
Pro tip: Lay out removed parts on a labeled tray in the order you removed them. Note the orientation of any tabs, slots, or springs.
Diagnose the Root Cause of the Problem

A faucet that won’t turn off isn’t always caused by a bad washer. Pinpointing the exact problem saves time and prevents unnecessary part purchases.
Check for Worn Washers in Compression Faucets
In compression models, the rubber washer at the stem base is the most common failure point.
What to look for:
– Cracked, flattened, or brittle washer
– Corrosion on the brass screw holding the washer
– Pitting or roughness on the valve seat
Replace the washer with an identical size. Never reuse old washers—even slightly worn ones fail quickly.
Inspect the Valve Seat for Damage
The valve seat is the metal surface the washer seals against. If it’s pitted or eroded, no washer will create a proper seal.
How to test:
– Shine a flashlight into the faucet body
– Run a finger over the seat—rough spots indicate damage
– Use steel wool to lightly resurface minor pits
If deeply corroded, replace the entire faucet body or use a lapping tool to smooth the surface.
Look for Cartridge Failure in Single-Handle Faucets
Cartridge failure is the number one cause of modern faucets that won’t shut off. The internal seals within the cartridge degrade over time, preventing full closure.
Signs of cartridge problems:
– Water drips from the spout despite handle in off position
– Handle feels loose or wobbly
– Temperature control is inconsistent
Replace Faulty Cartridges Properly
Cartridge replacement is the most common repair for single-handle faucets that won’t turn off.
Remove the Old Cartridge
Use pliers or a cartridge puller to extract the old cartridge. If it’s stuck, spray WD-40 and wait 10 minutes before trying again.
Match the New Cartridge Exactly
Cartridges are model-specific. Check these critical dimensions:
– Length and diameter must match exactly
– Number and position of slots or tabs
– Hot and cold orientation (some have color-coded indicators)
Warning: Universal cartridges must match all dimensions—don’t guess or assume compatibility. Bring the old cartridge to the hardware store for visual matching if you lack part numbers.
Clean Away Mineral Buildup
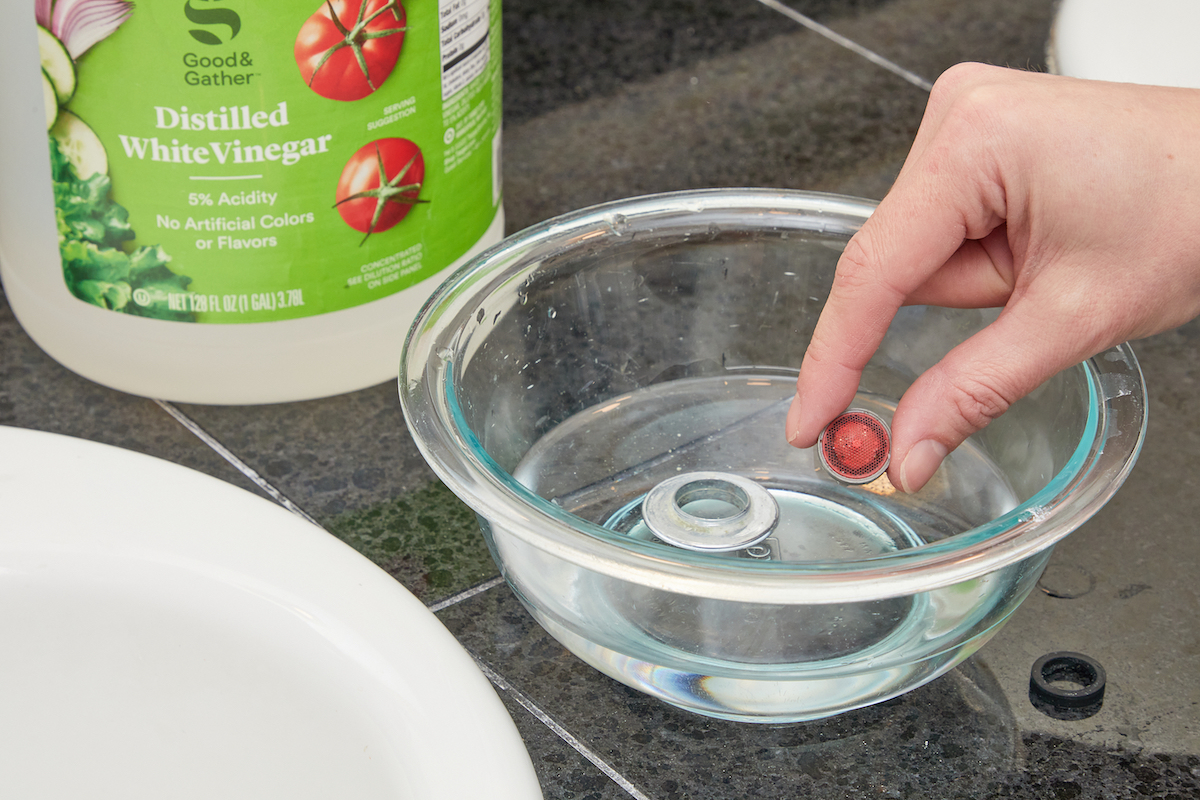
Hard water leaves deposits that clog internal passages and prevent full closure. Cleaning mineral buildup often resolves leaks that parts replacement alone won’t fix.
Soak Parts in White Vinegar
Remove all disassembled parts and soak them in white vinegar for 30 to 60 minutes. For heavy scale buildup, wrap parts in a vinegar-soaked cloth overnight.
Scrub and Rinse Thoroughly
Use a soft-bristled brush to remove residue. Avoid steel wool on plastic or chrome parts.
Critical areas to clean:
– Cartridge chambers and ports
– Valve seat recess
– Disc housing in ceramic disc faucets
– Ball chambers in ball-type faucets
Rinse everything thoroughly with clean water before reassembly.
Fix Bathtub Faucet Handle Misalignment
Some bathtub faucets continue running because the handle isn’t engaging the internal mechanism properly.
Realign the Mechanism
After removing the handle, you’ll see a square or hex-shaped shaft. Rotate it slightly until the handle points to the off position when reinstalled.
Tighten the Set Screw
A loose set screw causes the handle to slip. Replace it if the threads are stripped. Use a hex key to secure it firmly.
User tip: One homeowner fixed a spinning handle by tightening the hidden set screw and rotating the shaft one-eighth of a turn—water stopped instantly.
Reassemble Without Over-Tightening
Putting the faucet back together incorrectly causes new leaks and damage.
Install the Cartridge or Stem Correctly
Slide the new cartridge into place with tabs aligned. Push it all the way down—partial seating causes leaks.
Hand-Tighten First Then Finish
Reattach the retaining nut by hand, then give it a quarter to half turn with a wrench. Over-tightening cracks plastic components and damages threads.
Reattach the Handle
Slide it back on, secure with the screw, and snap the decorative cap into place.
Test the Faucet Thoroughly
Turn the water supply back on slowly to avoid pressure surges that could damage new parts.
Verify Complete Shutoff
Turn the faucet on and off several times. Water should stop completely when the handle is in the off position.
Check for Leaks and Unusual Noises
Look for these warning signs:
– Drips from the spout or handle
– Hissing or whistling sounds
– Foghorn-like noise
Foghorn noise indicates trapped air in the lines. Run water for one to two minutes to purge it.
If water still runs after repair:
– Double-check cartridge alignment
– Inspect for debris in the valve body
– Confirm the valve seat is flush and undamaged
Emergency Fix: Manually Shut Off Water Temporarily
If you can’t repair the faucet immediately, stop the flow temporarily.
Use a Wrench on the Stem
Remove the handle and grip the square valve stem with an adjustable wrench. Turn clockwise to manually shut off water.
Restore Flow When Ready
Turn counterclockwise to reopen. Apply WD-40 if the stem is stiff or corroded.
Warning: This is a temporary solution. Forcing a worn stem may break it.
When to Replace the Entire Faucet
Some faucets aren’t worth repairing.
Replace If:
- Parts are no longer available for your model
- The valve body is cracked or severely corroded
- You’ve made multiple repairs with recurring leaks
- You’re upgrading to a more efficient fixture
Modern faucets cost $100 to $300 and typically last 10 to 15 years with minimal maintenance.
Prevent Future Faucet Failures
Stop leaks before they start with regular maintenance.
Clean Components Annually
Disassemble and clean faucet parts every 6 to 12 months, especially in hard water areas.
Use a Water Softener
Installing a water softener reduces scale buildup and extends the life of seals and cartridges.
Install a Pressure-Reducing Valve
Water pressure above 80 pounds per square inch destroys internal parts. Test pressure with a gauge on an outdoor spigot.
Replace Parts Proactively
Swap out cartridges and washers every 7 to 10 years, even if no leak is visible yet.
Know When to Call a Professional Plumber
DIY repairs work for most cases, but some situations need expert help.
Call a Plumber If:
- Shutoff valves are missing or broken
- Components are seized or stripped
- Water damage exists behind walls
- You can’t identify the faucet type
- Water pressure consistently exceeds 80 psi
Inspector note: A running faucet during a home inspection often leads to repair requests. Fixing it early prevents delays if you plan to sell your home.
Frequently Asked Questions About Fixing a Faucet That Won’t Turn Off
Why does my faucet keep running even after I replaced the washer?
The valve seat may be damaged or corroded. Even with a new washer, a pitted valve seat prevents a proper seal. Inspect the valve seat for roughness or pitting, and either resurface it with steel wool or replace the faucet if damage is severe.
Can I use any cartridge brand for my faucet?
No. Cartridges are manufacturer and model-specific. Using an incompatible cartridge prevents proper fit and won’t stop the leak. Match exact dimensions, slot configuration, and hot-cold orientation, or bring the old cartridge to the hardware store for visual matching.
How do I stop a faucet that has no shutoff valves?
If your faucet lacks under-sink shutoff valves, turn off your home’s main water supply. The main shutoff is typically near the water meter or in the basement. This stops water flow to the entire house while you make repairs.
Why is my faucet making a loud foghorn noise after repair?
Trapped air in the lines causes foghorn-like sounds. Run the faucet at full flow for one to two minutes to purge the air. If noise persists, check that the shutoff valves are fully open and no debris is blocking the cartridge.
How much does it cost to fix a faucet that won’t turn off?
DIY repair costs $10 to $50 for replacement parts like washers, cartridges, or valve seats. Professional plumber visits typically cost $150 to $350 including parts and labor.
Should I repair or replace a faucet that’s over 20 years old?
Replace if the faucet is 20 years or older and requires frequent repairs. Older faucets often have unavailable parts, and continued repairs cost more than installing a new fixture with a warranty.
Key Takeaways for Fixing Your Faucet That Won’t Turn Off
A faucet that won’t turn off is usually a simple fix involving three main steps: identifying your faucet type, replacing the worn component (washer, cartridge, or valve seat), and cleaning away mineral deposits that prevent proper sealing. Always shut off the water supply before starting repairs, and take photos during disassembly to remember how parts go back together.
The most common causes are worn rubber washers in compression faucets, failed cartridges in single-handle models, and mineral buildup from hard water. Using OEM replacement parts and avoiding over-tightening during reassembly prevents recurring problems. With basic tools and these steps, you can stop the leak, save hundreds of gallons of water weekly, and avoid costly water damage—all without calling a plumber.







