
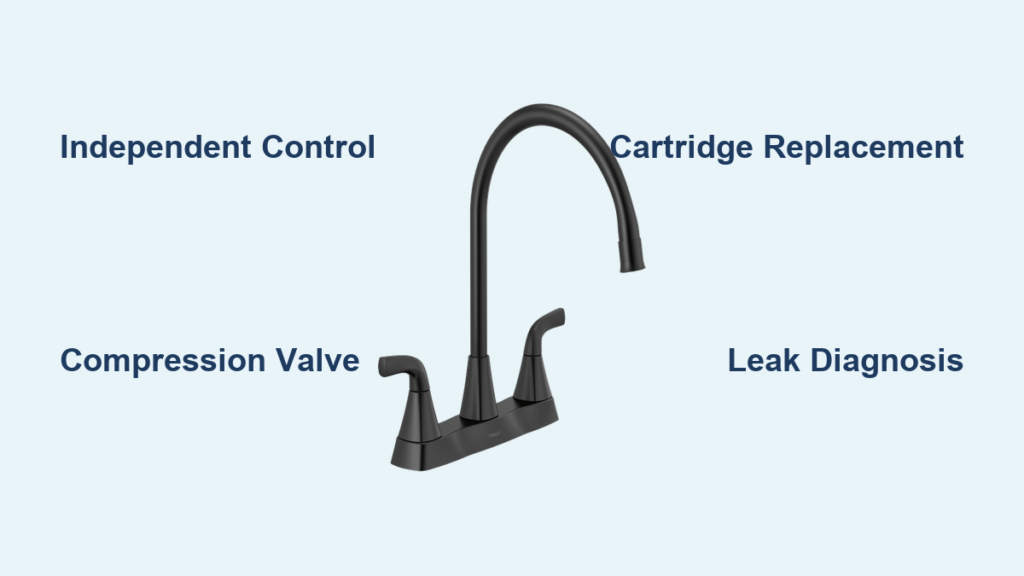
If your kitchen or bathroom still uses a classic two-handle faucet, you are not alone. Millions of homes rely on this durable, intuitive design to control water flow and temperature through two independent handles. But have you ever wondered how does a two-handle faucet work? Unlike modern single-lever models, this design gives you separate control over hot and cold water, allowing precise adjustments and easy troubleshooting when repairs are needed.
This guide breaks down every aspect of two-handle faucet functionality. You will learn what happens inside each handle when you turn the tap, how water travels from supply lines to the spout, and which components keep everything running smoothly. Whether you are diagnosing a leak, planning an installation, or simply curious about the mechanics, this article covers the essential details.
Independent Hot and Cold Control
A two-handle faucet operates by separating hot and cold water regulation into two distinct mechanical systems. The left handle controls the hot water valve while the right handle controls the cold water valve. Each handle connects to its own internal valve mechanism, and turning a handle counterclockwise lifts an internal component off a sealed seat to allow water flow.
Why the Handles Are Mechanically Isolated
Each handle functions independently because hot and cold lines do not connect until they reach the mixing chamber beneath the spout. This hydraulic separation means water cannot flow from one side to the other unless a valve fails. Dedicated valve bodies with sealed chambers, stems, and seals make repairs straightforward since you can work on one side without affecting the other.
How Temperature Is Determined
The final water temperature depends entirely on how much each handle is opened. Both handles fully open produces a warm mix closer to the hot supply temperature. Hot fully open with cold slightly open delivers very hot water, while cold fully open with hot closed produces cold-only flow. There is no automatic blending or thermostatic regulation in standard models, so sudden pressure changes like a toilet flushing can cause noticeable temperature shifts.
Standard Design and Size Variations
Two-handle faucets follow a universal operational principle but vary significantly based on application. Bathroom models typically feature a compact size, short spout, and lower flow rates of 1.5 to 2.0 gallons per minute. Kitchen models include a larger build with a high-arc swivel spout and flow rates up to 2.2 gallons per minute.
Common Mounting Configurations
The 3-hole center-set mounts all three components on a single baseplate with standard 4-inch center-to-center spacing between handle holes. The 4-hole setup adds an extra hole for accessories like a side sprayer or soap dispenser. Widespread installations use three separate pieces with adjustable spacing of 6, 8, or custom inches between components.
Key Physical Specifications
Standard hole size is 1⅜ inches in diameter with ½-inch NPT inlet connections. Spout height ranges from 3 to 8 inches for bathroom faucets and 8 to 12 inches for kitchen models. Handle length typically measures 2 to 4 inches, and base spread options include 4, 6, or 8 inches.
Core Components and Their Roles
Every two-handle faucet relies on interlocking parts that regulate water delivery and prevent leaks. Understanding these components helps with diagnosis and repair.
Essential Internal Parts
Handles serve as the user interface, rotating to open or close valves. Valve stems or cartridges translate handle rotation into movement that controls flow. Valve seats provide the sealing surface at the valve base where worn seats cause leaks. O-rings prevent water from leaking up through the handle stem. Springs assist in closing valves in some diaphragm models. Brass studs serve as threaded connectors where supply lines attach. The mixing chamber combines hot and cold water beneath the spout. The spout delivers mixed water to the sink, and the aerator adds air to reduce splashing and conserve water.
Visual Identification Cues
Red or blue inserts in handles indicate hot and cold sides. Handles usually face forward when in the closed position. Knurling or texture on handles improves grip during operation.
Valve Mechanism Types Explained

Not all two-handle faucets work the same internally. Four main valve technologies determine longevity, repair needs, and overall performance.
Compression Valves
Found in homes built before the 1990s, compression valves use a rubber washer at the end of a threaded stem. Turning the handle lifts the washer off the valve seat to allow flow, and clockwise rotation reseats the washer to stop flow. The most common failure is washer wear or a pitted valve seat causing dripping. Repair involves replacing the washer and resurfacing or replacing the seat.
Cartridge Valves
Cartridge valves use a removable plastic or brass cartridge with internal channels. Rotating the handle aligns or blocks water pathways for smooth operation without washers. Failure points include cartridge cracking or mineral buildup restricting flow. Replacement requires an exact model match, so bringing the old cartridge to the store is essential.
Ceramic Disc Valves
Modern premium units feature ceramic disc valves with two ceramic discs containing holes that align to allow flow. These are extremely durable, resistant to heat and corrosion, and operate with minimal friction. Failure is rare but can occur if chips or cracks develop in the ceramic, causing sudden leaks.
Diaphragm Valves
Used in some American Standard and vintage-style faucets, diaphragm valves employ a flexible rubber diaphragm that flexes open when the handle is lifted. Water pressure helps maintain the seal when closed. Issues arise when the diaphragm hardens or tears over time, leading to spout or handle leaks.
Water Path and Mixing Process

Understanding how water moves through the faucet reveals why proper sealing and clean components matter for optimal performance.
Step-by-Step Water Flow
Water travels from shutoff valves through supply lines to brass studs on valve bodies. It enters the hot or cold valve body where the stem or cartridge regulates flow. The water then flows into the mixing chamber beneath the spout where streams combine. Finally, mixed water exits through the spout and aerator.
No Built-In Anti-Scald Protection
Standard two-handle faucets lack automatic safety features. When cold pressure drops due to another fixture being used, hot water dominates the mix and output becomes suddenly hotter. Installing a pressure-balancing valve in older systems helps reduce scald risk.
Can It Work with One Supply Line
No. Two independent water lines are required for normal operation. Each handle connects to a dedicated supply, with the left handle linking to the hot line and the right handle to the cold line. If only one line is connected, only one handle produces water and true mixing becomes impossible.
Exceptions and Workarounds
Dual-outlet mixing valves can split a single source but are non-standard and rarely used. In RVs or temporary setups, both inlets may connect to the same line, but this eliminates temperature control. DIY conversions are not recommended due to cross-contamination risks and poor performance.
Installation: Step-by-Step Guide
Installing a two-handle faucet follows a standard process regardless of the valve type.
Step 1: Prepare the Sink
Turn off hot and cold shutoff valves. Open handles to drain residual water. Clean the sink deck thoroughly. Apply a continuous bead of plumber’s putty around the mounting plate for metal sinks, or use silicone sealant for granite, quartz, or composite sinks.
Step 2: Position the Faucet
Insert faucet shanks through sink holes. Align baseplate flush with the sink surface. Route sprayer hose through the fourth hole if present. Ensure the spout clears sink edges.
Step 3: Secure from Below
Slide mounting nuts onto threaded tails. Tighten evenly using a basin wrench, alternating between sides to prevent warping.
Step 4: Connect Supply Lines
Attach flexible braided stainless steel lines to brass studs. Hand-tighten first, then give a quarter turn with an adjustable wrench. Connect to shutoff valves, matching hot to hot and cold to cold. Wrap Teflon tape clockwise on valve threads for a proper seal.
Step 5: Install Accessories
Connect side sprayer to the diverter valve. Test diverter function before finalizing. Secure all hoses to avoid kinking.
Step 6: Mount Handles
Insert cartridge or stem into each valve body. Place handle over the stem and tighten the setscrew, often hidden under a decorative cap. Orient handles toward the user when closed.
Step 7: Test the System
Slowly open shutoff valves. Check for leaks at the base, handle stems, and supply line connections. Run water at full flow for one minute to flush debris. Remove and clean the aerator, then test temperature blending.
Troubleshooting Common Problems
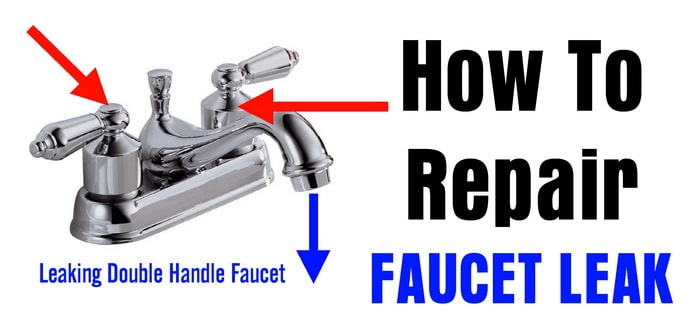
Most issues stem from wear, mineral buildup, or improper installation. Knowing the symptom helps identify the cause quickly.
Dripping Spout When Off
Worn washers, damaged valve seats, or failing cartridges cause this problem. Shut off water, disassemble the valve, and replace the washer or cartridge. Resurface or replace pitted valve seats as needed.
Leaking Around the Handle
Worn O-rings or loose packing nuts lead to handle leaks. Remove the handle, replace the O-ring, and re-tighten the packing nut before reassembling and testing.
Low Water Pressure
Clogged aerators or inlet screens reduce flow. Unscrew the aerator and soak it in white vinegar for 30 minutes. Scrub with a toothbrush and flush backward with water before reinstalling.
Handle Spins Freely
A broken plastic keyway on the cartridge causes this issue. Remove the cartridge and bring it to a hardware store for an exact replacement match.
Stiff or Hard-to-Turn Handles
Mineral buildup, corroded stems, or lack of lubrication create resistance. Soak the stem in vinegar and lubricate with plumber’s grease. Avoid petroleum-based lubes that degrade rubber seals.
Maintenance and Longevity Tips
Proper care extends service life and prevents costly repairs.
Preventive Maintenance Schedule
Clean the aerator every three to six months. Inspect supply lines every six months. Wipe down handles and spout weekly. Check for base leaks monthly. Lubricate stems every two years.
When to Replace vs. Repair
Repair is appropriate when only one component is faulty, the faucet is less than ten years old, and the finish is intact. Replace when multiple leaks persist after repair, corrosion affects the valve body, the spout is cracked, or you want water-saving upgrades.
Performance and Durability Metrics

Manufacturers test two-handle faucets rigorously before market release.
Quality Testing Standards
Cycle testing simulates 500,000 or more on/off cycles to simulate over ten years of use. Leak testing checks for drips under 40 to 80 psi pressure. Thermal shock testing subjects faucets to rapid hot and cold cycling. Corrosion resistance testing uses salt spray tests per ASTM B117 standards.
Expected Lifespan by Component
Brass valve bodies last 15 to 20 years. Ceramic discs last 10 to 15 years. Cartridges last 8 to 12 years. Compression washers last 2 to 5 years. O-rings last 5 to 7 years. Supply lines should be replaced after ten years if bulging or corroded.
Who Should Use a Two-Handle Faucet
This design suits specific users and applications better than others.
Ideal User Profiles
DIYers benefit from simple mechanics and easy repairs with basic tools. Vintage restorers appreciate designs that match pre-1980s sinks and decor. Homeowners with older plumbing benefit from compatibility with existing 4-inch hole spacing. Commercial kitchens value redundant control and easy leak diagnosis.
Not Ideal For
Two-handle faucets take up more counter space, making them less ideal for small sinks. They require two-handed operation, making them less suitable for accessibility needs. They are less water-efficient unless upgraded with aerators.
Pros and Cons Summary
Advantages
Independent hot and cold control allows precise adjustments. Easy leak diagnosis identifies which side is causing problems. Repairable with standard tools. Works well in low-pressure systems. Durable with proper care. Classic aesthetic appeal suits many home styles.
Limitations
Requires more counter space than single-handle models. Slower to adjust temperature. Manual balancing can be imprecise. Greater risk of cross-contamination if valves fail. Less water-efficient than modern alternatives.
Frequently Asked Questions About Two-Handle Faucets
What is the difference between a two-handle and single-handle faucet?
A two-handle faucet uses separate handles for hot and cold water, giving independent control over each supply. A single-handle faucet uses one lever to control both temperature and flow by moving left or right for temperature and up or down for flow rate.
How do I know if my two-handle faucet has compression or cartridge valves?
Check when the faucet was installed. Faucets installed before the 1990s typically use compression valves with rubber washers. Modern faucets usually feature cartridge, ceramic disc, or diaphragm mechanisms. Removing the handle and inspecting the internal component confirms the type.
Can I convert a two-handle faucet to use a single handle?
Converting is not straightforward and generally not recommended. The plumbing would require significant modification, and the faucet body is designed specifically for two-valve operation. Purchasing a compatible single-handle faucet is the practical solution.
Why does my two-handle faucet temperature change when I flush the toilet?
Standard two-handle faucets lack pressure-balancing technology. When toilet flushing drops cold water pressure, hot water dominates the mix, causing sudden temperature increases. Installing a pressure-balancing valve or switching to a fixture with anti-scald protection resolves this issue.
How often should I replace the washers in my two-handle faucet?
Compression valve washers typically need replacement every 2 to 5 years due to wear. Cartridge, ceramic disc, and diaphragm mechanisms last longer and typically only require replacement if they develop leaks or damage.
Are two-handle faucets more expensive to repair than single-handle models?
Repair costs are generally comparable. Two-handle faucets may have slightly higher parts costs since they contain two valve assemblies instead of one. However, the simpler mechanics often make DIY repairs more accessible, potentially saving on labor costs.
Key Takeaways for Understanding Two-Handle Faucets
A two-handle faucet works by using two independent valves, one for hot and one for cold water, controlled by separate handles. Water flows through each valve into a mixing chamber beneath the spout where it combines before exiting. The system relies on mechanical components like stems, cartridges, washers, and O-rings to regulate flow and prevent leaks. Understanding these basics empowers you to maintain your faucet effectively, whether diagnosing a problem or performing routine maintenance. With proper care, a quality two-handle faucet provides 10 to 15 years of reliable service, making it a durable and timeless choice for many homes.







