
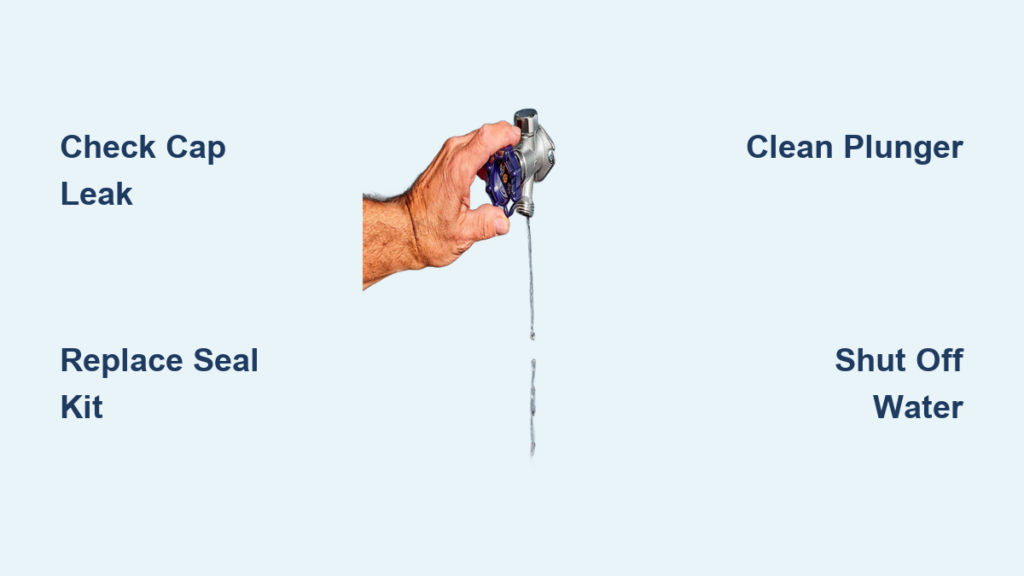
You turn on your outdoor spigot, only to see water spraying from the top cap instead of flowing cleanly from the spout. This is a common sign of a failing anti-siphon faucet, a critical plumbing fixture designed to protect your home’s drinking water and prevent freeze damage. When it malfunctions, it doesn’t just waste water; it compromises safety and efficiency. The good news? Most issues can be fixed quickly and cheaply with basic tools and a $7 repair kit. Whether you’re dealing with a constant drip, a stuck cap, or a frozen valve, this guide will walk you through diagnosing the problem, cleaning or replacing internal components, and knowing when full replacement is necessary.
Identify the Problem
Before grabbing tools, determine whether what you’re seeing is normal drainage or a real malfunction.
Normal vs. Faulty Operation
An anti-siphon faucet is designed to weep slightly after shutoff. This is intentional. When turned off, residual water in the outer pipe drains out through the cap’s vent hole to prevent freezing. This weeping should stop within 4 to 6 hours.
But if water streams or sprays from the cap while the faucet is on, that’s not normal. It means the internal plunger isn’t sealing properly, allowing pressurized water to escape through the vent. This is a mechanical failure requiring repair.
Quick Check:
– If water flows from the cap during use, it’s broken.
– If it only drips after shutdown and stops in hours, it’s working as intended.
Elevation-Induced Leaks
A common false alarm occurs when a hose is coiled or hung above the faucet. Gravity prevents full drainage, causing water to back up and leak from the cap. This mimics a faulty valve but is actually user error. To test: lower the hose below the faucet. Does the leak stop? If yes, reposition the hose next time.
Understand How It Works
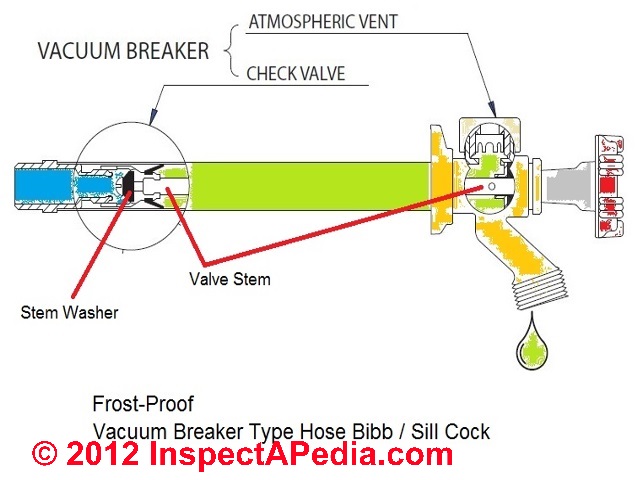
Knowing the internal mechanism helps diagnose and fix the issue.
Vacuum Breaker Function
The anti-siphon feature relies on a vacuum breaker at the top of the faucet. Inside, a plunger moves with water pressure.
Faucet ON: Water pushes the plunger up, sealing the vent hole. Water flows out the spout.
Faucet OFF: Pressure drops, plunger falls, opening the vent. Air enters, breaking any siphon.
This simple system prevents contaminated hose water from buckets, sprayers, or pools from being sucked back into your clean water supply.
Key Internal Parts
The anti-siphon valve contains several critical components working together:
- Plastic or metal cap protects the assembly but is not watertight.
- Plunger or disc moves to open or close the vent.
- Seal with vent hole allows air entry when the faucet is off.
- O-rings and washers maintain seals between parts.
- Bonnet or valve body houses all internal components.
Failure usually stems from worn seals, debris, or a missing flat washer beneath the plunger.
Diagnose Common Symptoms
Use these signs to pinpoint the exact issue with your anti-siphon faucet.
Water Streams from Cap During Use
This is the most common failure symptom. Causes include:
- Worn or cracked plunger seal
- Mineral buildup preventing proper seating
- Missing or damaged flat rubber washer
- Debris trapped under the plunger
Pro Tip: Hard water areas see more mineral clogs. Vinegar cleaning often resolves this issue without requiring new parts.
Cap Turns But Won’t Unscrew
On older units over 10 years old, the cap may spin without releasing. This happens because plastic threads have degraded, the cap is press-fit rather than threaded, or a breakaway screw is blocking removal. Try gently prying the cap off with a flathead screwdriver. If it resists, it’s likely a pry-off design.
Persistent Weeping After 6 Plus Hours
Some drainage is normal, but if it continues beyond half a day, the internal seal may be cracked, the cap is damaged or not seated properly, or the vent hole is clogged, preventing proper drainage. Clean or replace the seal and check for cracks.
Handle Base Leak
If water leaks near the handle rather than the cap, the issue is likely the packing nut, not the anti-siphon valve. Tighten it ¼ to ½ turn with a wrench. Over-tightening can damage the stem.
Repair the Anti-Siphon Valve
Two main approaches exist: replace the top assembly or disassemble and clean the internal components.
Replace Vacuum Breaker Assembly
Best for models where the top unscrews as a single unit, such as Mansfield or Prier models.
Tools Needed
- Replacement kit (Prier 630-7500 or equivalent, about $7)
- Screwdriver
- Adjustable wrench (optional)
Shut Off Water Supply
Locate the indoor shut-off valve, usually about 12 inches inside the wall in a basement or utility room. Turn it clockwise to close. Even if the outdoor faucet is off, residual pressure can cause flooding during disassembly.
Warning: Skipping this step risks water damage. Always shut off the supply first.
Remove Handle
Pop off the decorative cap on the handle. Use a screwdriver to remove the handle screw, then pull the handle straight off the stem.
Unscrew Old Valve
Grasp the top cap or bonnet and turn counterclockwise to remove. If stuck, use a wrench with a cloth to avoid scratching. Do not force it. Brittle plastic can crack easily.
Caution: Some models use breakaway screws that destroy threads if removed. If you encounter resistance, full replacement may be needed.
Install New Kit
Insert the new plunger and seal into the replacement body. Screw it into place by hand. Hand-tighten only. Over-tightening can crack plastic or damage threads. Snap on the new cap and reattach the handle.
Test the Fix
Turn water back on. Open the faucet. If no water leaks from the cap during use, the repair succeeded. A small drip after shutoff is normal.
Clean and Rebuild Internal Components
For units with accessible internals, such as ABP 450 or 420 series, cleaning may restore function without replacement.
Access the Internal Mechanism
Do not assume the cap unscrews. Many older models use a press-fit or pry-off design. Gently slide a flathead screwdriver under the cap’s edge and lift it off. Work slowly. UV exposure makes plastic brittle after 10 or more years.
Remove and Inspect Parts
Take out the plunger, seal, and O-rings. Note their order for reassembly. Look for a small flat rubber washer beneath the plunger. This is often missing in repair kits and is a common cause of leaks.
Check all rubber parts for hardness (loss of elasticity), cracks or warping, or swelling from chemical exposure.
Clean with Vinegar
Soak parts in white vinegar for 15 to 30 minutes to dissolve mineral deposits. Use a soft brush to clean the plunger, seal, and vent hole. Rinse thoroughly with water.
Why vinegar? It’s non-corrosive and effective on calcium and lime buildup, ideal for hard water areas.
Replace Worn Seals
If any rubber part feels stiff or cracked, replace it. Use manufacturer-specific kits like PK-1430 for Arrowhead Brass ABP 420 or 450 series, or 630-7500 for Mansfield or Prier models. If the flat washer is missing, it can be sourced separately from plumbing suppliers or cut from rubber sheeting.
Reassemble Carefully
Reinstall parts in reverse order. Press or screw the cap back on. Reattach the handle. Turn water on and test. No leak during use means success.
Fix Handle Leaks Separately
If water escapes from the handle base, the anti-siphon valve isn’t the culprit.
Tighten Packing Nut
Place one wrench on the faucet body to prevent twisting. Use another on the inner nut beneath the handle. Tighten ¼ to ½ turn only.
Warning: Over-tightening can strip threads or bind the stem, making the handle hard to turn.
Replace Packing If Needed
If the leak persists, the packing material is likely hardened or damaged. This requires full disassembly and replacement. Consider replacing the entire faucet if parts are old.
Handle Breakaway Tamper-Proof Screws
Some models, particularly Woodford faucets, use breakaway screws to prevent removal of the vacuum breaker.
Why They Exist
These screws are designed to destroy the male hose threads if someone tries to remove the anti-siphon cap. This forces full replacement, ensuring the backflow protection cannot be bypassed, which is critical for safety.
Can You Remove It
Sometimes. If the screw hasn’t been fully tightened, it may unscrew. But if corroded or stripped, drilling it out carefully may be the only option, risking thread damage.
Best Practice
When installing a new unit, do not reinstall the breakaway screw. This preserves serviceability while maintaining protection. Many modern units now ship without it.
Replace the Entire Faucet
When repair isn’t possible, full replacement is the solution.
When to Replace
Consider replacement when the model is discontinued, the valve seat is damaged or solder-fouled, a breakaway screw prevents access, or the body is cracked or corroded.
Identify Connection Type
Before buying a replacement, determine how the faucet connects inside. Threaded connections (½ inch male) can be unscrewed from the interior pipe. Soldered connections (½ inch copper) require cutting and re-piping, which is more complex.
Warning: Never assume it’s threaded. Forcing a wrench on a soldered unit can damage pipes.
Install New Freeze-Proof Spigot
- Shut off the main water.
- Cut access if behind siding or brick.
- Remove the old unit.
- Install new outward-sloping faucet to ensure drainage.
- Use Teflon tape on threads.
- Reconnect and test.
Choose models from reliable brands like Watts or Prier for proven performance.
Upgrade with Screw-On Vacuum Breaker
If you have a standard hose bibb without built-in protection, a screw-on vacuum breaker offers an alternative.
Watts VC-2 Installation
Use a screw-on vacuum breaker like the Watts VC-2. It threads onto any standard 3/4 inch garden hose thread outlet.
Myth Busting: Outer diameter doesn’t matter. Thread size is always 3/4 inch GHT. Even if the faucet looks larger, it will fit.
Screw it on by hand. Replace annually or if cracked.
Limitation: Not for use on faucets with integrated anti-siphon valves. Only use on standard bibbs.
Source the Right Parts
Using correct components is essential for a successful repair.
Compatible Repair Kits
| Kit | Fits | Source |
|---|---|---|
| PK-1430 | ABP 420/450 Series | Arrowhead Brass Products |
| 630-7500 | Mansfield (Prier) | Prier Products |
| Watts VC-2 | Standard 3/4 inch GHT | Home Depot, plumbing suppliers |
Note: Anti-siphon parts are not universal. Match your model exactly.
Finding Missing Washer
Many kits omit the small flat rubber washer beneath the plunger. If missing, search Amazon or eBay for anti-siphon flat washer, visit a specialty plumbing shop, or cut one from rubber sheeting (size should be slightly smaller than a standard hose washer).
Prevent Future Failures
Extend the life of your faucet with simple maintenance.
Winterize Annually
Even freeze-proof models can burst if a hose is left attached.
- Shut off the indoor supply valve.
- Open outdoor faucet to drain.
- Disconnect all hoses. This is the number one cause of winter pipe bursts.
Expert Tip: In winter, remove the hose. They do not drain properly and water will stand in the pipe and freeze.
Inspect Every Spring
Check for cap damage, weeping beyond 6 hours, or corrosion and stiffness. Clean with vinegar if needed.
Replace Proactively
After 10 to 12 years, rubber seals degrade from UV exposure and temperature swings. Replace the anti-siphon kit even if it seems fine. Many users report multiple units failing simultaneously at this age.
Use Hoses Correctly
Hang hoses below faucet level for full drainage. Avoid leaving sprayers or nozzles attached. They trap water and prevent proper drainage.
Frequently Asked Questions About Anti-Siphon Faucets
Why does my anti-siphon faucet drip after I turn it off?
This is normal behavior. Anti-siphon faucets are designed to let residual water in the outer pipe drain out through the vent hole. This prevents freeze damage. The dripping should stop within 4 to 6 hours.
Can I use my outdoor faucet without the anti-siphon cap?
No. The anti-siphon cap contains the vacuum breaker that prevents contaminated water from being siphoned back into your home’s clean water supply. Removing it compromises your water safety.
How do I know if my anti-siphon faucet is freeze-proof?
Freeze-proof anti-siphon faucets have a long valve stem that extends 8 to 14 inches into the heated portion of your home. The valve closes near the interior wall, allowing the outer pipe to drain when turned off.
What causes the anti-siphon valve to fail?
The most common causes are worn or degraded plunger seals, mineral buildup from hard water, freeze damage from trapped water, UV degradation weakening plastic components, and missing or damaged flat washers beneath the plunger.
Can I replace just the anti-siphon cap or do I need a whole new faucet?
It depends on your model. Some faucets have removable vacuum breaker assemblies that can be replaced individually. Others use breakaway screws or press-fit designs that require full faucet replacement.
How often should I replace my anti-siphon faucet?
With proper maintenance, anti-siphon faucets typically last 10 to 12 years. In harsh climates or areas with high UV exposure, consider replacing the anti-siphon kit or entire unit at this age, even if it appears functional.
Key Takeaways for Fixing Your Anti-Siphon Faucet
Fixing an anti-siphon faucet isn’t just about stopping a drip. It’s about protecting your home’s water safety and preventing costly freeze damage. With the right knowledge, a simple repair takes minutes and saves water, money, and stress. The most important steps are to first confirm whether the leak is abnormal (water flowing during use rather than just dripping after shutdown), use manufacturer-specific parts for proper fit, and always shut off the water supply before starting any repair. Remember that the small flat rubber washer beneath the plunger is often missing from repair kits and is a common cause of persistent leaks. Finally, winterize every year by disconnecting hoses, as this remains the leading cause of burst pipes in freeze-proof faucets. Now that you know how to diagnose, clean, replace, and maintain these critical fixtures, you’re equipped to keep your outdoor plumbing running safely for years to come.







