
Removing a sink faucet is a common household project whether you’re upgrading to a modern fixture, fixing a persistent leak, or remodeling your kitchen or bathroom. Knowing how to remove a sink faucet properly prevents water damage, protects your sink and countertop, and makes installing the replacement much smoother. This guide covers every step, from turning off water supply to handling stubborn, rusted installations that require extra effort.
This comprehensive guide works for both kitchen and bathroom faucets, including pull-down sprayers, pop-up drains, and single-hole or widespread configurations. You’ll learn which tools you need, when to use penetrating oil, how to break tough seals, and when it’s time to call a professional.
Turn Off Water Supply Before Removing Your Faucet
Shutting off water flow is the most critical first step. Even a small drip can cause water damage when you disconnect supply lines.
Locate and Close Under-Sink Valves
Find the hot and cold shut-off valves beneath your sink. Turn both handles clockwise until they are fully closed. For lever-style valves, ensure the handle is perpendicular to the pipe when closed.
Test the shutoff: Turn on the faucet handles. If water stops flowing, the valves are working properly. If water continues to drip, shut off the main water supply to your house immediately.
Drain Residual Water From Supply Lines
Even with valves closed, water remains in the supply lines and faucet internals. Failing to drain this water leads to spills and potential cabinet damage.
Release Pressure and Empty Lines
Open both hot and cold faucet handles fully. Let water run until the flow stops completely. This relieves pressure in the lines and empties residual water from the faucet body.
Place a bucket or paint tray under the plumbing to catch any remaining drips when you disconnect lines.
Clear Space and Protect Your Work Area
Working under the sink requires adequate space and surface protection to prevent damage and keep small parts from falling into the drain.
Remove Items and Protect Surfaces
Take out all cleaning supplies, storage bins, and trash cans from beneath the sink. Lay down towels or rags to protect cabinet flooring. Stuff a rag into the sink drain to prevent screws, washers, or small tools from falling in and getting lost.
Disconnect Water Supply Lines From the Faucet
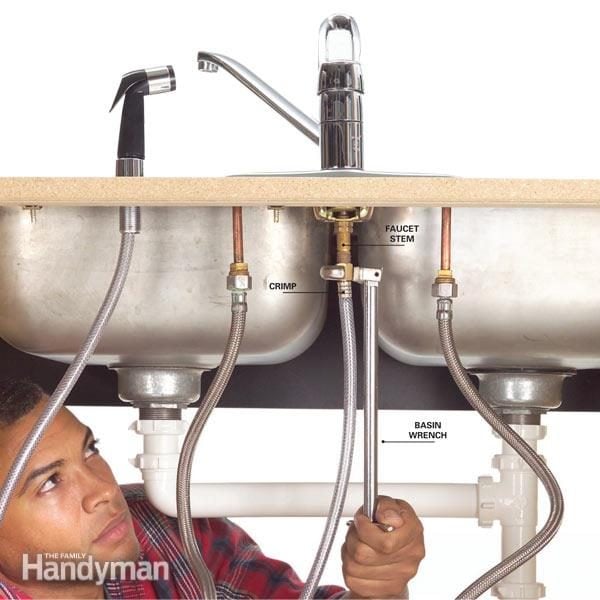
With water off and lines drained, you can begin disconnecting the plumbing. This step requires stabilizing the faucet while loosening connections.
Use Proper Wrench Technique
Grip the supply line nut with an adjustable wrench while holding the faucet shank steady with a second wrench. Turn counterclockwise to loosen. If connections are tight from corrosion, apply penetrating oil and wait 15 to 30 minutes before retrying.
Label hot and cold lines: Wrap painter’s tape around each line and mark “HOT” and “COLD” to prevent confusion during reinstallation. Take a photo of the setup before disconnecting for visual reference.
Remove Kitchen Sprayer or Bathroom Pop-Up Drain
Kitchen faucets often have sprayer hoses while bathroom faucets typically have pop-up drain mechanisms. Both require separate removal steps.
Disconnect Kitchen Sprayer Hose
Locate the quick-connect fitting or diverter valve under the sink. For Moen-style faucets, press the push-button release to free the hose. For models with hose clamps, loosen the screw with a flathead screwdriver and gently pull the hose free.
Remove Bathroom Pop-Up Drain
Unscrew the clevis screw or lift rod screw on the back of the faucet body. Use pliers to loosen the pivot nut on the drain tailpiece, then push the entire pop-up assembly upward through the sink opening. Remove the drain flange and rubber washer from above the sink.
Loosen Mounting Hardware Under the Sink
:max_bytes(150000):strip_icc()/SPR-how-to-use-a-basin-wrench-2718720-step-03-d6851359278f44cdb435e22c5d4bdfe8.jpg)
Most faucets secure to the sink deck with mounting nuts that require a basin wrench for access.
Use a Basin Wrench for Tight Spaces
Insert the basin wrench onto the mounting nuts beneath the sink. Turn counterclockwise to loosen. For kitchen faucets, look for brass fastening nuts or hand-tightened plates. For bathroom faucets, loosen mounting nuts on each tailpiece.
If stuck: Apply penetrating oil, tap gently with a mallet, or use locking pliers on rounded nuts. Never force the wrench—resistance may mean dried sealant or an additional clip is still in place.
Extract the Old Faucet From the Sink Deck
With all connections and hardware removed, the faucet should lift out. Sometimes a seal keeps it in place.
Lift Straight Up and Break Any Seal
Grasp the faucet base and pull upward. If it doesn’t budge, the faucet is likely sealed with caulk, putty, or mineral deposits. Use a plastic putty knife to cut around the base from above. Slide the blade between the faucet and sink to slice through old sealant.
Avoid metal tools on porcelain, ceramic, or stone surfaces—scratches are permanent. Gentle rocking can help break adhesion without damaging the sink.
Clean the Mounting Area After Removal
Once the faucet is out, thoroughly clean the sink deck to prepare for the new installation.
Scrape Off Old Sealant and Inspect Holes
Use a plastic scraper to remove dried putty, silicone, or gasket material. For stubborn residue, apply mineral spirits or citrus-based cleaner. Wipe with vinegar or isopropyl alcohol to disinfect. Inspect mounting holes for debris, rust, or damage and flush with water if needed.
Replace old gaskets and washers—never reuse them. New mounting hardware ensures a secure, leak-free installation.
Handle Stubborn or Rusted Faucet Installations
Older faucets or those in hard water areas may be fused by rust and mineral buildup. Several techniques can help.
Apply Penetrating Oil for Corrosion
Spray PB Blaster or Kroil on rusted mounting nuts. Let it soak for 15 to 30 minutes. Tap the nut lightly with a hammer to help the oil penetrate deeper into the corrosion.
Remove Stripped or Damaged Screws
If screw heads are stripped, drill a small pilot hole with a left-handed drill bit. The reverse thread may back the screw out automatically. If not, insert a screw extractor and turn counterclockwise.
Cut Off the Faucet as a Last Resort
When corrosion welds the faucet in place, destructive removal may be necessary. Cover the sink and surrounding area with plastic sheeting taped securely. Use cardboard or wood shims between the faucet and countertop to prevent scratches. Cut the faucet just above the sink surface using a hacksaw, saber saw, or oscillating multi-tool. Spray water on the cut zone to reduce heat and metal dust. After cutting, pry off the remaining base with needle-nose pliers.
Why cut from the top? It minimizes risk to countertops and exposes mounting hardware for easier removal.
When to Call a Professional Plumber
Some situations require professional help rather than DIY effort.
Signs You Need Expert Help
Call a plumber if the faucet is fused by rust and won’t budge despite penetrating oil. Also seek help if shut-off valves are broken or leaking, water lines are soldered copper rather than flexible hoses, you’re working with expensive countertops like granite or marble and fear cracking, or you lack essential tools like a basin wrench or oscillating tool.
Hiring a plumber costs $150 to $300 but prevents costly mistakes and damage to high-end surfaces.
Frequently Asked Questions About Removing a Sink Faucet
How long does it take to remove a sink faucet?
Most straightforward removals take 30 minutes to an hour. Complicated removals with severe corrosion or destructive methods can take two to three hours.
Can I remove a sink faucet without a basin wrench?
A basin wrench is highly recommended for reaching mounting nuts in tight spaces. However, you can use an adjustable wrench or locking pliers if the nuts are accessible. Specialty tools like flexible shaft wrenches also work in tight angles.
What should I do if the faucet is stuck to the sink?
Apply penetrating oil around the base and wait 15 to 30 minutes. Use a plastic putty knife to cut through old caulk or putty. Gently rock the faucet side to side to break the seal. Avoid metal tools that could scratch the sink surface.
Do I need to replace the drain assembly when removing a bathroom faucet?
Not necessarily. If the old pop-up drain is in good condition and matches your new faucet, you can reuse it. However, replacing the drain assembly is often simpler and ensures compatibility with the new faucet.
How do I protect granite or marble countertops during faucet removal?
Never hammer, pry, or grind directly on stone surfaces. Use plastic or wood shims as leverage points. Cover the sink and surrounding area with plastic sheeting during any cutting operations. Work slowly and prioritize non-destructive methods first.
What tools are absolutely necessary to remove a sink faucet?
Essential tools include an adjustable wrench, basin wrench, flashlight, towels, bucket, and screwdriver. For difficult removals, add penetrating oil, locking pliers, and a plastic putty knife.
Key Takeaways for Successfully Removing Your Sink Faucet
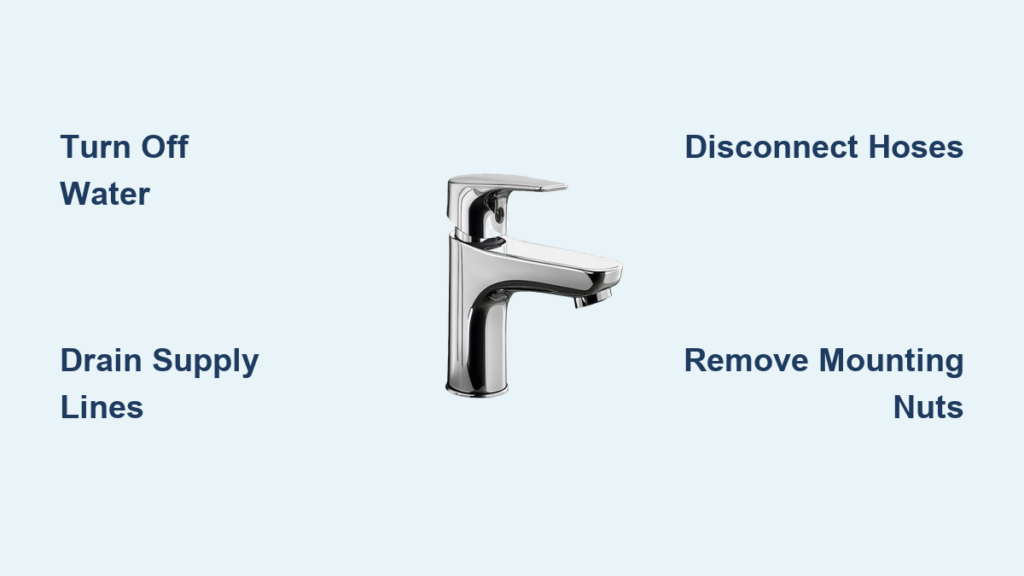
Removing a sink faucet follows a logical sequence: turn off water, drain lines, disconnect supply hoses, remove accessories like sprayers or pop-up drains, loosen mounting hardware, and extract the unit. Taking photos before disassembly helps enormously during reinstallation. Never skip the water shutoff step, even for a seemingly simple job.
For stubborn or rusted faucets, apply penetrating oil before forcing anything. If corrosion is severe, cutting the faucet from above may be necessary, but protect your countertop first. Replace all mounting hardware, gaskets, and washers with new parts rather than reusing old ones. Check shut-off valves for leaks before installing your new faucet.
With the right tools, patience, and this step-by-step approach, you can confidently remove any sink faucet while protecting your plumbing and surfaces.







