

Installing an outdoor faucet boosts your home’s functionality, perfect for watering gardens, washing cars, or filling pools. However, a poorly installed spigot can lead to leaks, frozen pipes, or contaminated water. This guide walks you through selecting the right frost-proof sillcock, gathering proper tools, and following each installation step correctly so you avoid common DIY mistakes and ensure a code-compliant, long-lasting outdoor water source.
Choose the Right Outdoor Faucet for Your Climate
Install a Frost-Proof Sillcock in Freezing Climates
If you live north of the Mason-Dixon Line or anywhere freezing temperatures occur, install a frost-proof sillcock. Unlike standard hose bibbs, its valve sits 6-12 inches inside your home, within the heated space. When you shut it off, water drains from the outdoor section, preventing ice buildup and burst pipes. One user warned that a standard faucet in freezing weather is “a wintertime disaster waiting to happen.” Don’t ignore climate-specific design.
Use Standard Hose Bibbs Only in Warm Climates
Standard outdoor faucets have the shutoff valve right at the exterior wall. Water remains in the outdoor pipe section when turned off, a recipe for frozen, cracked lines. Only use them in southern regions with no freezing risk. For cold climates, a frost-proof design isn’t optional, it’s essential.
Gather Tools and Materials for the Job
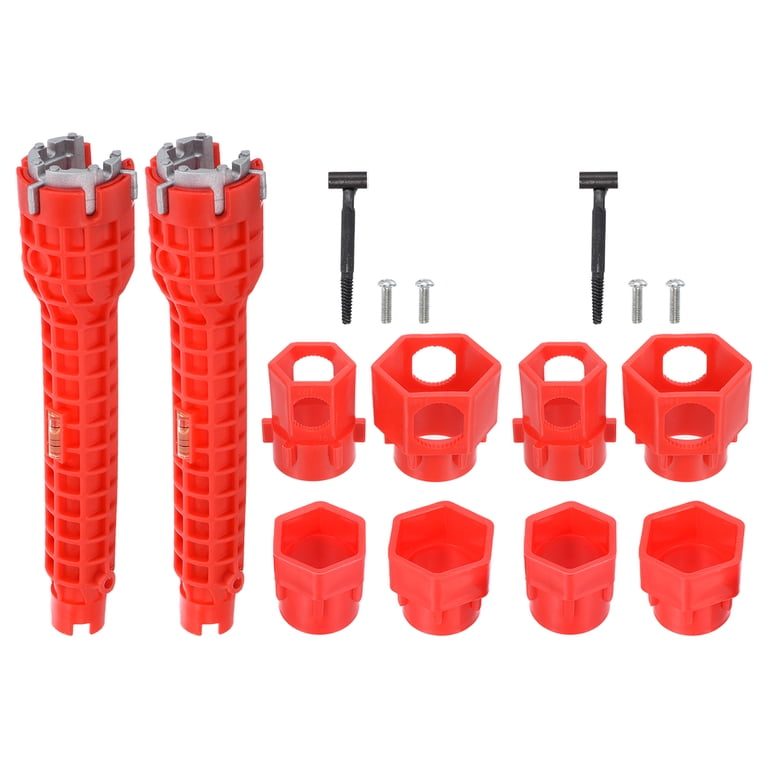
Essential Tools Required
You need specific tools to install an outdoor faucet properly. Here’s what to gather:
- Pipe or tubing cutter for clean, burr-free cuts
- Deburring tool for removing sharp edges after cutting
- Adjustable wrench and strap wrench
- Standard pipe wrench for holding supply pipes steady
- Level for alignment checks
- Cordless drill with 1⅜-inch self-feeding wood bit
- Screwdriver and steel wool for cleaning threads
- Safety glasses and work gloves
For copper pipes, add a soldering torch, flux, and solder. PEX installations require a crimper, clamp tool, or expansion system. SharkBite push-to-connect fittings offer a solder-free alternative.
Materials Checklist
The right materials ensure a leak-free, code-compliant installation:
- ½-inch NPT outdoor faucet, frost-proof recommended
- Vinyl siding mounting block if applicable
- Exterior-grade screws in stainless steel or coated finish
- Teflon tape for threaded connections
- Exterior silicone sealant for weatherproofing
- Plumber’s putty as optional extra seal
- House-wrap tape for moisture protection
- Spray foam insulation for interior gaps
- Pipe insulation to prevent condensation
- SharkBite or PEX adapter for supply line
- Interior shut-off valve for future repairs
- Drain valve for winterization in cold zones
- Vacuum breaker, often code-required
Pick the Best Location for Your Outdoor Faucet
Find a Practical Installation Spot
Mount the faucet near where you’ll use it most, close to gardens, driveways, or patios. But make sure it meets these requirements:
- Within reach of your cold water supply, accessible from basement or crawl space
- You can route pipe without hitting electrical wires, gas lines, or structural beams
- The pipe can slope downward toward the exterior for drainage
Set the Correct Height
Standard height is 12-18 inches above ground. For vinyl siding, measure from the bottom of the trim piece. If the trim is 7 inches wide, center the faucet 3½ inches up. Use an interior reference point like a pipe or conduit to align the hole accurately. Drill a ¼-inch pilot hole first to confirm positioning before the big cut.
Prepare the Wall and Siding
Install a Mounting Block for Vinyl Siding
Vinyl siding cannot support a faucet alone. You need a vinyl siding mounting block. Here’s how to install it:
- Measure the block’s hole spacing and transfer to siding
- Cut a slightly oversized opening in the siding
- Remove the affected siding section
- Screw the back ring to the sheathing
- Level it before securing fully
- Apply house-wrap tape behind the flange for extra moisture resistance
- Reinstall siding over the block
- Snap on the outer ring
This prevents sagging, improves sealing, and maintains siding integrity.
Drill the Wall Penetration
Use the Right Bit and Angle
Grab a 1⅜-inch self-feeding wood bit with extension, ideal for thick walls. Drill from inside to outside with a slight downward slope of 5-10 degrees so water drains away from your house. Never drill through the bottom third of floor joists, as this weakens structural support. Instead, route the pipe under the beam and back up to create a low-point trap for winter draining.
Check for Hidden Hazards
Before drilling, scan for electrical cables, gas lines, and existing plumbing. Use a stud finder with AC detection to avoid shocks. This safety step prevents costly mistakes and dangerous situations.
Shut Off Water and Relieve Pressure
Locate and Turn Off the Main Water Supply
For city water systems, find the shut-off near the foundation or curb-side box. For well systems, it’s in the wellhouse between the pump and pressure tank. Turn ball valves perpendicular to the pipe to shut off. Then open an existing outdoor faucet to drain residual water and relieve pressure. Confirm the system is depressurized when no water flows. Place a bucket under the work area to catch drips during disconnection.
Remove the Old Faucet
Safely Disconnect the Existing Unit
Use a pipe wrench on the supply pipe inside to hold it steady while you work. Loosen the faucet with an adjustable wrench on the flats or a strap wrench to protect the finish. If you lack a strap wrench, slip a rubber sleeve over the pipe wrench. Cut the pipe a few inches behind the old faucet using a pipe cutter for copper or PEX cutter for PEX. Remove the old unit and clean the surrounding area thoroughly.
Run the Supply Line
Route Pipe Safely and Smartly
Run the pipe between or under floor joists, along beam sides for support. Secure the pipe every 32 inches with 2×4 cleats. Transfer the faucet height measurement to the supports for proper alignment. In cold climates, create a drainable system by running the pipe down under the beam and back up to the faucet. This creates a low point where a drain valve can be installed for complete winter drainage.
Connect the Plumbing
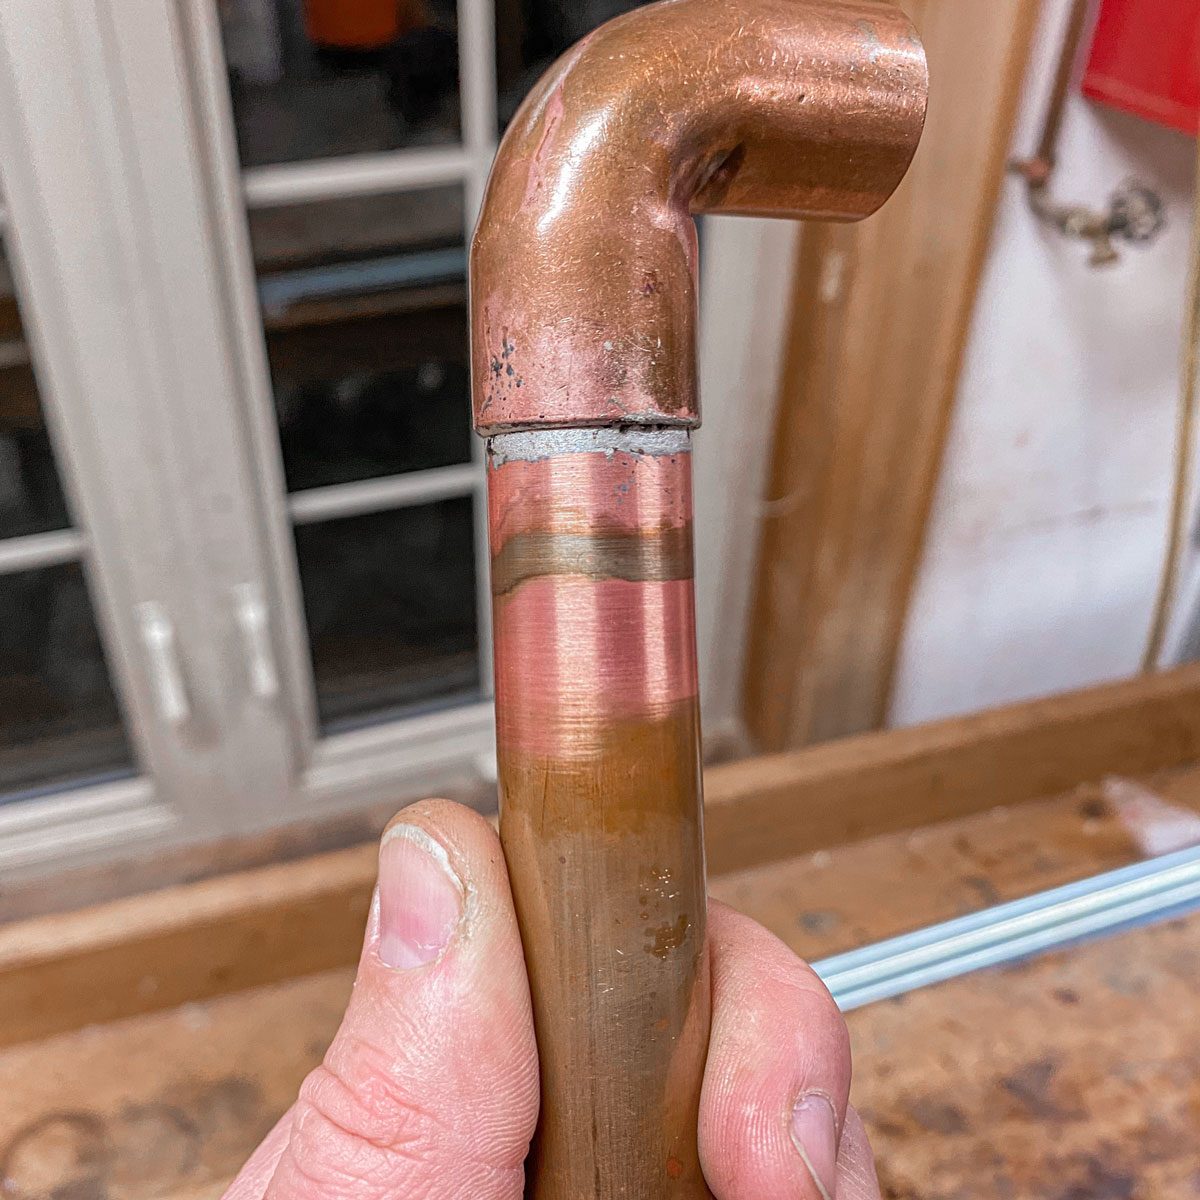
Solder Copper Joints
Cut and deburr the pipe, then clean it with an emery cloth. Apply flux to both the pipe and fitting. Heat the fitting until the flux bubbles, then apply solder opposite the heat source. Let the joint cool naturally and wipe off excess flux to prevent corrosion. Use a copper elbow to transition from vertical to horizontal runs.
Use SharkBite Fittings
SharkBite push-to-connect fittings offer a solder-free option ideal for DIYers avoiding open flames. Cut the pipe cleanly, then deburr inside and out. Insert the pipe until it hits the stop, checking the depth mark first. This connection method requires no solder, glue, or clamps. Add an interior shut-off valve upstream for future repairs.
Work with PEX Tubing
PEX requires crimp, clamp, or expansion fittings depending on your chosen system. Attach a PEX adapter to the faucet side and apply Teflon tape to all threaded connections. Never expose PEX to sunlight, as UV rays degrade the material quickly. Transition to metal before the pipe exits the house.
Mount the Outdoor Faucet
Insert and Align the Spigot
Remove the handle for easier installation, then slide the faucet through the wall hole. Tilt the spout 5-10 degrees forward to ensure water drains out when turned off. Some models include a built-in shim for this purpose. Use a level to check alignment, then mark the screw hole locations.
Secure and Seal the Flange
Drill pilot holes for the screws. Apply exterior silicone sealant around the back of the flange, or use plumber’s putty for an extra seal. Secure with exterior-grade screws and reattach the handle. Add house-wrap tape behind the flange in rainy climates for additional weatherproofing.
Install a Vacuum Breaker
Prevent Backflow
Most areas require a vacuum breaker to stop contaminated water from backing into your home’s supply. Thread the vacuum breaker onto the spigot’s outlet and hand-tighten until snug. Use an adjustable wrench to tighten the set-screw on top, which locks it in place. Some jurisdictions require snapping off the head after installation to prevent tampering, but this makes replacement difficult. Ask your local code if a repairable model is allowed.
Test for Leaks
Perform a Water Test
Slowly turn on the main water supply and watch all interior and exterior connections for leaks. Open the faucet with a quarter-turn and check for strong, steady flow. Close it fully and observe the vacuum breaker for any dripping or spraying. Let the faucet run 5-10 minutes to flush debris. If you find a leak, turn off the water, disassemble, reapply Teflon tape or sealant, and retest.
Insulate and Winterize
Seal Interior Gaps
Use spray foam insulation around the pipe where it enters the house to stop cold air, prevent condensation, and improve energy efficiency. Replace any insulation you moved during installation. Wrap pipe insulation around the indoor section, especially in humid basements, to control condensation.
Winter Maintenance Plan
In freezing zones, close the interior shut-off valve before the first frost. Open the outdoor faucet to drain the line, then use the drain valve at the low point if installed. Close the faucet after draining to keep bugs and debris out. Remember that frost-proof faucets only work if they’re sloped forward for proper drainage.
Maintain Your Outdoor Faucet
Annual Inspection Checklist
Check the flange sealant, vacuum breaker, and handle operation in spring and fall. Re-caulk every few years and replace washers if the faucet drips. Clean the aerator to maintain flow and replace vacuum breakers every 3-5 years. Most brass faucets last 10-20 years with proper maintenance, while frost-proof models last longest when installed with correct slope and drainage. Most come with a 5-10 year limited warranty, so register yours with the manufacturer.
Know When to Call a Professional
DIY Feasibility
This is a moderate-level DIY project if you have basic tool skills, can solder or crimp, and understand water pressure and drainage principles. Most homeowners finish in one day. Hire a plumber if you’re relocating the water line, working near gas or electrical systems, dealing with masonry or structural walls, or if you’re unsure about shut-off procedures or local codes. You can replace a faucet yourself, but for new installations or code compliance, a licensed plumber is best.
Frequently Asked Questions About Installing an Outdoor Faucet
Do I need a frost-proof sillcock?
Yes, if you live in an area where temperatures drop below freezing. A frost-proof sillcock has the valve 6-12 inches inside your home, allowing water to drain from the outdoor section when turned off. This prevents frozen, burst pipes during winter.
What tools do I need to install an outdoor faucet?
You’ll need a pipe cutter, deburring tool, adjustable wrenches, a strap wrench, level, cordless drill with a 1⅜-inch self-feeding bit, and safety gear. For copper pipes, add a soldering torch, flux, and solder. For PEX, you’ll need a crimper or expansion tool.
Can I install an outdoor faucet myself?
Yes, this is a moderate DIY project for homeowners with basic plumbing skills. Most installations take one day. However, hire a professional if you’re relocating water lines, working near gas or electrical systems, or if you’re unsure about local codes.
How high should an outdoor faucet be mounted?
Standard height is 12-18 inches above ground level. For vinyl siding, measure from the bottom of the trim piece and center accordingly.
Why is a vacuum breaker required?
Most jurisdictions require vacuum breakers to prevent contaminated water from siphoning back into your home’s potable supply during negative pressure events. This protects your drinking water from contamination.
Key Takeaways for Installing Your Outdoor Faucet
A properly installed outdoor faucet adds convenience and value to your home, providing reliable water access for gardening, car washing, and pool filling. The most critical decision is selecting the right faucet type for your climate. If you live in a freezing zone, a frost-proof sillcock with the valve positioned 6-12 inches inside your home is essential to prevent burst pipes during winter. Standard hose bibbs work only in warm climates where freezing never occurs.
Proper installation requires attention to several key details. The faucet must tilt 5-10 degrees forward for drainage. All connections need proper sealing with Teflon tape, silicone, or plumber’s putty. A vacuum breaker is mandatory in most areas to prevent backflow contamination. Inside the house, seal the penetration with spray foam and insulate the supply line to prevent condensation and energy loss.
Annual maintenance extends the life of your outdoor faucet. Check seals and the vacuum breaker twice yearly, re-caulk as needed, and winterize properly in freezing climates by closing the interior shut-off valve and draining the line before cold weather arrives. With correct installation and care, your outdoor faucet will provide years of reliable service.







